
YoloV4实战:手把手教物体检测——YOLOV4(pytorch)
目录
摘要
YOLOV4在coco上面达到了43.5%AP ,在Tesla V100 上达到了65FPS。相比今年的其它模型,得分不算高,但是它不是通过提高输入图像的分辨率来提高得分的,而是改进网络结构。创新点主要有一下几个方面:
(1)输入端:这里指的创新主要是训练时对输入端的改进,主要包括Mosaic数据增强、cmBN、SAT自对抗训练。
(2)BackBone主干网络:将各种新的方式结合起来,包括:CSPDarknet53、Mish激活函数、Dropblock
(3)Neck:目标检测网络在BackBone和最后的输出层之间往往会插入一些层,比如Yolov4中的SPP模块、FPN+PAN结构
(4)Prediction:输出层的锚框机制和Yolov3相同,主要改进的是训练时的损失函数CIOU_Loss,以及预测框筛选的nms变为DIOU_nms
训练
本地环境:
Ubuntu20.04
pytorch1.5.1
CUDA10.1
Python3.7
下载代码
本文使用的代码是:https://github.com/Tianxiaomo/pytorch-Yolov4
训练和测试推理代码都已经完成。
下载权重文件
yolov4.conv.137.pth
链接一:https://pan.baidu.com/s/1ovBie4YyVQQoUrC3AY0joA 提取码:kcel
链接二:
https://drive.google.com/open?id=1fcbR0bWzYfIEdLJPzOsn4R5mlvR6IQyA
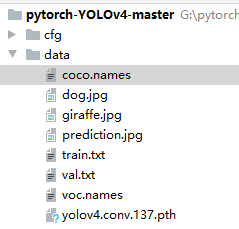
将下载的权重文件放到data文件夹下面
制作数据集
数据集地址:https://download.csdn.net/download/hhhhhhhhhhwwwwwwwwww/14003627
将Labelme数据集复制到pytorch-YOLOv4-master文件夹下面,如图:

然后用pycharm新建labelme2txt.py文件。写入生成训练集和验证集的代码。

labelme2txt.py代码:
from os import getcwd
from sklearn.model_selection import train_test_split
import json
import glob
wd = getcwd()
"labelme标注的json 数据集转为pytorch版yolov4的训练集"
classes = ["aircraft","oiltank"]
image_ids = glob.glob(r"LabelmeData/*jpg")
print(image_ids)
train_list_file = open('data/train.txt', 'w')
val_list_file = open('data/val.txt', 'w')
def convert_annotation(image_id, list_file):
jsonfile=open('%s.json' % (image_id))
in_file = json.load(jsonfile)
for i in range(0,len(in_file["shapes"])):
object=in_file["shapes"][i]
cls=object["label"]
points=object["points"]
xmin=int(points[0][0])
ymin=int(points[0][1])
xmax=int(points[1][0])
ymax=int(points[1][1])
if cls not in classes:
print("cls not in classes")
continue
cls_id = classes.index(cls)
b = (xmin, ymin, xmax, ymax)
list_file.write(" " + ",".join([str(a) for a in b]) + ',' + str(cls_id))
jsonfile.close()
def ChangeData2TXT(image_List,dataFile):
for image_id in image_List:
dataFile.write('%s' % (image_id.split('\\')[-1]))
convert_annotation(image_id.split('.')[0], dataFile)
dataFile.write('\n')
dataFile.close()
trainval_files, test_files = train_test_split(image_ids, test_size=0.2, random_state=55)
ChangeData2TXT(trainval_files,train_list_file)
ChangeData2TXT(test_files,val_list_file)
安装运行需要的包
参照requirements.txt安装本机没有的包,版本不一定要保持一致,只要后期不报错就没有事。
修改类别
将coco.names和voc.names里面的类别修改为自己数据集的类别(默认是coco.names,都改了肯定没有错。),顺序和labelme2txt.py中的classes顺序保持一致。修改配置文件cfg.py
Cfg.use_darknet_cfg = False
Cfg.batch = 2(根据自己的显卡修改,我的显卡是8G的最多可以训练里2个batch)。
Cfg.subdivisions = 1
修改models.py
将51行和53行的inplace=True改为inplace=False。如果不修改,训练的时候会报个错误。
修改train.py文件
找到526行,这个方法的参数是对cfg.py里面参数的更新。
主要修改的参数如下:
parser.add_argument('-g', '--gpu', metavar='G', type=str, default='0',
help='GPU', dest='gpu')#设置GPU使用的GPU
parser.add_argument('-dir', '--data-dir', type=str, default="LabelmeData",
help='dataset dir', dest='dataset_dir')#图片所在的文件夹。
parser.add_argument('-pretrained', type=str, default="data/yolov4.conv.137.pth", help='pretrained yolov4.conv.137')#设置预训练权重文件的路径。
parser.add_argument('-classes', type=int, default=80, help='dataset classes')#物体类别数。
parser.add_argument('-train_label_path', dest='train_label', type=str, default='data/train.txt', help="train label path")#训练集存放的路径。
注释415行到440行的代码,这段代码在验证的时候一直报错,我找不到原因。后续找到原因再更新。

将以上的内容修改完成后就可以点击run开始训练了。
测试
测试主要修改models.py的代码。将下面的代码从449行替换。
if __name__ == "__main__":

    import sys

    import cv2


    namesfile = None

    n_classes=2

    weightfile="checkpoints/Yolov4_epoch151.pth"

    imgfile="data/aircraft_4.jpg"#待测试的图片

    width=608

    height=608

    model = Yolov4(yolov4conv137weight=None, n_classes=n_classes, inference=True)


    pretrained_dict = torch.load(weightfile, map_location=torch.device('cpu'))

#如果使用GPU则改为:

#pretrained_dict = torch.load(weightfile, map_location=torch.device('cuda'))
model.load_state_dict(pretrained_dict)
use_cuda = True
if use_cuda:
model.cuda()
img = cv2.imread(imgfile)
# Inference input size is 416*416 does not mean training size is the same
# Training size could be 608*608 or even other sizes
# Optional inference sizes:
# Hight in {320, 416, 512, 608, ... 320 + 96 * n}
# Width in {320, 416, 512, 608, ... 320 + 96 * m}
sized = cv2.resize(img, (width, height))
sized = cv2.cvtColor(sized, cv2.COLOR_BGR2RGB)
from tool.utils import load_class_names, plot_boxes_cv2
from tool.torch_utils import do_detect
for i in range(2): # This 'for' loop is for speed check
# Because the first iteration is usually longer
boxes = do_detect(model, sized, 0.4, 0.6, use_cuda)
if namesfile == None:
if n_classes == 2:
namesfile = 'data/voc.names'
elif n_classes == 80:
namesfile = 'data/coco.names'
else:
print("please give namefile")
class_names = load_class_names(namesfile)
resultImg=plot_boxes_cv2(img, boxes[0], 'predictions.jpg', class_names)
cv2.imshow("image",resultImg)
cv2.waitKey(0);
测试结果:

源码链接:https://download.csdn.net/download/hhhhhhhhhhwwwwwwwwww/12821500
参考文章:
深入浅出Yolo系列之Yolov3&Yolov4核心基础知识完整讲解
https://blog.csdn.net/nan355655600/article/details/106246625?utm_medium=distribute.pc_relevant.none-task-blog-BlogCommendFromMachineLearnPai2-2.nonecase&depth_1-utm_source=distribute.pc_relevant.none-task-blog-BlogCommendFromMachineLearnPai2-2.nonecase
相关文章
- 【PyTorch】教程:torch.nn (1)
- DL:深度学习框架Pytorch、 Tensorflow各种角度对比
- pytorch使用horovod多gpu训练
- 【图像分类】实战——使用DenseNet实现识别秃头(pytorch)
- 【图像分类】实战——使用ResNet实现猫狗分类(pytorch)
- Pytorch实现InceptionV2
- 【实战】PyTorch 在 CIFAR-10 数据集上的训练及测试过程
- pytorch的4种边界Padding方法--ZeroPad2d、ConstantPad2d、ReflectionPad2d、ReplicationPad2d
- Pytorch深度学习实战(1)—— 使用LSTM 自动编码器进行时间序列异常检测
- 【Pytorch深度学习实战】(8)双向循环神经网络(BiRNN)
- 【Pytorch深度学习实战】(3)逻辑回归(Logistic Regression)
- Python基于PyTorch实现BP神经网络ANN回归模型项目实战
- Pytorch——把模型的所有参数的梯度清0
- Pytorch网络模型转Onnx格式,多种方法(opencv、onnxruntime、c++)调用Onnx
- early stopping早停_pytorch学习
- Pytorch深度学习实战笔记
- PyTorch学习笔记(六):PyTorch进阶训练技巧
- DBNet实战:详解DBNet训练与测试(pytorch)
- segmentation_models.pytorch实战:使用segmentation_models.pytorch图像分割框架实现对人物的抠图
- 【Pytorch】第 7 章 :深度 Q 网络实战
- 【Pytorch】第 2 章 :马尔可夫决策过程和动态规划
- pytorch 37 yolov8项目的入门解读