
Vue外卖项目笔记(一)
目录
1 环境搭建
1.1 搭建前台项目
1.2 搭建后台项目
1.3 搭建项目整体架构
新建路由文件
- 根据项目效果图在
views一下四个文件Msite.vueOrder.vueProfile.vueSearch.vue
注册路径
- 在
routes/index.js引入路由文件,并为其注册路径
import Msite from "../views/Msite/Msite"
import Order from "../views/Order/Order"
import Profile from "../views/Profile/Profile"
import Search from "../views/Search/Search"
- 注意这里的重定向
    {
      path: '/msite',
      component: Msite
    },
    {
      path: '/order',
      component: Order
    },
    {
      path: '/profile',
      component: Profile
    },
    {
      path: '/search',
      component: Search
    },
    {
      path: '/',
      redirect:'/msite'
    },
在components下新建文件FooterGuide.vue写上如下代码,在代码中我们使用了一下,我们会一一介绍
- 一像素边框
- 阿里图标库
- less的混合
  <footer class="footer border-1px">
    <a @click.prevent="goPath('/msite')" href="javasript;" class="footer-item">
      <span :class="{on:isCurrent('/msite')}">
        <i class="iconfont icon-waimai"></i>
      </span>
      <span class="footer-span">外卖</span>
    </a>
    <a  @click.prevent="goPath('/search')" href="javasript;" class="footer-item">
      <span :class="{on:isCurrent('/search')}" >
        <i class="iconfont icon-search"></i>
      </span>
      <span class="footer-span">搜索</span>
    </a>
    <a  @click.prevent="goPath('/order')" href="javasript;" class="footer-item">
      <span :class="{on:isCurrent('/order')}">
        <i class="iconfont icon-dingdan"></i>
      </span>
      <span class="footer-span">订单</span>
    </a>
    <a  @click.prevent="goPath('/profile')" href="javasript;" class="footer-item">
      <span :class="{on:isCurrent('/profile')}">
        <i class="iconfont icon-geren"></i>
      </span>
      <span class="footer-span">我的</span>
    </a>
  </footer>
  methods:{
    goPath(path){
      console.log(this.$route.path)
      this.$router.replace(path)
    },
    isCurrent (path) {
      return this.$route.path === path
    }
  }
};
 @import "../assets/less/mixin";
 .footer {
     .top-border-1px(#e4e4e4);
     display: flex;
     position: fixed;
     bottom: 0;
     left: 0;
     right: 0;
     height: 50px;
     width: 100%;
     background-color: #fff;
     z-index: 100;

     .footer-item {
         display: flex;
         flex: 1;
         flex-direction: column;
         align-items: center;
         text-align: center;
         font-size: 22px;
         margin: 5px;

         .iconfont {
             font-size: 22px;
         }
     }

     .on {
         color: #02a774;
     }

     .footer-span {
         display: block;
         font-size: 12px;
     }
1. 一像素边框
- 对于一像素边框和2x3x图 详情点击,我们可以在
assets文件夹下新建less文件夹,在新建mixin.less文件,可以将代码复制过去
2. 阿里图标库的使用
- 对于阿里图标库的使用 详情点击
在App.vue中引入
import FooterGuide from './components/FooterGuide/FooterGuide'
export default {
  components:{
    FooterGuide
  }
}
显示路由组件
  <div id="app">
    <router-view />
    <FooterGuide>
  </div>
搭建好之后的效果图如下

2 后台交互
在src文件夹下新建api文件夹,然后在文件夹内新建两个文件
ajax.js,用于发送请求index.js,用于暴露接口
下载axios
npm install axios -S
写代码
ajax.js
import axios from 'axios'
export default function ajax(url, data = {}, type = 'GET') {
    return new Promise((resolve, reject) => {
        let promise
        if (type==='GET') {
            promise = axios.get(url, {
                params:data
            })
        } else {
            promise = axios.post(url,data)
        }
        promise.then(value => {
            resolve(value.data)
        }).catch(reason => {
            reject(reason)
        })
    })
}
配置代理
- 在根目录下新建
vue.config.js,写上如下代码
module.exports = {
    devServer: {
        /*比较简单的配置代理的方式,详细的可以查看官网*/
        proxy: 'http://localhost:3000'
    }
}
- 配置好代理后一定要重启
3 Msite.vue
3.1 插槽的使用
封装HeaderTop.vue组件
- 观察效果图,这个组件是多个组件都可以使用的,所以我们可以把它封装成一个组件,在
components文件夹下,新建文件HeaderTop.vue - 这里使用了vue中的slot ,详情点击,代码如下
 <header class="header">
     <div class="header_left">
         <slot name="left"></slot>
     </div>
     <div class="header_title">
         <span class="header_title_text">{{title}}</span>
     </div>
     <div class="header_right">
         <slot name="right"></slot>
     </div>
 </header>
  export default {
      props:['title'],
      name: "HeaderTop"
  }
.header {
    display: flex;
    align-items: center;
    width: 100%;
    height: 45px;
    background-color: #02a774;
    z-index: 1000;
    .header_left {
        width: 20%;
        margin-left: 15px;
        font-size: 15px;
        color: white;
    }
    .header_title {
        width: 60%;
        font-size: 20px;
        color: #fff;
        .header_title_text {
            display: block;
            margin: 0 auto;
            width: 90%;
            overflow: hidden;
            text-overflow: ellipsis;
            white-space: nowrap;
            text-align: center;
        }
    }
    .header_right {
        width: 20%;
        margin-right: 15px;
        font-size: 14px;
        color: #fff;
        text-align: right;
    }
}
- 这里设置了左右两个插槽,并使用标签传递了一个属性
在Msite.vue中使用组件
Msite.vue
import HeaderTop from "../../components/HeaderTop"
export default {
    name: "Msite",
    components:{
        HeaderTop
    }
}
 <div>
     <header-top title="hello world"></header-top>
 </div>
使用之后的效果

3.2 后端写地址接口
- 打开
routes/index.js文件,写上如下代码
/* 根据经纬度获取位置 */
router.get('/position/:geohash', async (ctx, next) => {
  /* 取出携带的参数 */
  const { geohash } = ctx.params
  /* 发送请求 */
  await ajax(`http://cangdu.org:8001/v2/pois/${geohash}`)
    .then(data => {
      /* 返回数据 */
      ctx.body = {
        code: 0,
        data
      }
    })
})
- 这里涉及到了一个
params参数geohash,以及需要发送请求,就需要axios - 还要注意要异步返回数据
axios处理
- 下载axios
npm install axios -S
- 在根目录下新建
api文件夹,我们可以把前端后台交互的ajax.js文件复制过来,不过这里,我们用另一种写法
const axios = require('axios')

module.exports = function ajax(url = '', data = {}, type = 'GET') {
  return new Promise(function (resolve, reject) {

    let promise

    if (type === 'GET') {
      // 准备url query参数数据
      let dataStr = '' //数据拼接字符串
      Object.keys(data).forEach(key => {
        dataStr += key + '=' + data[key] + '&'
      })
      if (dataStr !== '') {
        dataStr = dataStr.substr(0, dataStr.lastIndexOf('&'))
        url = url + '?' + dataStr
      }
      // 发送get请求
      promise = axios.get(url)
    } else {
      // 发送post请求
      promise = axios.post(url, data)
    }

    promise.then(response => {
      resolve(response.data)
    })
      .catch(error => {
        reject(error)
      })
  })
}
- 在
routes/index.js中引入
const ajax = require('../api/ajax')
3.3 前端请求数据
src/store/index.js
在state中存储一个经纬度
state: {
  latitude: 40.10038, // 纬度
  longitude: 116.36867, // 经度
},
前端请求函数
src/api/index.js
import ajax from './ajax'
export const reqAddress = (geohash) => ajax(`/position/${geohash}`)
定义请求的方法
在store/index.js中定义请求的方法,并用vuex管理状态
  state: {
    address:''
  },
  mutations: {
    RECEIVE_ADDRESS(state,{address}) {
      state.address = address
    },
  },
  actions: {
    async getAddress ({commit, state}) {
      const geohash = `${state.latitude},${state.longitude}`
      const result = await reqAddress(geohash)
      if (result.code === 0) {
        const address = result.data
        commit('RECEIVE_ADDRESS', {address})
      }
    },
  },
生命周期中使用方法
Msite.vue
import {mapState} from 'vuex'
import HeaderTop from "../../components/HeaderTop"
export default {
    name: "Msite",
    computed:{
      ...mapState(["address"])
    },
    mounted() {
        /*触发方法*/
        this.$store.dispatch("getAddress");
    },
    components:{
        HeaderTop
    }
}
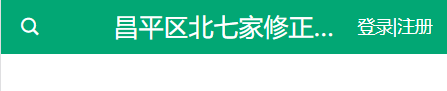
 <div>
     <header-top :title="address.name">
         <div slot="left">
             <i class="iconfont icon-sousuo"></i>
         </div>
         <div slot="right">登录|注册</div>
     </header-top>
 </div>
- 使用了插槽,向里面添加了结构
效果图
3.4 网格导航
写静态结构
<nav class="border-1px">
     <div>
         <a href="javascript:;">
             <img src="./nav/1.jpg" alt="">
             <span>麻辣烫</span>
         </a>
         <!--省略七个相同的结构-->
     </div>
 </nav>
 @import "../../assets/less/mixin";
 nav{
     .bottom-border-1px(#eee);
     height: 200px;
     div{
         display: flex;
         flex-wrap: wrap;
         a{
             display: block;
             width: 25%;
             font-size: 13px;
             color: #666;
             text-align: center;
             img{
                 display: block;
                 width: 50px;
                 height: 50px;
                 margin: 10px auto 8px;
             }
         }
     }
 }
效果图

使用Swiper动态展示导航窗格
- 下载Swiper
npm install swiper -S
- 在使用的组件引入Swiper和相应的样式文件
import Swiper from "swiper";
import "swiper/css/swiper.min.css";
- 使用它的类名
<div class="swiper-container">
    <div class="swiper-wrapper">
        <div class="swiper-slide">Slide 1</div>
        <div class="swiper-slide">Slide 2</div>
        <div class="swiper-slide">Slide 3</div>
    </div>
    <!-- 如果需要分页器 -->
    <div class="swiper-pagination"></div>

    <!-- 如果需要导航按钮 -->
    <div class="swiper-button-prev"></div>
    <div class="swiper-button-next"></div>

    <!-- 如果需要滚动条 -->
    <div class="swiper-scrollbar"></div>
</div>
- 使用Swiper构造函数,进行配置
在项目中使用
<nav class="border-1px">
    <div class="swiper-container">
        <div class="swiper-wrapper">
            <div class="swiper-slide">
                <a href="javascript:;">
                    <img src="./nav/1.jpg" alt />
                    <span>麻辣烫</span>
                </a>
                <!-- 此处省略七个相同的结构 -->
            </div>
            <div class="swiper-slide">
                <a href="javascript:;">
                    <img src="./nav/1.jpg" alt />
                    <span>麻辣烫</span>
                </a>
                <!-- 此处省略七个相同的结构 -->
            </div>
        </div>
        <div class="swiper-pagination"></div>
    </div>
</nav>
- 需要注意的是我们删掉了一个div结构,然后又重新复制了一组图片,修改的样式如下
.swiper-container {
    height: 100%;
        /* 修改分页器颜色 */
    --swiper-pagination-color: #02a774;
    .swiper-wrapper {
        height: 100%;
        .swiper-slide {
            height: 100%;
            display: flex;
            justify-content: center;
            flex-wrap: wrap;
            align-items: flex-start;
        }
    }
}

nav {
    .bottom-border-1px(#eee);
    height: 200px;
    a {
        display: block;
        width: 25%;
        font-size: 13px;
        color: #666;
        text-align: center;
        img {
            display: block;
            width: 50px;
            height: 50px;
            margin: 10px auto 0;
        }
    }
}
- 在这个样式中,我们把div的样式给了
swiper-slide
mounted() {
    /*触发方法*/
    this.$store.dispatch("getAddress");
    new Swiper(".swiper-container", {
        loop: true,
        pagination: {
            el: ".swiper-pagination"
        }
    });
},
- 使用构造函数,当把上面的代码写完后我们就会发现,他已经能滑动了
3.5 接收网格数据
写后台接口
routes\index.js
/* 食品分类数据 */
router.get('/index_category', async ctx => {
  /* 使用定时器模拟发送请求数据 */
  const result = await getData()
  function getData() {
    return new Promise((resovle, reject) => {
      setTimeout(() => {
        const data = require('../data/index_category.json')
        /* 返回数据 */
        resovle(data)
      }, 300)
    })
  }
  ctx.body = result
})
测试后台接口
- 我们可以在postman或者浏览器中输入以下网址:
localhost:3000/index_category观察返回的数据

我们需要的是返回数据中的title和img_url,img_url有一个基础的路径'https://fuss10.elemecdn.com
3.6 后台数据与前台数据的转换
返回的后台数据是一个一维数组,和我们需要的前台数据的结构是不一样的(swiper-slide有两个,每个swiper-slide中还有八个小图标,所以我们需要的结构应该是一个二维数组,且二维数组中最后一个数组的元素过分树应该小于等于8个)
前台请求并接受数据
src\api\index.js
export const reqFoodCategorys = () => ajax('/index_category')
src\store\index.js
  state: {
    categorys: [], // 食品分类数组
  },
  mutations: {
    RECEIVE_CATEGORYS (state, {categorys}) {
      state.categorys = categorys
    },
  },
  actions: {
    async getCategorys({commit}) {
      const result = await reqFoodCategorys()
      if (result.code === 0) {
        const categorys = result.data
        commit('RECEIVE_CATEGORYS', {categorys})
      }
    },
  },
触发方法
src\views\Msite\Msite.vue
data () {
  return {
    baseImageUrl: 'https://fuss10.elemecdn.com'
  }
},
mounted () {
  this.$store.dispatch('getCategorys')
},
computed: {
  ...mapState(['address', 'categorys']),
}
我们需要对于categorys这个数组进行处理,把它分割成二维数组
computed: {
 ...mapState(['address', 'categorys']),
 categorysArr () {
   const {categorys} = this
   // 准备空的2维数组
   const arr = []
   // 准备一个小数组(最大长度为8)
   let lastArr = []
   // 遍历categorys
   categorys.forEach(c => {
     // 如果当前小数组已经满了, 创建一个新的
     if(lastArr.length===8) {
       lastArr = []
     }
     // 如果minArr是空的, 将小数组保存到大数组中
     if(lastArr.length===0) {
       arr.push(lastArr)
     }
     // 将当前分类保存到小数组中
     lastArr.push(c)
   })
   return arr
 }
},
- 遍历一维数组,向最后一个数组中添加元素
- 如果最后一个数组满了,把它添加到二维数组中
- 需要注意的是这里要先把一维数组放到二维数组里面去
结构中遍历
src\views\Msite\Msite.vue
<div class="swiper-wrapper">
    <div
        class="swiper-slide"
        v-for="(categorys, index) in categorysArr"
        :key="index"
    >
        <a href="javascript:;" v-for="(category, index) in categorys" :key="index">
            <img :src="baseImageUrl + category.image_url" alt />
            <span v-text="category.title"></span>
        </a>
    </div>
</div>
- 当我们把代码写好的时候,效果如下

优化
- 这个时候你会发现一个问题,当你刷新浏览器,就会发现轮播效果没有了!这是因为更新界面是异步的,而进行初始树Swiper构造函数的时候,还拿不到相应的数据,我们需要异步数据有之后才能拿到相应的数据
- 所以我们应该在
categorys有数据之后初始化Swiper构造函数 - 因此我们可以监视
categorys待他有数据之后,执行Swiper - 但是我们还要注意的是渲染页面是异步的,而有了数据是,还没有渲染页面,因此我们需要用到一个生命周期函数
$nextTick(),详情点击
src\views\Msite\Msite.vue
watch: {
  categorys (value) {
    this.$nextTick(() => {
      new Swiper('.swiper-container', {
        loop: true,
        pagination: {
          el: '.swiper-pagination',
        },
      })
    })
  }
},
- 当我们把代码写上的时候,发现问题解决了
3.7 附近商家
后台项目
- 这一次的接口我们使用get的query参数,,同样我们使用
setTimeout来模拟异步请求
routes\index.js
/* 根据经纬度获取商家列表 */
router.get('/shops',async ctx => {
  const query = ctx.query
  console.log(query)
  const reslut = await new Promise(resovle => {
    setTimeout(() => {
      const data = require('../data/shops.json')
      resovle(data)
    } ,300)
  })
  ctx.body = { code:0,data:reslut}
})
我们通过postman或者浏览器访问一下接口

前台请求
src\api\index.js
export const reqShops = (longitude, latitude) => ajax('/shops', {longitude, latitude})
src\store\index.js
import { reqShops } from "../api"
state: {
	shops[]
},
mutations: {
  RECEIVE_SHOPS (state, {shops}) {
    state.shops = shops
  },
},
actions: {
  // 异步获取商家列表
  async getShops({ commit, state }) {
    // 发送异步ajax请求
    const { longitude, latitude } = state
    const result = await reqShops(longitude, latitude)
    // 提交一个mutation
    if (result.code === 0) {
      const shops = result.data
      commit('RECEIVE_SHOPS', { shops })
    }
  },
},
在声明周期中触发函数
this.$store.dispatch('getShops')
- 只要执行了这个语句在vuex中就有相应的数据了
3.8 ShopList组件
观察到店铺的列表是一个重复的结构,我们可以把它抽成一个组件

- 基础结构
 <section class="shopper border-1px">
     <i class="iconfont icon-xuanxiang"></i>
     <span>附近商家</span>
 </section>
 <ShopList />
.iconfont {
    font-size: 25px;
}
.shopper {
    .top-border-1px(#e4e4e4);
    margin-top: 10px;
    padding-top: 10px;
    padding-left: 10px;
    background-color: #fff;
    font-size: 14px;
    color: #999;
    .iconfont {
        color: #464646;
        font-size: 14px;
    }
}
- 这里使用了
ShopList.vue组件(一会我们去定义),以及字体图标
写ShopList.vue组件的时候,我们可以先写静态组件,再写动态组件,这里就不演示静态组件的书写了,而是直接写动态组件
src\components\ShopList.vue
<div>
	<div v-if="shops.length">
		<section class="shop" v-for="(shop,index) in shops" :key="index" @click="toShop">
			<section class="shop-left">
				<img src alt />
			</section>
			<section class="shop-middle">
				<div>
					<span class="shop-rank">品牌</span>
					<span class="shop-name">{{shop.name}}</span>
				</div>
				<div class="shop-middle-middle">
					<Star :rating="shop.rating" :size="24" />
					<span class="scroe">{{shop.rating}}</span>
					<span class="sale">月售{{shop.recent_order_num}}单</span>
				</div>
				<div class="shop-middle-bottom">
					<span>¥20起送 / 配送费¥{{shop.float_delivery_fee}}</span>
				</div>
			</section>
			<section class="shop-right">
				<div class="shop-right-top">
					<span>保</span>
					<span>票</span>
					<span>准</span>
				</div>
				<span class="green-center">个人专送</span>
			</section>
		</section>
	</div>

	<ul v-else>
		<li v-for="(item,index) in 6" :key="index">
			<img src="./images/shop_back.svg" alt="">
		</li>
	</ul>
</div>
import Star from '@/components/Star'
import { mapState } from "vuex";
export default {
	methods:{
		toShop () {
			this.$router.push('./shop')
		}
	},
	computed: {
		...mapState(["shops"])
	},
	components: {
		Star
	}
};
@import '../assets/less/mixin.less';
.shop {
	display: flex;
	padding: 15px 8px;
	.shop-left {
		width: 70px;
		height: 70px;
		border: 1px solid black;
	}
	.shop-middle {
		flex: 1;
		padding-left: 8px;
		.shop-rank {
			padding: 1px 2px;
			font-size: 11px;
			font-weight: bold;
			background-color: #ffd930;
		}
		.shop-name {
			font-size: 16px;
			font-weight: bold;
		}
		.shop-middle-middle {
			display: flex;
			margin: 15px 0;
			span {
				font-size: 10px;
				color: #666;
			}
			.scroe {
				color: #ff8c47;
				font-weight: bold;
				margin: 0 2px;
			}
			.sale {
				transform: scale(0.7);
			}
		}
		.shop-middle-bottom {
			font-size: 12px;
			color: #666;
		}
	}
	.shop-right {
		text-align: center;

		.shop-right-top {
			font-size: 0;
			margin-bottom: 15px;
			span {
				font-size: 10px;
				color: #9b9b9b;
				border: 1px solid #8cb1d4;
				padding: 0 1px;
			}
		}

		.green-center {
			display: inline-block;
			color: #16ad7f;
			border: 1px solid #16ad7f;
			font-size: 12px;
			font-weight: bold;
			transform: scale(0.9);
		}
	}
}
需要注意的是
- 这里为了增加用户体验我们增加了骨架屏
- 注意在
Msite.vue中映射成组件 - 这里我们又使用了一个组件
Star.vue组件
3.9 Star组件
- 这里有2x图和3x图的动态使用
- 组件接收两个属性,一个是评分,一个是图的大小
<!-- 一定要有对应的类名 -->
<section class="star" :class="'star-' + size">
	<span class="star-item" v-for="(star,index) in starsArr" :class="star" :key="index"></span>
</section>
const CLASS_ON = "on";
const CLASS_HALF = "half";
const CLASS_OFF = "off";
export default {
	props: ["rating", "size"],
	computed: {
		starsArr() {
			const { rating } = this;
			const arr = [];
			const ratingInteget = Math.floor(rating);
			for (let i = 0; i < ratingInteget; i++) {
				arr.push(CLASS_ON);
			}
			if (rating * 10 - ratingInteget * 10 >= 5) {
				arr.push(CLASS_HALF);
			}
			while (arr.length < 5) {
				arr.push(CLASS_OFF);
			}
			return arr;
		}
	}
};
@import '../assets/less/mixin.less';
.star {
	font-size: 0;
	.star-item {
		display: inline-block;
		background-repeat: no-repeat;
	}
	&.star-48 {
		.star-item {
			width: 20px;
			height: 20px;
			margin-right: 22px;
			background-size: 20px 20px;
			&:last-child {
				margin-right: 0;
			}
			&.on {
				.bg-image("../../components/images/star48_on");
			}
			&.off {
				.bg-image("../../components/images/star48_on");
			}
			&.half {
				.bg-image("../../components/images/star48_half");
			}
		}
	}
	&.star-36 {
		.star-item {
			width: 15px;
			height: 15px;
			margin-right: 6px;
			background-size: 15px 15px;
			&:last-child {
				margin-right: 0;
			}
			&.on {
				.bg-image("../../components/images/star36_on");
			}
			&.off {
				.bg-image("../../components/images/star36_off");
			}
			&.half {
				.bg-image("../../components/images/star36_half");
			}
		}
	}
	&.star-24 {
		.star-item {
			width: 10px;
			height: 10px;
			margin-right: 3px;
			background-size: 10px 10px;
			&:last-child {
				margin-right: 0;
			}
			&.on {
				.bg-image("../../components/images/star24_on");
			}
			&.off {
				.bg-image("../../components/images/star24_off");
			}
			&.half {
				.bg-image("../../components/images/star24_half");
			}
		}
	}
}
- 我们使用了取整函数
Math.floor - 对于评分的小数部分的处理,采用了扩大十倍,遍历操作数组
- 尤其需要注意的是放在assets下面的文件会被当做一个模块来处理,而我们引用的是这个模块下的mixin,所以相对路径应该从这个模块开始写
3.10 使用BetterScroll实现更好的滑动效果
- 这里我们需要添加两个结构
<div class="wrapper">
    <div></div>
</div>
- 结构加在头部和底部两者之间的内容中
4 Shop组件
4.1 新建组件并注册路径
按照路径新建文件src\views\Shop\Shop.vue,把注册路径
import Shop from '@/views/Shop/Shop'
 {
   path: '/shop',
   component:Shop
 },
4.2 隐藏footer
我们使用路由的元信息API
src\router\index.js
 {
   path: '/msite',
   component: Msite,
   meta: {
     showFooter: true
   }
 },
 {
   path: '/search',
   component: Search,
   meta: {
     showFooter: true
   }
 },
 {
   path: '/order',
   component: Order,
   meta: {
     showFooter: true
   }
 },
 {
   path: '/profile',
   component: Profile,
   meta: {
     showFooter: true
   }
 },
给底部组件都有一个元信息,并在相应的组件取出他
src\App.vue
<footer-guide v-show="$route.meta.showFooter"></footer-guide>
- 当我们跳到
shop.vue组件的时候他是没有原信息的,所以就不显示
4.3 使用mock模拟后台数据
新建mock文件夹并新建两个文件
src\mock\data.json
详情可以观看文件
src\mock\mockServer.js
import Mock from 'mockjs'
import data from './data.json'

// 返回goods的接口
Mock.mock('/goods', {code:0, data: data.goods})
// 返回ratings的接口
Mock.mock('/ratings', {code:0, data: data.ratings})
// 返回info的接口
Mock.mock('/info', { code: 0, data: data.info })

/* 不需要暴露任何借口,只需要在入口文件进行加载 */
- 这里暴露了三个接口
在入口文件加载
import './mock/mockServer'
通过接口请求数据
src\api\index.js
/* mock模拟数据 */
export const reqShopInfo = () => ajax('/info')
export const reqShopFoods = () => ajax('/goods')
export const reqShopRatings = () => ajax('/ratings')
vuex管理数据
import { reqShopRatings, reqShopInfo, reqShopFoods } from "../api"
  state: {
    shopInfo: {},
    cartFoods: [],
    shopRatings: []
  },
  mutations: {
    RECEIVE_SHOPFOODS(state, { foods }) {
      state.foods = foods
    },
    RECEIVE_SHOPINFO(state, { shopInfo }) {
      state.shopInfo = shopInfo
    },
    RECEIVE_SHOP_RATINGS(state, { shopRatings }) {
      state.shopRatings = shopRatings
  },
  },
  actions: {
    async getShopFoods({ commit }, callback) {
      const result = await reqShopFoods()
      if (result.code === 0) {
        const foods = result.data
        commit('RECEIVE_SHOPFOODS', { foods })
        callback & callback()
      }
    },
    async getShopInfo({ commit }) {
      const result = await reqShopInfo()
      if (result.code === 0) {
        const shopInfo = result.data
        commit('RECEIVE_SHOPINFO', { shopInfo })
      }
    },
    async getShopRatings({ commit }, callback) {
      const result = await reqShopRatings()
      console.log(result)
      if (result.code === 0) {
        const shopRatings = result.data
        commit('RECEIVE_SHOP_RATINGS', { shopRatings })
      }
      callback && callback()
    },
  },
- 对于参数中传入的callback我们可以先不用管,需要的时候就会去解释他
4.4 头部组件书写
我们可以把头部单独抽成一个组件,按照路径新建文件src\components\ShopHeader.vue,同样,我们可以先写静态组件再写动态组件,这里直接写动态组件
<div class="shop-header">
<section>
<section
class="header-nav"
@click="$router.back()"
:style="{backgroundImage: `url(${shopInfo.bgImg})`}"
>
<i class="iconfont icon-arrow_left"></i>
</section>
<section class="header-content">
<img class="shop-logo" :src="shopInfo.avatar" alt @click="showShopInfo" />
<div class="shop-title" @click="showShopInfo">
<span class="min-tag">品牌</span>
<div class="shop-name">{{shopInfo.name}}</div>
<i class="content-icon"></i>
</div>
<div class="shop-rating">
<span>{{shopInfo.score}}</span>
<span>月售{{shopInfo.sellCount}}单</span>
<span>约{{shopInfo.deliveryTime}}分钟</span>
<span>{{shopInfo.description}}</span>
<span>距离{{shopInfo.distance}}</span>
</div>
<div class="shop-info" @click="showShopActi">
<span class="min-tag">首单</span>
<span class="activities">新用户下单立减17元(不与其他活动同时参与)</span>
<span>
8个优惠
<i></i>
</span>
</div>
</section>
</section>
</div>
.shop-header {
    .header-nav {
        height: 50px;
        /* 题上面用的是over属性 */
        background-size: 100% 100%;

        .iconfont {
            font-size: 20px;
            line-height: 50px;
            margin-left: 10px;
        }
    }

    .header-content {
        display: flex;
        flex-direction: column;
        align-items: center;
        position: relative;
        border: 1px transparent solid;

        img {
            position: absolute;
            left: 50%;
            transform: translateX(-50%);
            top: -33px;
            display: block;
            width: 66px;
            height: 66px;
            background-color: royalblue;
            z-index: 20;
        }

        .shop-title {
            margin-top: 50px;
            display: flex;

            .min-tag {
                background-color: #ffe631;
                font-size: 24px;
                display: inline-block;
                padding: 5px 8px;
                transform-origin: 38px 15px;
                transform: scale(0.5);
            }

            .shop-name {
                position: relative;
                font-size: 22px;
                font-weight: bold;
                /* 为什么文字不居中,他不是撑开的吗? */
                line-height: 34px;
            }

            .content-icon {
                position: relative;
                width: 20px;
                height: 16px;

                &::before {
                    position: absolute;
                    content: "";
                    left: 6px;
                    top: 10px;
                    border-left: 6px solid gray;
                    border-top: 6px solid transparent;
                    border-bottom: 6px solid transparent;
                    border-right: 6px solid transparent;
                }
            }
        }

        .shop-rating {
            margin-top: 3px;
            font-size: 11px;
        }

        .shop-info {
            margin-top: 8px;
            white-space: nowrap;
            font-size: 11px;

            .min-tag {
                display: inline-block;
                padding: 4px 5px;
                font-size: 18px;
                background-color: #70bc46;
                color: #fff;
                transform-origin: 40px 20px;
                transform: scale(0.5);
            }

            .activities {
                display: inline-block;
                width: 180px;
                overflow: hidden;
                text-overflow: ellipsis;
            }
        }
    }
}
computed: {
    ...mapState(["shopInfo"])
},
在Shop中映射组件,并触发相应的方法
mounted () {
    this.$store.dispatch('getShopInfo')
},
components: {
    ShopHeader
}
当我们把上面的代码写完后的效果图

头部点击提示
当我们点击商家店铺和商家店铺名称的时候会跳出一下提示框,让我们来写这个提示框,同样我们可以先写静态结构在写动态结构,我们这里直接写动态结构

<transition name="fade">
    <section class="notice-hint" v-show="showHint">
        <div class="notice-content">
            <h2>
                <span class="mini_tag">品牌</span>
                <span class="notice_title">{{shopInfo.name}}</span>
            </h2>
            <ul>
                <li>
                    <h3>{{shopInfo.score}}</h3>
                    <p>评分</p>
                </li>
                <li>
                    <h3>{{shopInfo.sellCount}}单</h3>
                    <p>月售</p>
                </li>
                <li>
                    <h3>{{shopInfo.description}}</h3>
                    <p>约{{shopInfo.deliveryTime}}分钟</p>
                </li>
                <li>
                    <h3>{{shopInfo.deliveryPrice}}元</h3>
                    <p>配送费用</p>
                </li>
                <li>
                    <h3>{{shopInfo.distance}}</h3>
                    <p>距离</p>
                </li>
            </ul>
            <div class="notice">
                <span>公告</span>
            </div>
            <div class="notice_footer">
                <span>{{shopInfo.bulletin}}</span>
            </div>
        </div>
        <div class="icon_close" @click="showShopInfo">
            <i class="iconfont icon-close"></i>
        </div>
    </section>
</transition>
.fade-enter-active,
.fade-leave-active {
    transition: opacity 0.5s;
}

.fade-enter,
.fade-leave-to {
    opacity: 0;
}
.notice-hint {
    position: fixed;
    left: 0;
    right: 0;
    top: 0;
    bottom: 0;
    display: flex;
    flex-direction: column;
    align-items: center;
    justify-content: center;
    background-color: rgba(100, 100, 100, 0.8);
    z-index: 100;

    .notice-content {
        width: 90%;
        background-color: #fff;
        height: 200px;
        display: flex;
        flex-direction: column;
        justify-content: center;
        align-items: center;
        border-radius: 5px;

        h2 {
            .mini_tag {
                display: inline-block;
                background-color: yellow;
                font-size: 24px;
                padding: 5px 8px;
                transform: scale(0.5);
                transform-origin: 40px;
            }

            .notice_title {
                font-size: 20px;
                font-weight: 700;
            }
        }

        ul {
            display: flex;
            width: 100%;
            margin-top: 10px;

            li {
                flex: 1;

                h3 {
                    font-size: 15px;
                    font-weight: 700;
                    text-align: center;
                }

                p {
                    font-size: 12px;
                    margin-top: 5px;
                    text-align: center;
                    color: #acacac;
                }
            }
        }

        .notice {
            width: 50%;
            margin: 10px;
            background-image: linear-gradient(90deg, #fff, #333 50%, #fff);
            background-size: 100% 1px;
            background-repeat: no-repeat;
            text-align: center;
            background-position: 50%;

            span {
                background-color: #fff;
                padding: 0 10px;
                font-size: 12px;
                color: #d7d7d7;
            }
        }

        .notice_footer {
            width: 90%;
            font-size: 12px;
            color: #333;
            line-height: 1.5;
            overflow-y: auto;
            word-break: break-all;
            height: 60px;
        }
    }
}

.icon_close {
    margin-top: 20px;
    width: 25px;
    height: 25px;
    font-size: 20px;
    color: rgba(2255, 225, 225, 0.8);
    border: 1px solid rgba(2255, 225, 225, 0.8);
    text-align: center;
    line-height: 22px;
    border-radius: 50%;
}
点击监听
export default {
    data() {
        return {
            showHint: false,
        };
    },
    methods: {
        showShopInfo() {
            this.showHint = !this.showHint;
        },
    }
};
<img class="shop-logo" :src="shopInfo.avatar" alt @click="showShopInfo" />
<div class="shop-title" @click="showShopInfo">
    <span class="min-tag">品牌</span>
    <div class="shop-name">{{shopInfo.name}}</div>
    <i class="content-icon"></i>
</div>
当我们将以上代码写完之后,就会发现效果已经哈勒
活动点击
当我们点击下方的优惠活动的时候,他会出现以下效果,我们来写以下效果

<transition name="fade">
    <section class="activity" v-show="showAcitivity">
        <div class="active_content">
            <div class="active_title">优惠活动</div>
            <ul>
                <li v-for="(support,index) in shopInfo.supports">
                    <span class="mini_tag">{{support.name}}</span>
                    <span class="activity_content">{{support.content}}</span>
                </li>
            </ul>
            <div class="icon_close2" @click="showShopActi">
                <i class="iconfont icon-close"></i>
            </div>
        </div>
    </section>
</transition>
.activity {
    position: fixed;
    left: 0;
    right: 0;
    top: 0;
    bottom: 0;
    background-color: rgba(100, 100, 100, 0.8);
    z-index: 100;

    .active_content {
        position: fixed;
        left: 0;
        bottom: 0;
        right: 0;
        height: 250px;
        background-color: #f5f5f5;
        z-index: 10000;

        .active_title {
            text-align: center;
            font-size: 20px;
            font-weight: bold;
            margin: 15px 0;
        }

        ul {
            width: 80%;
            height: 100%;
            margin: 0 auto;
            overflow-y: auto;

            li {
                margin: 20px 0;

                .mini_tag {
                    display: inline-block;
                    background-color: green;
                    color: #fff;
                    transform: scale(0.8);
                    padding: 5px 8px 3px;
                }

                .activity_content {
                    width: 80%;
                    font-size: 13px;
                    display: inline-block;
                    white-space: nowrap;
                    overflow: hidden;
                    text-overflow: ellipsis;
                }
            }
        }

        .icon_close2 {
            position: absolute;
            right: 10px;
            top: 10px;

            .iconfont {
                font-size: 20px;
            }
        }
    }
}
export default {
    data() {
        return {
            showAcitivity: false
        };
    },
    methods: {
        showShopActi() {
            this.showAcitivity = !this.showAcitivity;
        }
    }
};
绑定事件
<div class="shop-info" @click="showShopActi">
相关文章
- Why not always use the index as the key in a vue.js for loop?
- 基于 Vue.js 之 iView UI 框架非工程化实践记要 使用 Newtonsoft.Json 操作 JSON 字符串 基于.net core实现项目自动编译、并生成nuget包 webpack + vue 在dev和production模式下的小小区别 这样入门asp.net core 之 静态文件 这样入门asp.net core,如何
- 【Vue】项目打包部署到iis服务器中
- Laravel + Vue + element-ui 【前端项目一】vue 实现查看更多 5
- 给vue项目添加ESLint
- Vue - 中文汉字转拼音(工具函数封装)
- JavaScript - 判断今天是星期几(周几 / 礼拜几),适用于 Vue.js uni-app Nuxt.js 等前端项目
- Vue项目--尚品汇(登录注册)、token存储与过期
- Vue项目--尚品汇(开发流程、组件拆分,路由跳转)
- Vue项目---尚品汇(创建项目)
- Vue项目中使用AntV X6绘制流程图
- vue.js+node.js前端实战开发(一)————cmd命令搭建项目
- Vue 配置多页面,去掉.html后缀的技巧
- 从头开始学习vue-router
- vue 3.0 项目搭建移动端 (二) Vue-router: router-link 与 router-view keep-alive
- vue 3.0 项目搭建移动端 (八) vue.config.js 配置
- Vue 爬坑之路(一)—— 使用 vue-cli 搭建项目 (增补)
- vue从入门到进阶:渲染函数 & JSX(八)
- Vue相关开源项目库汇总 http://www.opendigg.com/tags/front-vue
- vue项目中两种回车键搜索功能实现
- vue学习笔记十:Vue中引入jquery
- vue项目集成mock.js
- electron-vue搭建项目
- [js高手之路] vue系列教程 - 组件定义与使用上部(7)
- Vue项目预渲染机制
- vue前台(三)search路径,列表设置过渡效果
- 全栈开发实战|人事管理系统的设计与实现(Spring Boot + Vue 3 + MyBatis)
- Django+Vue项目学习第八篇:Django项目部署到服务器
- 解决:Vue调试工具vue-devtools安装方法——解决下载速度缓慢,安装报错问题
- Vue项目安装core-js报错解决方案
- vue+element 构建的后台管理系统项目(1)新建项目