
Android NIO 系列教程(八) --NIO简易聊天室
2023-09-27 14:28:04 时间
Android NIO 系列教程(一) NIO概述
Android NIO 系列教程(二) – Channel
Android NIO 系列教程(三) – Buffer
Android NIO 系列教程(四) – Selector
Android NIO 系列教程(五) – FileChannel
Android NIO 系列教程(六) – SocketChannel
Android NIO 系列教程(七) – ServerSocketChannel
Android NIO 系列教程(八) --NIO简易聊天室
从上面几章,我们已经知道了 NIO 的 SocketChannel ,ServerSocketChannel,Selector 等知识,这章我们来做个总结,实现一个简易的聊天室。
今天要实现的效果如下:
首先,先构建服务器,从上面几章的理解,我们总结出以下步骤
- 创建 selector
- 创建ServerSocketChannel
- 创建非阻塞模式
- 绑定要监听的端口
- 向selector注册 channel
- 通过 selectionKeys 拿到想要监听的事件
所以服务端的代码如下:
首先是初始化:
//1.创建 selector
Selector selector = Selector.open();
//2.创建 ServerSocketChannel
ServerSocketChannel serverSocketChannel = ServerSocketChannel.open();
//3.绑定端口
serverSocketChannel.bind(new InetSocketAddress(Constants.PORT));
//4.设置为非阻塞模式
serverSocketChannel.configureBlocking(false);
//5.将channel注册到selector中
serverSocketChannel.register(selector, SelectionKey.OP_ACCEPT);
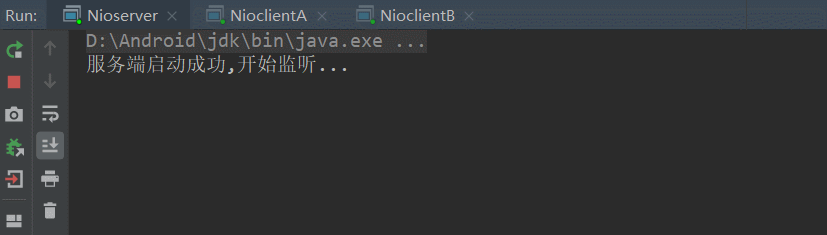
System.out.println("服务端启动成功,开始监听...");
接着监听感兴趣的事件,比如客户端接入和客户端的数据:
 // 7.通过selectedKeys() 拿到 selectedKeys 集合
    Set<SelectionKey> selectionKeys = selector.selectedKeys();
     Iterator<SelectionKey> iterator = selectionKeys.iterator();
     while (iterator.hasNext()){
         //拿到 selectedKeys 实例
         SelectionKey selectionKey = iterator.next();
         //移除 selectedKeys 实例
         iterator.remove();
         /**
          * 如果是接入事件
          */
         if (selectionKey.isAcceptable()){
             handleAccept(serverSocketChannel,selector);
         }

         /**
          * 如果是可读事件
          */
         if (selectionKey.isReadable()){
             handleRead(selectionKey,selector);
         }
     }
如果是 accept 事件,我们处理的比较简单,就打印个提示即可:
    /**
     * 处理接受事件
     * @param serverSocketChannel
     * @param selector
     * @throws IOException
     */
    private static void handleAccept(ServerSocketChannel serverSocketChannel,Selector selector) throws IOException {
        //拿到 SocketChannel 客户端
        SocketChannel socketChannel = serverSocketChannel.accept();
        System.out.println("新客户端连接:"+socketChannel.getRemoteAddress().toString());
        //设置 socketchannel 为非阻塞模式
        socketChannel.configureBlocking(false);
        //客户端注册读事件,这样我们才能接收到客户端的信息
        socketChannel.register(selector,SelectionKey.OP_READ);
        //发送 conected 提示服务端已经接收到
      //  ByteBuffer buf = Charset.forName("utf-8").encode(Constants.CLIENT_CONNECTED);
       // socketChannel.write(buf);

    }
注意到对 socketChannel 注册成 read 模式,这样,客户端的数据我们才能接收到。
接着是监听:
    /**
     * 处理客户端读事件,并广播出去
     * @param selectionKey
     * @param selector
     * @throws IOException
     */
    private static void handleRead(SelectionKey selectionKey,Selector selector) throws IOException {
        //拿到已经就绪的 channel
        SocketChannel channel = (SocketChannel) selectionKey.channel();
        if (channel != null) {
            //读取channel的数据
            ByteBuffer buf = ByteBuffer.allocate(512);
            StringBuilder sb = new StringBuilder();
            int readByte = channel.read(buf);
            while (readByte > 0) {
                //切换为读模式
                buf.flip();
                String msg = String.valueOf(Charset.forName("utf-8").decode(buf));
                sb.append(msg);
                readByte = channel.read(buf);
            }
            buf.clear();
            //将 channel 继续注册为可读事件
            channel.register(selector, SelectionKey.OP_READ);
            if (sb.length() > 0) {
                System.out.println(channel.getRemoteAddress().toString()+" : " + sb.toString());
                 //返回数据
                //String responeMsg = sb.length();
                //channel.write(Charset.forName("utf-8").encode(responeMsg));
                //广播
                broadcastMsg(selector,channel,sb.toString());
            }

        }

    }
注释已经很清楚了,这里就不过多解释了。然后广播的代码为:
    /**
     * g
     * @param selector
     * @param targetChannel
     * @param msg
     * @throws IOException
     */
    private static void broadcastMsg(Selector selector,SocketChannel targetChannel,String msg) throws IOException {
        //拿到已连接的客户端个数
        Set<SelectionKey> keys = selector.keys();
        for (SelectionKey selectionKey : keys) {
            Channel channel =  selectionKey.channel();
            //不是自己本身,其他通道才需要拿到信息
            if (channel instanceof SocketChannel){
                if (targetChannel != null &&
                        channel == targetChannel ){
                    continue;
                }
                ((SocketChannel) channel).write(Charset.forName("utf-8").encode(msg));
            }
        }

    }
接着是客户端,我们也总结了以下步骤:
- 创建 selector
- 创建 SocektChannel
- 设置非阻塞模式
- 使用 connect 连接服务器
- 通过 read() 或 write() 读写数据
首先,首先初始化为:
        //1.创建 selector
        Selector selector = Selector.open();
        //2.创建SocketChannel
        SocketChannel socketChannel = SocketChannel.open();
        //3.设置为非阻塞模式
        socketChannel.configureBlocking(false);
        //4.连接服务器
        socketChannel.connect(new InetSocketAddress("localhost", Constants.PORT));
        //注册读事件,读取服户端信息
        socketChannel.register(selector, SelectionKey.OP_READ);
接着,读取终端的信息,并发送给服务端:
if (socketChannel.finishConnect()) {
            while (!isFinish) {
                String msg = br.readLine();
                if ("bye".equals(msg)) {
                    isFinish = true;
                    sendData(socketChannel,"客户端A退出了");
                    readerThread.exit();
                    socketChannel.close();
                    System.out.println("服务端已退出");
                    break;
                } else {
                    sendData(socketChannel,msg);
                }

            }
        }
其中 sendData 如下:
    /**
     * 给服务器发送数据
     * @param channel
     * @param msg
     * @throws IOException
     */
    private static void sendData(SocketChannel channel,String msg) throws IOException {
        if (channel.isConnected()){
            channel.write(Charset.forName("utf-8").encode(msg));
        }
    }
而读取服务端的信息,则另开一个线程去监听数据即可:
static class ReaderThread extends Thread{
        private Selector selector;
        private boolean isFinish = false;
        public ReaderThread(Selector selector) {
            this.selector = selector;
        }

        @Override
        public void run() {
            super.run();
            try {
                while (!isFinish){
                    //调用 select 方法,拿到 channel
                    int channels = selector.select();
                    if (channels == 0){
                        continue;
                    }
                    //如果能拿到,则通过 selectedKeys() 方法,拿到 selectedKeys 的集合
                    Set<SelectionKey> selectionKeys = selector.selectedKeys();
                    Iterator<SelectionKey> iterator = selectionKeys.iterator();
                    while (iterator.hasNext()){
                        //拿到 selectedKeys 实例
                        SelectionKey selectionKey = iterator.next();
                        //如果是可读事件
                        if (selectionKey.isReadable()){
                            //拿到 就绪的 SocketChannel
                            SocketChannel channel = (SocketChannel) selectionKey.channel();
                            if (channel != null) {
                                //读取channel的数据
                                ByteBuffer buf = ByteBuffer.allocate(1024);
                                StringBuilder sb = new StringBuilder();
                                while (channel.read(buf) > 0) {
                                    //切换为读模式
                                    buf.flip();
                                    String msg = String.valueOf(Charset.forName("utf-8").decode(buf));
                                    sb.append(msg);
                                }
                                //将 channel 继续注册为可读事件
                                channel.register(selector, SelectionKey.OP_READ);
                                if (Constants.CLIENT_CONNECTED.equals(sb.toString())){
                                    sendData(channel,"我是客户端A");
                                }else {
                                    System.out.println(sb.toString());
                                }

                            }

                        }
                        iterator.remove();
                    }
                }
            } catch (IOException e) {
               // e.printStackTrace();
            }finally {
                exit();
            }
        }

        public void exit(){
            isFinish = true;
            try {
                selector.close();
            } catch (IOException e) {
                e.printStackTrace();
            }
        }
    }
这样,我们一个简易的聊天室就完成了。
可能你会问到,这样并没有体现 NIO 的单个 selector 和 多个channel 的优势啊,还有其他等问题,这些,等我们后面再去优化。
相关文章
- 精通Android自定义View(十三)事件分发简述
- Android入门之ActionBar实现Tab导航
- 《Android游戏开发详解》一2.15 改进程序
- 《Android应用开发从入门到精通》——第1章,第1.3节小结
- 关于Android中根据ID名动态获取资源的两个方法
- android:Android中用文件初始化sqlite数据库
- 详解Android中AsyncTask的使用
- Android Backup功能之全面实战
- Flutter iOS风格文本输入框CupertinoTextField光标在Android中未与提示文本对齐
- Android学习站点推荐
- 常见Android测试工具简介
- 【Android学习】kotlin语言基础知识学习