
Win10:SpringBoot+Redis样例
目录
一、Windows下载安装Redis
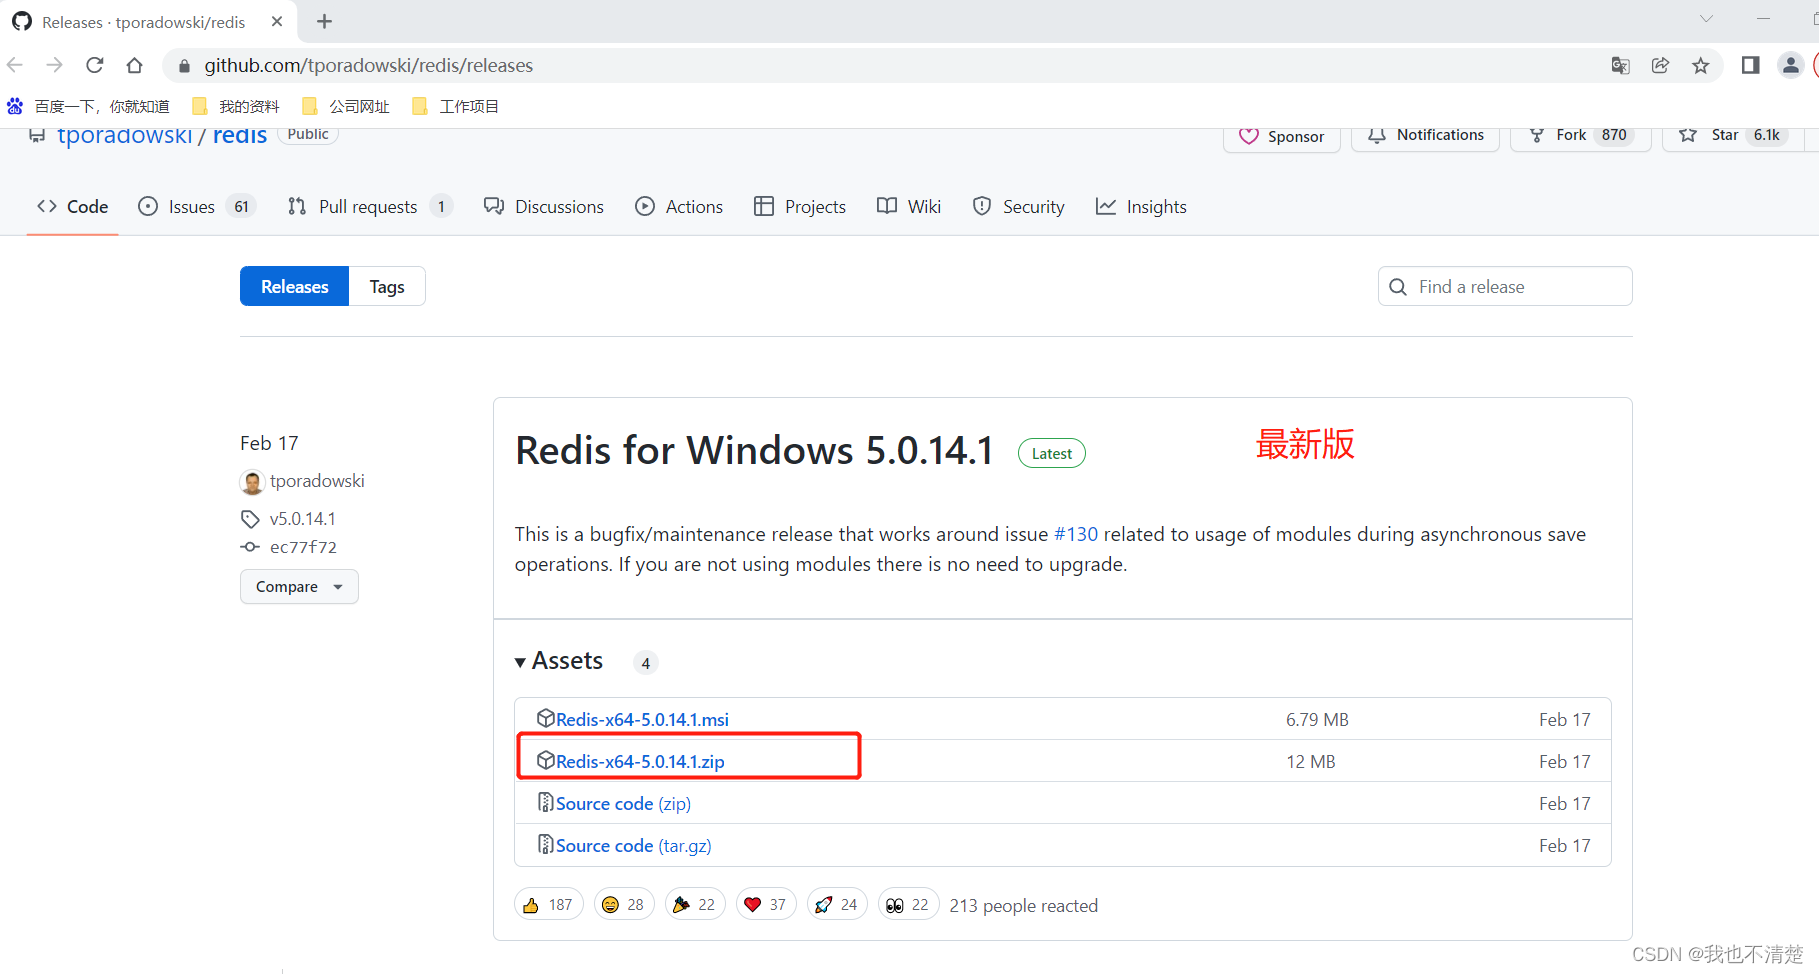
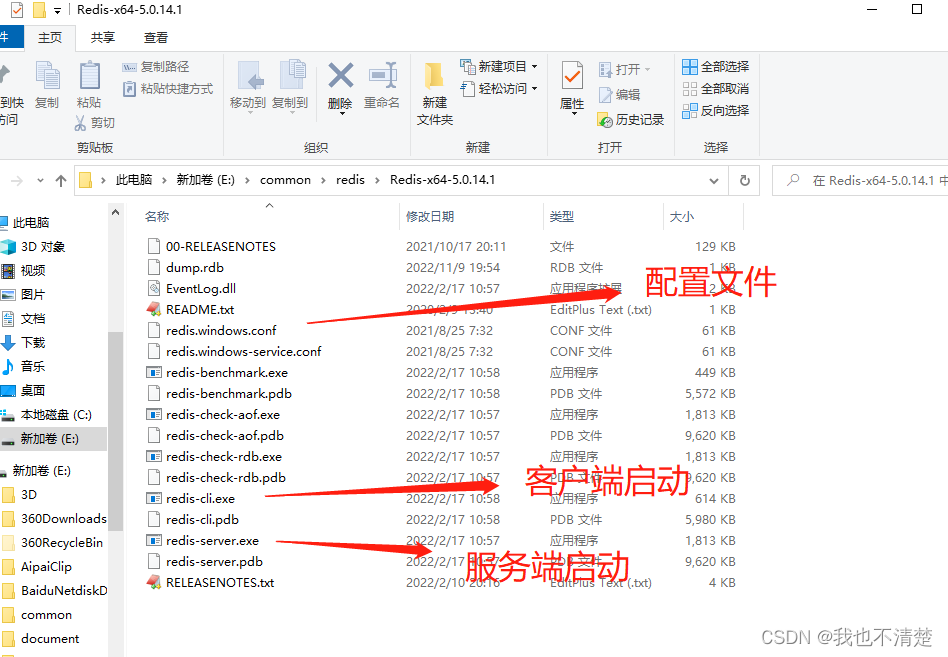
2、解压,尽量纯英文路径,并先启动服务端,然后启动客户端测试
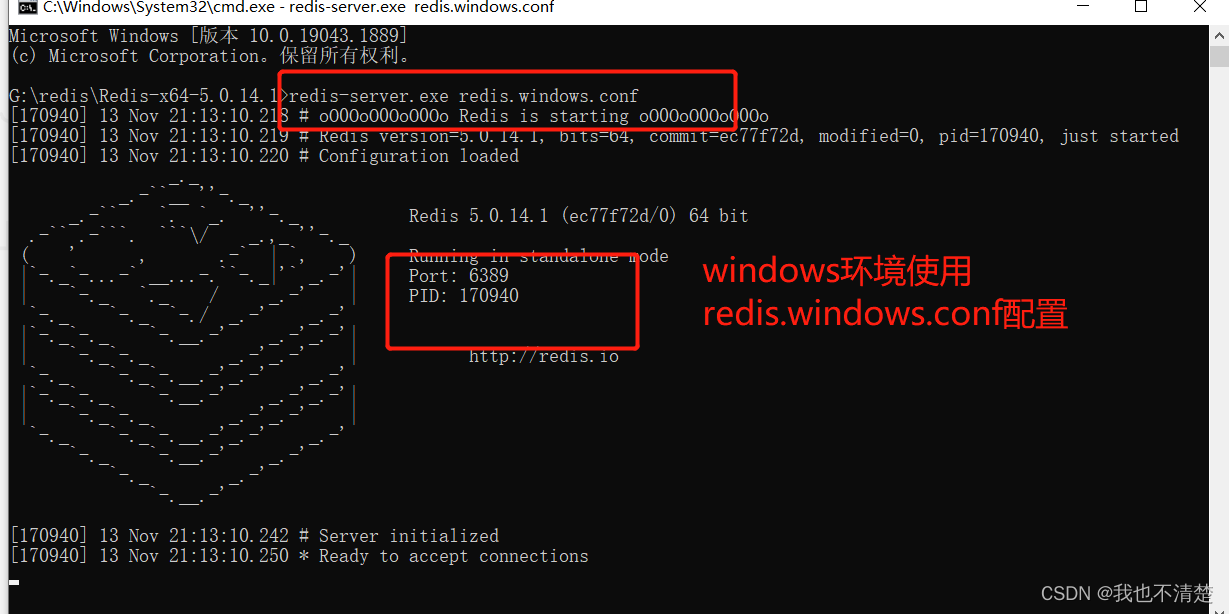
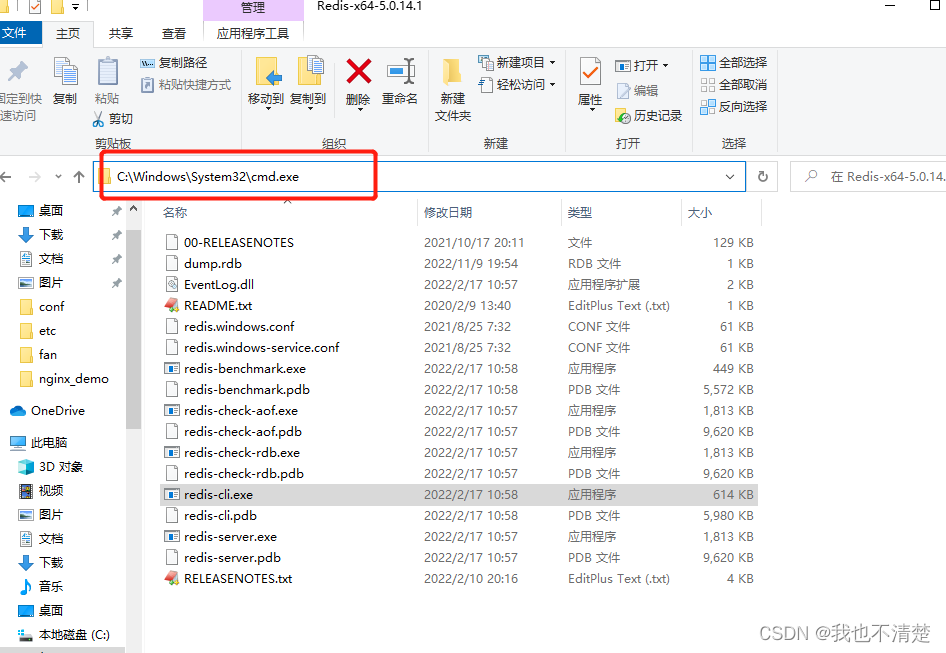
注:双击手动打开如下用图,如果修改了redis.windows.conf中port,手动双击exe发现还是6379,此时注意执行提示 还是取的默认redis.conf,所以要按如上图cmd执行指定redis.windows.conf
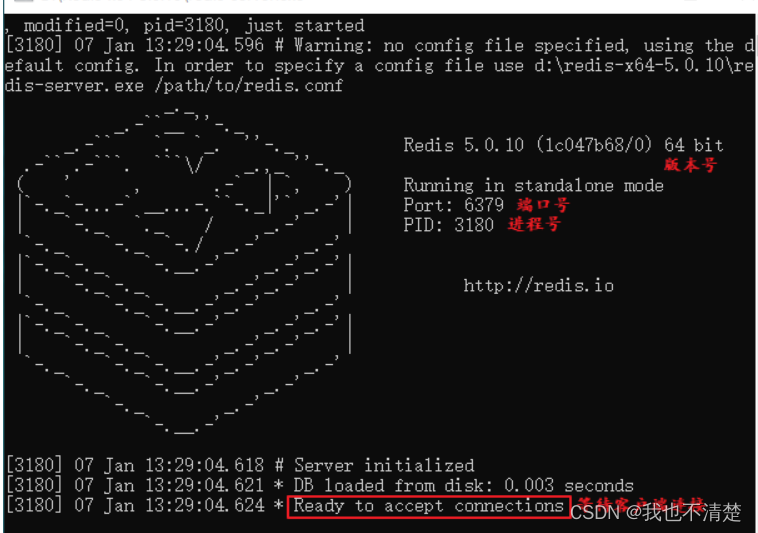
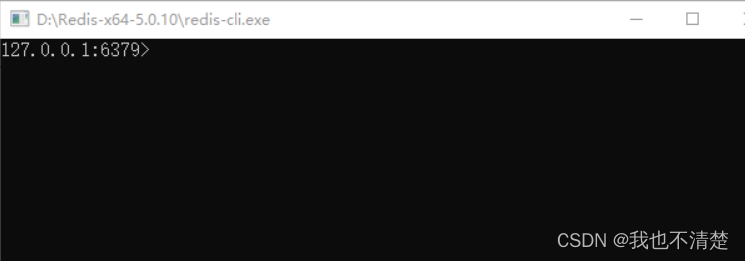
服务端和客户端如上图,说明环境没问题,但是如果弹框关了,Redis服务也会停掉;
3、批处理命令创建Redis服务
执行
redis-server.exe --service-install redis.windows.conf --loglevel verbose出现 Redis successfully installed as a service. 说明执行注册成功。
启动Redis服务:redis-server --service-start
#启动Redis服务:
redis-server --service-start
#安装服务:
redis-server --service-install
#卸载服务:
redis-server --service-uninstall
#停止服务:
redis-server --service-stop
#服务端启动时重命名:
redis-server --service-start --service-name Redis1
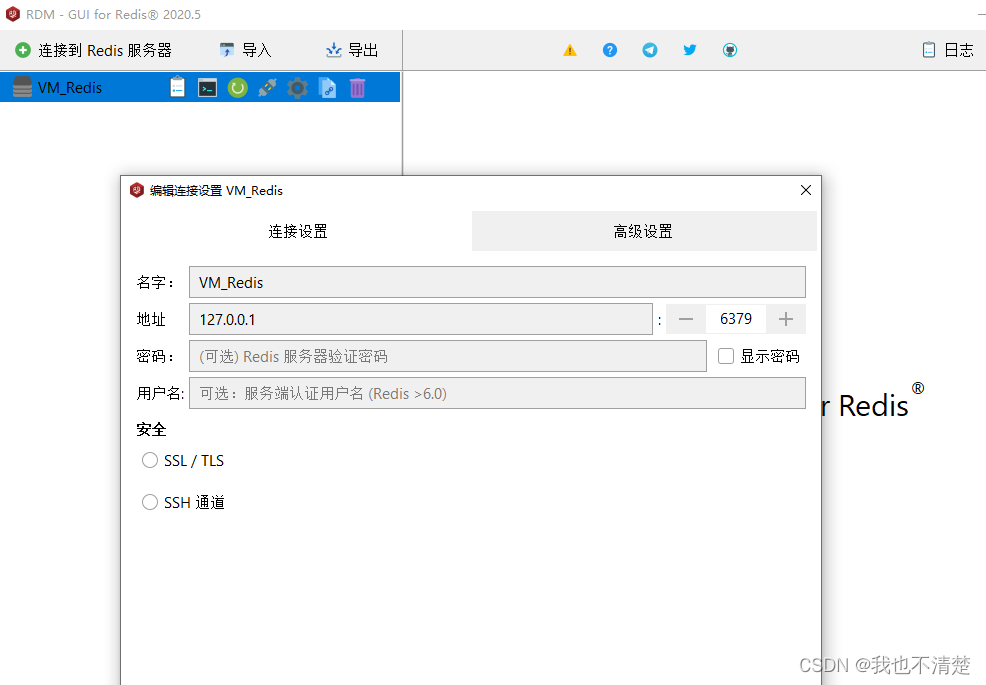
4、redis可视化工具 redisdestop_v2020.5.0
二、SpringBoot整合Redis样例
注:尽量创建 2.7.* 以下版本(避免Could not autowire. No beans of 'RedisConnectionFactory' type found.,虽然不影响程序运行,但是强迫症看着真的想毁灭吧。。。);
本样例中只列出常用 redisTemplate.opsForValue()、redisTemplate.opsForValue()、redisTemplate.opsForValue()三个例子。
1、创建SpringBoot

2、pom.xml如下:
<?xml version="1.0" encoding="UTF-8"?>
<project xmlns="http://maven.apache.org/POM/4.0.0" xmlns:xsi="http://www.w3.org/2001/XMLSchema-instance"
         xsi:schemaLocation="http://maven.apache.org/POM/4.0.0 https://maven.apache.org/xsd/maven-4.0.0.xsd">
    <modelVersion>4.0.0</modelVersion>
    <parent>
        <groupId>org.springframework.boot</groupId>
        <artifactId>spring-boot-starter-parent</artifactId>
        <version>2.6.11</version>
        <relativePath/> <!-- lookup parent from repository -->
    </parent>
    <groupId>com.redis</groupId>
    <artifactId>demo</artifactId>
    <version>1.0-SNAPSHOT</version>
    <packaging>war</packaging>
    <name>demo</name>
    <description>Demo project for Spring Boot</description>
    <properties>
        <java.version>1.8</java.version>
    </properties>
    <dependencies>
        <dependency>
            <groupId>org.springframework.boot</groupId>
            <artifactId>spring-boot-starter-web</artifactId>
        </dependency>
        <dependency>
            <groupId>org.springframework.boot</groupId>
            <artifactId>spring-boot-starter-tomcat</artifactId>
            <scope>provided</scope>
        </dependency>
        <dependency>
            <groupId>org.springframework.boot</groupId>
            <artifactId>spring-boot-starter-test</artifactId>
            <scope>test</scope>
        </dependency>

        <dependency>
            <groupId>org.springframework.boot</groupId>
            <artifactId>spring-boot-starter-data-redis</artifactId>
        </dependency>
        <dependency>
            <groupId>org.springframework.boot</groupId>
            <artifactId>spring-boot-test</artifactId>
        </dependency>
        <dependency>
            <groupId>junit</groupId>
            <artifactId>junit</artifactId>
        </dependency>
        <dependency>
            <groupId>org.springframework</groupId>
            <artifactId>spring-test</artifactId>
        </dependency>
    </dependencies>

    <build>
        <plugins>
            <plugin>
                <groupId>org.springframework.boot</groupId>
                <artifactId>spring-boot-maven-plugin</artifactId>
            </plugin>
        </plugins>
    </build>

</project>
3、application.yml 配置
server:
  port: 8080
spring:
  redis:
    host: 127.0.0.1
    port: 6379
    #password: ''
    database: 6
4、创建 RedisTest类测试
package com.redis.demo.test;

import org.junit.Test;
import org.junit.runner.RunWith;
import org.springframework.beans.factory.annotation.Autowired;
import org.springframework.boot.test.context.SpringBootTest;
import org.springframework.data.redis.core.RedisTemplate;
import org.springframework.test.context.junit4.SpringRunner;

@SpringBootTest
@RunWith(SpringRunner.class)
public class RedisTest {

    @Autowired
    private RedisTemplate redisTemplate;

    @Test
    public void testRedis(){
        String key = "1";
        redisTemplate.opsForValue().set("1","Hello world!");

        String res = (String) redisTemplate.opsForValue().get(key);
        System.out.println(res);
    }
}
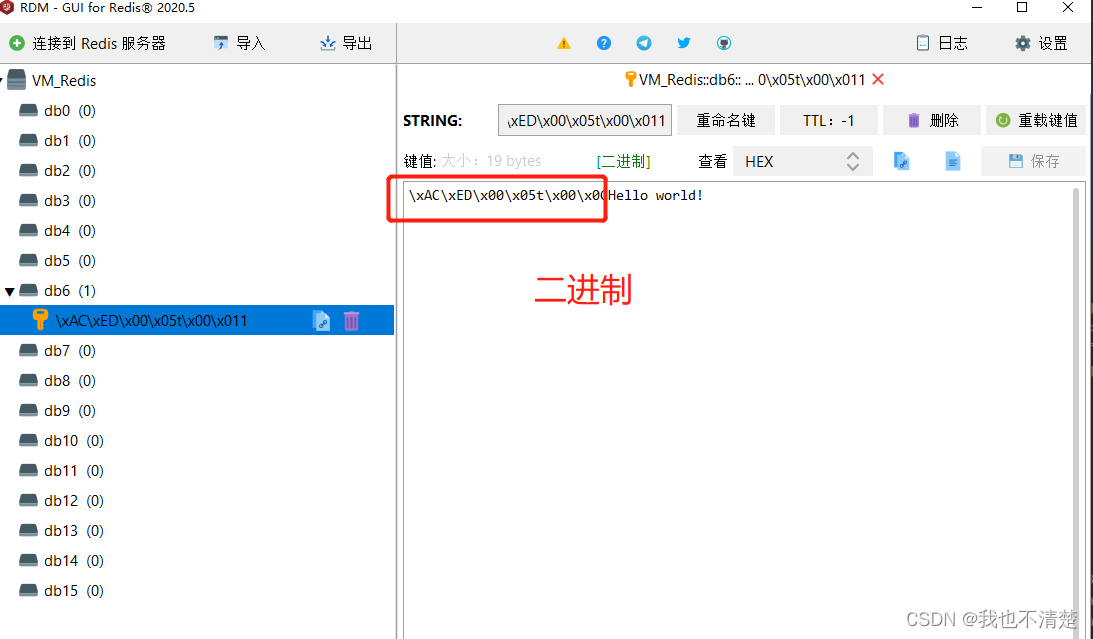
5、上述步骤4随然显示成功,但是可以在客户端工具中看到有乱码
package com.redis.demo.config;

import com.fasterxml.jackson.annotation.JsonAutoDetect;
import com.fasterxml.jackson.annotation.PropertyAccessor;
import com.fasterxml.jackson.databind.ObjectMapper;
import org.springframework.context.annotation.Bean;
import org.springframework.context.annotation.Configuration;
import org.springframework.data.redis.connection.RedisConnectionFactory;
import org.springframework.data.redis.core.RedisTemplate;
import org.springframework.data.redis.serializer.Jackson2JsonRedisSerializer;
import org.springframework.data.redis.serializer.StringRedisSerializer;

/**
 * redis配置
 * 主要是配置Redis的序列化规则,替换默认的jdkSerializer
 * key的序列化规则用StringRedisSerializer
 * value的序列化规则用Jackson2JsonRedisSerializer
 */
@Configuration
public class RedisConfig {

    @Bean
    public RedisTemplate<Object, Object> redisTemplate(RedisConnectionFactory connectionFactory) {
        RedisTemplate<Object, Object> redisTemplate = new RedisTemplate<>();
        redisTemplate.setConnectionFactory(connectionFactory);

        // 使用Jackson2JsonRedisSerialize替换默认序列化
        Jackson2JsonRedisSerializer jackson2JsonRedisSerializer = new Jackson2JsonRedisSerializer(Object.class);

        ObjectMapper objectMapper = new ObjectMapper();
        objectMapper.setVisibility(PropertyAccessor.ALL, JsonAutoDetect.Visibility.ANY);
        objectMapper.enableDefaultTyping(ObjectMapper.DefaultTyping.NON_FINAL);

        jackson2JsonRedisSerializer.setObjectMapper(objectMapper);

        // 设置key和value的序列化规则
        redisTemplate.setKeySerializer(new StringRedisSerializer());
        redisTemplate.setValueSerializer(jackson2JsonRedisSerializer);

        redisTemplate.setHashKeySerializer(new StringRedisSerializer());
        redisTemplate.setHashValueSerializer(jackson2JsonRedisSerializer);

        redisTemplate.afterPropertiesSet();
        return redisTemplate;
    }
}
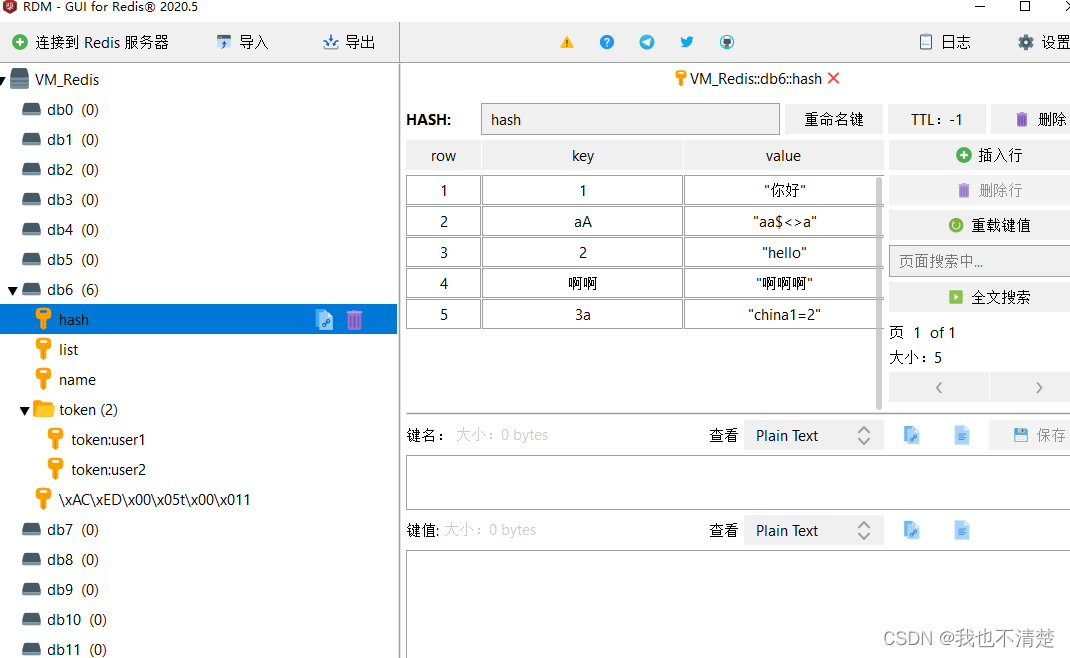
6、redisTemplate.opsForHash()
package com.redis.demo.test;

import org.junit.Test;
import org.junit.runner.RunWith;
import org.springframework.beans.factory.annotation.Autowired;
import org.springframework.boot.test.context.SpringBootTest;
import org.springframework.data.redis.core.RedisTemplate;
import org.springframework.test.context.junit4.SpringRunner;

import java.util.*;
import java.util.concurrent.TimeUnit;

/**
 * redisTemplate.opsForHash()
 */
@SpringBootTest
@RunWith(SpringRunner.class)
public class RedisTestOpsForHash {

    @Autowired
    private RedisTemplate redisTemplate;

    @Test
    public void testHashOps() {
        String key = "hash";
        // 单次往hash中存放一个数据
        redisTemplate.opsForHash().put(key, "1", "你好");

        Map<String, Object> map = new HashMap<>();
        map.put("2", "hello");
        map.put("3a", "china1=2");
        map.put("aA", "aa$<>a");
        map.put("啊啊", "啊啊啊");

        // 一次性向hash中存放一个map
        redisTemplate.opsForHash().putAll(key, map);

        // 获取hash下的所有key和value
        Map<String, Object> resultMap = redisTemplate.opsForHash().entries(key);
        for (String hashKey : resultMap.keySet()) {
            System.out.println(hashKey + ": " + resultMap.get(hashKey));
        }
    }


}
7、redisTemplate.opsForList()
package com.redis.demo.test;

import org.junit.Test;
import org.junit.runner.RunWith;
import org.springframework.beans.factory.annotation.Autowired;
import org.springframework.boot.test.context.SpringBootTest;
import org.springframework.data.redis.core.RedisTemplate;
import org.springframework.test.context.junit4.SpringRunner;

import java.util.ArrayList;
import java.util.HashSet;
import java.util.List;
import java.util.Set;
import java.util.concurrent.TimeUnit;

/**
 * redisTemplate.opsForList()
 */
@SpringBootTest
@RunWith(SpringRunner.class)
public class RedisTestOpsForList {

    @Autowired
    private RedisTemplate redisTemplate;

    @Test
    public void testListOps() {
        String listKey = "list";
        redisTemplate.opsForList().leftPush(listKey, "first value"); // 从list最左边插入数据
        redisTemplate.opsForList().leftPush(listKey, "second value but left");
        redisTemplate.opsForList().rightPush(listKey, 3); // 从list最右边插入数据

        List<Object> list = new ArrayList<>();
        list.add("hello");
        list.add("http://www.baidu.com");
        list.add(23344);
        list.add(false);
        redisTemplate.opsForList().rightPushAll(listKey, list); // 从list右边批量插入数据

        long size = redisTemplate.opsForList().size(listKey);
        if (size > 0) {
            for (int i = 0; i < size -1 ; i++  ) {
                // 从list最左边开始读取list中的数据,注意pop会导致出栈,也就是数据被取出来了(redis中就没有这个值了)
                // 此处我们读取size-1条数据,仅留下最后一条数据
                System.out.println(i + ":" + redisTemplate.opsForList().leftPop(listKey).toString());
            }
        }
    }


}
8、redisTemplate.opsForValue()
package com.redis.demo.test;

import org.junit.Test;
import org.junit.runner.RunWith;
import org.springframework.beans.factory.annotation.Autowired;
import org.springframework.boot.test.context.SpringBootTest;
import org.springframework.data.redis.core.RedisTemplate;
import org.springframework.test.context.junit4.SpringRunner;

import java.util.HashSet;
import java.util.List;
import java.util.Set;
import java.util.concurrent.TimeUnit;

/**
 * redisTemplate.opsForValue()
 */
@SpringBootTest
@RunWith(SpringRunner.class)
public class RedisTestOpsForValue {

    @Autowired
    private RedisTemplate redisTemplate;

    @Test
    public void testKeyOps() {
        // 测试redis操作key-value形式
        Set<String> keySet = new HashSet<>();

        String key1 = "name";
        keySet.add(key1);
        // 存储简单的key-value,并设置过期时间
        redisTemplate.opsForValue().set(key1, "admin", 1, TimeUnit.MINUTES);

        String key2 = "token:user1";
        String key3 = "token:user2";
        keySet.add(key2);
        keySet.add(key3);
        //
        redisTemplate.opsForValue().set(key2, "{\"name\":\"admin\"}, \"role\":\"admin\"");
        redisTemplate.opsForValue().set(key3, "{\"name\":\"test\"}, \"role\":\"test\"");

        // 根据key的集合获取多个value
        List<String> valueList = redisTemplate.opsForValue().multiGet(keySet);
        for (String value : valueList) {
            System.out.println(value);
        }
    }

}
三、客户端结果
四、其他
1、设置密码
A: 使用命令,临时,关闭后不再生效: config set requirepass 123456 ;
设置密码后重登 auth 123456
B: 永久,redis-windows.conf中启用requirepass ,去掉 # 注释符,修改为: requirepass 123456
重新登录:auth 123456
查看密码:config get requirepass
相关文章
- redis cluster 集群 实操 (史上最全,5W长文)
- Spring Boot Cache Redis缓存
- PHP+Redis 实现乐观锁机制
- laravel5.6 基于redis,使用消息队列(邮件推送)
- SpringBoot之集成Redis NoSql数据库
- Redis——Key事件通知
- 你必须知道的 4 种 Redis 集群方案及优缺点对比
- SpringBoot配置图片访问404SpringBoot配置图片访问路径springboot如何访问图片
- Redis集群管理(二)
- 面试题:简述redis主从同步的过程
- Redis开发 - 1. 认识redis
- springBoot 自动装配,SpringBoot自动配置,SpringBoot自动加载
- Linux Redis 主从复制,Redis slaveof replicaof主从复制,redis-sentinel哨兵
- Golang 实现 Redis(1): Golang 编写 Tcp 服务器
- Redis集群原理详解
- 【Redis入门笔记 05】Jedis 简介 & SpringBoot 集成
- Redis中缓存击穿 缓存穿透 缓存雪崩解决方案
- Redis安装(Windows环境下Redis安装)
- SpringBoot 使用jedis整合redis实现缓存处理
- Redis(1.17)redis客户端管理
- Redis(1.13)Redis cluster 分布式集群手动配置
- 在微信小程序上做一个「博客园年度总结」:使用redis存储数据
- 曹工说Redis源码(3)-- redis server 启动过程完整解析(中)
- 基于自动配置jar包和SpringBoot以及注解一分钟快速搭建企业项目开发环境,主要包含DataBase、mybatis、Dubbo、log4j、RabbitMQ、redis及相关客户端配置等等
- springboot 中spring-data-redis报错:远程主机强迫关闭了一个现有的连接,如何解决?
- redis下载安装教程
- Spring Boot2 redis