
【Vue】通过【总线bus】方式实现【兄弟组件】之间参数传递(图文+代码示例)
2023-09-11 14:14:57 时间
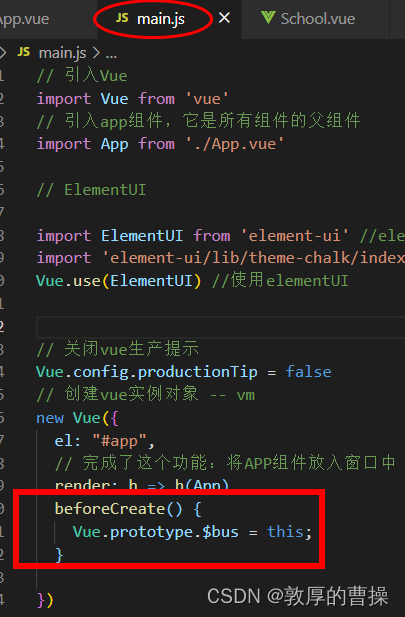
一、main.js
// 引入Vue
import Vue from 'vue'
// 引入app组件,它是所有组件的父组件
import App from './App.vue'

// ElementUI

import ElementUI from 'element-ui' //element-ui的全部组件
import 'element-ui/lib/theme-chalk/index.css'//element-ui的css
Vue.use(ElementUI) //使用elementUI


// 关闭vue生产提示
Vue.config.productionTip = false
// 创建vue实例对象 -- vm
new Vue({
  el: "#app",
  // 完成了这个功能:将APP组件放入窗口中
  render: h => h(App),
  beforeCreate() {
    Vue.prototype.$bus = this;
  }

})
2、app.vue
<template>
  <div id="myapp">
    <School> </School>
    <br />
    <Student> </Student>
  </div>
</template>

<script>
// 引入组件
import School from "@/components/School.vue";
import Student from "./components/Student.vue";

// 注册组件
export default {
  name: "App",
  components: {
    School,
    Student,
  },
  data() {
    return {
      appSchoolName: "",
      appAddress: "",
    };
  },
  methods: {
    getInfo(a, b) {
      this.appSchoolName = a;
      this.appAddress = b;
    },
  },
};
</script>

<style scoped>
#myapp {
  border: 1px rgb(134, 0, 0) dashed;
  /* height: 400px; */
  padding-top: 20px;
  padding-left: 10px;
  /* background-color: aqua; */
}
</style>
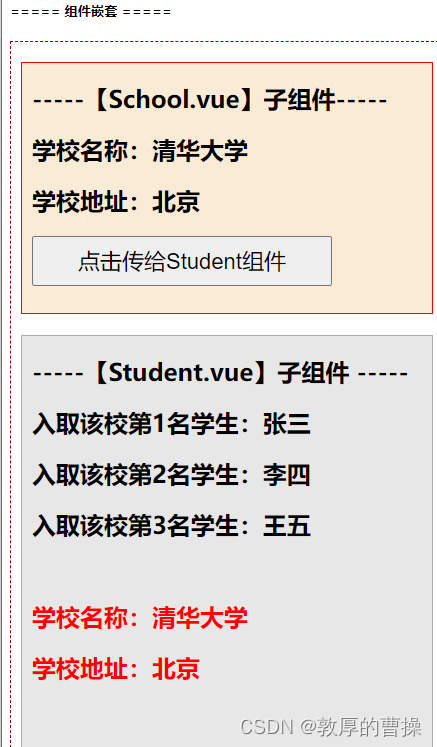
三、School.vue(发送)
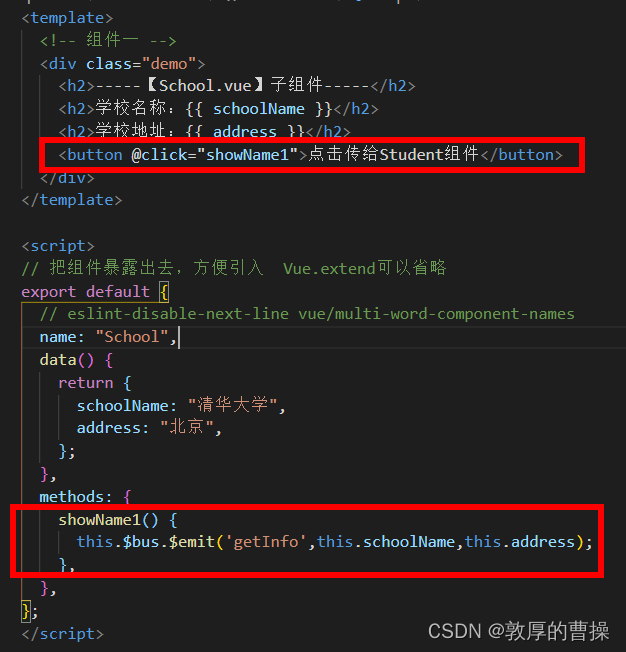
<template>
  <!-- 组件一 -->
  <div class="demo">
    <h2>-----【School.vue】子组件-----</h2>
    <h2>学校名称:{{ schoolName }}</h2>
    <h2>学校地址:{{ address }}</h2>
    <button @click="showName1">点击传给Student组件</button>
  </div>
</template>

<script>
// 把组件暴露出去,方便引入  Vue.extend可以省略
export default {
  // eslint-disable-next-line vue/multi-word-component-names
  name: "School",
  data() {
    return {
      schoolName: "清华大学",
      address: "北京",
    };
  },
  methods: {
    showName1() {
      this.$bus.$emit('getInfo',this.schoolName,this.address);
    },
  },
};
</script>

<style scoped>
.demo {
  background-color: antiquewhite;
  border: 1px red solid;
  padding-left: 10px;
  height: 250px;
  width:400px;
}
button{
  width:300px;
  height: 50px;
  /* background-color: antiquewhite; */
  font-size: 22px;

}
</style>
四、Student.vue(接收)
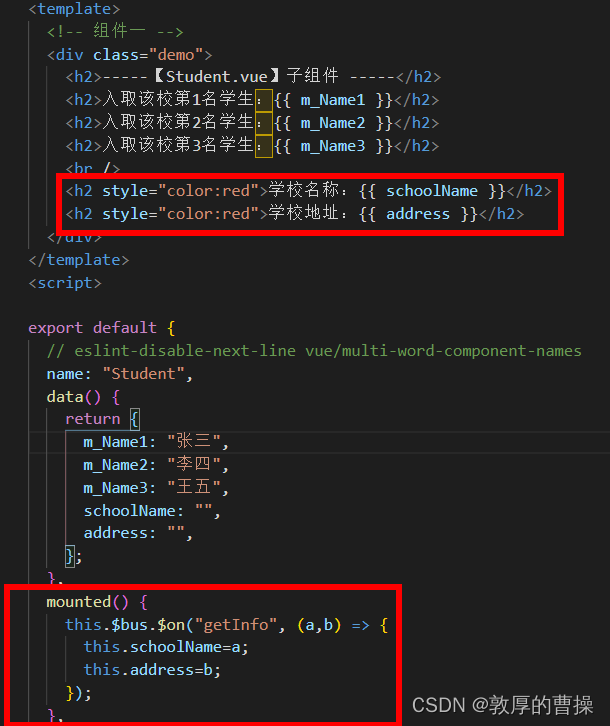
<template>
  <!-- 组件一 -->
  <div class="demo">
    <h2>-----【Student.vue】子组件 -----</h2>
    <h2>入取该校第1名学生:{{ m_Name1 }}</h2>
    <h2>入取该校第2名学生:{{ m_Name2 }}</h2>
    <h2>入取该校第3名学生:{{ m_Name3 }}</h2>
    <br />
    <h2 style="color:red">学校名称:{{ schoolName }}</h2>
    <h2 style="color:red">学校地址:{{ address }}</h2>
  </div>
</template>
<script>

export default {
  // eslint-disable-next-line vue/multi-word-component-names
  name: "Student",
  data() {
    return {
      m_Name1: "张三",
      m_Name2: "李四",
      m_Name3: "王五",
      schoolName: "",
      address: "",
    };
  },
  mounted() {
    this.$bus.$on("getInfo", (a,b) => {
      this.schoolName=a;
      this.address=b;
    });
  },
};
</script>


<style scoped>
.demo {
  background-color: rgb(231, 231, 231);
  border: 1px rgb(172, 172, 172) solid;
  height: 420px;
  width: 400px;
  padding-left: 10px;
}
.demo button {
  height: 40px;
  width: 200px;
  font-size: 18px;
}
</style>
相关文章
- Vue_(Router路由)-vue-router路由的基本用法
- vue中v-for图片src路径错误
- vue Element-UI组件
- CentOS安装nginx,部署vue项目
- Vue.js:轻量高效的前端组件化方案
- 【视频】vue单文件组件vue-cli
- vue商城项目开发:封装banner组件、组件参数传递
- Vue中组件化编码 完成任务的添加、删除、统计、勾选需求(实战练习三完结)
- Vue学习之--------组件在Vue脚手架中的使用(代码实现)(2022/7/24)
- Vue学习之--------组件的基本使用(非单文件组件)(代码实现)(2022/7/22)
- vue如何正确销毁当前组件的scroll事件?
- 105:vue+openlayers 引用组件来添加marker (示例代码)
- 031:vue+openlayers加载GPX数据(代码示例)
- 050:vue+openlayers使用Popup组件显示经纬度坐标(代码示例)
- vue父组件传值和子组件触发父组件方法
- Vue环境下,在单页面中遍历显示出多个Echarts图表
- vue框架中,图片应该保存在哪里?应该如何访问?
- WebStorm配置启动Vue项目
- 【vue】vue中如何实现组件封装、组件化开发及组件间传参_08
- Vue学习笔记之Vue中的路由使用
- 基于Java+SpringBoot+Vue前后端分离人事管理系统设计与实现
- vue 文件目录结构详解