
OceanBase之rpm包离线安装
一、场景简介
有些系统环境因为安全考虑,服务器本身是未连接到互联网的,这种情况下我们需要进行离线部署。通过将所需的程序软件包下载后通过局域网或者U盘等方式上传到服务器,在服务器上完成离线安装。OceanBase离线安装很方便,我们需要将OBD包安装好,配置后软件镜像,还是一样的可以通过OBD的方式部署OceanBase数据库。博文实验环境如下:
- 操作系统:centos7.6
- oceanbase数据库:oceanbase-ce-3.1.3
- obclient版本:obclient-2.0.1
二、安装步骤
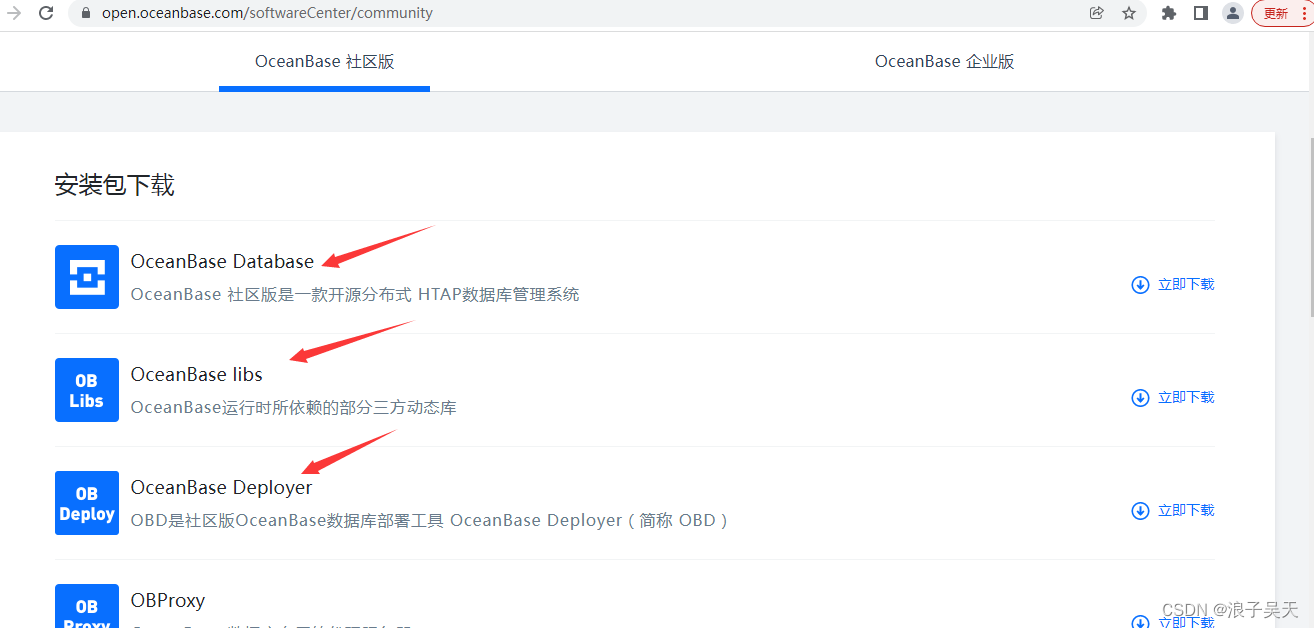
1、官网下载rpm安装包
oceanbase官网下载地址下载相关rpm包。
2、将下载的rpm包上传到服务器
[root@s153 opt]# ll
总用量 268000
-rw-r–r–. 1 root root 181499124 6月 6 15:08 obclient-2.0.1-2.el7.x86_64.rpm
-rw-r–r–. 1 root root 33460200 6月 6 14:58 ob-deploy-1.3.3-11.el7.x86_64.rpm
-rw-r–r–. 1 root root 9911060 6月 22 14:15 obproxy-ce-3.2.3-2.el7.x86_64.rpm
-rw-r–r–. 1 root root 49396832 5月 30 16:45 oceanbase-ce-3.1.3-10000292022032916.el7.x86_64.rpm
-rw-r–r–. 1 root root 158348 6月 6 14:58 oceanbase-ce-libs-3.1.3-10000292022032916.el7.x86_64.rpm
3、安装OBD
[root@s153 opt]# yum install -y ob-deploy-1.3.3-11.el7.x86_64.rpm
…
已安装:
ob-deploy.x86_64 0:1.3.3-11.el7
完毕!
[root@s153 opt]# source /etc/profile.d/obd.sh
4、禁用远程镜像仓库
[wuhs@s153 opt]$ obd mirror disable remote
Disable remote ok
5、设置本地镜像
运行以下命令,将 OceanBase 数据库安装包设置为本地镜像。
[wuhs@s153 opt]$ obd mirror clone obclient-2.0.1-2.el7.x86_64.rpm
name: obclient
version: 2.0.1
release:2.el7
arch: x86_64
md5: dab6af95a05f551702589e1f5f043f0ea9f4bfa0
add obclient-2.0.1-2.el7.x86_64.rpm to local mirror
[wuhs@s153 opt]$ obd mirror clone oceanbase-ce-libs-3.1.3-10000292022032916.el7.x86_64.rpm
name: oceanbase-ce-libs
version: 3.1.3
release:10000292022032916.el7
arch: x86_64
md5: c68c3aca8a1329a360fe5d65e1c3d4fa0f93f2d5
add oceanbase-ce-libs-3.1.3-10000292022032916.el7.x86_64.rpm to local mirror
[wuhs@s153 opt]$ obd mirror clone oceanbase-ce-3.1.3-10000292022032916.el7.x86_64.rpm
name: oceanbase-ce
version: 3.1.3
release:10000292022032916.el7
arch: x86_64
md5: eab08e5d473bd4884fdf2ac4d7dff6a329b68abe
add oceanbase-ce-3.1.3-10000292022032916.el7.x86_64.rpm to local mirror
[wuhs@s153 opt]$ obd mirror clone obproxy-ce-3.2.3-2.el7.x86_64.rpm
name: obproxy-ce
version: 3.2.3
release:2.el7
arch: x86_64
md5: bdd299bda2bdf71fd0fd3f155b6a2e39dffd2be1
add obproxy-ce-3.2.3-2.el7.x86_64.rpm to local mirror
6、查看仓库的 RPM 列表
[wuhs@s153 opt]$ obd mirror list local
±--------------------------------------------------------------------------------------------------------+
| local Package List |
±------------------±--------±----------------------±-------±-----------------------------------------+
| name | version | release | arch | md5 |
±------------------±--------±----------------------±-------±-----------------------------------------+
| obclient | 2.0.1 | 2.el7 | x86_64 | dab6af95a05f551702589e1f5f043f0ea9f4bfa0 |
| oceanbase-ce-libs | 3.1.3 | 10000292022032916.el7 | x86_64 | c68c3aca8a1329a360fe5d65e1c3d4fa0f93f2d5 |
| oceanbase-ce | 3.1.3 | 10000292022032916.el7 | x86_64 | eab08e5d473bd4884fdf2ac4d7dff6a329b68abe |
| obproxy-ce | 3.2.3 | 2.el7 | x86_64 | bdd299bda2bdf71fd0fd3f155b6a2e39dffd2be1 |
±------------------±--------±----------------------±-------±-----------------------------------------+
7、系统参数配置
系统参数配置参照博文OceanBase社区版之OBD方式部署方式本地安装中的环境准备章节。
8、使用obd部署
如果需要使用普通用户部署记得在要使用普通用户执行克隆软件包镜像,否则会找不到软件包。
[wuhs@s153 ~]$ obd cluster deploy myob -c local.yaml
Package oceanbase-ce-3.1.3 is available.
install oceanbase-ce-3.1.3 for local ok
±------------------------------------------------------------------------------------------+
| Packages |
±-------------±--------±----------------------±-----------------------------------------+
| Repository | Version | Release | Md5 |
±-------------±--------±----------------------±-----------------------------------------+
| oceanbase-ce | 3.1.3 | 10000292022032916.el7 | eab08e5d473bd4884fdf2ac4d7dff6a329b68abe |
±-------------±--------±----------------------±-----------------------------------------+
Repository integrity check ok
Parameter check ok
Open ssh connection ok
Remote oceanbase-ce-3.1.3-eab08e5d473bd4884fdf2ac4d7dff6a329b68abe repository install ok
Remote oceanbase-ce-3.1.3-eab08e5d473bd4884fdf2ac4d7dff6a329b68abe repository lib check !!
[WARN] 192.168.0.153 oceanbase-ce-3.1.3-eab08e5d473bd4884fdf2ac4d7dff6a329b68abe require: libmariadb.so.3
Try to get lib-repository
Package oceanbase-ce-libs-3.1.3 is available.
install oceanbase-ce-libs-3.1.3 for local ok
Use oceanbase-ce-libs-3.1.3-c68c3aca8a1329a360fe5d65e1c3d4fa0f93f2d5 for oceanbase-ce-3.1.3-eab08e5d473bd4884fdf2ac4d7dff6a329b68abe
Remote oceanbase-ce-libs-3.1.3-c68c3aca8a1329a360fe5d65e1c3d4fa0f93f2d5 repository install ok
Remote oceanbase-ce-3.1.3-eab08e5d473bd4884fdf2ac4d7dff6a329b68abe repository lib check ok
Cluster status check ok
Initializes observer work home ok
myob deployed
9、启动集群
[wuhs@s153 ~]$ obd cluster display myob
Deploy “myob” is deployed
See https://open.oceanbase.com/docs/obd-cn/V1.3.0/10000000000099584.
[wuhs@s153 ~]$ obd cluster start myob
Get local repositories and plugins ok
Open ssh connection ok
Load cluster param plugin ok
Check before start observer ok
Start observer ok
observer program health check ok
Connect to observer ok
Initialize cluster
Cluster bootstrap ok
Wait for observer init ok
±------------------------------------------------+
| observer |
±--------------±--------±-----±------±-------+
| ip | version | port | zone | status |
±--------------±--------±-----±------±-------+
| 192.168.0.153 | 3.1.3 | 2881 | zone1 | active |
±--------------±--------±-----±------±-------+
myob running
10、安装obclient
离线安装obclient,注意obclient依赖libobclient,所以我们需要先安装libobclient,然后安装obclient。
[root@s153 opt]# yum install -y libobclient-2.0.0-2.el7.x86_64.rpm
[root@s153 opt]# yum install -y obclient-2.0.1-2.el7.x86_64.rpm
11、连接数据库
[root@s153 opt]# obclient -uroot -P2881 -h 127.0.0.1
Welcome to the OceanBase. Commands end with ; or \g.
Your MySQL connection id is 3221487961
Server version: 5.7.25 OceanBase 3.1.3 (r10000292022032916-3d79cacb37012cf61b7cb8faf00d9a6bb152bcd1) (Built Mar 29 2022 08:20:39)
Copyright © 2000, 2018, Oracle, MariaDB Corporation Ab and others.
Type ‘help;’ or ‘\h’ for help. Type ‘\c’ to clear the current input statement.
MySQL [(none)]> select version();
±-------------------+
| version() |
±-------------------+
| 3.1.3-OceanBase CE |
±-------------------+
1 row in set (0.022 sec)
三、QA
1、启动的时候报错
- 报错信息:[ERROR] 192.168.0.153 lo fail to ping 192.168.0.153. Please check configuration
devname

- 报错原因:配置IP地址为网卡地址,非loopback地址。
- 解决方案:编辑配置文件,重新部署集群myob 。
[wuhs@s153 ~]$ sudo obd cluster edit-config myob
#将devname参数改为:devname: eth0
[wuhs@s153 ~]$ sudo obd cluster redeploy myob
2、启动失败报错
- 报错信息:[WARN] OBD-2002: Failed to start 192.168.0.153 observer
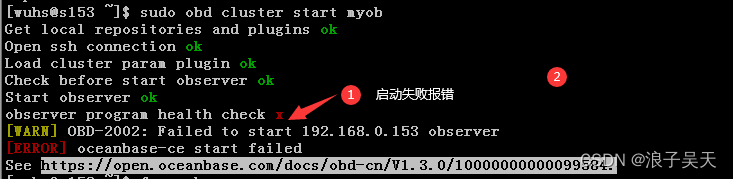
- 报错原因:内存不足8G
- 解决方案:扩容内存后重新启动。
相关文章
- [ubuntu Setup] ubuntu 14.10 安装 JDK
- Eclipse 插件安装、升级和卸载的方法
- Cloudera Manager 5 和 CDH5 本地(离线)安装指南(Hadoop集群搭建)
- Mac 安装 nodejs
- 安装autoit libary失败问题解决
- Linux下安装tomcat+jdk+mysql记录
- 同网段通过网刻安装操作系统
- 大数据基础之Drill(1)简介、安装及使用
- 运维基础之Ansible(2)离线安装
- xen安装
- helm离线安装helm-push插件
- 【网址收藏】在 Kubernetes k8s上离线安装 KubeSphere(官网)
- centos7离线安装tengine所需依赖
- typora及vue主题安装
- vcruntime140.dll 丢失64位系统(mysql8安装失败提示)
- npm i 安装报错
- 离线yum 安装软件
- 明明白白WAS&IBM JDK的版本以及它们各安装了哪些补丁!
- 【服务器安装Redis】Centos7离线安装redis
- 简单易操作 VsCoe离线安装插件【步骤+图片+插件】
- magent编译安装及常见错误
- linux下, 再次遇到使用thinkphp的模板标签时,报错used undefined function ThinkTemplatesimplexml_load_string() 是因为没有安装 php-xml包
- 使用dpkg命令卸载已经安装的软件包
- python目前安装的包备份
- centos7下离线安装TensorFlow2.2.0 For Python3.8(部署狂人的日记)
- 【服务器安装mysql】centos7下使用mysql离线安装包安装mysql5.7
- arthas的安装(在线/离线)和卸载
- Harbor高可用集群设计及部署(基于离线安装方式)
- CentOS7操作系统离线安装docker
- Ubuntu 18.04 安装 Docker