
Ubuntu 16.04上安装Lighttpd+PHP 7(PHP-FPM)+MySQL 5.7
Lighttpd 是一款安全、快速、符合标准的Web服务器。本教程介绍了如何通过PHP7(PHP-FPM)和MySQL5.7在Ubuntu16.04服务器上安装Lighttpd服务。 PHP-FPM(FastCGI进程管理器)是一种替代PHP的FastCGI适用于各种规模的网站,尤其是繁忙的网站有用的一些额外的功能。
1、安装初步说明
在本教程中,使用的IP地址为192.168.1.100,主机名server1.example.com。这些设置可能与你的服务器不同,所以你不得不在适当情况下更换他们。
运行的所有步骤在本教程中使用的root权限,所以一定要确保你以root身份登录:
sudo -s
2、安装MySQL 5.7
安装命令:
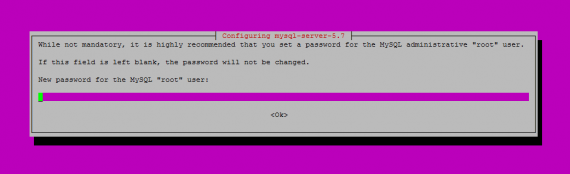
apt-get -y install mysql-server mysql-client
安装过程中要求设置 root 账户密码,如图:
MySQL 安装更改设置命令:
mysql_secure_installation
如下进行设置:
root@server1:~# mysql_secure_installation
Securing the MySQL server deployment.
Enter password for user root: Enter the MySQL root password
VALIDATE PASSWORD PLUGIN can be used to test passwords
and improve security. It checks the strength of password
and allows the users to set only those passwords which are
secure enough. Would you like to setup VALIDATE PASSWORD plugin?
Press y|Y for Yes, any other key for No: Press y if you want this function or press Enter otherwise.
Using existing password for root.
Change the password for root ? ((Press y|Y for Yes, any other key for No) : Press enter
skipping.
By default, a MySQL installation has an anonymous user,
allowing anyone to log into MySQL without having to have
a user account created for them. This is intended only for
testing, and to make the installation go a bit smoother.
You should remove them before moving into a production
environment.
Remove anonymous users? (Press y|Y for Yes, any other key for No) : y
Success.
Normally, root should only be allowed to connect from
localhost . This ensures that someone cannot guess at
the root password from the network.
Disallow root login remotely? (Press y|Y for Yes, any other key for No) : y
Success.
By default, MySQL comes with a database named test that
anyone can access. This is also intended only for testing,
and should be removed before moving into a production
environment.
Remove test database and access to it? (Press y|Y for Yes, any other key for No) : y
Dropping test database
Success.
Removing privileges on test database
Success.
Reloading the privilege tables will ensure that all changes
made so far will take effect immediately.
Reload privilege tables now? (Press y|Y for Yes, any other key for No) : y
Success.
All done!
3、安装Lighttpd:
安装命令:
apt-get -y install lighttpd
浏览器输入主机地址,看看安装是否成功:

另外说明一下:
Lighttpd 默认根目录: /var/www/html
配置文件:/etc/lighttpd/lighttpd.conf、
其他配置:/etc/lighttpd/conf-available
/etc/lighttpd/conf-enabled
/etc/lighttpd/conf-available
4、安装PHP 7.0
安装命令:
apt-get -y install php7.0-fpm php7.0
5、配置 Lighttpd 与 PHP 7.0
打开 php.ini:
nano /etc/php/7.0/fpm/php.ini
文件配置:
[...]

; cgi.fix_pathinfo provides *real* PATH_INFO/PATH_TRANSLATED support for CGI. PHPs

; previous behaviour was to set PATH_TRANSLATED to SCRIPT_FILENAME, and to not grok

; what PATH_INFO is. For more information on PATH_INFO, see the cgi specs. Setting

; this to 1 will cause PHP CGI to fix its paths to conform to the spec. A setting

; of zero causes PHP to behave as before. Default is 1. You should fix your scripts

; to use SCRIPT_FILENAME rather than PATH_TRANSLATED.

; http://php.net/cgi.fix-pathinfo

cgi.fix_pathinfo=1

[...]
httpd配置文件,我们需要将 /etc/lighttpd/conf-available/15-fastcgi-php.conf 进行备份:
cd /etc/lighttpd/conf-available/
cp 15-fastcgi-php.conf 15-fastcgi-php.conf.bak
nano 15-fastcgi-php.conf
内容修改:
# /usr/share/doc/lighttpd-doc/fastcgi.txt.gz

# http://redmine.lighttpd.net/projects/lighttpd/wiki/Docs:ConfigurationOptions#mod_fastcgi-fastcgi

## Start an FastCGI server for php (needs the php7.0-cgi package)

fastcgi.server += ( ".php" =

 "socket" = "/var/run/php/php7.0-fpm.sock",

 "broken-scriptfilename" = "enable"

)
要启用FastCGI配置,运行以下命令:
lighttpd-enable-mod fastcgi
lighttpd-enable-mod fastcgi-php
这将创建符号链接
/etc/lighttpd/conf-enabled/10-fastcgi.conf 指向/etc/lighttpd/conf-available/10-fastcgi.conf
/etc/lighttpd/conf-enabled/15-fastcgi-php.conf 指向 /etc/lighttpd/conf-available/15-fastcgi-php.conf
ls -l /etc/lighttpd/conf-enabled
执行情况:
root@server1:/etc/lighttpd/conf-available# ls -l /etc/lighttpd/conf-enabled

total 0

lrwxrwxrwx 1 root root 33 Apr 27 11:26 10-fastcgi.conf - ../conf-available/10-fastcgi.conf

lrwxrwxrwx 1 root root 37 Apr 27 11:26 15-fastcgi-php.conf - ../conf-available/15-fastcgi-php.conf

lrwxrwxrwx 1 root root 42 Apr 21 11:10 90-javascript-alias.conf - ../conf-available/90-javascript-alias.conf

root@server1:/etc/lighttpd/conf-available#
重新加载Lighttpd:
service lighttpd force-reload
注意:如果提示你的语言环境错误,那么你可以下面的命令删除错误:
apt-get -y install language-pack-en-base
dpkg-reconfigure locales
6、建立一个探针文件看看安装情况:
nano /var/www/html/info.php
内容:
 ?php

phpinfo();

?
好了,浏览器访问这个探针文件:http://192.168.1.100/info.php
7、PHP 获得 MySQL 支持
产看模块:
apt-cache search php7.0
安装模块:
apt-get -y install php7.0-mysql php7.0-curl php7.0-gd php7.0-intl php-pear php-imagick php7.0-imap php7.0-mcrypt php-memcache php7.0-pspell php7.0-recode php7.0-sqlite3 php7.0-tidy php7.0-xmlrpc php7.0-xsl php7.0-mbstring php-gettext
apt-get -y install php-apcu
重新加载php7.0-fpm:
service php7.0-fpm reload
8、安装phpmyadmin
命令:
apt-get -y install phpmyadmin
安装过程中询问设置:
Web server to reconfigure automatically: Configure database for phpmyadmin with dbconfig-common? MySQL application password for phpmyadmin:
如果出现错误:
Run /etc/init.d/lighttpd force-reload to enable changes
dpkg: error processing package phpmyadmin ( configure):
subprocess installed post-installation script returned error exit status 2
E: Sub-process /usr/bin/dpkg returned an error code (1)
运行下面的命令:
/etc/init.d/lighttpd force-reload
apt-get -y install phpmyadmin
然后访问 phpMyAdmin 浏览器输入:http://192.168.1.100/phpmyadmin/
9、使PHP-FPM使用TCP连接(可选)
编辑:
ano /etc/php/7.0/fpm/pool.d/www.conf
内容如下:
[...]

;listen = /var/run/php/php7.0-fpm.sock

listen = 127.0.0.1:9000

[...]
重新加载PHP-FPM:
service php7.0-fpm reload
再配置一个文件:
nano /etc/lighttpd/conf-available/15-fastcgi-php.conf
配置内容如下:
# /usr/share/doc/lighttpd-doc/fastcgi.txt.gz

# http://redmine.lighttpd.net/projects/lighttpd/wiki/Docs:ConfigurationOptions#mod_fastcgi-fastcgi

## Start an FastCGI server for php (needs the php7.0-cgi package)

fastcgi.server += ( ".php" =

 "host" = "127.0.0.1",

 "port" = "9000",

 "broken-scriptfilename" = "enable"


 原创文章,作者:ItWorker,如若转载,请注明出处:https://blog.ytso.com/32151.html

 mysqlUbuntu
相关文章
- MySQL中的索引分区技术(mysql索引分区)
- 安装php MySQL:步骤指南(安装phpmysql)
- 记录MySQL:如何读取被锁的记录(mysql读被锁)
- 数据库架设手机MySQL数据库:解决方案(手机mysql)
- MySQL免安装版:快速轻松的下载体验(mysql下载免安装)
- MySQL学习权威论坛:成为MySQL专家(mysql学习论坛)
- MySQL分区表 构建大数据结构(mysql大数据分区分表)
- ubuntu 12.04 安装 nginx+php+mysql web服务器
- 安装MySQL数据库,64位系统轻松下载(mysql安装版64下载)
- 求救:MySQL安装不成功,缺少配置信息!(安装mysql没有配置)
- 保护MySQL被黑:无密码保护的危险(mysql没有密码)
- MySQL安装必备:构建根目录(mysql安装目录)
- 实现VB调用MySQL数据库的高效解决方案(vb调用mysql数据库)
- 无需安装,即可快速使用MySQL下载(mysql免安装下载)
- CentOS7简明教程:快速轻松安装MySQL(centos7安装mysql)
- MySQL索引:精准搜索的算法之路(mysql索引的算法)
- MySQL安装不能启动服务 排查MySQL安装不能启动的原因(mysql安装没有服务)
- 上MySQL在何处安装?(mysql装在哪)
- 深入了解MySQL字段中文化管理技巧(mysql字段中文)
- 使用PHP和MSSQL实现网站搭建(php mssql 搭建)
- 比较MySQL和Oracle:哪一个更可靠?(mysql和oracle区别)
- 备份MySQL自动实现事务备份完善了数据安全(mysql自动事务)
- MySQL中BIT字段的默认值问题(mysql中bit默认值)
- cmd快速下载MySQL数据库的技巧(cmd下下载mysql)
- 深入探索MySQL数据库库的管理与优化技巧(mysql下的库)
- MySQL下载和安装详细步骤简介(mysql下载及安装流程)