
gitlab添加yml文件.gitlab-ci.yml
文件 添加 gitlab CI yml
2023-09-14 09:00:34 时间
一、前言
没有使用或不熟悉gitlab的同学,对在gitlab上新建项目、添加yml文件(用于CI/CD控制)这两个操作会感到茫然,下面我将实现方法作以说明。
二、实现方法
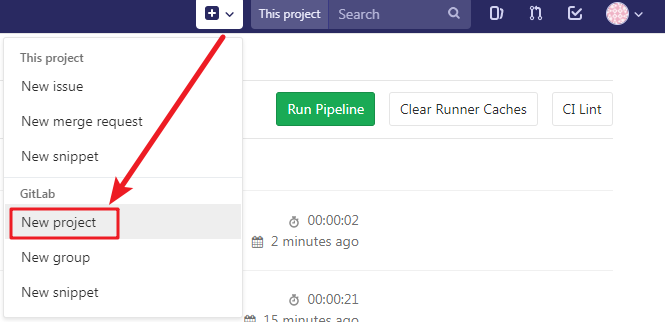
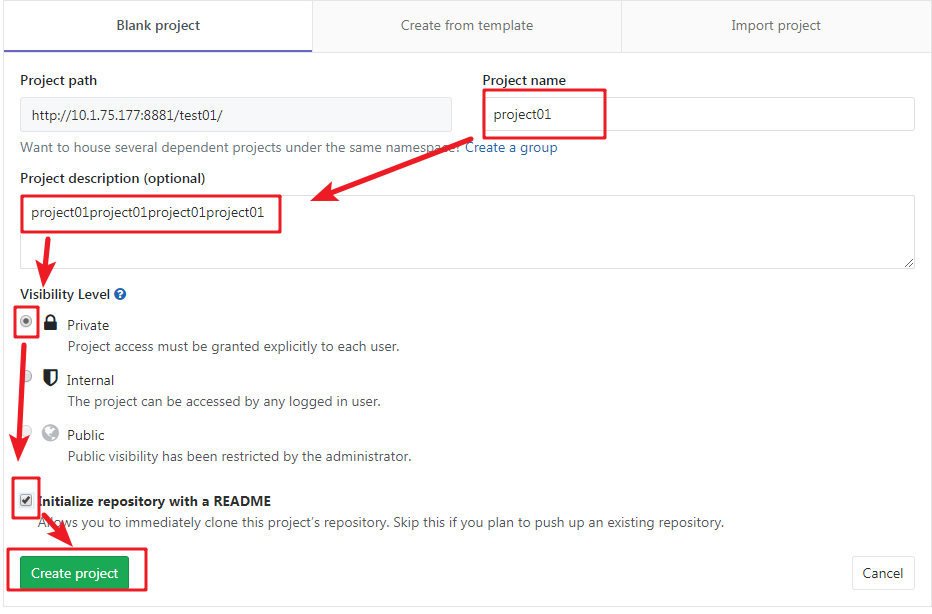
1、在gitlab中新建项目(以空私有项目为例)
添加+ -》 New project -》填写相关内容 Create Project
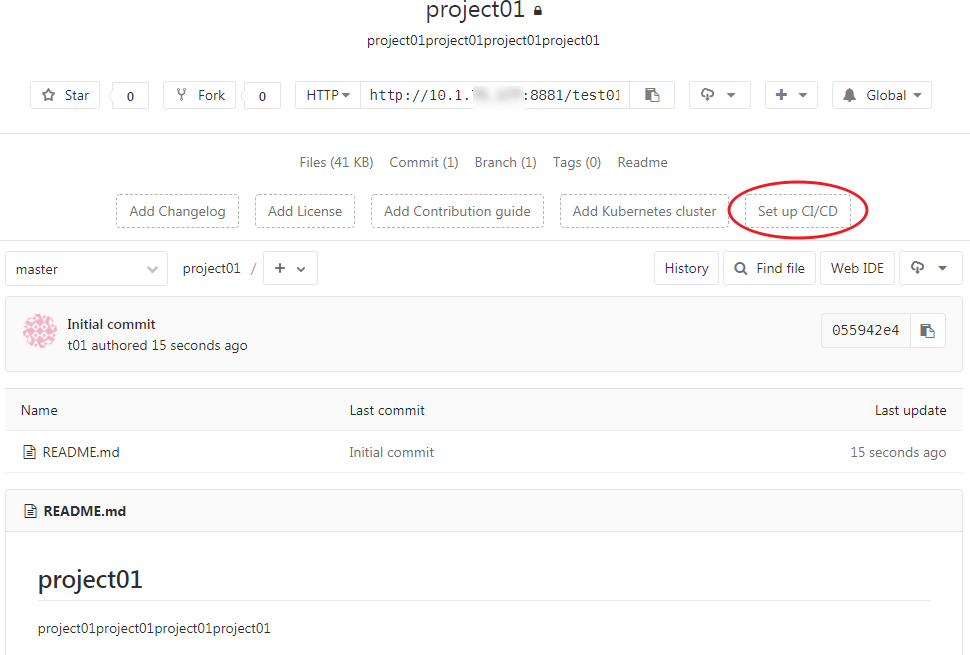
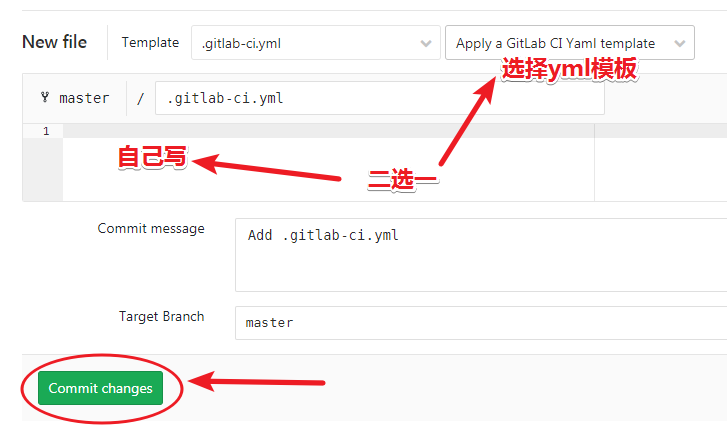
2、添加yml文件
选择项目-》set up CI/CD -》 自己写或者使用模板 -》commit changes
3、展示流水线(pipeline)的效果:编译(build)、测试(test,包括test1,test2)、部署(deploy)的流水线
以模板的改写为例
.gitlab-ci.yml中键入
# This file is a template, and might need editing before it works on your project.
# see https://docs.gitlab.com/ce/ci/yaml/README.html for all available options

# you can delete this line if you're not using Docker
image: busybox:latest

before_script:
  - echo "Before script section"
  - echo "For example you might run an update here or install a build dependency"
  - echo "Or perhaps you might print out some debugging details"
  - ping -c 5 127.0.0.1

after_script:
  - echo "After script section"
  - echo "For example you might do some cleanup here"
  - ping -c 6 127.0.0.1

build1:
  stage: build
  script:
    - echo "Do your build here"
    - ping -c 10 127.0.0.1

test1:
  stage: test
  script:
    - echo "Do a test here"
    - echo "For example run a test suite"
    - ping -c 11 127.0.0.1

test2:
  stage: test
  script:
    - echo "Do another parallel test here"
    - echo "For example run a lint test"
    - ping -c 12 127.0.0.1

deploy1:
  stage: deploy
  script:
    - echo "Do your deploy here"
    - ping -c 20 127.0.0.1
yml中脚本内容的说明:
(1)一个yml文件,就是一个流水线(pipeline)
(2)该流水线中包含了3个阶段(stage,包括build、test、deploy)
(3)每个阶段包含了1到2个作业(job)。
build阶段:包含build1作业
test阶段:包含test1和test2作业(共2个作业)
deploy阶段:包含deploy1作业
注意:当只有一个runner时,作业之间的相互关系是串行的,不是并行的。即前面的作为没有执行完成、或者执行失败,后面的作业就都不再执行。

(4)关键词作业
before_script关键词作业:会在阶段中的每个自定义作业执行前,都重新执行一遍。
after_script关键词作业:会在阶段中的每个自定义作业执行后(不论成功还是失败),都重新执行一遍。
相关文章
- [Python学习] 专题四.文件基础知识
- log4net使用删除日志文件,保留指定数量的文件
- VA助手添加扩展文件后缀名
- iOS开发 -- 为本地文件添加自定义属性的工具类
- OC方法和文件编译
- pom.xml文件中,添加自定义参数Properties
- git 添加忽略文件
- gitlab添加yml文件.gitlab-ci.yml
- python实现下载文件路径自动添加(1)的递增路径
- 【RF库XML测试】测试的XML文件说明
- 如何对数据排序和拆分文件
- 不进docker容器修改文件
- Shell或命令行计算数组或文件的行数和列数
- 流媒体测试笔记记录之————解决问题video.js 播放m3u8格式的文件,根据官方的文档添加videojs-contrib-hls也不行的原因解决了
- WCF HTTP 错误 404.3 - Not Found(由于扩展配置问题而无法提供您请求的页面。如果该页面是脚本,请添加处理程序。如果应下载文件,请添加 MIME 映射。)
- 二十行代码实现JavaScript在本地生成pdf文件
- vue文件命名规范和文件夹命名规范
- Py之pandas:在表格文件中增加数据之纵向行数据添加之将字典格式的数据,按照行数据,从头开始for循环添加到dataframe中
- jboss7 添加虚拟目录 上传文件路径
- VC++给软件添加异常捕获模块生成dump文件(附源码)
- Selenium上传文件有多少种方式?不信你有我全....
- 在查找预编译头时遇到意外的文件结尾。是否忘记了向源中添加“#include "StdAfx.h"”?
- GridFS大文件的添加、获取、查看、删除
- git 删除添加的文件
- 【Qt】加载.h文件显示窗体并添加交互逻辑