
cas单点登录-CAS5.1.3 overlay服务器搭建(二)
服务器 搭建 登录 单点 CAS Overlay
2023-09-14 08:57:25 时间
前言
本节主要讲解怎么搭建cas服务端,并且在浏览器中使用https访问cas服务端
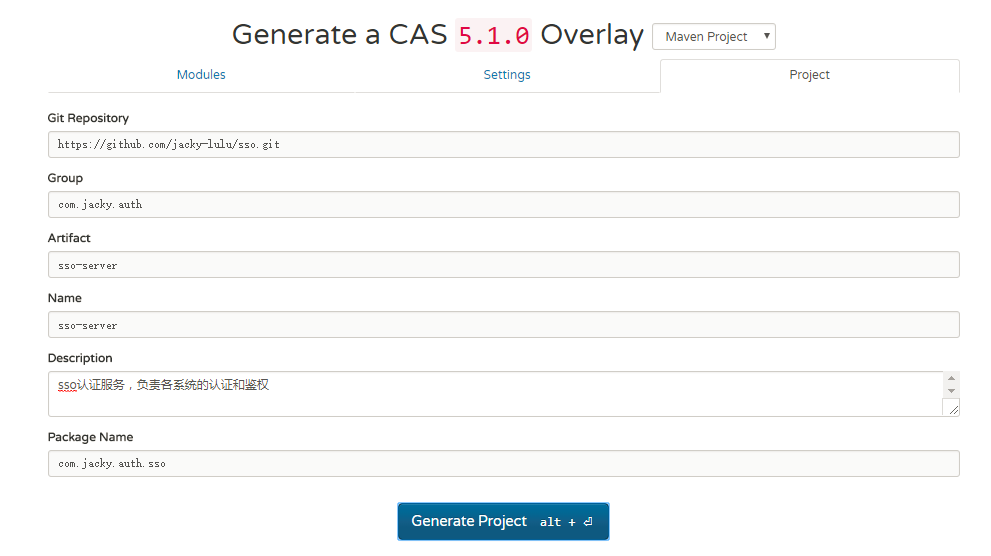
1、通过cas代码生成工具(https://casinitializr.herokuapp.com/),生成cas服务端工程(这个需要FQ)

2、代码修改
- 修改maven为国内
- 删除java文件
- 修改日志目录
2.1、修改sso下的pom.xml文件如下:
<?xml version="1.0" encoding="UTF-8"?>
<project xmlns="http://maven.apache.org/POM/4.0.0"
         xmlns:xsi="http://www.w3.org/2001/XMLSchema-instance"
         xsi:schemaLocation="http://maven.apache.org/POM/4.0.0 http://maven.apache.org/xsd/maven-4.0.0.xsd">
    <modelVersion>4.0.0</modelVersion>

    <groupId>com.jacky.auth</groupId>
    <artifactId>sso</artifactId>
    <version>1.0.0</version>
    <packaging>pom</packaging>

    <modules>
        <module>sso-server</module>
    </modules>


    <properties>
        <java.version>1.8</java.version>
        <project.build.sourceEncoding>UTF-8</project.build.sourceEncoding>
        <project.reporting.outputEncoding>UTF-8</project.reporting.outputEncoding>
        <maven.compiler.source>1.8</maven.compiler.source>
        <maven.compiler.target>1.8</maven.compiler.target>
        <cas.version>5.1.3</cas.version>
        <springboot.version>1.5.3.RELEASE</springboot.version>
    </properties>


    <!--为了加快下载jar包速度,修改成国内的代理-->
    <repositories>
        <repository>
            <releases>
                <enabled>true</enabled>
            </releases>
            <id>maven2-release</id>
            <url>http://uk.maven.org/maven2/</url>
        </repository>


        <repository>
            <snapshots>
                <enabled>true</enabled>
                <!--快照版本库两个小时检查更新一遍-->
                <updatePolicy>interval:120</updatePolicy>
            </snapshots>
            <id>oss-snapshots</id>
            <url>http://repository.jboss.org/nexus/content/groups/public/</url>
        </repository>
    </repositories>
</project>
2.2、调整log4j2.xml日子配置文件的位置
- 把
etc/cas/config/log4j2.xml放到项目的src/main/resources下。 - 把内容由
<Property name="cas.log.dir" >.</Property>调整成<Property name="cas.log.dir" >logs</Property>(修改log文件的输出路劲为当前目录的logs文件夹下)
2.3、修改application.properties文件
我们把依赖包下载 的 cas-server-webapp-tomcat/5.1.3/cas-server-webapp-tomcat-5.1.3.war!/WEB-INF/classes/application.properties 拷贝到src/main/resources 下并且进行修改,
主要是
- server.ssl.enabled=true #打开https
-
#SSL配置
server.ssl.key-store=classpath:tomcat.keystore
server.ssl.key-store-password=123456
server.ssl.keyAlias=passport.sso.com
#SSL配置
如下
# CAS Server Context Configuration
server.context-path=/cas
server.port=8443
#关闭https
#server.ssl.enabled=false
#打开https
server.ssl.enabled=true

#SSL配置
server.ssl.key-store=classpath:tomcat.keystore
server.ssl.key-store-password=123456
server.ssl.keyAlias=passport.sso.com
#SSL配置

server.max-http-header-size=2097152
server.use-forward-headers=true
server.connection-timeout=20000
server.error.include-stacktrace=NEVER

server.tomcat.max-http-post-size=2097152
server.tomcat.basedir=build/tomcat
server.tomcat.accesslog.enabled=true
server.tomcat.accesslog.pattern=%t %a "%r" %s (%D ms)
server.tomcat.accesslog.suffix=.log
server.tomcat.max-threads=10
server.tomcat.port-header=X-Forwarded-Port
server.tomcat.protocol-header=X-Forwarded-Proto
server.tomcat.protocol-header-https-value=https
server.tomcat.remote-ip-header=X-FORWARDED-FOR
server.tomcat.uri-encoding=UTF-8

spring.http.encoding.charset=UTF-8
spring.http.encoding.enabled=true
spring.http.encoding.force=true

##
# CAS Cloud Bus Configuration
#
spring.cloud.bus.enabled=false

endpoints.enabled=false
endpoints.sensitive=true

endpoints.restart.enabled=false
endpoints.shutdown.enabled=false

management.security.enabled=true
management.security.roles=ACTUATOR,ADMIN
management.security.sessions=if_required
management.context-path=/status
management.add-application-context-header=false

security.basic.authorize-mode=role
security.basic.enabled=false
security.basic.path=/cas/status/**

##
# CAS Web Application Session Configuration
#
server.session.timeout=300
server.session.cookie.http-only=true
server.session.tracking-modes=COOKIE

##
# CAS Thymeleaf View Configuration
#
spring.thymeleaf.encoding=UTF-8
spring.thymeleaf.cache=true
spring.thymeleaf.mode=HTML
##
# CAS Log4j Configuration
#
# logging.config=file:/etc/cas/log4j2.xml
server.context-parameters.isLog4jAutoInitializationDisabled=true

##
# CAS AspectJ Configuration
#
spring.aop.auto=true
spring.aop.proxy-target-class=true

##
# CAS Authentication Credentials
#
cas.authn.accept.users=casuser::Mellon
2.4、删除java文件
包括src/main/java,src/test/java,否则会影响运行
最后目录结构如下

2.5、为什么不用ect下的文件?
为了配置文件能够统一起来
3、运行
我们的运行使用cas提供的脚本
初始化命令
build.cmd init
打包命令
build.cmd package
启动命令
build.cmd run
清理target目录文件命令
build.cmd clean
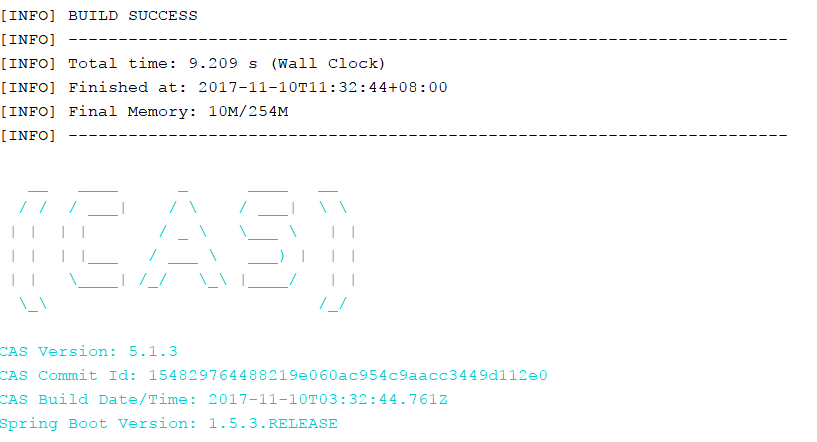
如图:

如果看到如下,恭喜你,项目 启动成功了
4、访问测试
https://jacky.sso.com:8443/cas/login
看到页面
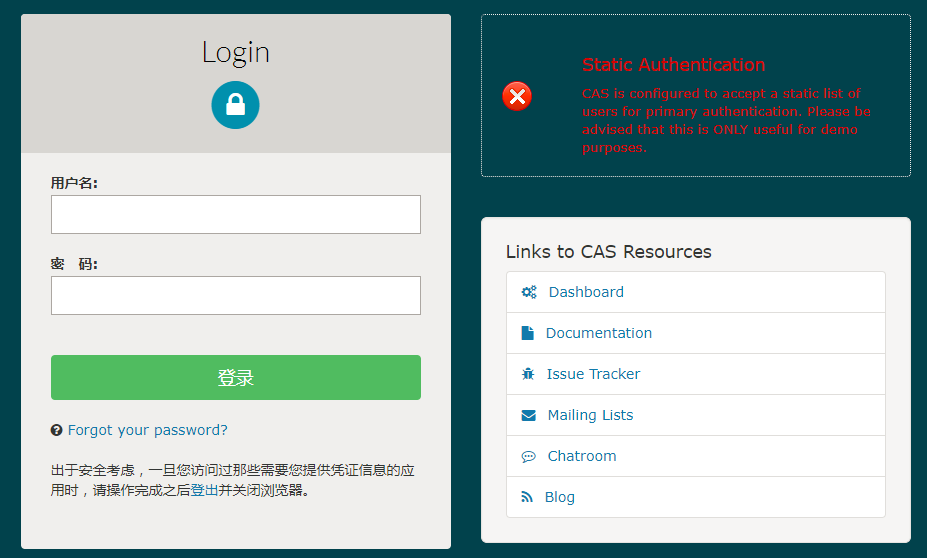
5、测试登录
默认用户名/密码为:casuser/Mellon
登录成功页面

6、总结
- 本节利用cas代码生成器生成cas服务代码,并且调整代码
- 结合第一节,实现https统过域名访问cas服务
欢迎关注
相关文章
- webpack(10)webpack-dev-server搭建本地服务器「建议收藏」
- 惠普电脑蓝屏开不了机怎么解决_hp服务器售后电话800
- 自己搭建git服务器_搭建git服务器web界面
- 用2核2G的入门级云服务器搭建个人博客网站
- 腾讯云windows服务器切换vpc失败的解决方案
- 搭建Redis服务器步骤详细介绍
- linux运维之NFS服务器配置详解程序员
- [PHP] PHP服务器接口SAPI中的结构体详解编程语言
- 使用PHP连接虚拟机MySQL服务器(连接虚拟机mysql)
- Mac下连接Linux服务器的方法(mac连接linux服务器)
- 服务器轻松搭建属于自己的Web服务器:Linux一键安装(linux一键安装web)
- 快速搭建Linux服务器环境的详细步骤(linux服务器环境配置)
- WAMP安装:一步步搭建你的Redis服务器(wamp安装redis)
- 服务器Linux下架设Sftp服务器,快速上手(linux下搭建sftp)
- 怎样完美卸载MSSQL服务器?(怎么完美卸载mssql)
- Linux部署命令:让你轻松搭建服务器的必备技能(linux部署命令)
- 高性能linux与高性能:实现极致服务器性能(linuxif或)
- 重启MS SQL服务器: 使用SHUTDOWN命令(重启mssql的命令)
- 本地服务器搭建配置Redis服务器(本地配置 redis)
- 一分钱,一台云服务器装上Redis(一台云服务器装redis)
- 如何使用Redis搭建专业的服务器环境(如何把redis设成服务)
- 搭建Redis集群在云服务器上的挑战(在云服务器搭建redis)
- 重启Linux服务器,使用Redis获得新的面貌(redis重启linux)
- Windows服务器下MySql数据库单向主从备份详细实现步骤分享