
java web开发(编写spring mvc下的表单处理程序)
【 声明:版权所有,欢迎转载,请勿用于商业用途。 联系信箱:feixiaoxing @163.com】
之前讨论过jsp是怎么把数据传递给servlet的,那么在spring mvc框架下面表单数据一般怎么处理呢?本文参考了这个范例,https://www.w3cschool.cn/wkspring/v41f1mmk.html。今天正好借着IDEA工具,实现一下这个功能。
1、利用IDEA创建一个spring mvc工程
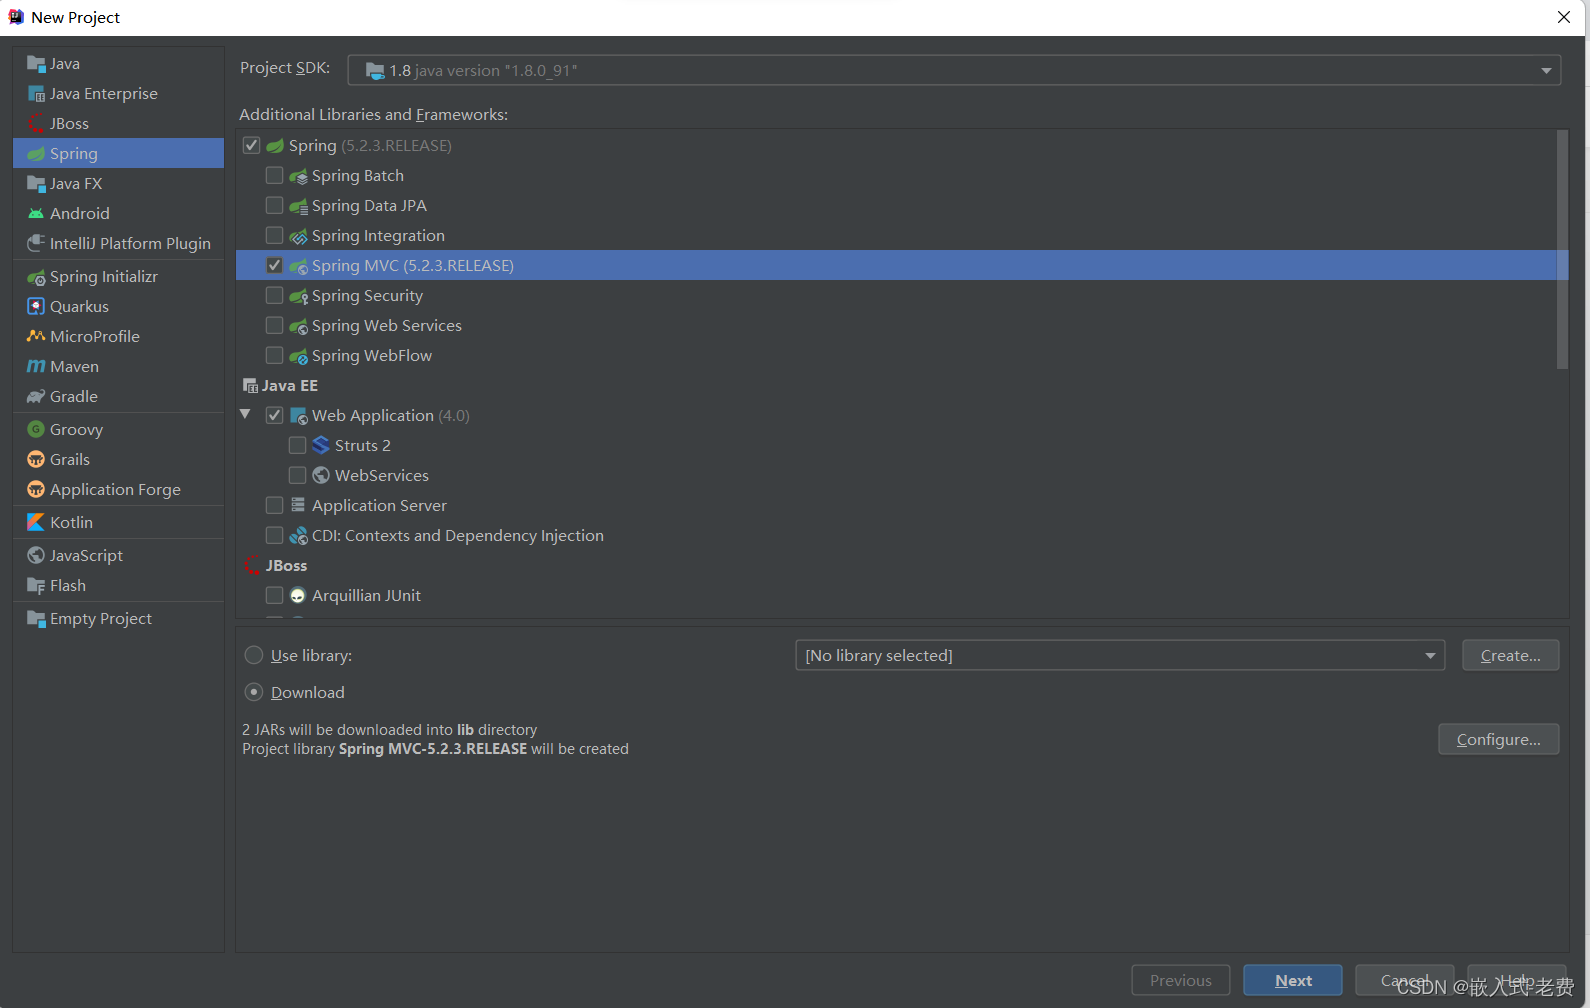
2、工程本身命名为Hello,确定完成
3、配置好Tomcat
有两个部分需要配置下,一个是端口,不妨配置为8092。另外一个在deployment里面,也需要配置下。
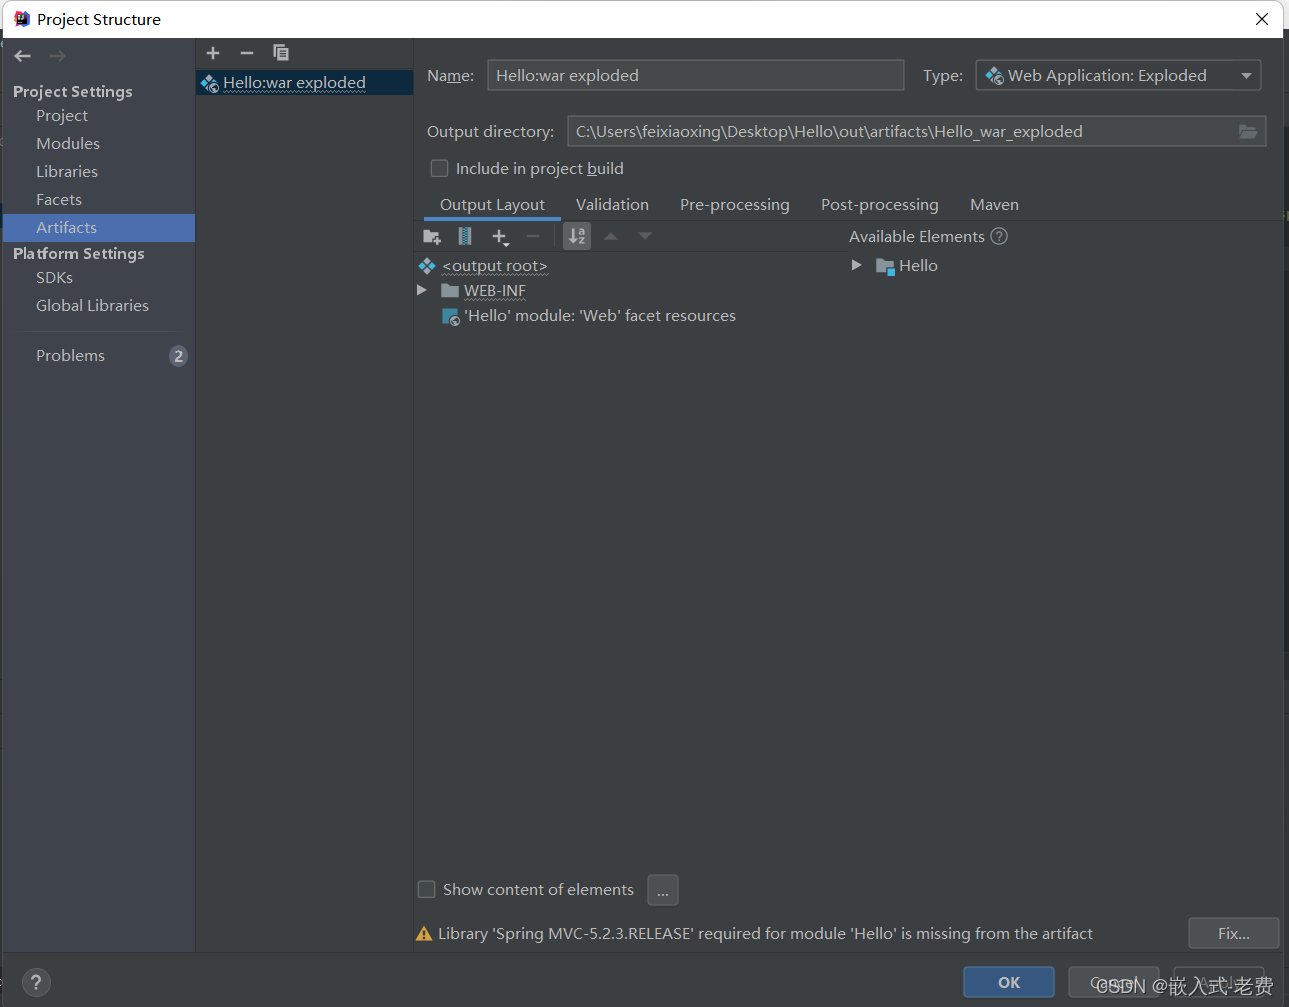
4、打开File->Project structure,添加lib文件,单击右下角的fix按钮即可,
5、启动tomcat服务器,如果可以看到index.jsp网页的内容,那说明一切正常
6、将web.xml中的*.form修改为/
7、修改dispatch-servlet.xml配置文件
<?xml version="1.0" encoding="UTF-8"?>
<beans xmlns="http://www.springframework.org/schema/beans"
       xmlns:context="http://www.springframework.org/schema/context"
       xmlns:xsi="http://www.w3.org/2001/XMLSchema-instance"
       xsi:schemaLocation="
   http://www.springframework.org/schema/beans
   http://www.springframework.org/schema/beans/spring-beans-3.0.xsd
   http://www.springframework.org/schema/context
   http://www.springframework.org/schema/context/spring-context-3.0.xsd">

    <context:component-scan base-package="com.tutorialspoint" />

    <bean class="org.springframework.web.servlet.view.InternalResourceViewResolver">
        <property name="prefix" value="/WEB-INF/jsp/" />
        <property name="suffix" value=".jsp" />
    </bean>

</beans>
8、在src目录下面创建com.tutorialspoint package
8.1 创建Student.java
package com.tutorialspoint;

public class Student {
    private Integer age;
    private String name;
    private Integer id;
    public void setAge(Integer age) {
        this.age = age;
    }
    public Integer getAge() {
        return age;
    }
    public void setName(String name) {
        this.name = name;
    }
    public String getName() {
        return name;
    }
    public void setId(Integer id) {
        this.id = id;
    }
    public Integer getId() {
        return id;
    }
}
8.2 编写StudentController.java文件
package com.tutorialspoint;

import org.springframework.stereotype.Controller;
import org.springframework.web.bind.annotation.ModelAttribute;
import org.springframework.web.bind.annotation.RequestMapping;
import org.springframework.web.bind.annotation.RequestMethod;
import org.springframework.web.servlet.ModelAndView;
import org.springframework.ui.ModelMap;
@Controller
public class StudentController {
    @RequestMapping(value = "/student", method = RequestMethod.GET)
    public ModelAndView student() {
        return new ModelAndView("student", "command", new Student());
    }
    @RequestMapping(value = "/addStudent", method = RequestMethod.POST)
    public String addStudent(@ModelAttribute("Hello_war_exploded")Student student,
                             ModelMap model) {
        model.addAttribute("name", student.getName());
        model.addAttribute("age", student.getAge());
        model.addAttribute("id", student.getId());
        return "result";
    }
}
这里的Hello_war_exploded是最终要生成war文件时的名字,这个是需要注意一下的。
9、在WEB/WEB-INF创建一个jsp目录
9.1 创建student.jsp
<%@taglib uri="http://www.springframework.org/tags/form" prefix="form"%>
<html>
<head>
    <title>Spring MVC Form Handling</title>
</head>
<body>

<h2>Student Information</h2>
<form:form method="POST" action="addStudent">
   <table>
    <tr>
        <td><form:label path="name">Name</form:label></td>
        <td><form:input path="name" /></td>
    </tr>
    <tr>
        <td><form:label path="age">Age</form:label></td>
        <td><form:input path="age" /></td>
    </tr>
    <tr>
        <td><form:label path="id">id</form:label></td>
        <td><form:input path="id" /></td>
    </tr>
    <tr>
        <td colspan="2">
            <input type="submit" value="Submit"/>
        </td>
    </tr>
</table>
</form:form>
</body>
</html>
9.2 创建result.jsp
<%@taglib uri="http://www.springframework.org/tags/form" prefix="form"%>
<html>
<head>
    <title>Spring MVC Form Handling</title>
</head>
<body>

<h2>Submitted Student Information</h2>
   <table>
    <tr>
        <td>Name</td>
        <td>${name}</td>
    </tr>
    <tr>
        <td>Age</td>
        <td>${age}</td>
    </tr>
    <tr>
        <td>ID</td>
        <td>${id}</td>
    </tr>
</table>
</body>
</html>
10、所有条件都准备好之后,就可以开始调试了
输入localhost:8092/Hello_war_exploded/student之后,就可以看到这样的网页,

不妨输入tom、20、1,单击submit提交之后,就可以看到这样的网页,
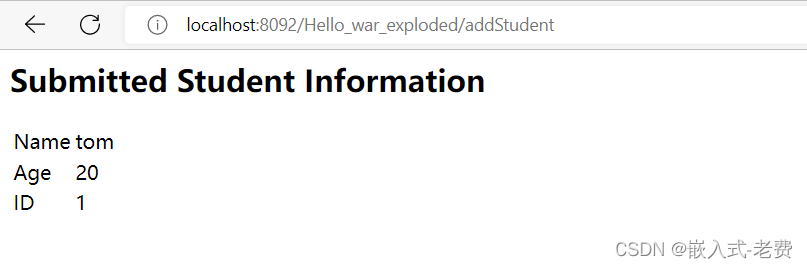
如果我们可以正确地看到上面这两项内容,基本说明网页部分是没有问题的。如果出现的结果有错误,那么就要回头查一下,是哪个地方出了问题。
相关文章
- 如何预防SQL注入,XSS漏洞(spring,java)
- Java Spring中同时访问多种不同数据库
- Spring Framework 4.0.0发布,首次支持Java 8
- 深入研究 Java Synchronize 和 Lock 的区别与用法
- centos eclipse java.net.UnknownHostException: mysql: 未知的名称或服务
- 为什么说 Java 程序员到了必须掌握 Spring Boot 的时候?
- 面试官:你知道SPI吗?Java、Spring、Dubbo三者SPI机制的原理和区别了解吗?
- (转)java术语(PO/POJO/VO/BO/DAO/DTO)
- [Java][Android][Process] Process 创建+控制+分析 经验浅谈
- 【转载】java高并发/mysql/mybatis/spring博客
- java opencv 4.0.1安装配置
- JAVA中日期 yyyy-MM-dd HH:mm:ss和yyyy-MM-dd hh:mm:ss的区别
- Spring data jpa hibernate:查询异常java.sql.SQLException: Column '列名' not found
- idea运行项目时报错:Error:java无效的源发行版:1.8
- 从零开始学 Java - Spring AOP 实现主从读写分离
- Java 枚举7常见种用法
- java百科常识
- 一天十道Java面试题----第四天(线程池复用的原理------>spring事务的实现方式原理以及隔离级别)
- java ssh 框架下 利用junit4 spring-test进行单元测试
- Java Spring Security 5 报错:There is no PasswordEncoder mapped for the id “null”
- Java 使用Spring WebFlux上传多个文件方法代码