Halcon实例转OpenCV之焊点检测
2023-09-27 14:25:48 时间
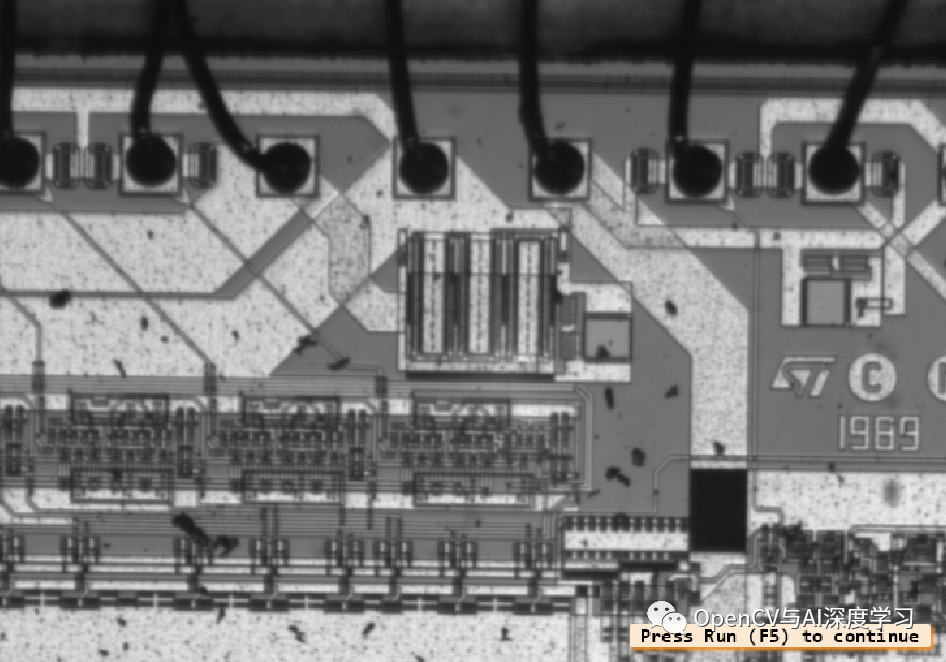
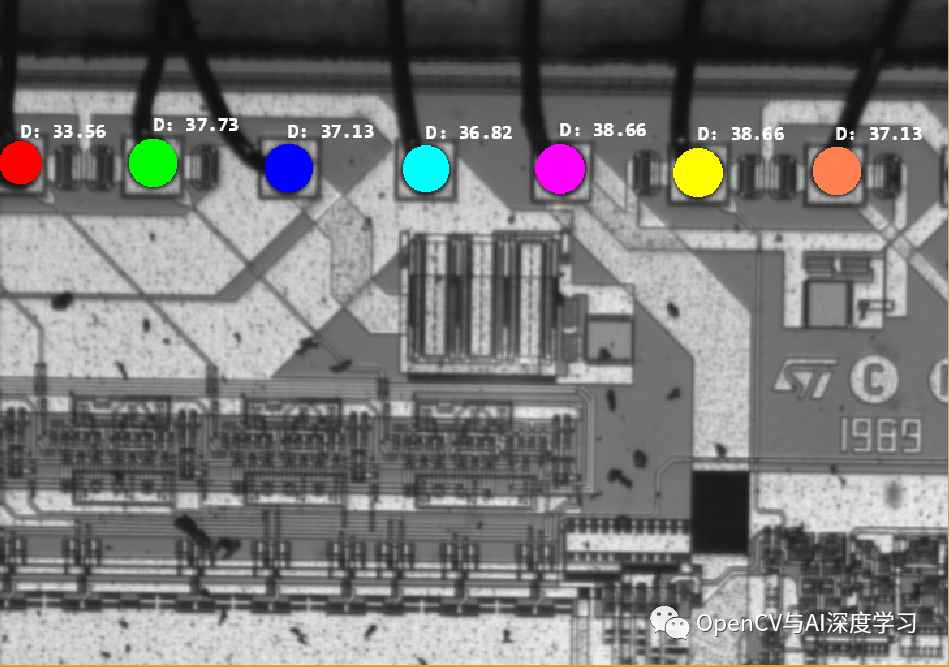
Halcon例程中有一个焊点检测例程ball.hdev,大家可以在例程中搜索查看,如下是实例使用的测试图和运行结果图:
测试图像:

运行结果图:

实现的大致步骤:
① 二值化后获取Board区域,设置为分析的ROI
② 二值化 + 开运算获取和分割大致为焊点的区域
③ 通过Blob的圆度阈值删选,剔除非圆的Blob,保留圆形焊点
④ 计算圆形焊点的最小外接矩形直径并标示
Halcon实现代码:
* ball.hdev: Inspection of Ball Bonding
*
dev_update_window ('off')
dev_close_window ()
dev_open_window (0, 0, 728, 512, 'black', WindowID)
read_image (Bond, 'die/die_03')
dev_display (Bond)
set_display_font (WindowID, 14, 'mono', 'true', 'false')
disp_continue_message (WindowID, 'black', 'true')
stop ()
threshold (Bond, Bright, 100, 255)
shape_trans (Bright, Die, 'rectangle2')
dev_set_color ('green')
dev_set_line_width (3)
dev_set_draw ('margin')
dev_display (Die)
disp_continue_message (WindowID, 'black', 'true')
stop ()
reduce_domain (Bond, Die, DieGrey)
threshold (DieGrey, Wires, 0, 50)
fill_up_shape (Wires, WiresFilled, 'area', 1, 100)
dev_display (Bond)
dev_set_draw ('fill')
dev_set_color ('red')
dev_display (WiresFilled)
disp_continue_message (WindowID, 'black', 'true')
stop ()
opening_circle (WiresFilled, Balls, 15.5)
dev_set_color ('green')
dev_display (Balls)
disp_continue_message (WindowID, 'black', 'true')
stop ()
connection (Balls, SingleBalls)
select_shape (SingleBalls, IntermediateBalls, 'circularity', 'and', 0.85, 1.0)
sort_region (IntermediateBalls, FinalBalls, 'first_point', 'true', 'column')
dev_display (Bond)
dev_set_colored (12)
dev_display (FinalBalls)
disp_continue_message (WindowID, 'black', 'true')
stop ()
smallest_circle (FinalBalls, Row, Column, Radius)
NumBalls := |Radius|
Diameter := 2 * Radius
meanDiameter := mean(Diameter)
minDiameter := min(Diameter)
dev_display (Bond)
disp_circle (WindowID, Row, Column, Radius)
dev_set_color ('white')
disp_message (WindowID, 'D: ' + Diameter$'.4', 'image', Row - 2 * Radius, Column, 'white', 'false')
dev_update_window ('on')
Halcon转OpenCV思路步骤:
① 获取Board区域并设置ROI,本文直接给定ROI,当然大家也可以先二值化,然后通过获取轮廓外接矩形的方式获取ROI,这里直接指定:
ROI = img[50:img.shape[0],0:img.shape[1]]② 二值化 + 开运算获取大致焊点区域
gray = cv2.cvtColor(ROI,cv2.COLOR_BGR2GRAY)
gray = cv2.medianBlur(gray, 3)#中值滤波ret,thresh = cv2.threshold(gray, 30, 255, cv2.THRESH_BINARY_INV)cv2.imshow('thresh',thresh)#矩形结构元素k1=np.ones((19,19), np.uint8)#圆形结构元素k2=np.zeros((19,19), np.uint8)cv2.circle(k2,(9,9),10,(1,1,1),-1, cv2.LINE_AA)opening = cv2.morphologyEx(thresh, cv2.MORPH_OPEN, k2)
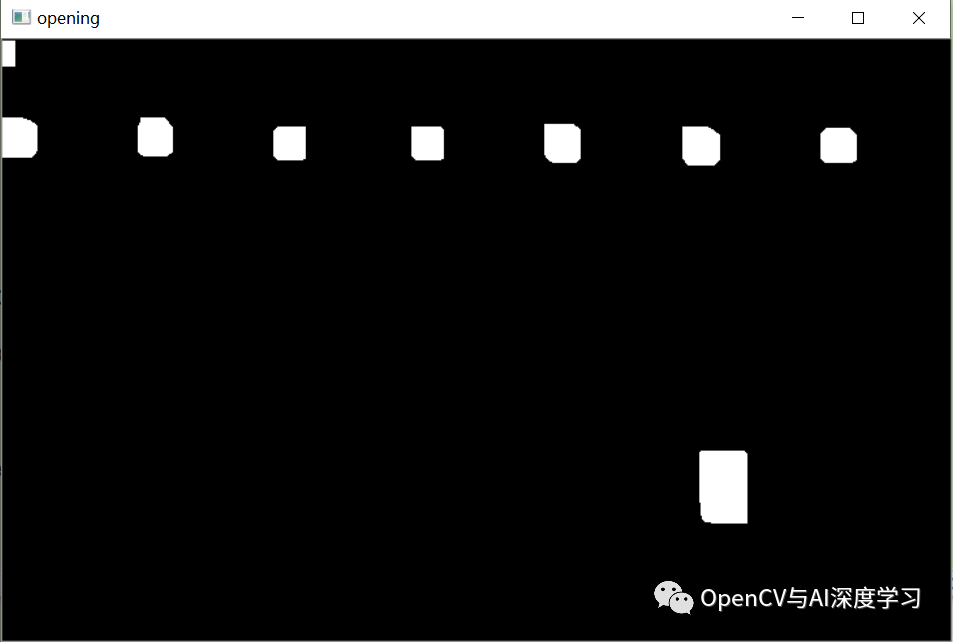
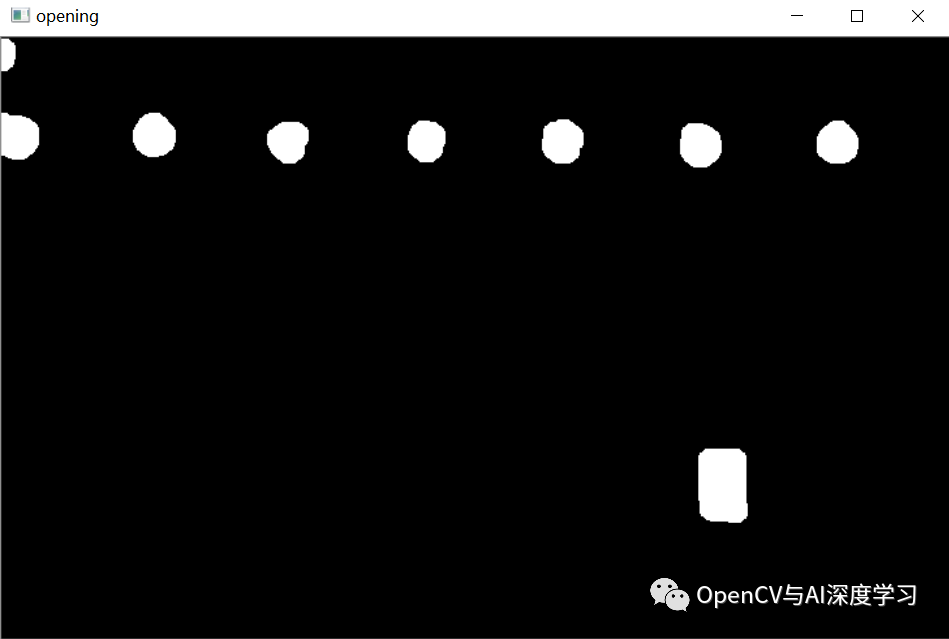
这里特别需要注意的是halcon做开运算使用的opening_circle()算子,使用的圆形结构元素,对于提取圆形轮廓来说,圆形结构元素比矩形结构元素更好,下面是比对效果:
矩形结构元素做开运算效果:

圆形结构元素做开运算效果(更接近圆形轮廓本身):

③ 通过圆形度来剔除非圆形轮廓,圆形度计算方式这里使用轮廓面积与轮廓最小外接矩形的比值,代码如下(圆形度大于0.65则保留):
index = 0
for cnt in contours:area = cv2.contourArea(cnt)center,radius = cv2.minEnclosingCircle(cnt)circularity = area / (PI * radius * radius)if circularity > 0.65:random_color = colors[index % len(colors)]cv2.circle(img,(int(center[0]),int(center[1]+50)),int(radius),random_color,-1, cv2.LINE_AA)cv2.putText(img,("D=%0.2f"%(radius*2)), (int(center[0]-5),int(center[1]+50-25)), font, 0.45, (255,255,255), 2)index = index + 1
④ 计算标示相对简单,注意标注颜色如果我们使用0~255的随机数,可能生成的颜色会比较暗,这里使用一个包含6种颜色的数组,通过取余的方式来给对应的圆形轮廓赋值,然后用最小外接圆的参数来绘制。
color1 = (255, 0, 0)color2 = (0, 255, 0)color3 = (0, 0, 255)color4 = (255, 255, 0)color5 = (255, 0, 255)color6 = (0, 255, 255)colors = [color1,color2,color3,color4,color5,color6]random_color = colors[index % len(colors)]
最终效果如下:

完整代码将发布在知识星球中,喜欢请关注本公众号,谢谢!
相关文章
- 一个很奇怪的 OpenCV出错:resize的坑
- OpenCV函数convertScaleAbs()作了怎样的运算?
- OpenCV Native开发环境搭建
- MFC与OpenCv中的图片转换实例
- OpenCV图像阈值、图像滤波、双阈值、上下采样
- OpenCV调用TensorFlow预训练模型
- OpenCV图像各向异性滤波
- OpenCV C++ 遍历文件夹下所有文件
- Python代码库OpenCV之基础环境搭建(含代码)
- 编译支持opengl的opencv
- opencv学习笔记——minMaxIdx函数的含义及用法
- 第三章 Opencv图像像素操作
- 学习OpenCV研究报告指出系列(二)源代码被编译并配有实例project

