
【翻译】使用Visual Studio在Azure上部署Asp.Net Core Web应用
配置运行环境
- Install the latest Azure SDK for Visual Studio. The SDK installs Visual Studio if you don't already have it.
- 安装Azure SDK for Visual Studio,如果你的Visual Studio还没有安装这个SDK的话
-
Verify your Azure account. You can open a free Azure account or Activate Visual Studio subscriber benefits.
-
验证你的Azure账号。你可以注册一个免费的Azure账号也可以激活你的Visual Studio的Azure信用额度。
创建Web应用
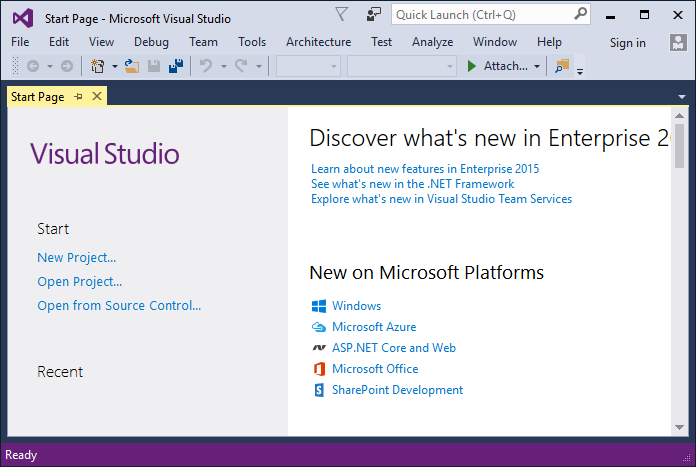
In the Visual Studio Start Page, tap New Project....
在Visual Studio启示页面,点击New Project…
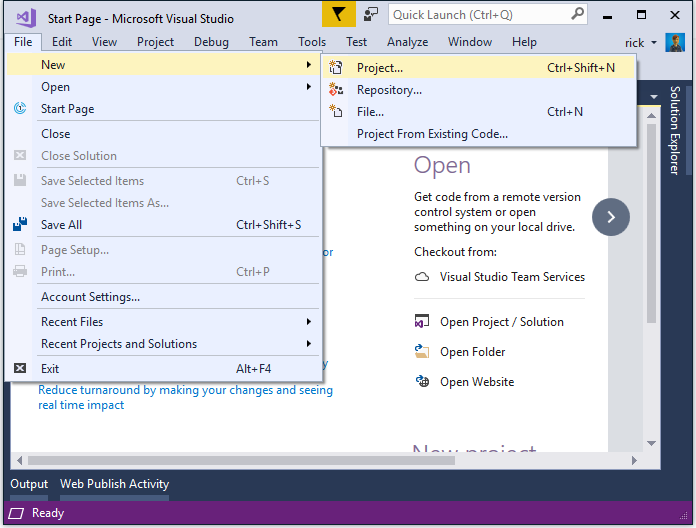
Alternatively, you can use the menus to create a new project. Tap File > New > Project....
你也可以通过菜单来创建一个新的项目。点击File > New > Project…
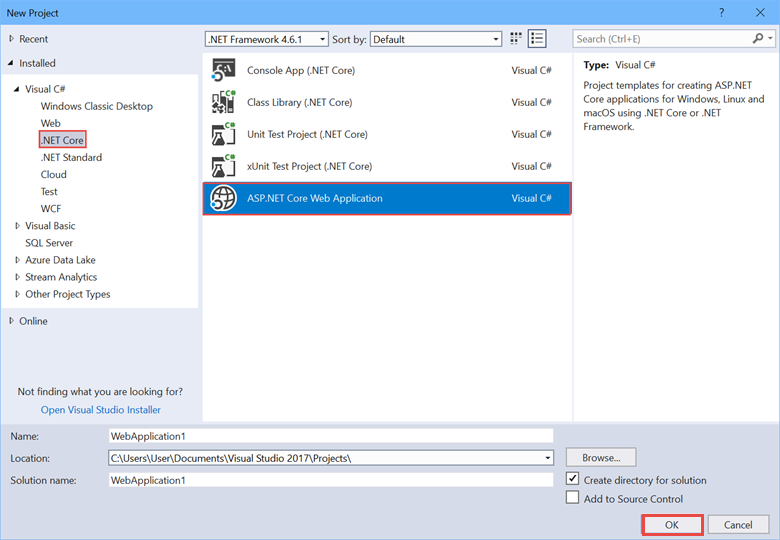
Complete the New Project dialog:
完成新项目的创建
-
In the left pane, tap Web
-
在左边面板,点击Web
-
In the center pane, tap ASP.NET Core Web Application (.NET Core)
-
在中间的面板,点击选择Asp.Net Core Web Application(.Net Core)
-
Tap OK
-
点击OK
In the New ASP.NET Core Web Application (.NET Core) dialog:
在New Asp.Net Core Web Application(.Net Core)对话框中:
-
Tap Web Application
-
点击Web Application
-
Verify Authentication is set to Individual User Accounts
-
Authentication设置成Individual User Accounts
-
Verify Host in the cloud is not checked
-
不选中Host in the Cloud
-
Tap OK
-
点击OK
在本地测试应用
-
Press Ctrl-F5 to run the app locally
-
按Ctrl+F5在本地运行应用
-
Tap the About and Contact links. Depending on the size of your device, you might need to tap the navigation icon to show the links
-
点击About和Contact链接,根据你设备分辨率的大小,你可能需要点击导航图标才能看到这些链接。
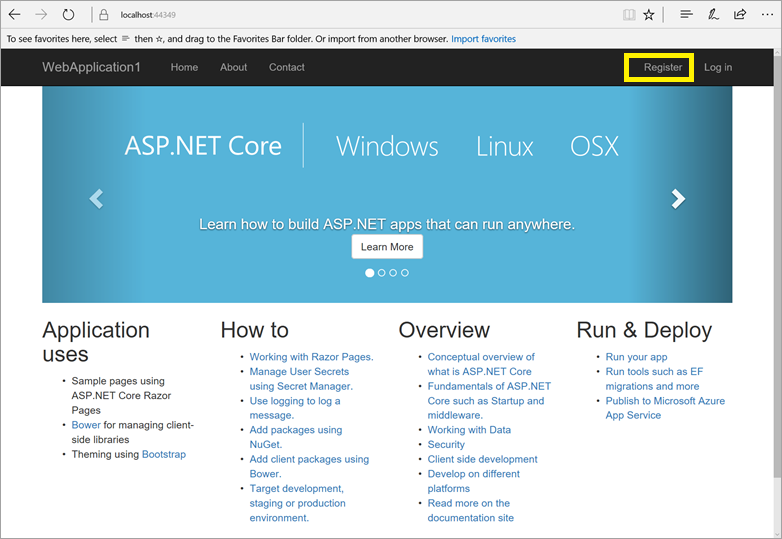
- Tap Register and register a new user. You can use a fictitious email address. When you submit, you'll get the following error:
- 点击注册链接注册一个新的用户。你可以输入虚拟的Email地址,当你点击提交的时候,你会看到错误:
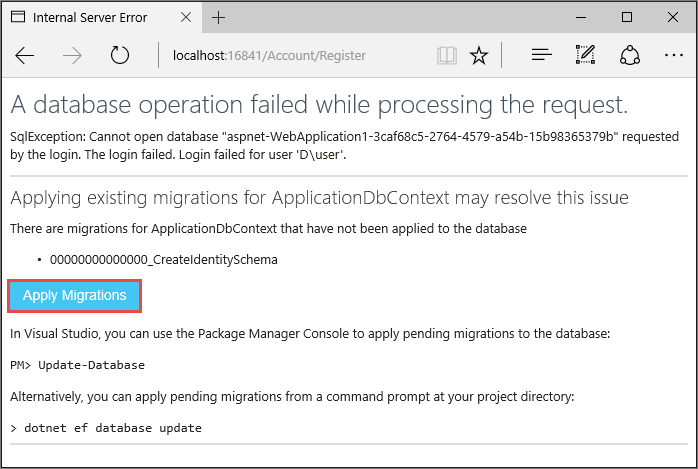
You can fix the problem in two different ways:
你可以使用以下两种方式修复问题:
-
Tap Apply Migrations and, once the page updates, refresh the page;
-
点击Apply Migrations,等待更新后,刷新页面
-
Run the following from a command prompt in the project's directory:
-
在命令终端下,到项目目录运行以下命令:
dotnet ef database update
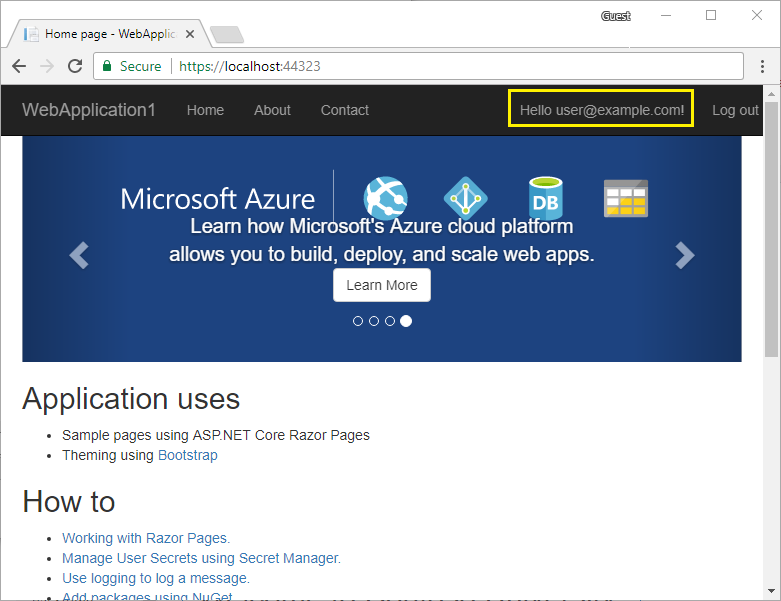
The app displays the email used to register the new user and a Log off link.
刷新页面后,页面会显示我们注册的新用户和看到一个Log off的链接。
应用部署到Azure
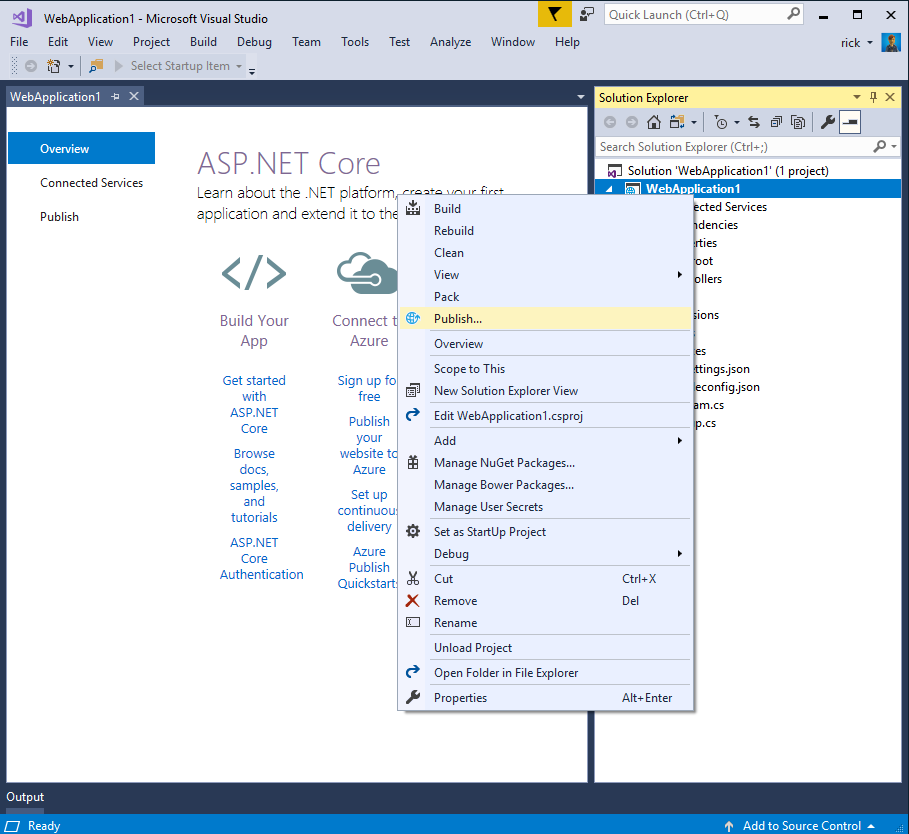
Right-click on the project in Solution Explorer and select Publish....
在Solution Explorer右键项目,点击Publish
In the Publish dialog, tap Microsoft Azure App Service.
在Publish对话框中,点击Microsoft Azure App service.
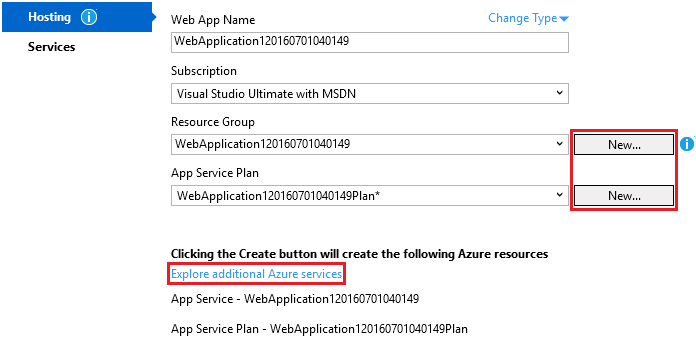
Tap New... to create a new resource group. Creating a new resource group will make it easier to delete all the Azure resources you create in this tutorial.
点击New创建一个新的资源组。创建新的资源组可以方便你删除所有在Azure上创建的范例资源。
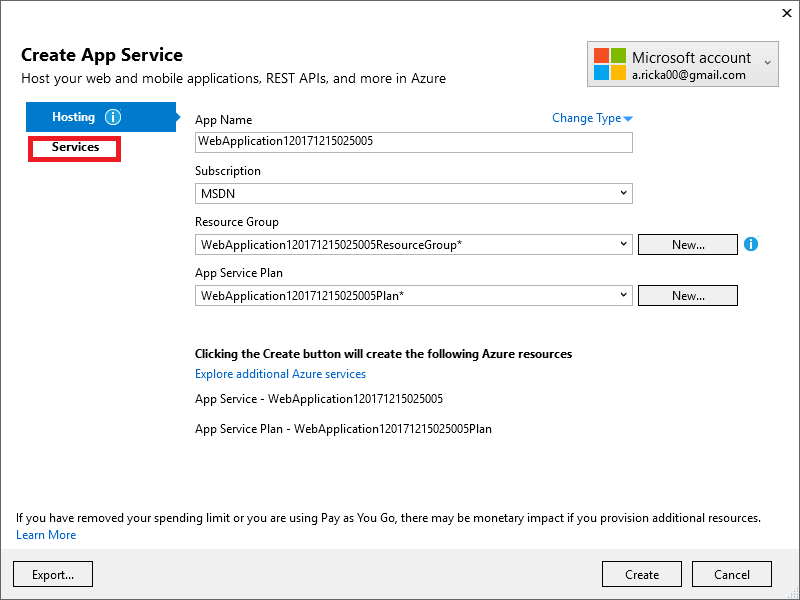
Create a new resource group and app service plan:
添加一个新的Resource group和app service plan:
-
Tap New... for the resource group and enter a name for the new resource group
-
在resource group点击New,然后为这个资源组取名
-
Tap New... for the app service plan and select a location near you. You can keep the default generated name
-
在app service plan点击New,选择一个
-
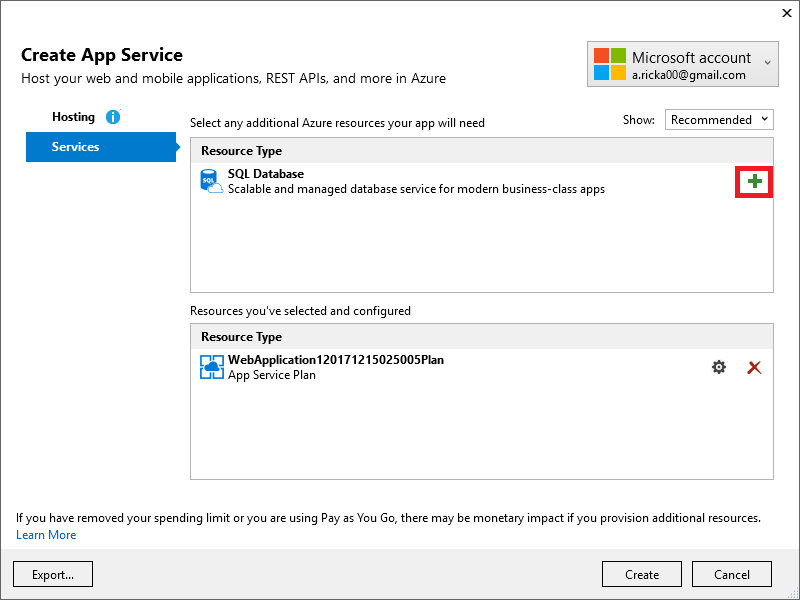
Tap Explore additional Azure services to create a new database
-
点击Explore additional Azure services去创建一个新的数据库
- Tap the green + icon to create a new SQL Database
- 点击绿色的加号图标创建一个新的Sql数据库
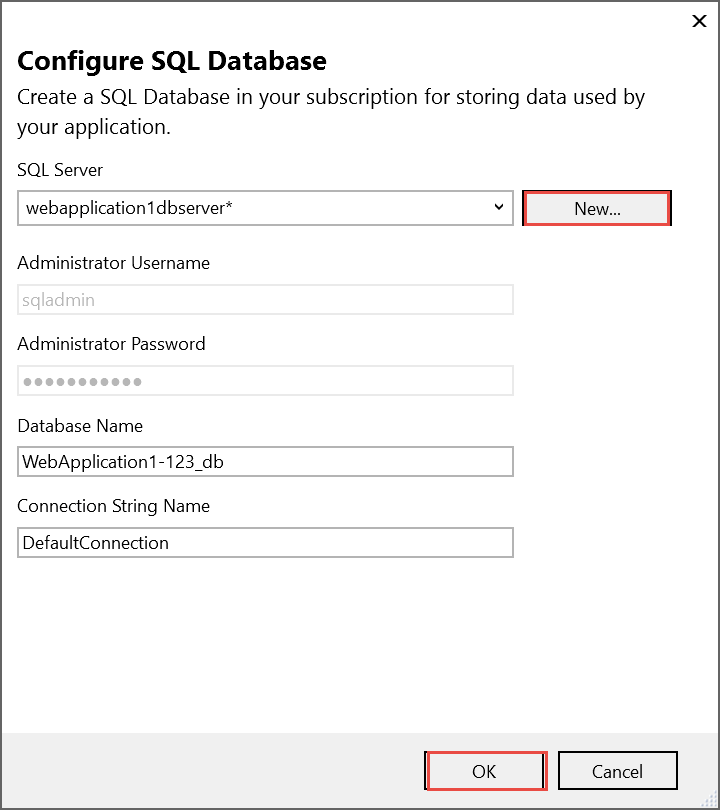
- Tap New... on the Configure SQL Database dialog to create a new database server.
- 在Configure Sql Database对话框中点击New创建一个新的数据库
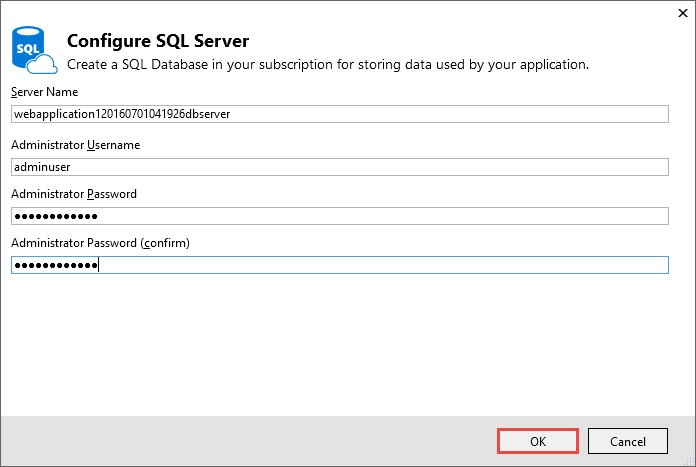
- Enter an administrator user name and password, and then tap OK. Don't forget the user name and password you create in this step. You can keep the default Server Name
- 输入一个管理员名和密码,点击OK。不要忘记你设置的用户名和密码。ServerName可以保持默认的。
- Tap OK on the Configure SQL Database dialog
- 在Configure SQL Database对话框点击OK
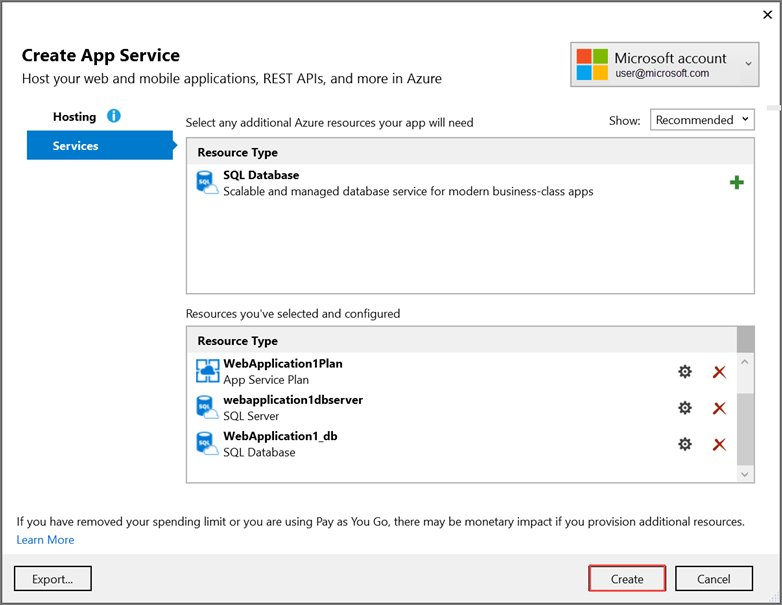
- Tap Create on the Create App Service dialog
- 在Creat App Service对话框点击Create

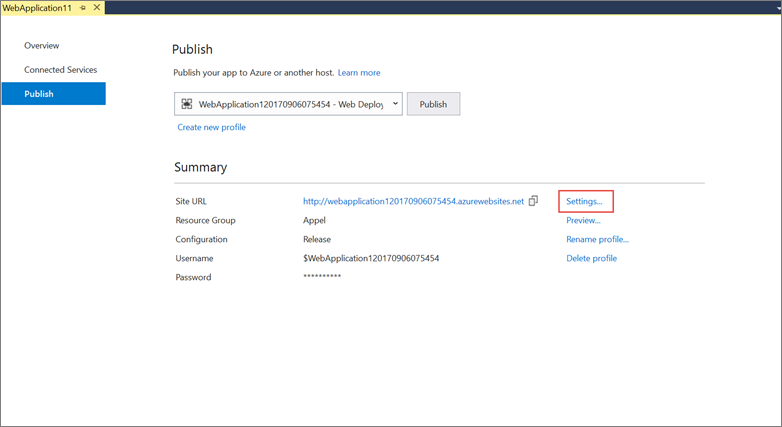
- Tap Next in the Publish dialog
- 在Publish对话框点击Next
-
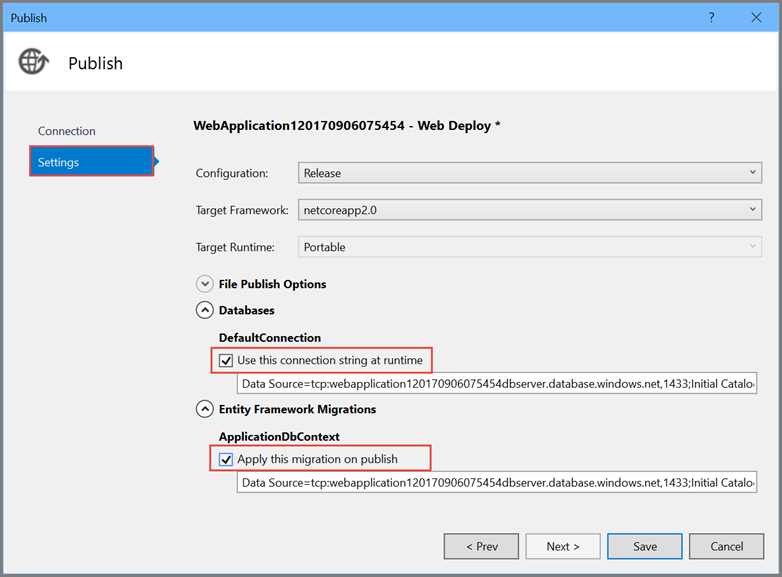
On the Settings stage of the Publish dialog:
-
点击Publish对话框的Settings标签
-
Expand Databases and check Use this connection string at runtime
-
扩展Databases,选中Use this connection string at runtime
-
Expand Entity Framework Migrations and check Apply this migration on publish
-
扩展Entity Framework Migrations,选中Apply this migration on publish
-
-
Tap Publish and wait until Visual Studio finishes publishing your app
-
点击Publish,等待Visual Studio完成发布你的应用。
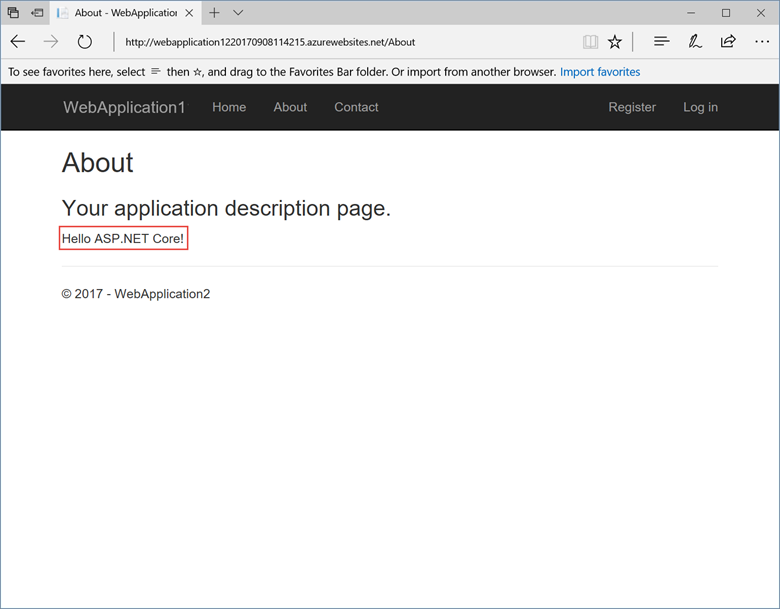
Visual Studio will publish your app to Azure and launch the cloud app in your browser.
Visual Studio会在发布到Azure后通过浏览器打开你在云端部署的应用。
在Azure上测试你的应用
-
Test the About and Contact links
-
测试About和Contact链接
-
Register a new user
-
注册一个用户
更新应用
- Edit the
Views/Home/About.cshtmlRazor view file and change its contents. For example: - 编辑Views/Home/About.cshtml文件,修改它。参考:
@{
       ViewData["Title"] = "About";
   }
   <h2>@ViewData["Title"].</h2>
   <h3>@ViewData["Message"]</h3>

   <p>My updated about page.</p>
- Right-click on the project and tap Publish... again
- 再次右键项目点击Publish
- After the app is published, verify the changes you made are available on Azure
- 发布后,检查下在Azure端的应用是否改变
清除应用
When you have finished testing the app, go to the Azure portal and delete the app.
当你完成测试后,去Azure后台删除这个应用。
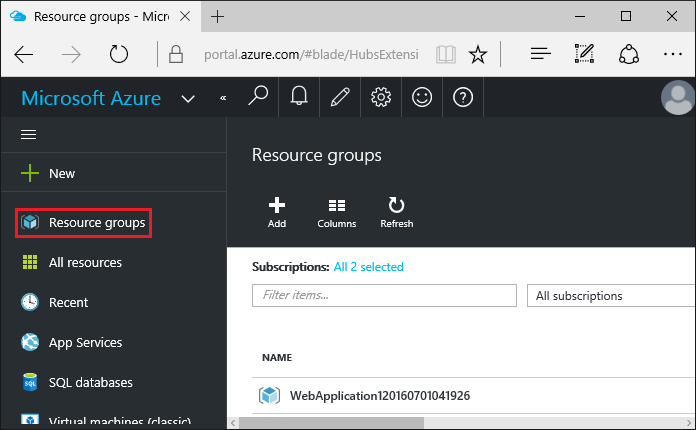
- Select Resource groups, then tap the resource group you created
- 选择Resource groups,然后选中你创建的资源组
- In the Resource group blade, tap Delete
- 在Resource group选项卡中,点击Delete
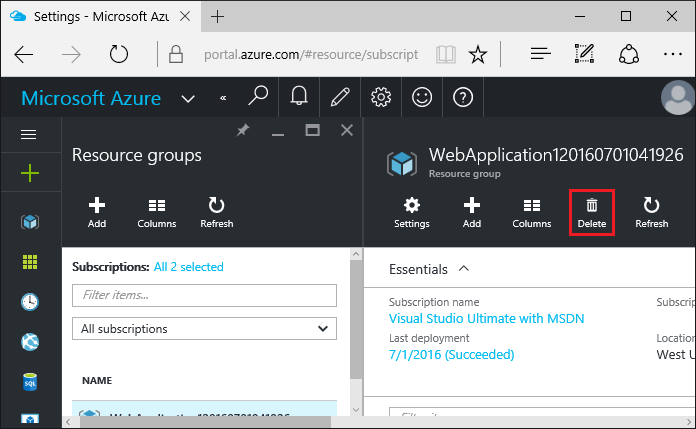
- Enter the name of the resource group and tap Delete. Your app and all other resources created in this tutorial are now deleted from Azure
- 输入资源组名点击Delete。你的应用和创建的资源在Azure中将会被删除。
原文链接
https://docs.microsoft.com/zh-cn/aspnet/core/tutorials/publish-to-azure-webapp-using-vs
相关文章
- 适用于 Android 的 Visual Studio 模拟器
- Visual Studio Code-GO tasks 设置 (实现在vsc下直接编译输出的功能)
- 用Visual studio2012在Windows8上开发内核驱动监视线程创建
- 【VS开发】Visual C++内存泄露检测—VLD工具使用说明
- 【翻译】在Visual Studio中使用Asp.Net Core MVC创建你的第一个Web API应用(一)
- 抛弃强大的TFS ,借助于BugTracker.NET + Visual Source Safe + SourceLink搭建项目开发环境
- Visual Studio 更新NuGet
- Visual C++ 开发从入门到精通
- 【论文&模型学习】从自然语言监督中学习可迁移视觉 CLIP(Learning Transferable Visual Models From Natural Language Supervision)
- Visual Studio Code 快捷键的设置
- 禁用visual studio实时调试器
- Visual Studio v1.67改进了深色主题
- Microsoft Visual Studio2019 v16.9.3-SEO狼术
- 给Visual Studio 2022下配置arduino环境插件在VS下编写arduino代码
- dotnet 各个版本的下载链接----Download .NET SDKs for Visual Studio
- VS(Visual Studio)中Nuget的使用
- Visual Studio.Net 快捷键表
- Building OpenSSL for Visual Studio
- Visual Studio 2008 可扩展性开发(一):VS概览
- Visual Studio 2017 ASP.NET Core开发
- Visual C++ 6.0静态、动态链接库