
SpringBoot 整合 thymeleaf
SpringBoot 整合 thymeleaf
2023-09-11 14:22:18 时间
1. pom.xml 加入 Thymeleaf 启动器
   <dependency>
            <groupId>org.springframework.boot</groupId>
            <artifactId>spring-boot-starter-thymeleaf</artifactId>
        </dependency>
2. 将 HTML 页面放到 classpath:/templates/ 目录下, Thymeleaf 就能自动渲染
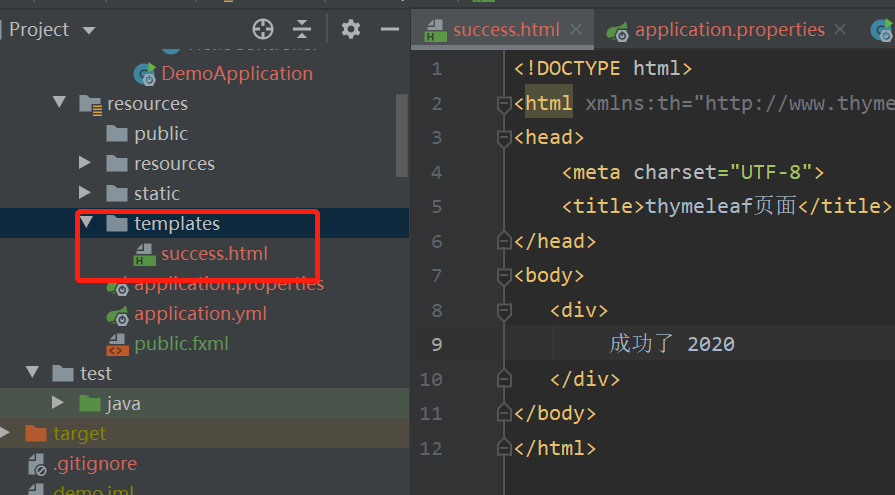
3,编写controller
package com.example.demo.controller;

import org.springframework.stereotype.Controller;
import org.springframework.web.bind.annotation.GetMapping;
import org.springframework.web.bind.annotation.ResponseBody;

import java.util.Map;

@Controller
public class HelloController {
    @ResponseBody
    @GetMapping("/execute")
    public String execute () {
        return "success";
    }
}
注意这里不要使用 RestController 否则返回的是字符串 不是页面
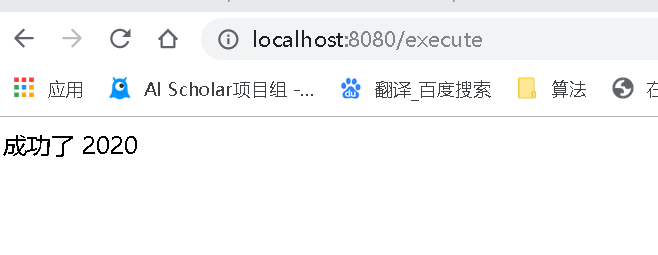
4. 浏览器访问
5.将操作层的数据填写入模板中
导入 Thymeleaf 的名称空间
在 html 页面加上以下名称空间, 使用 Thymeleaf 时就有语法提示。
<html xmlns:th="http://www.thymeleaf.org">
相关文章
- SpringBoot使用JWT实现Token登录校验
- SpringBoot注解最全详解(整合超详细版本)
- SpringBoot修改默认端口号
- 手把手教你 SpringBoot整合Kafka
- springboot启动报错:“Error starting ApplicationContext. To display the conditions report re-run your appl
- SpringBoot整合FastJson(七)
- SpringBoot实体类大小写转换
- SpringBoot中JSON时间转换为东八区
- 【Java】Springboot集成Druid
- Springboot整合Redis作为Mybatis的二级缓存
- Linux环境下Kafka的安装与使用(SpringBoot整合云服务器上的Kafka)
- Java学习-085-Springboot 解决 InetAddress.getLocalHost().getHostName() took 13387 milliseconds to respond. Please verify your network configuration
- spring框架漏洞整理(Springboot漏洞)
- 【SpringBoot】SpingBoot整合AOP
- SpringBoot入门十(整合之Junit测试)
- 2023年springboot面试题
- 解决SpringBoot跨域的三种方式
- SpringBoot + openFeign实现远程接口调用
- SpringBoot 与Shiro 整合系列(四)多realm延伸之实现多realm不同数据表用户登录认证和鉴权
- SpringBoot 整合shiro(一):基本概念信息
- springboot+mybatis整合(单元测试,异常处理,日志管理,AOP)
- springboot整合webservice
- SpringBoot 整合swagger3.X