
hadoop集群的搭建
第一句:关闭防火墙,关闭防火墙,关闭所有节点的防火墙
1.安装虚拟机
2.虚拟机上安装centos7作为hadoop的主节点
1)修改主机名
vim /etc/hostname
清空里里面的内容;然后填写master
2)修改hosts
vim /etc/hosts
内容如下:
127.0.0.1   localhost localhost.localdomain localhost4 localhost4.localdomain4
::1         localhost localhost.localdomain localhost6 localhost6.localdomain6
192.168.123.128 guoyansi128
192.168.123.129 guoyansi129
192.168.123.130 guoyansi130
3.克隆出两个centos7作为hadoop的slave
1)分别修改主机名
vim /etc/hostname
清空里里面的内容;然后分别填写slave0和slave1
2)分别修改hosts;
vim /etc/hosts
内容都如下:
127.0.0.1   localhost localhost.localdomain localhost4 localhost4.localdomain4
::1         localhost localhost.localdomain localhost6 localhost6.localdomain6
192.168.123.128 guoyansi128
192.168.123.129 guoyansi129
192.168.123.130 guoyansi130
4.安装jdk1.8
5.安装hadoop
一:下载hadoop:hadoop-2.6.5.tar.gz
二:hadoop上传到/usr/local/src中(这是我的个人习惯)
三:解压:
tar -zxvf hadoop-2.6.5.tar.gz
四:复制到上级目录:
cp hadoop-2.6.5 ../
五:进入hadoop的安装目录
cd /usr/local/hadoop-2.6.5
六:从安装目录开始配置环境
1.修改环境变量
cd etc/hadoop
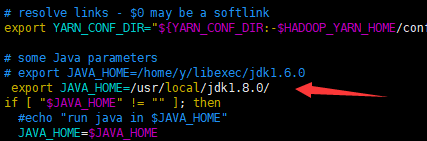
vim hadoop-env.sh

2.配置Yarn环境变量
vim yarn-env.sh
3.配置核心组织文件
vim core-site.xml
内容如下:


<?xml version="1.0" encoding="UTF-8"?>
<?xml-stylesheet type="text/xsl" href="configuration.xsl"?>
<!--
  Licensed under the Apache License, Version 2.0 (the "License");
  you may not use this file except in compliance with the License.
  You may obtain a copy of the License at

    http://www.apache.org/licenses/LICENSE-2.0

  Unless required by applicable law or agreed to in writing, software
  distributed under the License is distributed on an "AS IS" BASIS,
  WITHOUT WARRANTIES OR CONDITIONS OF ANY KIND, either express or implied.
  See the License for the specific language governing permissions and
  limitations under the License. See accompanying LICENSE file.
-->

<!-- Put site-specific property overrides in this file. -->

<configuration>
        <property>
                <name>fs.defaultFS</name>
                <value>hdfs://guoyansi128:9000</value>
        </property>
        <property>
                <name>hadoop.tmp.dir</name>
                <value>/usr/local/hadoop-2.6.5/hadoopdata</value>
        </property>
</configuration>
4.配置文件系统
vim hdfs-site.xml
<?xml version="1.0" encoding="UTF-8"?>
<?xml-stylesheet type="text/xsl" href="configuration.xsl"?>
<!--
  Licensed under the Apache License, Version 2.0 (the "License");
  you may not use this file except in compliance with the License.
  You may obtain a copy of the License at

    http://www.apache.org/licenses/LICENSE-2.0

  Unless required by applicable law or agreed to in writing, software
  distributed under the License is distributed on an "AS IS" BASIS,
  WITHOUT WARRANTIES OR CONDITIONS OF ANY KIND, either express or implied.
  See the License for the specific language governing permissions and
  limitations under the License. See accompanying LICENSE file.
-->

<!-- Put site-specific property overrides in this file. -->

<configuration>
        <property>
                <name>dfs.replication</name>
                <value>1</value>
        </property>
</configuration>
hdfs.replication配置超过3没有意义,因为hdfs的最大副本就是3.
5.配置yarn-site.xml文件
vim yarn-site.xml
<?xml version="1.0"?>
<!--
  Licensed under the Apache License, Version 2.0 (the "License");
  you may not use this file except in compliance with the License.
  You may obtain a copy of the License at

    http://www.apache.org/licenses/LICENSE-2.0

  Unless required by applicable law or agreed to in writing, software
  distributed under the License is distributed on an "AS IS" BASIS,
  WITHOUT WARRANTIES OR CONDITIONS OF ANY KIND, either express or implied.
  See the License for the specific language governing permissions and
  limitations under the License. See accompanying LICENSE file.
-->
<configuration>
    <property>
        <name>yarn.nodemanager.aux-services</name>
        <value>mapreduce_shuffle</value>
    </property>
    <property>
        <name>yarn.resourcemanager.address</name>
        <value>guoyansi128:18040</value>
    </property>
    <property>
        <name>yarn.resourcemanager.scheduler.address</name>
        <value>guoyansi128:18030</value>
    </property>
    <property>
        <name>yarn.resourcemanager.resource-tracker.address</name>
        <value>guoyansi128:18025</value>
    </property>
    <property>
        <name>yarn.resourcemanager.admin.address</name>
        <value>guoyansi128:18141</value>
    </property>
    <property>
        <name>yarn.resourcemanager.webapp.address</name>
        <value>guoyansi128:18088</value>
    </property>
</configuration>
6.配置MapReduce计算框架文件
vim mapred-site.xml
<?xml-stylesheet type="text/xsl" href="configuration.xsl"?>
<!--
  Licensed under the Apache License, Version 2.0 (the "License");
  you may not use this file except in compliance with the License.
  You may obtain a copy of the License at

    http://www.apache.org/licenses/LICENSE-2.0

  Unless required by applicable law or agreed to in writing, software
  distributed under the License is distributed on an "AS IS" BASIS,
  WITHOUT WARRANTIES OR CONDITIONS OF ANY KIND, either express or implied.
  See the License for the specific language governing permissions and
  limitations under the License. See accompanying LICENSE file.
-->

<!-- Put site-specific property overrides in this file. -->

<configuration>
        <property>
                <name>mapreduce.framework.name</name>
                <value>yarn</value>
        </property>
</configuration>
7.配置master的slaves文件
vim slaves
guoyansi128,也就是hadoop的master节点配置完毕。此时可以 使用命令行把
master上的安装全部拷贝到两台slave上(192.168.123.129;192.168.123.130)
scp -r /usr/local/hadoop-2.6.5 root@guoyansi129:/usr/local/
scp -r /usr/local/hadoop-2.6.5 root@guoyansi129:/usr/local/
现在可以到这两台机子上查看是否复制过来了。
启动hadoop
首次启动,需要做一些配置:
以下操作都是在master节点上操作的
回到家目录
cd
修改.bash_profile配置文件(这个文件需要用 ls -a命令才能看到)
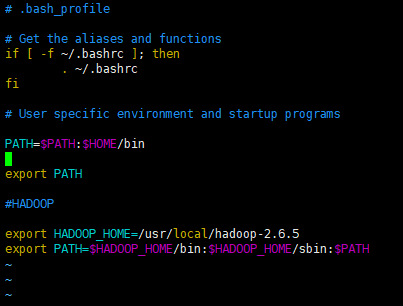
vim .bash_profile
将下面内容添加到文件末尾
#HADOOP
export HADOOP_HOME=/usr/local/hadoop-2.6.5
export PATH=$HADOOP_HOME/bin:$HADOOP_HOME/sbin:$PATH
保存后退出,执行source命令
source .bash_profile
在/usr/local/hadoop中创建hadoop数据目录
mkdir hadoopdata
这个目录的路径与core-site.xml中的目录是对应的
格式化文件系统
hdfs namenode -format
启动命令:
./sbin/start-all.sh
关闭命令:
./sbin/start-stop.sh
验证Hadoop是否启动成功
方法一:
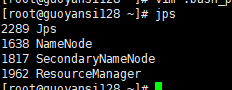
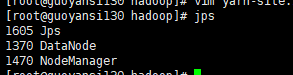
jps
如下master上表示启动成功:
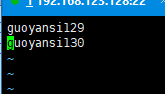
guoyansi129和guoyansi130会有这样的提示
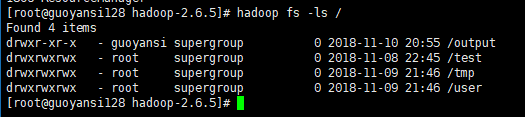
方法二:查看HDFS上的目录列表能否正常显示
hadoop fs -ls /
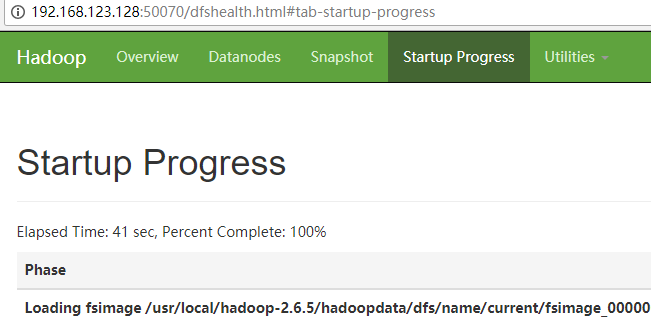
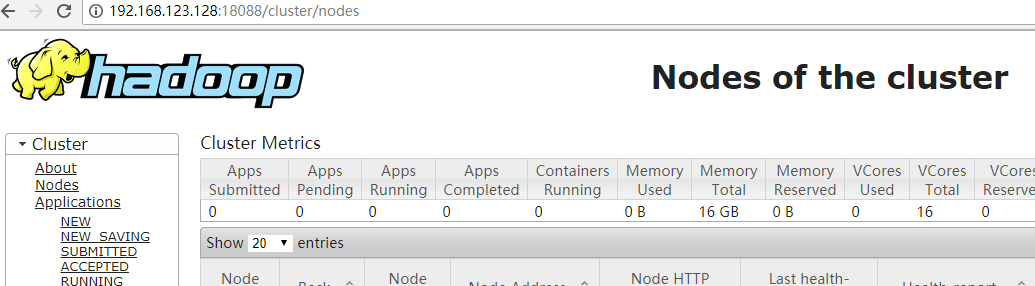
方法三:通过浏览器访问主机50070和18088端口
http://192.168.123.128:50070
http://192.168.123.128:18088
我一开始以为hadoop只要启动成功了 就万事大吉了。
在后面测试mapreduce的时候,发现执行不出结果。
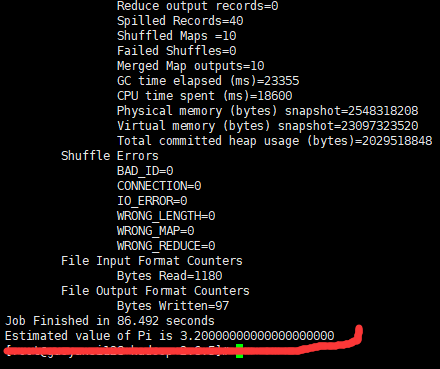
例如我在guoyansi128上执行这个命令,计算圆周率的问题的时候给我提示
java.net.NoRouteToHostException: 没有到主机的路由
hadoop jar /usr/local/hadoop-2.6.5/share/hadoop/mapreduce/hadoop-mapreduce-examples-2.6.5.jar pi 10 10
百度一顿狂搜,答案都是关闭防火墙,可是我的防火墙都快被我关烂了,答案还是不对。
第二天坐在马桶上突然想起来,是不是guoyansi129,guoyansi130的防火墙没关。
测试一下果然发现是其中一台节点的防火墙没关。关闭防火墙后重启hadoop,重新输入上面的命令,经过一分钟左右的计算答案终于出来了。
截图为证;
最后一句:关闭防火墙,关闭防火墙,关闭所有节点的防火墙
相关文章
- Hadoop程序运行中的Error(1)-Error: org.apache.hadoop.hdfs.BlockMissingException
- Hadoop+HBase 集群搭建
- Hadoop基准测试(转载)
- 大数据和Hadoop生态圈
- [转]Spark能否取代Hadoop?
- 《HBase管理指南》一1.4 安装Hadoop
- 《Hadoop实战手册》一1.3 使用distcp实现集群间数据复制
- 《Hadoop MapReduce实战手册》一第1章 搭建Hadoop并在集群中运行
- 《Hadoop MapReduce实战手册》一第2章 HDFS进阶
- 《HBase权威指南》一1.5 HBase:Hadoop数据库
- Hadoop集群启动后没有SecondaryNameNode,IllegalArgument报错:Does not contain a valid host:port authority: hdfs:
- Hadoop(二)CentOS7.5搭建Hadoop2.7.6完全分布式集群
- Hadoop 集群网络拓扑
- Hadoop 集群规模要多大
- 在Hadoop集群中用PySpark处理数据的知识详解
- 基于Docker快速搭建多节点Hadoop集群--已验证
- 使用Docker在本地搭建Hadoop分布式集群
- 《Spark与Hadoop大数据分析》一一2.4 安装 Hadoop 和 Spark 集群
- 《Hadoop集群与安全》一1.2 Hadoop发行版
- 《Hadoop集群与安全》一2.2 设置NameNode
- 《Hadoop集群与安全》一2.3 小结
- 《Hadoop集群与安全》一导读
- Hadoop学习---Ubuntu中hadoop完全分布式安装教程
- hadoop(2): 安装&使用 sqoop
- 【Hadoop】Hadoop生态系列之搭建HadoopHA集群