
macOS 下安装tomcat
The Servlet 4.0 specification is out and Tomcat 9.0.x does support it. Time to dive into Tomcat 9. [updated on Sep.2.2018]
Prerequisite: Java
Since OS X 10.7 Java is not (pre-)installed anymore, let’s fix that first. As I’m writing this, Java 1.8.0_181 is the latest version for Java 8, available for download here: http://www.oracle.com/technetwork/java/index.html
The JDK installer package comes in a dmg and installs easily on the Mac; and after opening the Terminal app again,
|
1
|
java -version
|
now shows something like this:
|
1
2
3
|
java version "1.8.0_181"
Java(TM) SE Runtime Environment (build 1.8.0_181-b13)
Java HotSpot(TM) 64-Bit Server VM (build 25.181-b13, mixed mode)
|
Whatever you do, when opening Terminal and running ‘java -version’, you should see something like this, with a version of at least 1.8.x I.e. Tomcat 9.x requires Java 8 or later.
JAVA_HOME is an important environment variable, not just for Tomcat, and it’s important to get it right. Here is a trick that allows me to keep the environment variable current, even after a Java Update was installed. In ~/.bash_profile, I set the variable like so:
|
1
|
export JAVA_HOME=$(/usr/libexec/java_home)
|
Installing Tomcat
Here are the easy to follow steps to get it up and running on your Mac
- Download a binary distribution of the core module: apache-tomcat-9.0.12 from here. I picked the tar.gz in Binary Distributions / Coresection.
- Opening/unarchiving the archive will create a new folder structure in your Downloads folder: (btw, this free Unarchiver app is perfect for all kinds of compressed files and superior to the built-in Archive Utility.app)
~/Downloads/apache-tomcat-9.0.12 - Open to Terminal app to move the unarchived distribution to /usr/local
sudo mkdir -p /usr/localsudo mv ~/Downloads/apache-tomcat-9.0.12 /usr/local - To make it easy to replace this release with future releases, we are going to create a symbolic link that we are going to use when referring to Tomcat (after removing the old link, you might have from installing a previous version):
sudo rm -f /Library/Tomcatsudo ln -s /usr/local/apache-tomcat-9.0.12 /Library/Tomcat - Change ownership of the /Library/Tomcat folder hierarchy:
sudo chown -R <your_username> /Library/Tomcat - Make all scripts executable:
sudo chmod +x /Library/Tomcat/bin/*.sh
Tomcat 9.x
Instead of using the start and stop scripts, like so:$ /Library/Tomcat/bin/startup.sh
$ /Library/Tomcat/bin/shutdown.sh
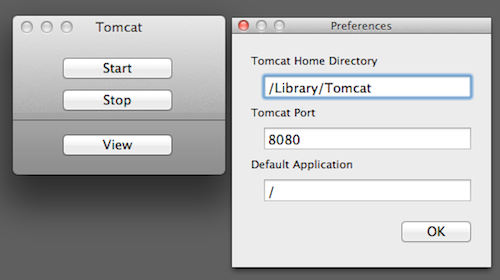
you may also want to check out Activata’s Tomcat Controller, or here a tiny freeware app, providing a UI to quickly start/stop Tomcat. It may not say so, but Tomcat Controller works on macOS 10.14 just fine.
Finally, after your started Tomcat, open your Mac’s Web browser and take a look at the default page: http://localhost:8080

相关文章
- Tomcat 系统架构与设计模式,第 1 部分: 工作原理
- Linux中Tomcat和Jboss的安装和部署
- solrCloud+tomcat+zookeeper集群配置
- 1.环境搭建-mysql+tomcat+myeclipse安装并配置
- 安装和配置Apache-tomcat
- 【JAVA】TomCat服务器安装与MyEclipse新建Jsp-Web项目步骤!(一步步截图示例)
- Centos6.2中配置tomcat
- Tomcat 的运行机制
- [转]Tomcat安装配置(手把手教,内容很详细)
- Redis tomcat
- Tomcat安装、配置与使用
- 解决FineReport 中下拉框报错问题,无需降级tomcat版本
- Tomcat部署静态网站
- Linxu安装Tomcat与Jdk并卸载自带OpenJdk
- Tomcat性能优化(三) Executor配置
- 使用Tomcat搭建基于域名的虚拟机
- Tomcat 启动报错:No default web.xml
- Tomcat 输入http://localhost:8080打不开网页的解决方法
- Tomcat(一):背景知识和安装tomcat
- Linux Centos7 tomcat9安装配置,Centos Tomcat开机启动
- linux下安装jdk+tomcat+eclipse+mysql
- 【Docker】如何用Docker安装Tomcat
- Tomcat_启动多个tomcat时,会报StandardServer.await: Invalid command '' received错误
- Nginx+Tomcat在Windows下做负载均衡
- 安装Tomcat
- Eclipse安装配置tomcat
- Linux安装Java和tomcat,并添加开机启动服务
- Linux+Tomcat环境下安装SSL证书
- java.lang.IllegalArgumentException: java.io.IOException: Alias name [tomcat] does not identify a key entry