
ssm框架搭建 SpringMVC4 + Spring 4+ MyBatis3+JQuery+JQueryUI+Echarts3
SSM详细整合之 SpringMVC4 + Spring 4+ MyBatis3+JQuery+JQueryUI+Echarts3
本文衍生的零基础视频:https://edu.csdn.net/course/detail/4468
本文衍生的实战项目,手把手让你张工作经验视频:https://edu.csdn.net/course/detail/9614
摘要: SpringMVC4 + Spring 4+ MyBatis3+JQuery+JQueryUI+Echarts3+Bootstrap3+MVC+Ajax等整合环境的搭建。
手把手教你整合最优雅SSM框架: SpringMVC4 + Spring 4+ MyBatis3+JQuery+JQueryUI+Echarts3+Bootstrap3+MVC+Ajax
当我们看大部分教学课堂或者机构的实体课堂中把SSH(Struts1.x/ Struts 2.x+hibernate4/hibernate5.x+Spring4.x) 作为最核心教学内容。但实际互联网企业应用中,SpringMVC可以完全替代Struts系列,注解方式,快捷编程,通过restful风格定义url,让地址看起来非常优雅。MyBatis也可以替换Hibernate,正因为MyBatis的半自动特点,这会让有数据库经验的软件设计师能开发出高效率的SQL语句。
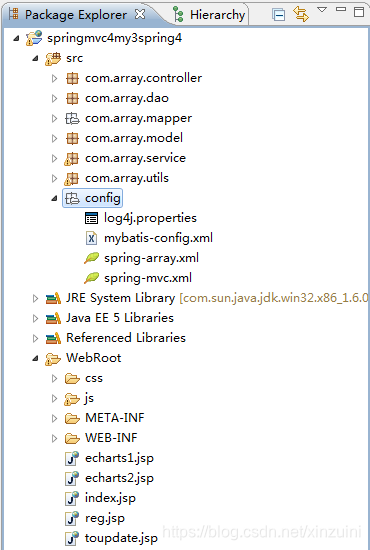
====================整体项目结构展示===================
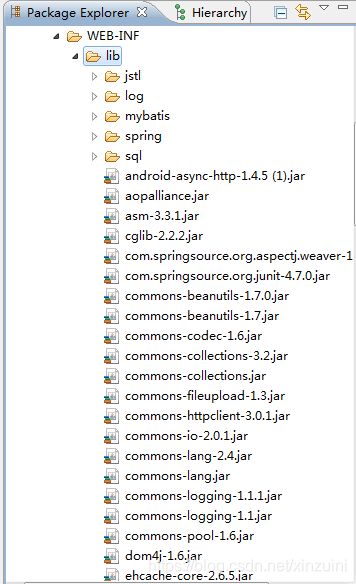
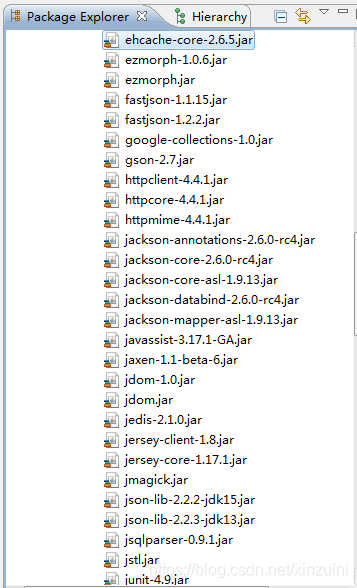
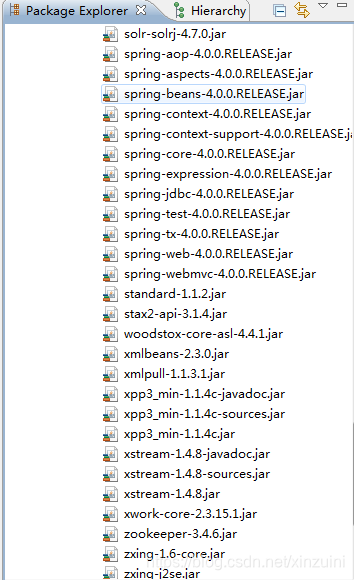
=========================整体lib结构展示===============
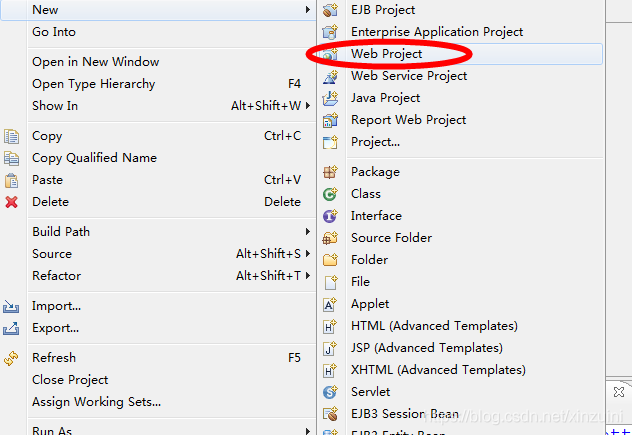
===================2.1新建项目工程=====================
===================2.2改变字符集utf-8==================

===============2.3创建package========================

==================2.4 复制jar放入lib文件夹===============
========(涉及的jar文件可以联系作者提供,也可以上网自己搜索下载)======

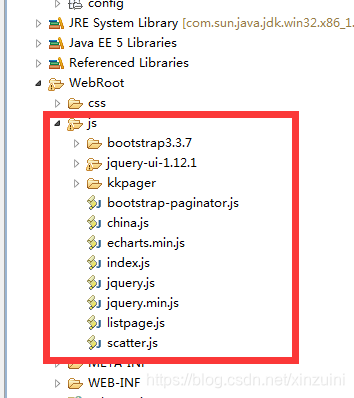
==========2.5 复制js,jquery到新建的js文件=================
========(涉及的js文件可以联系作者提供,也可以上网自己搜索下载)======
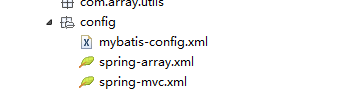
===============2.6.1 新建src下面的config ==================

============2.6.2 在config中新建 mybatis-config.xml=============
============2.6.3 配置mybatis和分页插件:mybatis-config.xml=======
<?xml version="1.0" encoding="UTF-8"?>
<!DOCTYPE configuration PUBLIC "-//mybatis.org//DTD Config 3.0//EN"
"http://mybatis.org/dtd/mybatis-3-config.dtd">
<setting name="logImpl" value="STDOUT_LOGGING"/>
<!-- 配置分页插件,如果不设计分页,下面的可以不用写 -->
<plugin interceptor="com.github.pagehelper.PageHelper">
<property name="dialect" value="mysql"/>
============2.7.1 在config中新建 spring-array.xml ==============
============2.7.2 配置Spring配置文件:spring-array.xml===========
<?xml version="1.0" encoding="UTF-8"?>
<beans xmlns="http://www.springframework.org/schema/beans"
xmlns:xsi="http://www.w3.org/2001/XMLSchema-instance" xmlns:p="http://www.springframework.org/schema/p"
xmlns:context="http://www.springframework.org/schema/context" xmlns:tx="http://www.springframework.org/schema/tx"
http://www.springframework.org/schema/beans
http://www.springframework.org/schema/beans/spring-beans-4.0.xsd
http://www.springframework.org/schema/context
http://www.springframework.org/schema/context/spring-context-4.0.xsd
http://www.springframework.org/schema/tx
http://www.springframework.org/schema/tx/spring-tx-4.0.xsd">
<bean id="dataSource" class="org.springframework.jdbc.datasource.DriverManagerDataSource">
<property name="driverClassName" value="com.mysql.jdbc.Driver"></property>
<property name="url" value="jdbc:mysql://localhost:3306/array"></property>
<property name="username" value="root"></property>
<property name="password" value="1111"></property>
<bean id="sqlSessionFactory" class="org.mybatis.spring.SqlSessionFactoryBean">
<property name="dataSource" ref="dataSource"></property>
<!-- 2.2扫描mybatis的在mapper包中的xml 和扫描mybatis的配置文件-->
<property name="mapperLocations" value="classpath:com/array/mapper/*.xml"></property>
<property name="configLocation" value="classpath:config/mybatis-config.xml"></property>
<bean id="mapperScannerConfigurer" class="org.mybatis.spring.mapper.MapperScannerConfigurer">
<property name="basePackage" value="com/array/dao"></property>
<property name="sqlSessionFactoryBeanName" value="sqlSessionFactory"></property>
<bean id="txManager" class="org.springframework.jdbc.datasource.DataSourceTransactionManager">
<property name="dataSource" ref="dataSource"></property>
<tx:annotation-driven transaction-manager="txManager"/>
<bean id="" class="org.springframework.beans.factory.config.PropertyPlaceholderConfigurer">
<value>classpath:config/log4j.properties</value>
============2.8.1 在config中新建 spring-mvc.xml ==============
============2.8.2 配置Spring配置文件:spring-mvc.xml===========
<?xml version="1.0" encoding="UTF-8"?>
<beans xmlns="http://www.springframework.org/schema/beans"
xmlns:xsi="http://www.w3.org/2001/XMLSchema-instance" xmlns:context="http://www.springframework.org/schema/context"
xmlns:mvc="http://www.springframework.org/schema/mvc"
xsi:schemaLocation="http://www.springframework.org/schema/beans
http://www.springframework.org/schema/beans/spring-beans.xsd
http://www.springframework.org/schema/context
http://www.springframework.org/schema/context/spring-context-4.0.xsd
http://www.springframework.org/schema/mvc
http://www.springframework.org/schema/mvc/spring-mvc-4.0.xsd">
<context:component-scan base-package="com.array"></context:component-scan>
<!-- 3.配置例外:不是让所有的代码都走springmvc的过滤器 -->
<!-- 配置静态资源,不被DispatcherServlet处理 -->
<mvc:resources location="/images/" mapping="/images/**"/>
<mvc:resources location="/js/" mapping="/js/**"/>
<mvc:resources location="/css/" mapping="/css/**"/>
<!-- 4.定义跳转文件的前缀和后缀,视图view的配置 -->
<bean id="viewResolver" class="org.springframework.web.servlet.view.InternalResourceViewResolver">
<property name="prefix" value="/WEB-INF/views/"></property>
<property name="suffix" value=".jsp"></property>
============2.9.1 在config中新建 log4j.properties ==============
============2.9.2 配置日志配置文件:log4j.properties(可选)========
log4j.rootLogger=DEBUG,CONSOLE,FILEOUT
log4j.addivity.org.apache=true
# CONSOLE \u6253\u5370\u5230\u63A7\u5236\u53F0
log4j.appender.CONSOLE=org.apache.log4j.ConsoleAppender
log4j.appender.CONSOLE.Target=System.out
log4j.appender.CONSOLE.layout=org.apache.log4j.PatternLayout
log4j.appender.CONSOLE.layout.ConversionPattern=[%-5p] %d{yyyy-MM-dd HH\:mm\:ss} \:%m%n
# FILEOUT \u6253\u5370\u5230 <span style="font-family: Arial, Helvetica, sans-serif;">D\:\\report.log</span>
log4j.appender.FILEOUT=org.apache.log4j.RollingFileAppender
log4j.appender.FILEOUT.File=D\:\\report.log
log4j.appender.FILEOUT.layout=org.apache.log4j.PatternLayout
log4j.appender.fileout.MaxFileSize=100000KB
log4j.appender.FILEOUT.Append=true
#log4j.appender.CONSOLE.layout.ConversionPattern=[framework] %d \u2013 %c -%-4r [%t] %-5p %c %x \u2013 %m%n
log4j.appender.FILEOUT.layout.ConversionPattern=[%-5p]_%d{yyyy-MM-dd HH\:mm\:ss} \:%m%n
============2.10.1 SSM整合核心Web.xml的详细配置=============
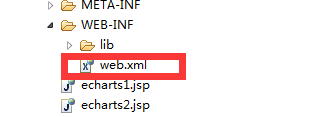
============2.10.2 SSM整合核心Web.xml的详细配置=============
===========springmvc4和spring4容器的对象加载核心配置详解========
<?xml version="1.0" encoding="UTF-8"?>
xmlns="http://java.sun.com/xml/ns/javaee"
xmlns:xsi="http://www.w3.org/2001/XMLSchema-instance"
xsi:schemaLocation="http://java.sun.com/xml/ns/javaee
http://java.sun.com/xml/ns/javaee/web-app_2_5.xsd">
<listener-class>org.springframework.web.context.ContextLoaderListener</listener-class>
<!-- 2.加载Spring容器所有配置文件的路径 -->
<param-name>contextConfigLocation</param-name>
<param-value>classpath:config/spring-*.xml</param-value>
<servlet-name>springMVC</servlet-name>
<servlet-class>org.springframework.web.servlet.DispatcherServlet</servlet-class>
<param-name>contextConfigLocation</param-name>
<param-value>classpath:config/spring-mvc.xml</param-value>
<load-on-startup>1</load-on-startup>
<servlet-name>springMVC</servlet-name>
<url-pattern>*.do</url-pattern>
<listener-class>org.springframework.web.util.IntrospectorCleanupListener</listener-class>
<welcome-file>index.jsp</welcome-file>
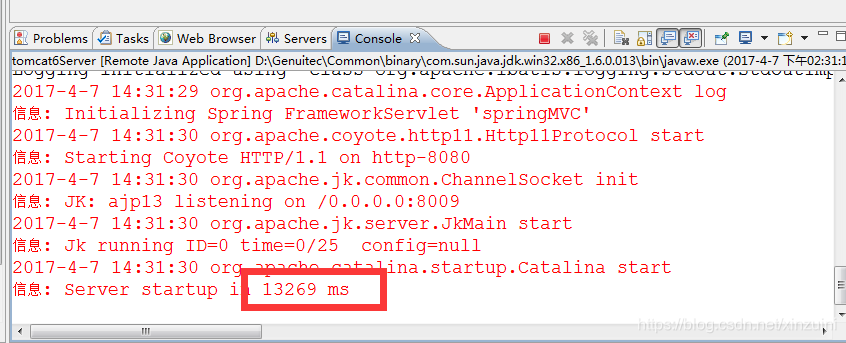
============2.11 整合完毕,环境测试效果如下================
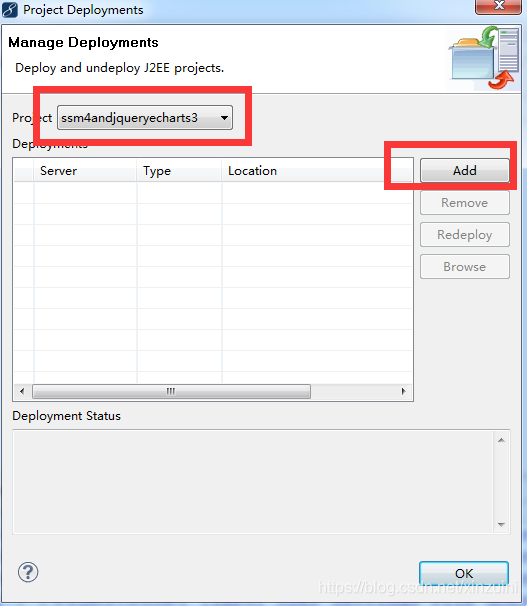
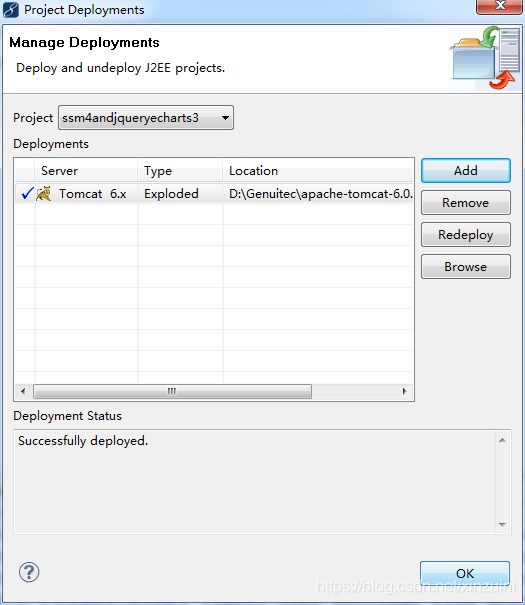
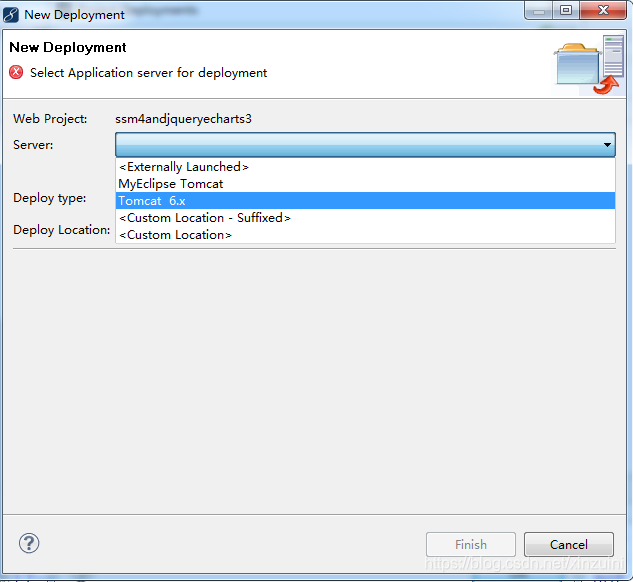
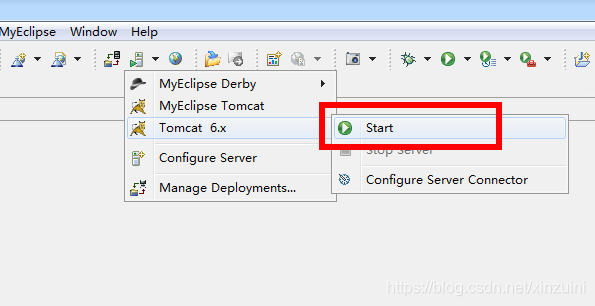
===============2.12 成功展示===================
======================环境搭建完毕======================
大家不要怕麻烦,正因为SSM4整合的麻烦,一般人不会,您会了,企业才会录用你,不然企业凭什么给您高薪?无论生活之路有多难,却始终保持平和心态,不叫屈,不埋怨,怀揣希望,阔步向前……
本文衍生的零基础视频:https://edu.csdn.net/course/detail/4468
本文衍生的实战项目,手把手让你张工作经验视频:https://edu.csdn.net/course/detail/9614
~~~干货博客继续更新中~~~
相关文章
- 面试(4)-spring-Spring面试题和答案
- 史上最全的CSS hack方式一览 jQuery 图片轮播的代码分离 JQuery中的动画 C#中Trim()、TrimStart()、TrimEnd()的用法 marquee 标签的使用详情 js鼠标事件 js添加遮罩层 页面上通过地址栏传值时出现乱码的两种解决方法 ref和out的区别在c#中 总结
- [转]Spring 注解总结
- Spring
- spring事务传播机制
- Spring源码之从缓存中获取Bean(八)
- Spring Boot 2.5.0 重新设计的spring.sql.init 配置有啥用?
- Spring MVC启动过程
- jQuery验证控件jquery.validate.js的使用介绍
- Spring集成Redis集群(含spring集成redis代码)
- spring aop使用,spring aop注解,Spring切面编程
- jquery中Live方法不可用,Jquery中Live方法失效
- Spring整合CXF步骤,Spring实现webService,spring整合WebService
- jQuery插件之验证控件jquery.validate.js
- spring集成PHPRPC及使用
- Jquery_JQuery之DataTables强大的表格解决方案
- Spring注解学习-@Configuration注解使用
- 【转】Spring学习---为什么要用spring,springMVC
- spring mvc Spring Data Redis RedisTemplate [转]
- [转]Spring Boot——2分钟构建spring web mvc REST风格HelloWorld
- Java高手速成 | Spring、JPA与Hibernate的整合
- javaEE之------Spring-----》 AspectJ注解
- 菜鸟学习Spring——60s利用JoinPoint获取參数的值和方法名称
- Spring整合Hibernate的步骤
- Spring Remoting: Hessian--转