
小学生python游戏编程3----拼图游戏-准备
小学生python游戏编程3---拼图游戏-准备
主要设计
1、背景
早在1760年,法英两国几乎同时出现这种既流行又有益的娱乐方式。把一张图片粘在硬纸板上,然后把它剪成不规则的小碎片。最初这些图片都是有教育意义的,要么附有适于年轻人阅读的短文,要么向新兴资产阶级传授历史或地理知识。
到19世纪初,新的大规模生产工业技术赋予了拼图明确的形式。以前庞大笨重的拼图由边缘光滑的碎片排列组成,轻微的震动就能使它们分开。在1840年左右,德国和法国的拼图制造商用联锁的咬接机来切割拼图,现代的拼图迷们都很熟悉这种形式。他们用软木材、夹板和纸板代替硬木薄板,大大降低了成本。最终价格低廉的拼图被各阶层的消费者接受,很快在孩子们、成年人和老年人中掀起玩拼图狂潮。
相信大家都玩过很多纸质的,木质的,电子的拼图游戏,今天就讲讲用python如何实现拼图游戏的准备工作。在图片上写些英语单词,孩子拼完一个基本可以看到一个完整的英语单词。

2、图片分隔
把整张图片分隔成n个小图片
3、把小图片打乱顺序组装成拼图
应用知识点
1、python知识点
1.1 Pillow(PIL)库的用法介绍
Pillow库是一个Python的第三方库。
在Python2中,PIL(Python Imaging Library)是一个非常好用的图像处理库,但PIL不支持Python3,所以有人(Alex Clark和Contributors)提供了Pillow,可以在Python3中使用。
打开一张图片并显示,如下代码
# coding=utf-8
from PIL import Image
image = Image.open("aaa.jpg")
image.show()
1.2 PIL安装
(venv) F:\le_python>pip install pillow
Looking in indexes: https://pypi.doubanio.com/simple
Collecting pillow
  Downloading https://pypi.doubanio.com/packages/ce/1c/c639b5662d3b831c4b95e08bc610a50a5b9e719f71338bedc0117e8dc5d3/Pillow-9.2.0-cp37-cp37m-win32.whl (2.8MB)
    100% |████████████████████████████████| 2.8MB 6.0MB/s
Installing collected packages: pillow
Successfully installed pillow-9.2.0
1.3 Image属性
    image = Image.open("images/yuantu/apple.png")
    print('width: ', image.width)
    print('height: ', image.height)
    print('size: ', image.size)
    print('mode: ', image.mode)
    print('format: ', image.format)
    print('is_animated: ', image.is_animated)
    print('readonly: ', image.readonly)
    print('info:', image.info)
显示:
width:  231
height:  184
size:  (231, 184)
mode:  RGB
format:  PNG
is_animated:  False
readonly:  1
info: {'dpi': (119.9896, 119.9896), 'Software': 'Snipaste'}
width属性表示图片的像素宽度
height属性表示图片的像素高度
width和height组成了size属性,size是一个元组。
mode属性表示图片的模式,如RGBA,RGB,P,L等。
format属性表示图片的格式,格式一般与图片的后缀扩展名相关。
readonly属性表述图片是否为只读,值为1或0,表示的是布尔值。
info属性表示图片的信息,是一个字典。
1.4 image方法
打开文件:
yuantu = Image.open(os.path.join(rootdir,‘apple.png’))

裁剪图片:
image.crop(box=None): 裁剪图片,返回裁剪区域的图片。box表示裁剪的区域,传入长度为4的元组(x0, y0, x1, y1),不传默认为拷贝原图,相当于copy()方法,如果裁剪的区域超过了原图的区域,超出部分用像素格填充。
box解释:
box, 图片粘贴的位置或区域。传入一个长度为2或4的元组,如果不传值,默认为(0, 0),图片被粘贴在当前图片的左上角。如果传入长度为2的元组(x, y),表示被粘贴图片的左上角坐标位置。如果传入长度为4的元组(x1, y1, x2, y2),表示图片粘贴的区域,此时区域的大小必须与被粘贴图片一致,否则会报错,传入的元组长度为其他值也会报错。

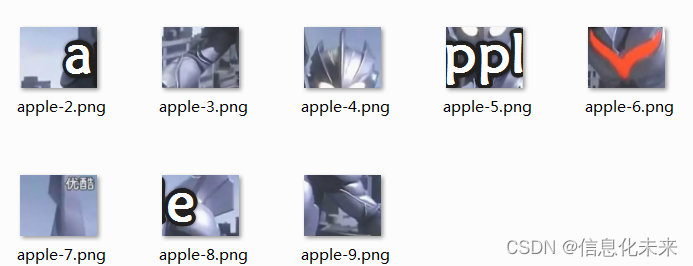
分隔成如下小图
功能截图
代码实现
# -*- coding: utf-8 -*-
# @Time : 2022年10月05日 16时07分
# @Author : Chenyi
# @File : 图片分隔.py
# python install pillow
import os
from PIL import Image
# 分割图片,横向分成x份,纵向分成y份
def cut_image(image, x, y):
width, height = image.size
item_width = int(width / x)
item_height = int(height / y)
box_list = []
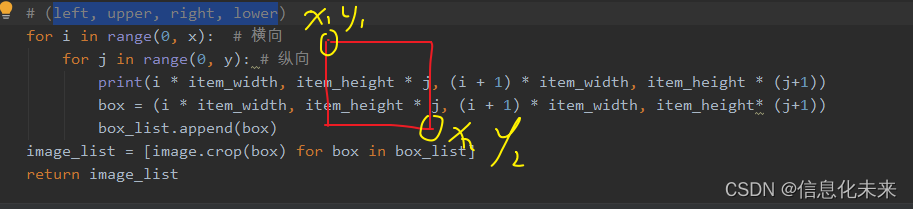
# (left, upper, right, lower)
for i in range(0, x): # 横向
for j in range(0, y): # 纵向
print(i * item_width, item_height * j, (i + 1) * item_width, item_height * (j+1))
box = (i * item_width, item_height * j, (i + 1) * item_width, item_height* (j+1))
box_list.append(box)
image_list = [image.crop(box) for box in box_list]
return image_list
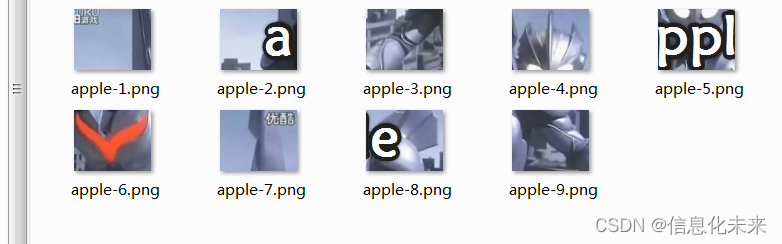
# 保存分割后的图片
def save_images(image_list, dir_name, file_name):
index = 1
for image in image_list:
image.save(dir_name+file_name + '-' + str(index) + '.png', 'PNG')
index += 1
if __name__ == '__main__':
rootdir = "images/yuantu"
# 获取rootdir目录下的文件名清单
list = os.listdir(rootdir)
print(list)
yuantu = Image.open(os.path.join(rootdir,'apple.png'))
print(yuantu)
pics=cut_image(yuantu, 3, 3)
save_images(pics, "images/fenge/", 'apple')
总结
通过此次的《拼图游戏准备》,让我对PIL中image的相关知识有了进一步的了解,对用 python这门语言进行图片处理比以前更深刻的认识。
源码获取
可关注博主后,私聊博主免费获取
需要技术指导,育娃新思考,企业软件合作等更多服务请联系博主
今天是以此模板持续更新此育儿专栏的第 3 /50次。
可以关注我,点赞我、评论我、收藏我啦。
相关文章
- 【华为OD机试真题 python】查找重复代码【2022 Q4 | 100分】
- 地球引擎初级教程——Python API 语法(内涵JavaScript转python工具包介绍)
- 中途转行python?怎么学?没有基础的我30了自学Python转行靠谱吗?
- 《Python和Pygame游戏开发指南》——2.5 pygame.event.Event对象
- 《Python游戏编程入门》——1.4 小结
- 转【Python】Python-skier游戏[摘自.与孩子一起学编程]
- 小学生python游戏编程arcade----灯光示例
- 小学生python游戏编程arcade----精灵调用图片的两种类
- 小学生python游戏编程arcade----烟花粒子
- 小学生python游戏编程arcade----碰撞精灵消失问题
- 小学生python游戏编程arcade----爆炸粒子类
- 小学生python游戏编程arcade----坦克大战2
- 小学生python游戏编程arcade----坦克大战(1)
- 小学生python游戏编程arcade----可旋转炮台的坦克
- 小学生python游戏编程arcade----基本知识4角色动画
- 小学生python游戏编程arcade----基本知识1
- 小学生python游戏编程5----拼图游戏继
- 【python百度智能云】:Python — 三种获取__VIEWSTATE、__VIEWSTATEGENERATOR、__EVENTVALIDATION方法。