
Unity 一些有用的碎片知识整理 之 一(之 四 更新中...)
—— 系列文章链接
目录
三、Unity 中使用C# Conditional 特性做编辑器宏命令条件编译
八、Unity 与 Android 使用 AndroidJNI的交互方式
十、unity-调用动态库 C++/C 打包的 dll-windows 篇
十一、 Unity System.DateTime.Now.Ticks
十三、分屏UI Canvas 的点击事件 EventCamera 的切换,激活对应屏的UI 交互(以左右双屏为例)
十五、Unity 粗略计算场景中所有模型的面数和顶点数(Tris 和 Verts)
十六、Unity 按住 “ Shift+空格 ” 使得聚焦窗口最大化最小化
十七、Unity C# 获取变量的地址(C# 获取对象的地址(测试后感觉不对))
十九、Unity3D 唤醒微信 打开微信(非微信登录、微信分享,只是在设备上调起其他已安装的应用)
二十一、Xml 的序列化读写(注意读写完后,一定记得close,不然可能会影响读写操作的数据正确性)
二十二、Unity工程 打包到Android平台文件读取路径
一、应用切换到后台的事件函数
using System.Collections;
using System.Collections.Generic;
using UnityEngine;

public class TestFocus : MonoBehaviour
{
    // Start is called before the first frame update
    void Start()
    {

    }


    void OnApplicationFocus(bool isFoucs) {
        if (isFoucs == true)
        {
            Debug.Log("OnApplicationFocus:true = "+ isFoucs);
        }
        else
        {
            Debug.Log("OnApplicationFocus:false = " + isFoucs);
        }
    }
    void OnApplicationPause(bool isPause)
    {
        if (isPause == true)
        {
            Debug.Log("OnApplicationPause:true = " + isPause);
        }
        else
        {
            Debug.Log("OnApplicationPause:false = " + isPause);
        }
    }
}
正常进:
OnApplicationFocus, isFocus=True
正常退:
OnApplicationQuit
Home出:
OnApplicationPause, isPause=True
OnApplicationFocus, isFocus=False
Home进:
OnApplicationPause, isPause=False
OnApplicationFocus, _isFocus=True
Kill进程:
当前应用双击Home,然后Kill:
OnApplicationQuit (IOS 有回调,android 没回调)
跳出当前应用,然后Kill:
OnApplicationQuit (IOS和Android都没回调)
二、Unity 时间格式化输出
System.DateTime.Now.ToString("yyyy:MM:dd:HH:mm:ss:fff")
2019:06:19:20:20:37:788
三、Unity 中使用C# Conditional 特性做编辑器宏命令条件编译
1) 概要
在传统的C#项目中,用Conditional特性做条件编译时,需要在Visual Studio中项目的属性里添加上条件编译符号,用法参考这篇文章。
而在Unity项目中,条件编译符号需要在Unity Editor编辑器中添加。
2) 为什么要用条件编译
Unity中最常见的使用条件编译的情况就是分平台编译不同的代码片段。由于Unity是跨平台的,不同平台有不同的特性,我们经常能见到 #if...#endif 来做条件编译的代码块。
另一种常见用法是,例如在编辑器下运行时输出日志,而在打包真机调试时为了节省性能需要关闭日志(在Update()函数中每帧输出日志很耗性能)。此时可以把输出日志的函数使用Conditional特性来标记上,只有在Unity编辑器中开启了指定的宏命令,这个输出日志的函数才能被编译,即可很方便地开关日志。
3) 例子
public static class DebugExtension
    {
        [System.Diagnostics.Conditional("DEBUG")]
    public static void Log(string tag, string message)
    {
        if (EnableLog)
        {
            if (EnableTime)
            {
                Debug.LogFormat("{0} {1}::{2}", DateTime.Now.ToString("HH:mm:ss:fff"), tag, message);
            }
            else
            {
                Debug.LogFormat("{0}::{1}", tag, message);
            }
        }
    }
   }
上面的代码中,通过C#的扩展方法,给所有的System.Object类添加了一个Log()方法,该方法被标记为[System.Diagnostics.Conditional("DEBUG")]。需要在Unity编辑器中添加上DEBUG宏命令,该方法才能被编译。
4) Unity编辑器添加宏命令在File - Build Settings - Player Settings - Other Settings中,如下图

输入了DEBUG后,上面的Log()方法才能被编译。如果去掉DEBUG,所有调用了Log()函数的代码也不会被编译!
四、Unity 自定义日志封装时的注意事项
1、在使用自己封装的Debug时候,在控制台双击Log会直接跳到封装语句里面的Log,而不是调用Debuger的地方,但是有解决方法,打包成dll文件,就不会出现上面这种情况了
2、[System.Diagnostics.Conditional("DEBUG")] 宏定义,调试的时候添加宏定义,发布的时候去掉,可以减少性能消耗
3、添加 tag 标签,传递函数名称作为函数的标记
using System;
using UnityEngine;

/// <summary>
/// 日志打印
/// 1、以前实习的时候写的日志系统是在Debug的事件中加一个监听,
///    把收到的日志保存到文件,这个很多博客都有写,因为大佬要求有行信息,
///    就是 xxxxx cs.168显示一个Log的行号
/// 2、然而在ReleaseBuild里面是没有行号的,别想了,只有Development Build日志才有行号。
/// 3、后来发现行号不是必要的,只要知道哪个函数发出的就好,
///    而且在Debug添加监听有很多局限性,不能修改控制台的Log信息,这时候想到封装Debug
/// 4、但是封装Debug在控制台双击Log会直接跳到封装语句里面的Log,而不是调用Debuger的地方,这个自己没试过说也说不清楚
/// 5、但是有解决方法,打包成dll文件,就不会出现上面这种情况了,如果你看不懂,自己封装一次Debug就知道了
/// 6、[System.Diagnostics.Conditional("DEBUG")] 宏定义,调试的时候添加宏定义,发布的时候去掉,可以减少性能消耗
/// </summary>
public class DebugWrapper
{
    public static bool EnableLog;
    public static bool EnableTime;

    static DebugWrapper()
    {
    }

    [System.Diagnostics.Conditional("DEBUG")]
    public static void Log(string tag, string message)
    {
        if (EnableLog)
        {
            if (EnableTime)
            {
                Debug.LogFormat("{0} {1}::{2}", DateTime.Now.ToString("HH:mm:ss:fff"), tag, message);
            }
            else
            {
                Debug.LogFormat("{0}::{1}", tag, message);
            }
        }
    }

    [System.Diagnostics.Conditional("DEBUG")]
    public static void Log(string tag, string format, params object[] args)
    {
        if (EnableLog)
        {
            string info = tag + "::" + format;
            if (EnableTime)
            {
                info = DateTime.Now.ToString("HH:mm:ss:fff") + " " + info;
            }
            Debug.LogFormat(info, args);
        }
    }

    [System.Diagnostics.Conditional("DEBUG")]
    public static void LogError(string tag, string message)
    {
        if (EnableLog)
        {
            if (EnableTime)
            {
                Debug.LogErrorFormat("{0} {1}::{2}", DateTime.Now.ToString("HH:mm:ss:fff"), tag, message);
            }
            else
            {
                Debug.LogErrorFormat("{0}::{1}", tag, message);
            }
        }
    }

    [System.Diagnostics.Conditional("DEBUG")]
    public static void LogError(string tag, string format, params object[] args)
    {
        if (EnableLog)
        {
            string info = tag + "::" + format;
            if (EnableTime)
            {
                info = DateTime.Now.ToString("HH:mm:ss:fff") + " " + info;
            }
            Debug.LogErrorFormat(info, args);
        }
    }

    [System.Diagnostics.Conditional("DEBUG")]
    public static void LogWarning(string tag, string message)
    {
        if (EnableLog)
        {
            if (EnableTime)
            {
                Debug.LogWarningFormat("{0} {1}::{2}", DateTime.Now.ToString("HH:mm:ss:fff"), tag, message);
            }
            else
            {
                Debug.LogWarningFormat("{0}::{1}", tag, message);
            }
        }
    }

    [System.Diagnostics.Conditional("DEBUG")]
    public static void LogWarning(string tag, string format, params object[] args)
    {
        if (EnableLog)
        {
            string info = tag + "::" + format;
            if (EnableTime)
            {
                info = DateTime.Now.ToString("HH:mm:ss:fff") + " " + info;
            }
            Debug.LogWarningFormat(info, args);
        }
    }

}
五、Unity 中 获取当前方法的名称空间、类名和方法名称
1)取得当前方法命名空间:System.Reflection.MethodBase.GetCurrentMethod().DeclaringType.Namespace
2)取得当前方法类全名,包括命名空间:System.Reflection.MethodBase.GetCurrentMethod().DeclaringType.FullName
3)取得当前方法名:System.Reflection.MethodBase.GetCurrentMethod().Name
using UnityEngine;

namespace XAN_Test {
    public class TT : MonoBehaviour
    {
        // Start is called before the first frame update
        void Start()
        {

            Debug.Log(GetMethodInfo());
        }

        public string GetMethodInfo()
        {
            string str = "";

            //取得当前方法命名空间
            str += "命名空间名:" + System.Reflection.MethodBase.GetCurrentMethod().DeclaringType.Namespace + "\n";

            //取得当前方法类全名 包括命名空间
            str += "类名:" + System.Reflection.MethodBase.GetCurrentMethod().DeclaringType.FullName + "\n";

            //取得当前方法名
            str += "方法名:" + System.Reflection.MethodBase.GetCurrentMethod().Name + "\n";

            str += "\n";

            //父方法
            System.Diagnostics.StackTrace ss = new System.Diagnostics.StackTrace(true);
            System.Reflection.MethodBase mb = ss.GetFrame(1).GetMethod();

            //取得父方法命名空间
            str += mb.DeclaringType.Namespace + "\n";

            //取得父方法类名
            str += mb.DeclaringType.Name + "\n";

            //取得父方法类全名
            str += mb.DeclaringType.FullName + "\n";

            //取得父方法名
            str += mb.Name + "\n";

            return str;

        }

    }
}
输出打印结果:
命名空间名:XAN_Test
类名:XAN_Test.TT
方法名:GetMethodInfo
XAN_Test
TT
XAN_Test.TT
Start
UnityEngine.Debug:Log(Object)
XAN_Test.TT:Start() (at Assets/TestTest/TT.cs:17)六、查看apk的签名信息
1)配置 jdk 中的 bin 路径到环境变量中 ,例如 C:\Program Files\Java\jdk1.8.0_181\bin

2、在 cmd 中输入 keytool -list -printcert -jarfile xxxx.apk 获取apk 的签名信息 (如果之前沒有配置jdk/bin的环境,可能会报 keytool 未知命令)

七、Unity 与 Android 交互的一些整理
1)获得UnityPlayer
AndroidJavaClass playerCls = new AndroidJavaClass("com.unity3d.player.UnityPlayer");2)获得当前activity:
AndroidJavaObject activity = playerCls.GetStatic<AndroidJavaObject>("currentActivity");3)获得applicationContext:
var applicationContext = activity.Call<AndroidJavaObject>("getApplicationContext");4)获取jar/aar中的某个实例和方法:
AndroidJavaClass jar = new AndroidJavaClass("com.xxx.xxx.xxx.xxx");5)如果有实例,可以通过以下语句获得
var instance= jar.CallStatic<AndroidJavaObject>("getInstance");6)成功获得实例后,就可以调用此类中任意可以访问到的方法了
instance.Call<int>("init", applicationContext , activity);在这里是访问了一个方法名为init,接收applicationContext,activity两个参数,并且返回int类型的函数,在这里要着重注意函数的类型,用相应的方法才能访问到,否则会出现异常错误。
八、Unity 与 Android 使用 AndroidJNI的交互方式
//JNI 新建一个线程

  AndroidJNI.AttachCurrentThread();


  //获得类

  IntPtr cls = AndroidJNI.FindClass("com/unity3d/player/UnityPlayer");

  IntPtr fid = AndroidJNI.GetStaticFieldID(cls, "currentActivity", "Landroid/app/Activity;");

  IntPtr obj = AndroidJNI.GetStaticObjectField(cls, fid);


  //获得类

  IntPtr cls_OurAppActitvityClass = AndroidJNI.FindClass("com/bodhi/TalkingBodhi");


  //获得方法

  IntPtr enableMethod = AndroidJNI.GetMethodID(cls_OurAppActitvityClass, "EnableADs", "V");


  //如果方法存在,则执行

  if (AndroidJNI.IsInstanceOf(obj, cls_OurAppActitvityClass) != false) {

      jvalue[] myArray = new jvalue[1];

      AndroidJNI.CallVoidMethod(obj, enableMethod, myArray);

  }
AndroidJNI 安卓JNI

'Raw' JNI interface to Android Dalvik (Java) VM from Mono (CS/JS)

从Mono (CS/JS),原始JNI接口到安卓Dalvik (Java)虚拟机。

    JNI是Java Native Interface的缩写,中文为JAVA本地调用。从Java1.1开始,Java Native Interface(JNI)标准成为java平台的一部分,它允许Java代码和其他语言写的代码进行交互。JNI一开始是为了本地已编译语言,尤其是C和C++而设计的,但是它并不妨碍你使用其他语言,只要调用约定受支持就可以了。

Class Functions类函数

    AttachCurrentThread
    Attaches the current thread to a Java (Dalvik) VM.
    附加当前线程到一个Java(Dalvik)虚拟机。


    DetachCurrentThread
    Detaches the current thread from a Java (Dalvik) VM.
    从一个Java(Dalvik)虚拟机,分类当前线程。


    GetVersion
    Returns the version of the native method interface.
    返回本地方法接口的版本。


    FindClass
    This function loads a locally-defined class.
    这个函数加载一个本地定义的类。


    FromReflectedMethod
    Converts a java.lang.reflect.Method or java.lang.reflect.Constructor object to a method ID.
    转换一个java.lang.reflect.Method或java.lang.reflect.Constructor对象到一个方法ID。


    FromReflectedField
    Converts a java.lang.reflect.Field to a field ID.
    转换一个java.lang.reflect.Field到一个域ID。


    ToReflectedMethod
    Converts a method ID derived from clazz to a java.lang.reflect.Method or java.lang.reflect.Constructor object.


    转换一个取自clazz的方法ID到一个java.lang.reflect.Method 或 java.lang.reflect.Constructor对象。


    ToReflectedField
    Converts a field ID derived from cls to a java.lang.reflect.Field object.
    转换一个取自clazz的域ID到一个java.lang.reflect.Field对象。


    GetSuperclass
    If clazz represents any class other than the class Object, then this function returns the object that represents the superclass of the class specified by clazz.
九、Unity DllImport 以及 并口通讯
using System.Runtime.InteropServices;
[DllImport("NaviteCode")]
A、dll放置的地方
1、exe所在目录
2、System32目录
3、环境变量目录
4、或者可以这样server.MapPath(.\bin*.dll)web中的
5、后来发现用[DllImport(@"C:\OJ\Bin\Judge.dll")]这样指定DLL的绝对路径就可以正常装载。
6、非托管的处理会比较麻烦.实际上,你拷贝到bin没有任何帮助,因为CLR会把文件拷贝到一个临时目录下,然后在那运行web,而CLR只会拷贝托管文件,这就是为什么我们明明把非托管的dll放在了bin下却依然提示不能加载模块了.
7 、导入Dll到Unity中。将Dll拷贝到Assets目录下任何一个目录都可以。一般是在Plugins目录中,因为Dll大多是外部功能块,同时也方便跨语言调用。
8、Unity里面调用Dll暂时遇到的坑
B、并口通讯
namespace ParallelPortControl
{
    class PortControl // Import dll to project
    {
        [DllImport("inpout32.dll", EntryPoint = "Out32")]
        public static extern void Output(int address, int value); // decimal
    }

  public partial class Form1 : Form
  {
    int decData = 0;
    int decAdd = 888; // 378h Selected Default

    PortControl.Output(decAdd, decData);
  }
}
1、简单地说下32位环境,使用x86配置
2、端口888转为16进制就是0378
3、kernel32.dll暂时未解决
十、unity-调用动态库 C++/C 打包的 dll-windows 篇
1、用vs新建个工程,随便写个函数


#ifndef __NativeCode_H__
#define __NativeCode_H__

#ifndef EXPORT_DLL
#define EXPORT_DLL __declspec(dllexport) //导出dll声明
#endif

extern "C" {
	EXPORT_DLL int MyAddFunc(int _a, int _b);
}
#endif
// NaviteCode.cpp : 定义 DLL 应用程序的导出函数。
//

#include "stdafx.h"

#include "NaviteCode.h"


extern "C" {
	int MyAddFunc(int _a, int _b)
	{
		return _a + _b;
	}
}
2、修改vs导出配置,导出为64位Release的dll(应为用的是unity是64位的)

3、生成,就出来了这个 NativeCode.dll


4、拷贝 NativeCode.dll 到unity工程中
- unity存放动态库是由规则的不同平台放置的目录不同,官网传送门,点我
- 所以按照规则,把 NativeCode.dll 放入 Assets\Plugins\x86_64 目录中

5、c#中调用一下,随便create个c#挂在场景的对象中
using System.Runtime.InteropServices;
using UnityEngine;

public class Test : MonoBehaviour
{

    [DllImport("NaviteCode")]
    //[DllImport(@"D:\Temp\DLL\NaviteCode.dll")]
    public static extern int MyAddFunc(int x, int y);

    // Start is called before the first frame update
    void Start()
    {
        int ret = MyAddFunc(20, 30);
        Debug.LogFormat("---ret == {0}", ret);
    }

}

6、运行结果

十一、 Unity System.DateTime.Now.Ticks
System.DateTime.Now.Ticks 是指从DateTime.MinValue之后过了多少时间,10000000为一秒,保存在long类型的变量里,可以将它传到datetime的构造函数内转成时间类型。
一个以0.1纳秒为单位的时间戳,
就是一个long型的数,
其实DateTime本质上就是一个long型的,通过0.1纳秒的单位,换算成各种时间,如果分,秒,年月日等等这些组合起来就是一个DateTime类型了
=========================================================================
此属性的值表示自 0001 年 1 月 1 日午夜 12:00:00 以来已经过的时间的以 100 毫微秒为间隔的间隔数。
void OnGUI()
    {
        if (GUI.Button(new Rect(100, 100, 200, 200), "Test DLL"))
        {
            long before = System.DateTime.Now.Ticks;
            Debug.Log("dlltest=" + dlltest());
            Debug.Log("take " + (System.DateTime.Now.Ticks - before));
        }
        if (GUI.Button(new Rect(100, 300, 200, 200), "SetCallback"))
        {
            long before = System.DateTime.Now.Ticks;
            SetCallback(Ucallback);
            Debug.Log("take " + (System.DateTime.Now.Ticks - before));
        }
        if (GUI.Button(new Rect(300, 300, 200, 200), "Test Mono"))
        {
            long before = System.DateTime.Now.Ticks;
            Debug.Log("monotest=" + monotest());
            Debug.Log("take " + (System.DateTime.Now.Ticks - before));
        }
    }
十二、Unity 支持的几种 3D 模型格式

十三、分屏UI Canvas 的点击事件 EventCamera 的切换,激活对应屏的UI 交互(以左右双屏为例)
 void Update () {

        //Canvas 相机 根据屏幕点击切换
        UICanvasCameraChange();
}

/// <summary>
    /// 根据鼠标点击位置,切换左右眼相机,激活切换对应UI交互
    /// </summary>
    private void UICanvasCameraChange() {
        if (Input.GetMouseButton(0)) {
            // 判断鼠标点击在左边屏幕,还是右边屏幕,设置不同相机
            // worldCamera 就是 Canvas 的 EventCamera
            if ((Screen.width) / 2 <= Input.mousePosition.x)
            {
                settingCancas.worldCamera = CameraManager.Instance.cameraRight;
            }
            else {
                settingCancas.worldCamera = CameraManager.Instance.cameraLeft;
            }
        }
    }
十四、Unity UGUI——遮罩效果(Mask)


十五、Unity 粗略计算场景中所有模型的面数和顶点数(Tris 和 Verts)
using UnityEngine;

using System.Collections;

public class CalculateVertsAndTris : MonoBehaviour

{
    public float f_UpdateInterval = 0.5F;  //刷新间隔

    private float f_LastInterval;      //上一次刷新的时间间隔

    public static int verts;

    public static int tris;
    // Use this for initialization

    void Start()
    {

        f_LastInterval = Time.realtimeSinceStartup;

    }

    ///

    /// 得到场景中所有的GameObject

    ///

    void GetAllObjects()

    {

        verts = 0;
        tris = 0;

        GameObject[] ob = FindObjectsOfType(typeof(GameObject)) as GameObject[];

        foreach (GameObject obj in ob)

        {

            GetAllVertsAndTris(obj);
        }

    }

    //得到三角面和顶点数

    void GetAllVertsAndTris(GameObject obj)
    {

        Component[] filters;

        filters = obj.GetComponentsInChildren<MeshFilter>();

        foreach (MeshFilter f in filters)

        {
            tris += f.sharedMesh.triangles.Length / 3;

            verts += f.sharedMesh.vertexCount;

        }

        SkinnedMeshRenderer smr = obj.GetComponent<SkinnedMeshRenderer>();
        if (smr != null)
        {
            tris += smr.sharedMesh.triangles.Length / 3;
            verts += smr.sharedMesh.vertexCount;
        }


    }

    void OnGUI()
    {

        string vertsdisplay = verts.ToString("#,##0 verts");

        GUILayout.Label(vertsdisplay);

        string trisdisplay = tris.ToString("#,##0 tris");
        GUILayout.Label(trisdisplay);

    }

    // Update is called once per frame

    void Update()
    {

        if (Time.realtimeSinceStartup > f_LastInterval + f_UpdateInterval)

        {

            f_LastInterval = Time.realtimeSinceStartup;

            GetAllObjects();

        }
    }

}
十六、Unity 按住 “ Shift+空格 ” 使得聚焦窗口最大化最小化
十七、Unity C# 获取变量的地址(C# 获取对象的地址(测试后感觉不对))
    public class RAM
    {

        public void Test()
        {
            try
            {
                int num_Size = 100000000;
                // 获取整型的地址
                var addr = getMemory(num_Size);
                Console.WriteLine("num_Size addr = " + addr);

                Person pp = new Person();
                pp.Id = 99;
                pp.Name = "test";
                pp.Sex = "nan";
                // 获取对象的地址
                var addr2 = getMemory(pp);
                Console.WriteLine("num_Size addr = " + addr2);

            }
            catch (Exception ex)
            {

            }
        }


        public string getMemory(object o) // 获取引用类型的内存地址方法
        {
            GCHandle h = GCHandle.Alloc(o, GCHandleType.WeakTrackResurrection);

            IntPtr addr = GCHandle.ToIntPtr(h);

            return "0x" + addr.ToString("X");
        }

    }


    [StructLayout(LayoutKind.Sequential)]
    public class Person
    {
        public int Id { get; set; }
        public string Name { get; set; }
        public string Sex { get; set; }
    }
注意:自己在Unity中测试,同一个变量,答应两次后,同一个变量或者对象的地址不一样,具体如下:
using System;
using System.Runtime.InteropServices;
using UnityEngine;

public class GetAddress : MonoBehaviour
{
    // Start is called before the first frame update
    void Start()
    {
        int i = 12;
        Vector3 v3 = new Vector3(1,2,3);
        myTestClass myTest = new myTestClass(4,5);

        Debug.Log("int i 在内存中的地址为:"+ getMemory(i));
        Debug.Log("int i 在内存中的地址为:"+ getMemory(i));
        Debug.Log("Vector v3 在内存中的地址为:"+ getMemory(v3));
        Debug.Log("Vector v3 在内存中的地址为:"+ getMemory(v3));
        Debug.Log("myTestClass myTest 在内存中的地址为:" + getMemory(myTest));
        Debug.Log("myTestClass myTest 在内存中的地址为:" + getMemory(myTest));
    }

    // Update is called once per frame
    void Update()
    {

    }

    /// <summary>
    /// 获取对应变量或对象在内存中的地址
    /// </summary>
    /// <param name="o">变量或者对象</param>
    /// <returns>返回变量或者对象的地址字符串</returns>
    public string getMemory(object o) // 获取引用类型的内存地址方法
    {
        GCHandle h = GCHandle.Alloc(o, GCHandleType.WeakTrackResurrection);

        IntPtr addr = GCHandle.ToIntPtr(h);

        return "0x" + addr.ToString("X");
    }

    /// <summary>
    /// 用来测试的类
    /// </summary>
    class myTestClass
    {
        int a;
        float y;

        public myTestClass(int a, float y)
        {
            this.a = a;
            this.y = y;
        }
    }
}

十八、Unity C# int 和 IntPtr 相互转换
public class TestIntptr : MonoBehaviour
{
    // Start is called before the first frame update
    void Start()
    {
        // int 转为 IntPtr
        int i = 12;
        IntPtr p = new IntPtr(i);
        IntPtr p1 = (IntPtr)(i);

        Debug.Log("i = "+ getMemory(i) + " p = "+ p.ToString("X"));

        // IntPtr 转为 int
        int myi = (int)p;
        Debug.Log("myi = "+ myi);

        Debug.Log("myTestClass mTC:"+getMemory(new myTestClass(1,2)));

    }

    public string getMemory(object o) // 获取引用类型的内存地址方法
    {
        GCHandle h = GCHandle.Alloc(o, GCHandleType.WeakTrackResurrection);

        IntPtr addr = GCHandle.ToIntPtr(h);

        return "0x" + addr.ToString("X");
    }

    class myTestClass {
        int a;
        float y;

        public myTestClass(int a,float y) {
            this.a = a;
            this.y = y;
        }
    }
}
十九、Unity3D 唤醒微信 打开微信(非微信登录、微信分享,只是在设备上调起其他已安装的应用)
public void OnButtonClick()
{
	Application.OpenURL("weixin://");    // weixin:// 为应用的URL
}
二十、Unity 中 DllImport 的属性简介
API函数是构筑Windows的基石, 是Windows编程的必备利器。每一种Windows应用程序开发工具都提供间接或者直接的方式调用Win32API,C#也不例外。使用Win32API的一个好处就是,我们可以实现更多的功能。
首先,要引入命名空间:using System.Runtime.InteropServices;
然后,声明在程序中所要用到的API函数。注意方法体为空。
DllImport属性用于指定包含外部方法的实现的dll位置。
(1)DllImport属性只能放在方法声明上。
(2)DllImport具有单个定位参数:指定包含被导入方法的dll名称的dllName参数。
(3)DllImport具有6个命名参数:
- a、CallingConvention参数:指示入口点的调用约定,如果未指定CallingConvention,则使用默认值CallingConvention.Winapi;
- b、CharSet参数:指示用在入口点种的字符集。如果未指定CharSet,则使用默认值CharSet.Auto;
- c、EntryPoint参数:给出所声明的方法在dll中入口点的名称。如果未指定EntryPoint,则使用方法本身的名称;
- d、ExactSpelling参数:指示EntryPoint是否必须与指示的入口点的拼写完全匹配。如果未指定ExactSpelling,则使用默认值false;
- e、PreserveSig参数:指示方法的签名应被应当被保留还是被转换。当签名被转换时,它被转换为一个具有HRESULT返回值和该返回值的一个名为retval的附加输出参数签名。如果未指定PreserveSig,则使用默认值false;
- f、SetLastError参数:指示方法是否保留Win32上的错误,如果未指定SetLastError,则使用默认值false。
DllImport是一次性属性类,而且用DllImport修饰的方法必须具有extern修饰符。
例子:[DllImport("kernel32")]
private static extern void GetWindowsDirectory(StringBuilder WinDir,int count);
[DllImport("user32.dll",EntryPoint = "FlashWindow")]
private static extern bool FlashWindow(IntPtr hWnd,bool bInvert);
[DllImport("ws2_32.dll")]
private static extern int inet_addr(string cp)
[DllImport("IPHLPAPI.dll")]
private static extern int SendARP(Int32 DestIP, Int32 SrcIP, ref Int64 pMacAddr, ref Int32 PhyAddrLen);
二十一、Xml 的序列化读写(注意读写完后,一定记得close,不然可能会影响读写操作的数据正确性)
 //数据 xml 序列化成 string
            StringWriter stringWriter = new StringWriter();
            XmlSerializer xmlSerializer = new XmlSerializer(typeof(List<PlayerPositionData>));
            xmlSerializer.Serialize(stringWriter,playerPositionDataList);
            stringWriter.Close();
            string playPositionDataListString = stringWriter.ToString();
            Dictionary<byte, object> data = new Dictionary<byte, object>();
            data.Add((byte)ParameterCode.PlayerPositionDataList, playPositionDataListString);
// xml 读取解析xml序列化数据
string playerPositionDataListString = DictionaryTool.GetValue<byte, object>(eventData.Parameters,(byte)ParameterCode.PlayerPositionDataList) as string;
Debug.Log("OnEvent:playerPositionDataListString"+ playerPositionDataListString);
using (StringReader stringReader = new StringReader(playerPositionDataListString)) {
XmlSerializer xmlSerializer = new XmlSerializer(typeof(List<PlayerPositionData>));
List<PlayerPositionData> playerPositionDataList = (List<PlayerPositionData>) xmlSerializer.Deserialize(stringReader);
stringReader.Close();
player.OnSyncPlayerPositionEvent(playerPositionDataList);二十二、Unity工程 打包到Android平台文件读取路径
当我们在Unity中开发了一个应用 然后想把他打包到android平台下,这时如果你的应用没有读取什么本地文件,一般来说是没有什么问题的,但是如果有本地xml或Json文件的读取,这时没有做路径的处理,那么打包后的apk就会出现问题,下来住要是分享如何处理android路径。
1. 第一种 路径加载文件Resources,当你在Unity工程的Asset路径下创建一个Resources文件夹,然后将一些资源文件放到该文件夹下,那么可以用脚本来直接加载Resources文件夹下的资源。
Resources.Load("文件名字,注:不包括文件后缀名");这样Load方法需要传入一个string类型的参数,然后返回Resources文件夹下的对应物体的GameObject对象。要注意的是用这种方法可以在PC端和Android加载资源,但是不能修改其中的资源,也就是说只可以读不可以写。所以一般都放一些预设体,当从PC端打包到android端的时候,这个文件夹中的资源会把没有用的东西都自己舍去只留下项目中真正使用的部分,相当于做了一定的优化。
2.第二种 直接放在项目根路径下来保存文件,把XML文件直接创建到Asset或者Asset目录下的其他文件夹中,在PC平台中可以使用Application.dataPath+路径 直接方法对应文件,但是在移动平台这样是不能访问的。Application.dataPath返回的其实就是Asset的根目录。
3.第三种 在Asset目录下创建StreamingAssets文件夹,这个文件夹中存放的资源在PC端可以实现可读可写操作,但是在移动端只能只能读,不能写,当我们通关后想把一些信息存起来是不可以的。
string filepath = Application.dataPath +"/StreamingAssets"+"/my.xml";
public static string LoadFile(string filePath)
{
    string url = Application.streamingAssetsPath + "/" + filePath;
    #if UNITY_EDITOR
    return File.ReadAllText(url);
    #elif UNITY_ANDROID
    WWW www = new WWW(url);
    while (!www.isDone) { }
    return www.text;
    #endif
}
在Android里读取文件,得用WWW来读取,如下代码:
4.第四种persistentDataPath 该路径下的文件是存放在手机沙盒当中的,在手机端是可读可写的,当我们想要用一个文件来存放每关的信息时,这个方式是可以的,但是由于这个文件我们无法再开发中直接创建,所以在项目的文件数据管理模块中,应用代码来生成这个文件比如说XML、Json这样生成的文件可以在移动端自由读写。
二十三、Unity3D 手游开发中所有特殊的文件夹
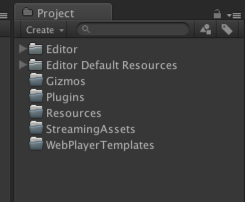
1.Editor
Editor文件夹可以在根目录下,也可以在子目录里,只要名子叫Editor就可以。比如目录:/xxx/xxx/Editor 和 /Editor 是一样的,无论多少个叫Editor的文件夹都可以。Editor下面放的所有资源文件或者脚本文件都不会被打进发布包中,并且脚本也只能在编辑时使用。一般呢会把一些工具类的脚本放在这里,或者是一些编辑时用的DLL。 比如我们现在要做类似技能编辑器,那么编辑器的代码放在这里是再好不过了,因为实际运行时我们只需要编辑器生成的文件,而不需要编辑器的核心代码。
2.Editor Default Resources
Editor Default Resources注意中间是有空格的,它必须放在Project视图的根目录下,如果你想放在/xxx/xxx/Editor Default Resources 这样是不行的。你可以把编辑器用到的一些资源放在这里,比如图片、文本文件、等等。它和Editor文件夹一样都不会被打到最终发布包里,仅仅用于开发时使用。你可以直接通过EditorGUIUtility.Load去读取该文件夹下的资源。
		TextAsset text = 	EditorGUIUtility.Load("test.txt")as TextAsset;
		Debug.Log(text.text);
3.Gizmos
我觉得这个文件夹其实没什么用处,如下代码所示它可以在Scene视图里给某个坐标绘制一个icon。它的好处是可以传一个Vecotor3 作为图片显示的位置。 参数2就是图片的名子,当然这个图片必须放在Gizmos文件夹下面。
 void OnDrawGizmos() {
        Gizmos.DrawIcon(transform.position, "0.png", true);
    }
如果只想挂在某个游戏对象身上,那么在Inspecotr里面就可以直接设置。。
这里还是要说说OnDrawGizmos()方法,只要脚本继承了MonoBehaviour后,并且在编辑模式下就会每一帧都执行它。发布的游戏肯定就不会执行了,它只能用于在scene视图中绘制一些小物件。比如要做摄像机轨迹,那么肯定是要在Scene视图中做一个预览的线,那么用Gizmos.DrawLine 和Gizmos.DrawFrustum就再好不过了。
4.Plugins
如果做手机游戏开发一般 andoird 或者 ios 要接一些sdk 可以把sdk依赖的库文件 放在这里,比如 .so .jar .a 文件。这样打完包以后就会自动把这些文件打在你的包中。
5.Resources
可以在根目录下,也可以在子目录里,只要名子叫Resources就可以。比如目录:/xxx/xxx/Resources 和 /Resources 是一样的,无论多少个叫Resources的文件夹都可以。Resources文件夹下的资源不管你用还是不用都会被打包进.apk或者.ipa
Resource.Load :编辑时和运行时都可以通过Resource.Load来直接读取。
Resources.LoadAssetAtPath() :它可以读取Assets目录下的任意文件夹下的资源,它可以在编辑时或者编辑器运行时用,它但是它不能在真机上用,它的路径是”Assets/xx/xx.xxx” 必须是这种路径,并且要带文件的后缀名。
AssetDatabase.LoadAssetAtPath():它可以读取Assets目录下的任意文件夹下的资源,它只能在编辑时用。它的路径是”Assets/xx/xx.xxx” 必须是这种路径,并且要带文件的后缀名。
我觉得在电脑上开发的时候尽量来用Resource.Load() 或者 Resources.LoadAssetAtPath() ,假如手机上选择一部分资源要打assetbundle,一部分资源Resource.Load().那么在做.apk或者.ipa的时候 现在都是用脚本来自动化打包,在打包之前 可以用AssetDatabase.MoveAsset()把已经打包成assetbundle的原始文件从Resources文件夹下移动出去在打包,这样打出来的运行包就不会包行多余的文件了。打完包以后再把移动出去的文件夹移动回来。
6. StreamingAssets
这个文件夹下的资源也会全都打包在.apk或者.ipa 它和Resources的区别是,Resources会压缩文件,但是它不会压缩原封不动的打包进去。并且它是一个只读的文件夹,就是程序运行时只能读 不能写。它在各个平台下的路径是不同的,不过你可以用Application.streamingAssetsPath 它会根据当前的平台选择对应的路径。
有些游戏为了让所有的资源全部使用assetbundle,会把一些初始的assetbundle放在StreamingAssets目录下,运行程序的时候在把这些assetbundle拷贝在Application.persistentDataPath目录下,如果这些assetbundle有更新的话,那么下载到新的assetbundle在把Application.persistentDataPath目录下原有的覆盖掉。
因为Application.persistentDataPath目录是应用程序的沙盒目录,所以打包之前是没有这个目录的,直到应用程序在手机上安装完毕才有这个目录。
StreamingAssets目录下的资源都是不压缩的,所以它比较大会占空间,比如你的应用装在手机上会占用100M的容量,那么你又在StreamingAssets放了一个100M的assetbundle,那么此时在装在手机上就会在200M的容量。
相关文章
- 【系统架构】如何解决热点数据更新问题
- MP(MyBatis-Plus)实现乐观锁更新功能
- .NET Reflector 7.6.1.824 Edition .NET程序反编译神器(附插件安装教程2012-10-13更新) 完全破解+使用教程
- 关闭IOS更新功能(ios4/5/6)
- 重新整理 .net core 实践篇—————服务的配置更新[十三]
- FileZilla关闭更新检测
- 【问题解决方案】Mac的软件更新中隐藏或开启MacOS Catalina更新提示的终端命令
- Kubernetes详解(二十四)——Deployment控制器更新实战与查看
- reactjs组件的生命周期函数:getSnapshotBeforeUpdate更新之前获取快照
- 【安富莱】STM32H7用户手册发布,重在BSP驱动包设计方法,HAL库的框架学习,授人以渔,更新至95章(2022-04-11)
- Elasticsearch 更新索引settings
- SAP Hybris Enterprise Commerce的一些有用链接 - 保证持续更新
- Interview之ML:机器学习算法工程师结构知识思维导图集合、求职九大必备技能之【数学基础、特征工程能力、模型评估和优化、机器学习基本概念/经典算法、深度学习算法、业务与应用】(持续更新)
- POJ2828 Buy Tickets 【线段树】+【单点更新】+【逆序】
- PostgreSQL的学习心得和知识总结(二十三)|PostgreSQL数据库内置函数汇总(持续更新...)
- Deep Freeze冰点无法冻结,提示由于正在等待重启以完成windows更新
- 抖音成牛年春晚独家合作伙伴;微信8.0安卓/IOS版正式更新;孙正义辞去软银董事长…
- yum更新Centos7的内核到最新
- 批量更新本机中的Python包