
Win10:SpringBoot+Vue+Nginx前后端分离
环境:
Windows10家庭版+JDK1.8_x64+IDEA:2020.3+Nginx:1.22.1+Node:14.16.0+Npm:6.14.11+Vue:2.5.2;
实现:
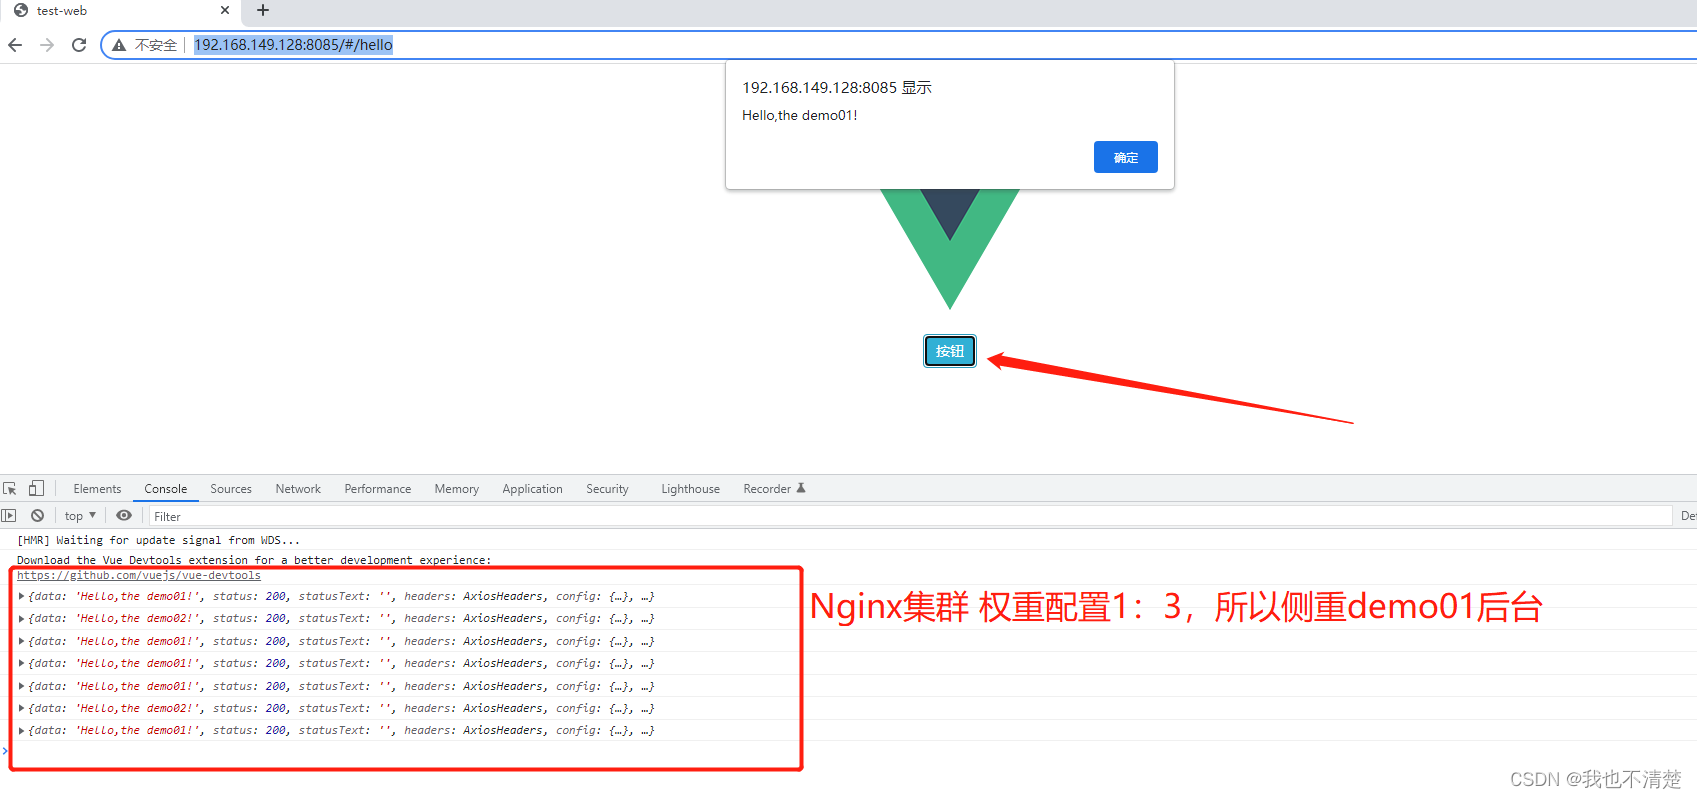
Vue+SpringBoot前后端分离,使用Nginx做代理、双服务负载均衡,双服务权重配置,侧重主服务,副服务用于灾备。
待考量:
后续后端可增加SpringBoot Cloud Gateway微服务;跨域问题,单点设计。
源码:例子源码
目录
一、前端Vue
1、环境安装
2、创建Vue项目

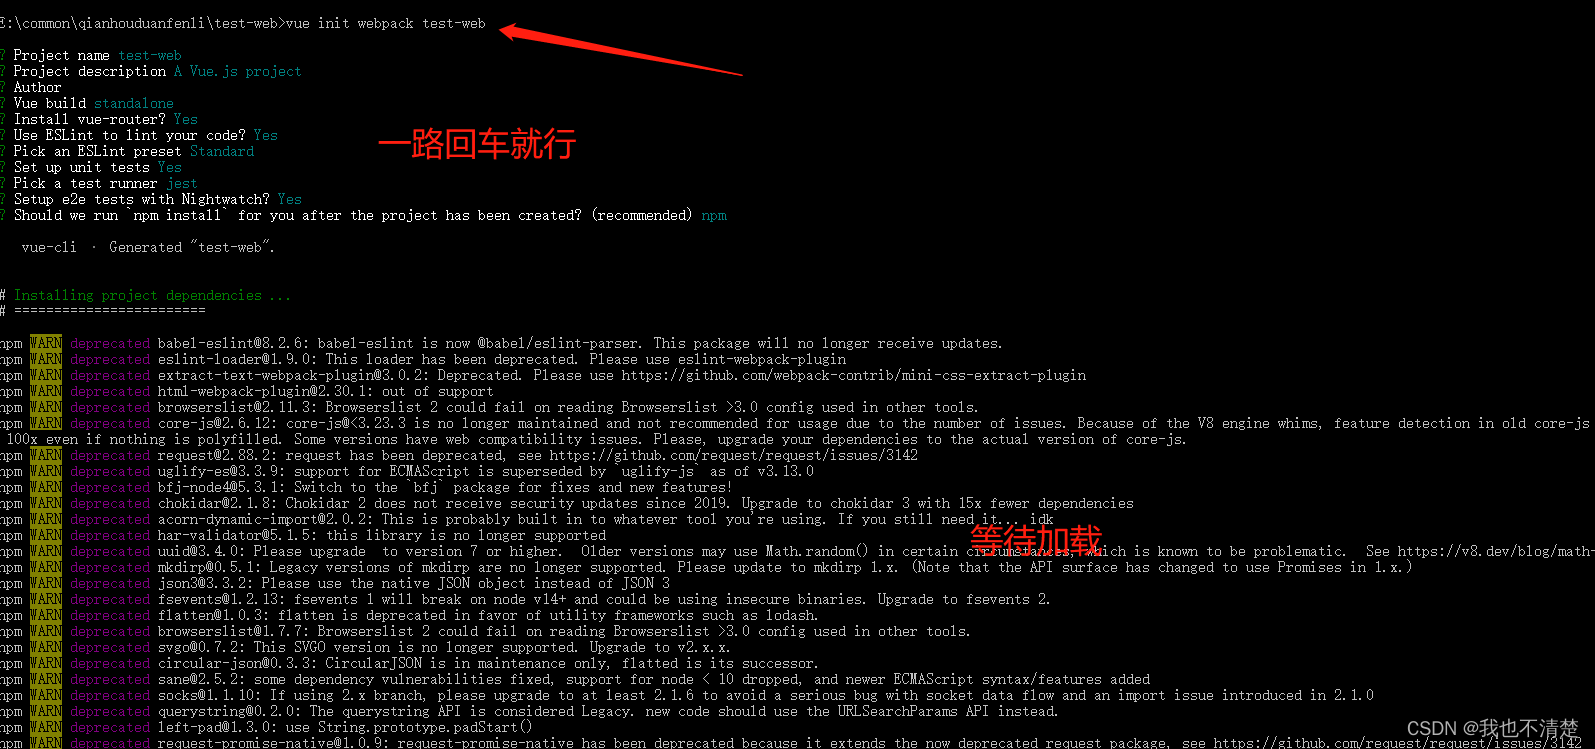
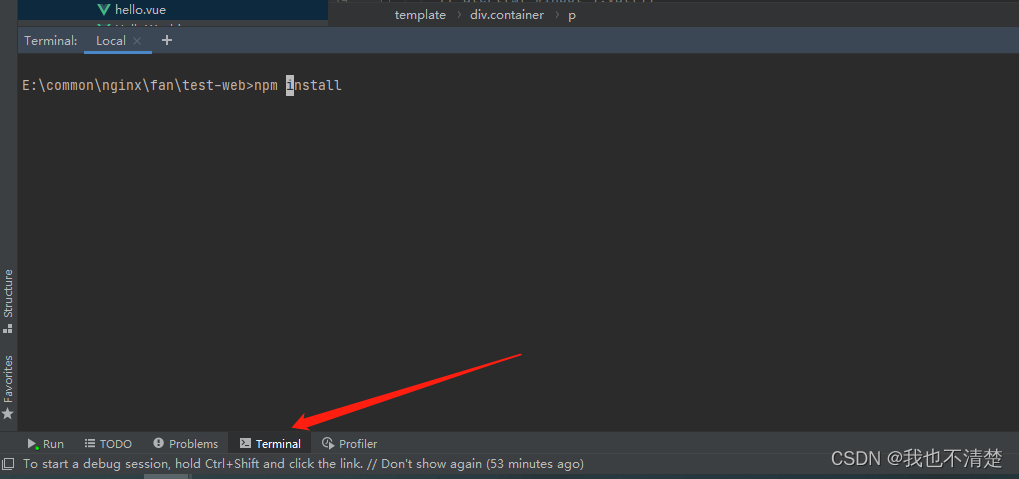
3、使用IDEA,open 、terminal中 npm install 依赖
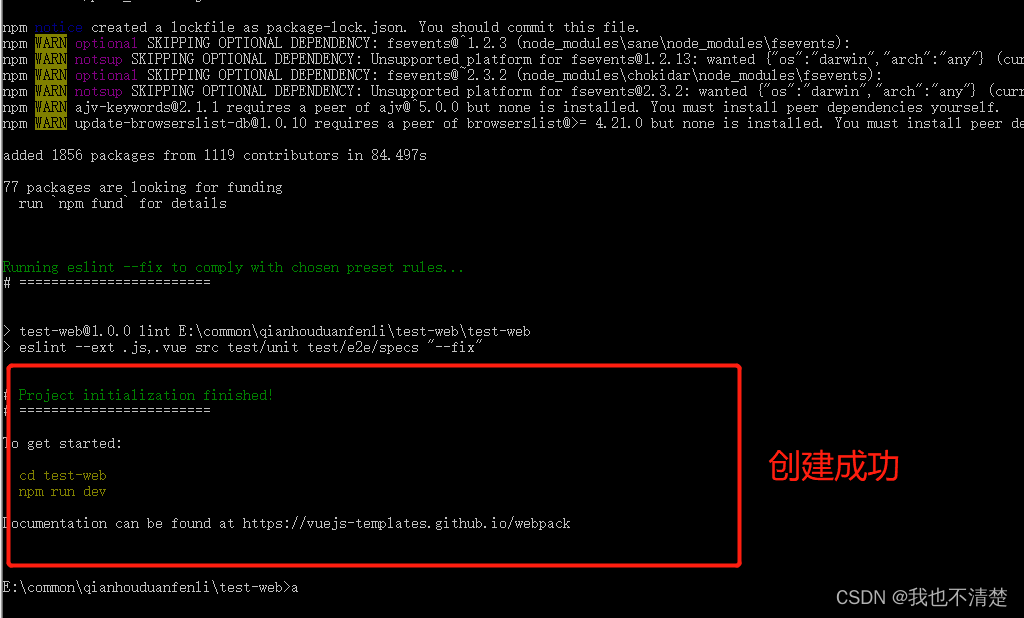
4、启动前端,验证是否创建初始化项目成功

5、脚手架增加依赖
npm install axios -S
npm install vue-resource -S
npm install vuex -S
npm install jquery -S
npm install bootstrap -S
npm install popper.js -S
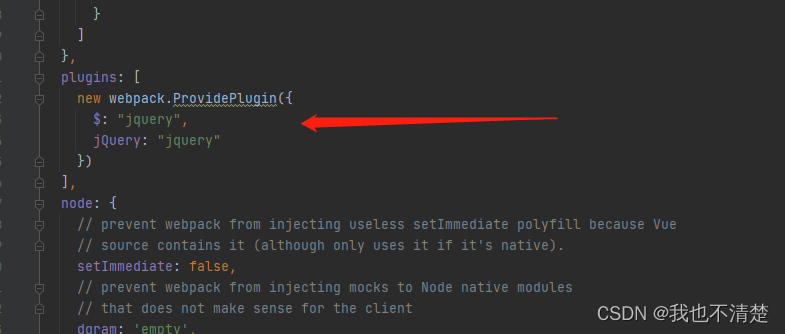
6、修改 webpack.base.conf.js,引入Jquery
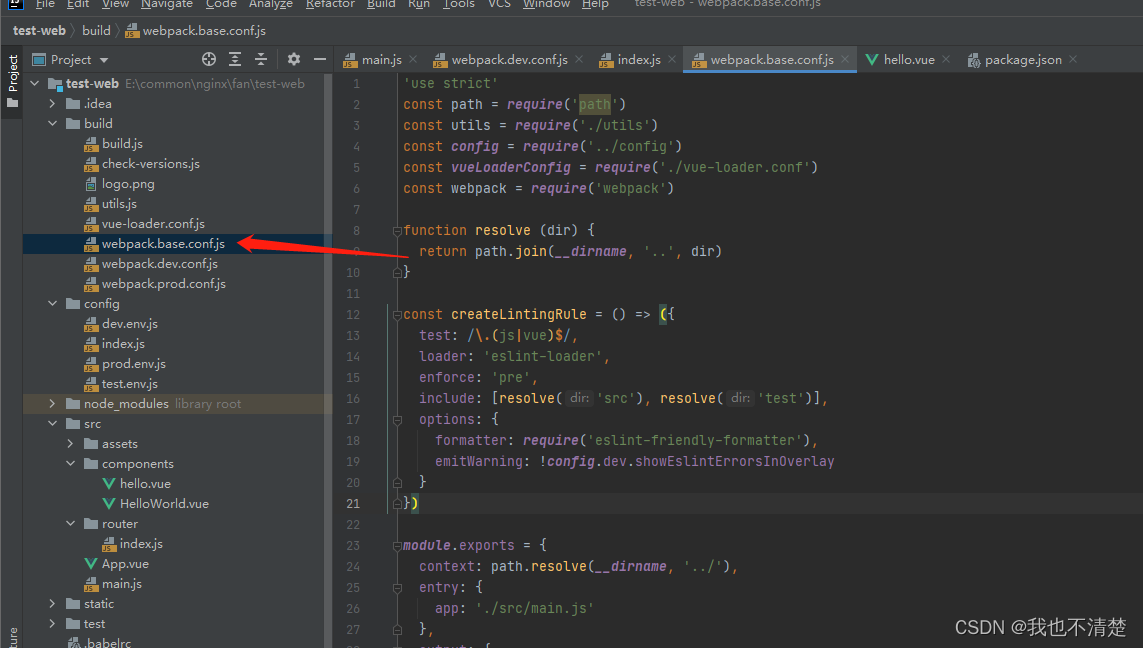
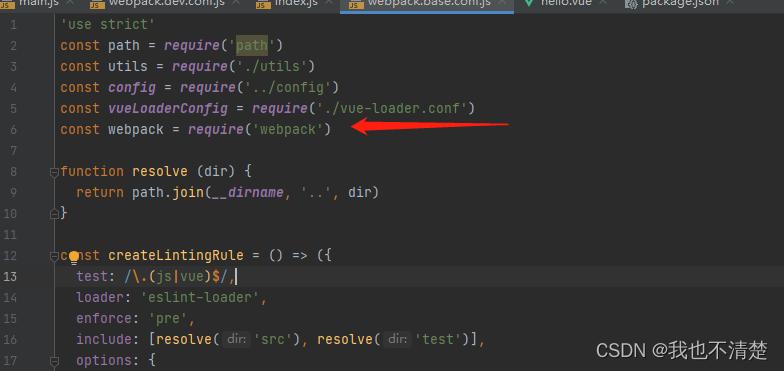
'use strict'
const path = require('path')
const utils = require('./utils')
const config = require('../config')
const vueLoaderConfig = require('./vue-loader.conf')
const webpack = require('webpack')

function resolve (dir) {
  return path.join(__dirname, '..', dir)
}

const createLintingRule = () => ({
  test: /\.(js|vue)$/,
  loader: 'eslint-loader',
  enforce: 'pre',
  include: [resolve('src'), resolve('test')],
  options: {
    formatter: require('eslint-friendly-formatter'),
    emitWarning: !config.dev.showEslintErrorsInOverlay
  }
})

module.exports = {
  context: path.resolve(__dirname, '../'),
  entry: {
    app: './src/main.js'
  },
  output: {
    path: config.build.assetsRoot,
    filename: '[name].js',
    publicPath: process.env.NODE_ENV === 'production'
      ? config.build.assetsPublicPath
      : config.dev.assetsPublicPath
  },
  resolve: {
    extensions: ['.js', '.vue', '.json'],
    alias: {
      'vue$': 'vue/dist/vue.esm.js',
      '@': resolve('src'),
    }
  },
  module: {
    rules: [
      ...(config.dev.useEslint ? [createLintingRule()] : []),
      {
        test: /\.vue$/,
        loader: 'vue-loader',
        options: vueLoaderConfig
      },
      {
        test: /\.js$/,
        loader: 'babel-loader',
        include: [resolve('src'), resolve('test'), resolve('node_modules/webpack-dev-server/client')]
      },
      {
        test: /\.(png|jpe?g|gif|svg)(\?.*)?$/,
        loader: 'url-loader',
        options: {
          limit: 10000,
          name: utils.assetsPath('img/[name].[hash:7].[ext]')
        }
      },
      {
        test: /\.(mp4|webm|ogg|mp3|wav|flac|aac)(\?.*)?$/,
        loader: 'url-loader',
        options: {
          limit: 10000,
          name: utils.assetsPath('media/[name].[hash:7].[ext]')
        }
      },
      {
        test: /\.(woff2?|eot|ttf|otf)(\?.*)?$/,
        loader: 'url-loader',
        options: {
          limit: 10000,
          name: utils.assetsPath('fonts/[name].[hash:7].[ext]')
        }
      }
    ]
  },
  plugins: [
    new webpack.ProvidePlugin({
      $: "jquery",
      jQuery: "jquery"
    })
  ],
  node: {
    // prevent webpack from injecting useless setImmediate polyfill because Vue
    // source contains it (although only uses it if it's native).
    setImmediate: false,
    // prevent webpack from injecting mocks to Node native modules
    // that does not make sense for the client
    dgram: 'empty',
    fs: 'empty',
    net: 'empty',
    tls: 'empty',
    child_process: 'empty'
  }
}
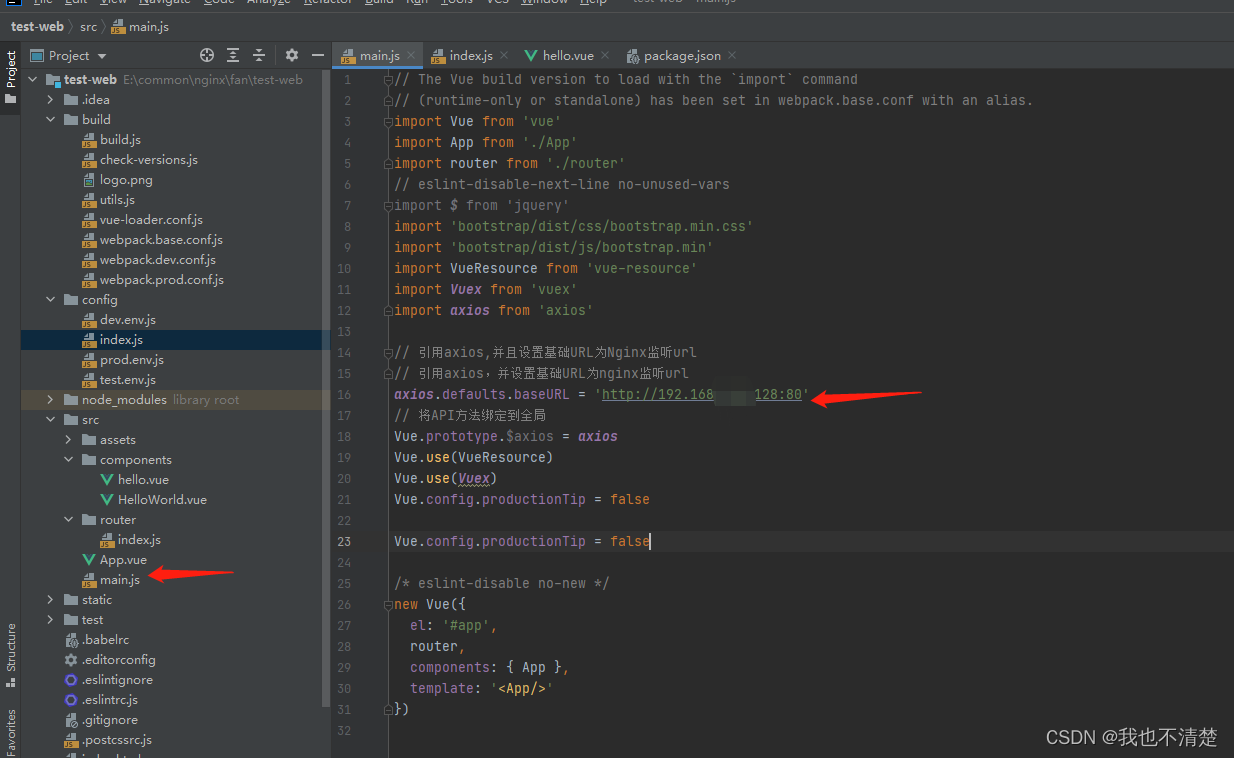
7、main.js Nginx监听
// The Vue build version to load with the `import` command
// (runtime-only or standalone) has been set in webpack.base.conf with an alias.
import Vue from 'vue'
import App from './App'
import router from './router'
// eslint-disable-next-line no-unused-vars
import $ from 'jquery'
import 'bootstrap/dist/css/bootstrap.min.css'
import 'bootstrap/dist/js/bootstrap.min'
import VueResource from 'vue-resource'
import Vuex from 'vuex'
import axios from 'axios'

// 引用axios,并且设置基础URL为Nginx监听url
// 引用axios,并设置基础URL为nginx监听url
axios.defaults.baseURL = 'http://192.168.**.128:80'
// 将API方法绑定到全局
Vue.prototype.$axios = axios
Vue.use(VueResource)
Vue.use(Vuex)
Vue.config.productionTip = false

Vue.config.productionTip = false

/* eslint-disable no-new */
new Vue({
  el: '#app',
  router,
  components: { App },
  template: '<App/>'
})
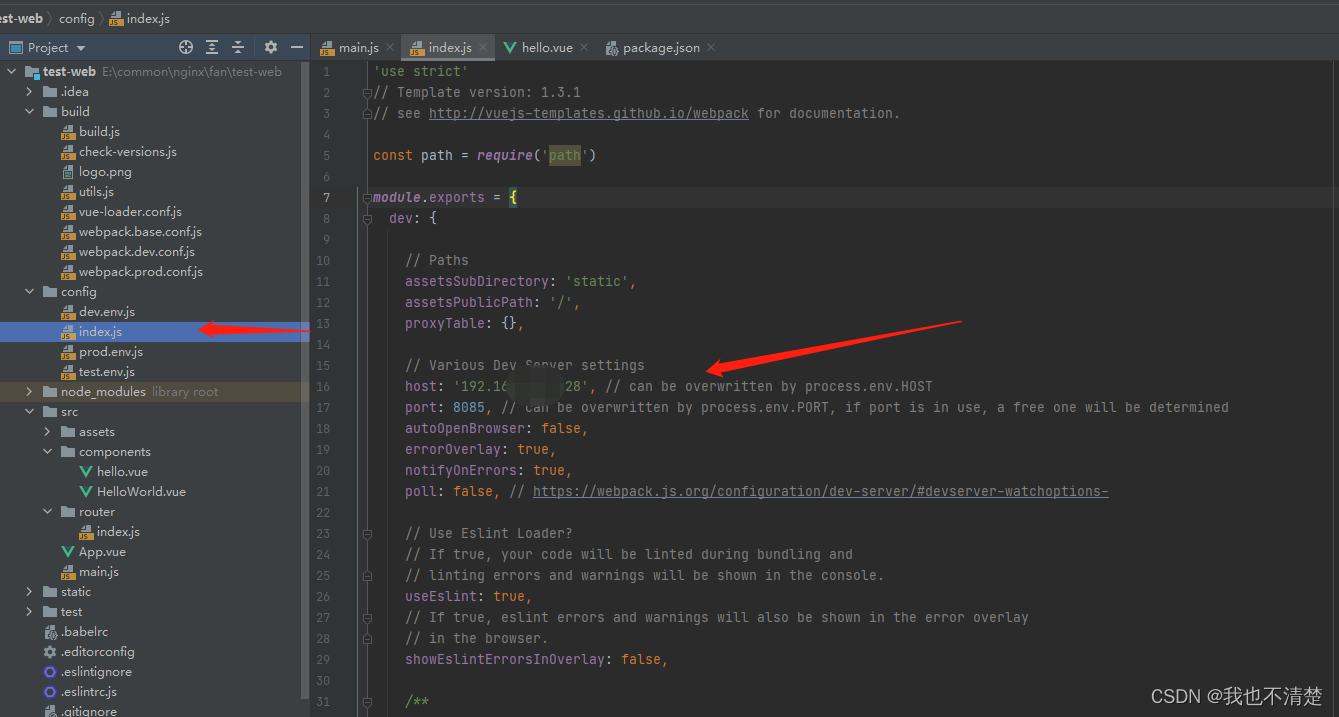
8、config中index.js指定前端Vue host:port
9、创建前端页面,调用后台
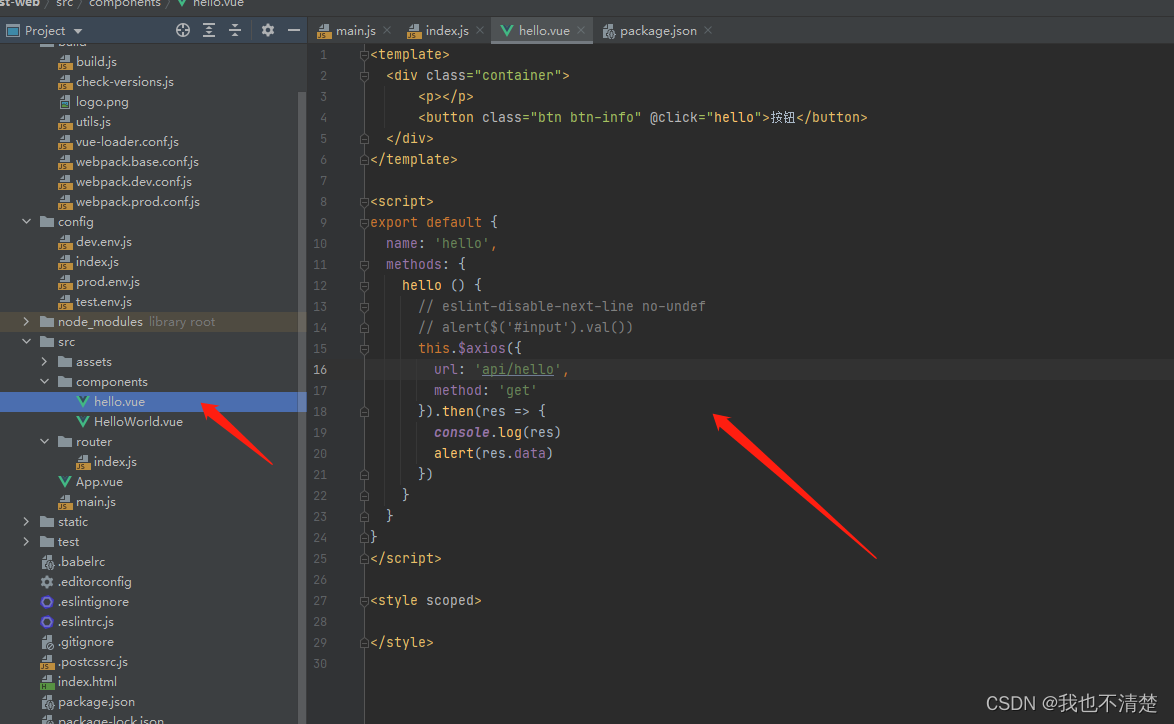
<template>
  <div class="container">
      <p></p>
      <button class="btn btn-info" @click="hello">按钮</button>
  </div>
</template>

<script>
export default {
  name: 'hello',
  methods: {
    hello () {
      // eslint-disable-next-line no-undef
      // alert($('#input').val())
      this.$axios({
        url: 'api/hello',
        method: 'get'
      }).then(res => {
        console.log(res)
        alert(res.data)
      })
    }
  }
}
</script>

<style scoped>

</style>
10、router index.js重定向中增加新增页面,真正用到vue中

二、后端Springboot双服务
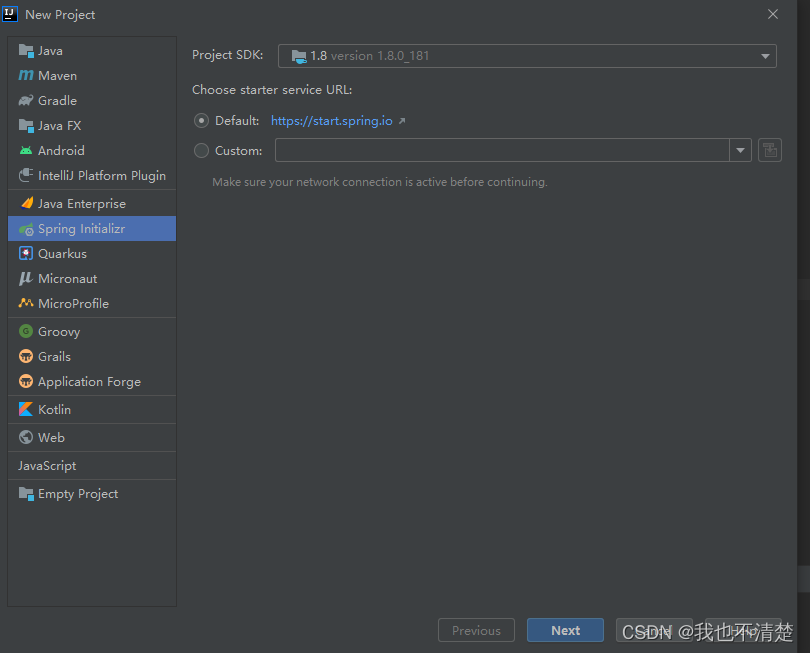
1、创建Springboot后端demo01、Next,next,,,,,只新增web组件就可以
2、指定demo01服务端口8080

3、自定义过滤器,用于过滤路由
package com.example.demo01.util;

import org.springframework.stereotype.Component;

import javax.servlet.*;
import javax.servlet.annotation.WebFilter;
import javax.servlet.http.HttpServletRequest;
import javax.servlet.http.HttpServletResponse;
import java.io.IOException;

/**
 * @author ${lcl}
 * @Title: ${NAME}
 * @ProjectName exhibition
 * @Description: TODO
 * @date 2019/2/28 00209:20
 */
@Component
@WebFilter(filterName = "OriginFilter",urlPatterns="/*")
public class OriginFilter implements Filter {
    public void destroy() {
    }

    public void doFilter(ServletRequest req, ServletResponse resp, FilterChain chain) throws ServletException, IOException {
        HttpServletResponse response = (HttpServletResponse) resp;
        HttpServletRequest request = (HttpServletRequest) req;
        response.setHeader("Access-Control-Allow-Origin", request.getHeader("Origin"));
        response.setHeader("Access-Control-Allow-Methods", "POST, GET, PUT, DELETE");
        response.setHeader("Access-Control-Allow-Headers", "x-requested-with");
        response.setHeader("Access-Control-Allow-Credentials","true"); //是否支持cookie跨域

        //response.reset();
      /*  response.setHeader("Access-Control-Allow-Origin", "*");
        response.setHeader("Access-Control-Allow-Methods", "GET, HEAD, POST, PUT, PATCH, DELETE, OPTIONS, TRACES");
        response.setHeader("Access-Control-Max-Age", "3600");
        response.setHeader("Access-Control-Allow-Headers", "x-requested-with");*/
        chain.doFilter(req, resp);
    }

    public void init(FilterConfig config) throws ServletException {

    }

}
4、Controller自定义,供前端访问
package com.example.demo01.controller;

import org.springframework.web.bind.annotation.RequestMapping;
import org.springframework.web.bind.annotation.RequestMethod;
import org.springframework.web.bind.annotation.RestController;

@RestController
public class Demo1Controller {

    @RequestMapping(value="demo01",method = RequestMethod.GET)
    public String demo(){
        return "Hello world Demo01!";
    }

    @RequestMapping(value="hello",method = RequestMethod.GET)
    public String hello(){
        return "Hello,the demo01!";
    }
}
5、同步骤1~4创建Demo02,指定不同端口8081,Demo02Controller
package com.example.demo02.controller;

import org.springframework.web.bind.annotation.RequestMapping;
import org.springframework.web.bind.annotation.RequestMethod;
import org.springframework.web.bind.annotation.RestController;

@RestController
public class Demo2Controller {

    @RequestMapping(value="demo02",method = RequestMethod.GET)
    public String demo(){
        return "Hello world Demo02!";
    }

    @RequestMapping(value="hello",method = RequestMethod.GET)
    public String hello(){
        return "Hello,the demo02!";
    }
}
三、Nginx安装配置
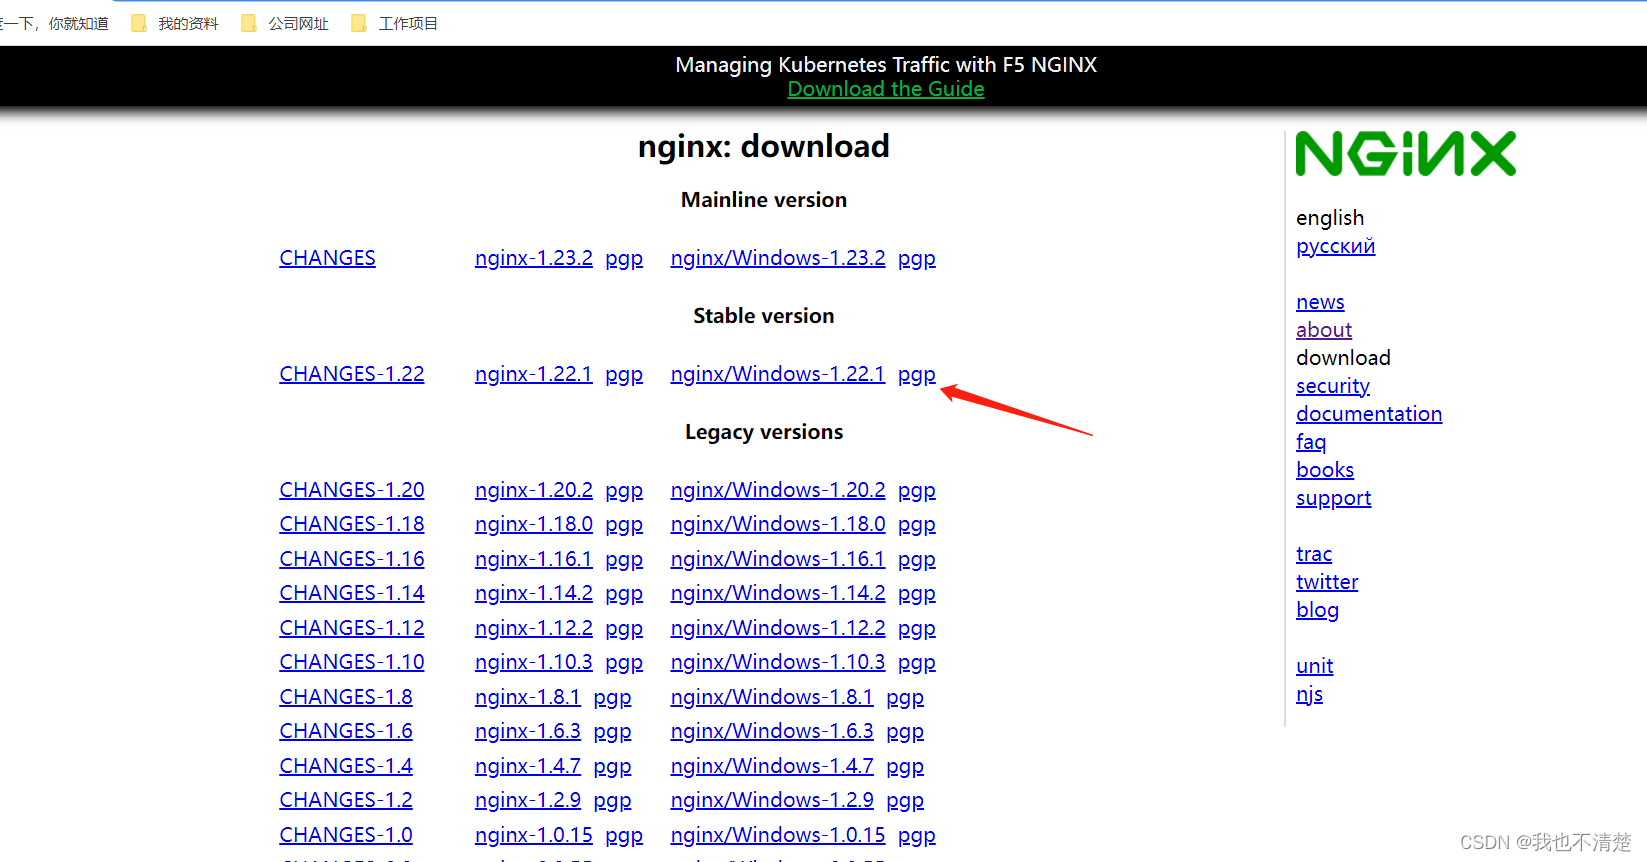
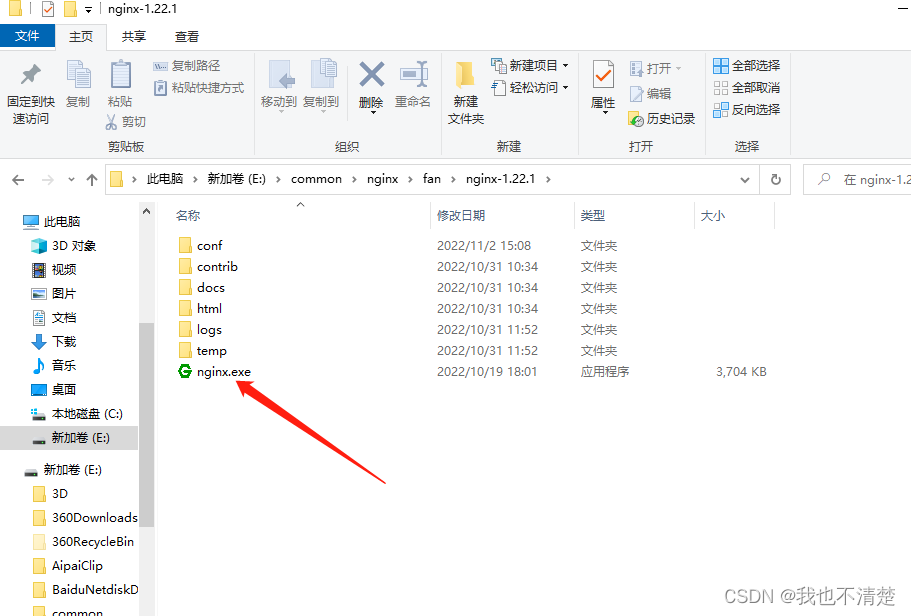
1、Nginx下载安装
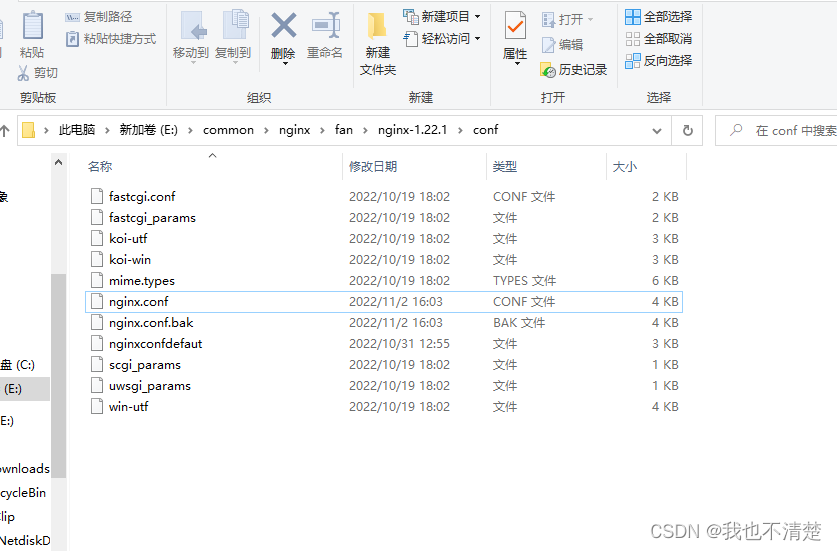
2、配置nginx.conf
3、双服务负载均衡、反向代理配置,,,本例子中未考虑跨域,session共享,后续考虑设计,可通过ip_hash,每个用户只单向访问一台服务器保证Session不跨域
#user  nobody;
worker_processes  1;

#error_log  logs/error.log;
#error_log  logs/error.log  notice;
#error_log  logs/error.log  info;

#pid        logs/nginx.pid;


events {
    worker_connections  1024;
}


http {
    include       mime.types;
    default_type  application/octet-stream;

    #log_format  main  '$remote_addr - $remote_user [$time_local] "$request" '
    #                  '$status $body_bytes_sent "$http_referer" '
    #                  '"$http_user_agent" "$http_x_forwarded_for"';

    #access_log  logs/access.log  main;

    sendfile        on;
    #tcp_nopush     on;

    #keepalive_timeout  0;
    keepalive_timeout  65;

    #gzip  on;

    #upstream 域名{         轮询    指定地址
    #     server IP:PORT;
    #     server IP:PORT;
    #}

    upstream 127.0.0.1{
         server 192.168.**.128:8080 weight=3;
         server 192.168.**.128:8081 weight=1;
    }

    server {
        listen       80;
        server_name  192.168.**.128;

        #charset koi8-r;

        #access_log  logs/host.access.log  main;


        #添加头部信息
        proxy_set_header Cookie $http_cookie;
        proxy_set_header X-Forwarded-Host $host;
        proxy_set_header X-Forwarded-Server $host;
        proxy_set_header X-Forwarded-For $proxy_add_x_forwarded_for;

	    location / {
	        proxy_pass http://192.168.**.128:8085/;
        }
	    location /api/ {
	        rewrite  ^/api/(.*)$ /$1 break;
	        proxy_pass http://127.0.0.1/api/;
	    }

        #error_page  404              /404.html;

        # redirect server error pages to the static page /50x.html
        #
        error_page   500 502 503 504  /50x.html;
        location = /50x.html {
            root   html;
        }

        # proxy the PHP scripts to Apache listening on 127.0.0.1:80
        #
        #location ~ \.php$ {
        #    proxy_pass   http://127.0.0.1;
        #}

        # pass the PHP scripts to FastCGI server listening on 127.0.0.1:9000
        #
        #location ~ \.php$ {
        #    root           html;
        #    fastcgi_pass   127.0.0.1:9000;
        #    fastcgi_index  index.php;
        #    fastcgi_param  SCRIPT_FILENAME  /scripts$fastcgi_script_name;
        #    include        fastcgi_params;
        #}

        # deny access to .htaccess files, if Apache's document root
        # concurs with nginx's one
        #
        #location ~ /\.ht {
        #    deny  all;
        #}
    }


    # another virtual host using mix of IP-, name-, and port-based configuration
    #
    #server {
    #    listen       8000;
    #    listen       somename:8080;
    #    server_name  somename  alias  another.alias;

    #    location / {
    #        root   html;
    #        index  index.html index.htm;
    #    }
    #}


    # HTTPS server
    #
    #server {
    #    listen       443 ssl;
    #    server_name  localhost;

    #    ssl_certificate      cert.pem;
    #    ssl_certificate_key  cert.key;

    #    ssl_session_cache    shared:SSL:1m;
    #    ssl_session_timeout  5m;

    #    ssl_ciphers  HIGH:!aNULL:!MD5;
    #    ssl_prefer_server_ciphers  on;

    #    location / {
    #        root   html;
    #        index  index.html index.htm;
    #    }
    #}

}
四、启动
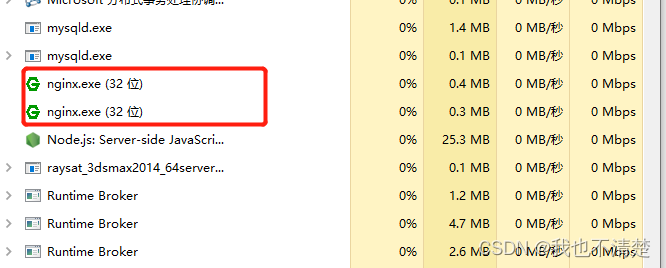
1、Nginx启动
2、前端启动

3、后端双服务启动


4、浏览器访问前端自定义页面hello
http://192.168.**.128:8085/#/hello
相关文章
- Vue_(Router路由)-vue-router路由的基本用法
- [Vue @Component] Define Props on a Vue Class with vue-property-decorator
- [Vue] Get up and running with vue-router
- 一个典型的Vue应用的App.vue
- Atitit 定时器timer 总结 目录 1. 定时器 循环定时器 和timeout超时定时器1 2. Spring定时器1 2.1. 大概流程1 2.2. 核心源码springboot1
- SpringBoot配置属性之其他
- vue-router路由的安装、配置、具体用法和Vue-router学习笔记
- vue 的 render 函数的用法:new Vue({ render: h => h(App), }).$mount(‘#app‘)
- 前后端分离解决跨域问题:springboot做后端+vue做前端
- Springboot怎么快速集成Redis?
- 仓库管理系统-前后端分离项目(SpringBoot+Vue)
- Springboot获取公网IP和当前所在城市(非常简单)
- SpringBoot中调用第三方接口的三种方式
- 在vue页面引入echarts,图表的数据来自数据库 springboot+mybatis+vue+elementui+echarts实现图表的制作
- Vue中vue-i18n结合vant-ui实现国际化
- SpringBoot无法访问接口,报错:This application has no explicit mapping for /error, so you are seeing this as a fallback.
- 启动SpringBoot项目的三种方式
- Vue(二)vue 指令及用法举例
- 基于Java+SpringBoot+Vue前后端分离农产品物流系统设计与实现(有视频讲解)
- 基于Java+SpringBoot+Vue前后端分离书店购书系统设计与实现(有视频教程)
- SpringBoot中使用Easyexcel实现Excel导入导出功能(二)
- Springboot优雅的参数校验(二)