
【springMVC】文件上传
1 实验环境
(1)导入 JAR 包
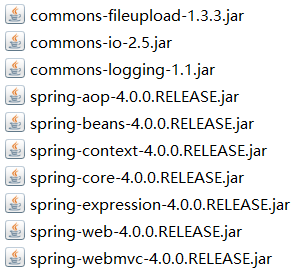
其中,前2个 jar 包为 springMVC 文件上传所需的,其下载地址见→commons-fileupload-1.3.3.jar、commons-io-2.5.jar
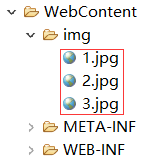
(2)工作目录
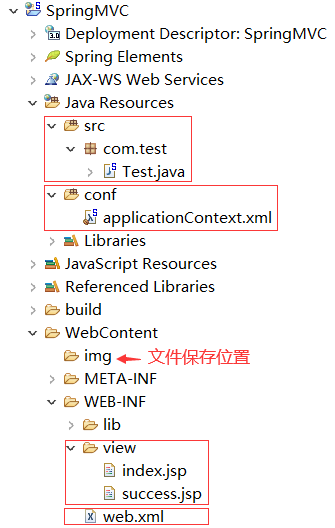
其中,img 文件夹为上传的图片待保存的位置。
(3)配置文件
web.xml
<?xml version="1.0" encoding="UTF-8"?>
<web-app xmlns:xsi="http://www.w3.org/2001/XMLSchema-instance"
	xmlns="http://java.sun.com/xml/ns/javaee"
	xsi:schemaLocation="http://java.sun.com/xml/ns/javaee http://java.sun.com/xml/ns/javaee/web-app_3_0.xsd" version="3.0">
  <!-- 首页网页 -->
  <welcome-file-list>
  	<welcome-file>/WEB-INF/view/index.jsp</welcome-file>
  </welcome-file-list>

  <!-- 配置核心(前端)控制器 DispatcherServlet -->
  <servlet>
  	<servlet-name>dispatcherServlet</servlet-name>
  	<servlet-class>org.springframework.web.servlet.DispatcherServlet</servlet-class>
  	<init-param>
  		<!-- 加载IOC容器配置文件 -->
  		<param-name>contextConfigLocation</param-name>
  		<param-value>classpath:applicationContext.xml</param-value>
  	</init-param>
  </servlet>
  <servlet-mapping>
  	<servlet-name>dispatcherServlet</servlet-name>
  	<url-pattern>/</url-pattern>
  </servlet-mapping>
</web-app>
applicationContext.xml
<?xml version="1.0" encoding="UTF-8"?>
<beans xmlns="http://www.springframework.org/schema/beans"
	xmlns:xsi="http://www.w3.org/2001/XMLSchema-instance"
	xmlns:context="http://www.springframework.org/schema/context"
	xmlns:mvc="http://www.springframework.org/schema/mvc"
	xsi:schemaLocation="http://www.springframework.org/schema/mvc http://www.springframework.org/schema/mvc/spring-mvc-4.0.xsd
		http://www.springframework.org/schema/beans http://www.springframework.org/schema/beans/spring-beans.xsd
		http://www.springframework.org/schema/context http://www.springframework.org/schema/context/spring-context-4.0.xsd">
	<!-- 扫描组件,将加@Controller注解的类作为SpringMVC的控制层 -->
	<context:component-scan base-package="com.test"></context:component-scan>

	<!-- 配置视图解析器 -->
 	<bean id="viewResolver" class="org.springframework.web.servlet.view.InternalResourceViewResolver">
		<property name="prefix" value="/WEB-INF/view/"></property>
		<property name="suffix" value=".jsp"></property>
	</bean>

	<!-- 将客户端上传的File文件,处理为MultipartFile,id名只能为multipartResolver -->
	<bean id="multipartResolver" class="org.springframework.web.multipart.commons.CommonsMultipartResolver">
		<property name="defaultEncoding" value="utf-8"></property>
		<property name="maxUploadSize" value="1048576"></property>
	</bean>
</beans>
注意:配置的 CommonsMultipartResolver,id 名只能为 multipartResolver。
2 案例分析
首先介绍下实验中的公共文件和 success.jsp,不同的是 index.jsp 和 Test.java,将在各节分别介绍。
success.jsp
<%@ page language="java" contentType="text/html; charset=UTF-8" pageEncoding="UTF-8"%>
<html>
<head>
	<meta http-equiv="Content-Type" content="text/html; charset=UTF-8">
	<title>成功</title>
</head>
<body>
	SUCCESS
</body>
</html>
2.1 上传单个文件
index.jsp
<%@ page language="java" contentType="text/html; charset=UTF-8" pageEncoding="UTF-8"%>
<html>
<head>
	<meta http-equiv="Content-Type" content="text/html; charset=UTF-8">
	<title>首页</title>
</head>
<body>
	<form action="upload" method="post" enctype="multipart/form-data">
		头像:<input type="file" name="uploadFile"/>
		<input type="submit" value="上传"/>
	</form>
</body>
</html>
(1)方法一(IO流)
Test.java
package com.test;

import java.io.File;
import java.io.FileOutputStream;
import java.io.IOException;
import java.io.InputStream;
import java.io.OutputStream;
import org.springframework.stereotype.Controller;
import org.springframework.web.bind.annotation.RequestMapping;
import org.springframework.web.bind.annotation.RequestMethod;
import org.springframework.web.bind.annotation.RequestParam;
import org.springframework.web.multipart.MultipartFile;

@Controller
public class Test {

	@RequestMapping(value="upload",method=RequestMethod.POST)
	public String upload(@RequestParam MultipartFile uploadFile) throws IOException {
		String fileName=uploadFile.getOriginalFilename(); //获取文件名称
		String path="G:\\spring\\SpringMVC\\WebContent\\img\\"+fileName; //保存文件路径
		InputStream is=uploadFile.getInputStream(); //获取输入流
		OutputStream os=new FileOutputStream(new File(path));
		int i=0;
		byte[] b=new byte[1024];
		while((i=is.read(b))!=-1) {
			os.write(b,0,i);
		}
		os.close();
		is.close();
		return "success";
	}
}在地址栏输入:http://localhost:8080/SpringMVC/,显示如下:
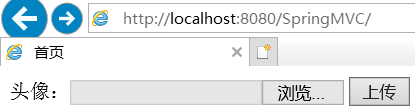
选择本地需要上传的图片,并点击上传,选中 img 文件夹,并按 F5 刷新,可以看到已上传的文件,如下:
(2)方法二(transferTo)
Test.java
package com.test;

import java.io.File;
import java.io.IOException;
import org.springframework.stereotype.Controller;
import org.springframework.web.bind.annotation.RequestMapping;
import org.springframework.web.bind.annotation.RequestMethod;
import org.springframework.web.bind.annotation.RequestParam;
import org.springframework.web.multipart.MultipartFile;

@Controller
public class Test {

	@RequestMapping(value="upload",method=RequestMethod.POST)
	public String upload(@RequestParam MultipartFile uploadFile) throws IOException {
		String fileName=uploadFile.getOriginalFilename(); //获取文件名称
		String path="G:\\spring\\SpringMVC\\WebContent\\img\\"+fileName; //保存文件路径
		uploadFile.transferTo(new File(path));
		return "success";
	}
}
2.2 上传多个文件
index.jsp
<%@ page language="java" contentType="text/html; charset=UTF-8" pageEncoding="UTF-8"%>
<html>
<head>
	<meta http-equiv="Content-Type" content="text/html; charset=UTF-8">
	<title>首页</title>
</head>
<body>
	<form action="upload" method="post" enctype="multipart/form-data">
		头像1:<input type="file" name="uploadFile"/><br/>
		头像2:<input type="file" name="uploadFile"/><br/>
		头像3:<input type="file" name="uploadFile"/><br/>
		<input type="submit" value="上传"/>
	</form>
</body>
</html>
Test.java
package com.test;

import java.io.File;
import java.io.IOException;
import org.springframework.stereotype.Controller;
import org.springframework.web.bind.annotation.RequestMapping;
import org.springframework.web.bind.annotation.RequestMethod;
import org.springframework.web.bind.annotation.RequestParam;
import org.springframework.web.multipart.MultipartFile;

@Controller
public class Test {

	@RequestMapping(value="upload",method=RequestMethod.POST)
	public String upload(@RequestParam MultipartFile[] uploadFile) throws IOException {
		String base_path="G:\\spring\\SpringMVC\\WebContent\\img\\";
		for(MultipartFile file:uploadFile){
			String fileName=file.getOriginalFilename(); //获取文件名称
			String path=base_path+fileName; //保存文件路径
			file.transferTo(new File(path));
		}
		return "success";
	}
}在地址栏输入:http://localhost:8080/SpringMVC/,显示如下:

选择本地需要上传的图片,并点击上传,选中 img 文件夹,并按 F5 刷新,可以看到已上传的文件,如下:
2.3 生成随机的文件名(UUID)
Test.java
package com.test;
import java.io.File;
import java.io.IOException;
import java.util.UUID;
import org.springframework.stereotype.Controller;
import org.springframework.web.bind.annotation.RequestMapping;
import org.springframework.web.bind.annotation.RequestMethod;
import org.springframework.web.bind.annotation.RequestParam;
import org.springframework.web.multipart.MultipartFile;
@Controller
public class Test {
@RequestMapping(value="upload",method=RequestMethod.POST)
public String upload(@RequestParam MultipartFile uploadFile) throws IOException {
String fileName=uploadFile.getOriginalFilename(); //获取文件名称
String extension=fileName.substring(fileName.lastIndexOf(".")); //获取文件扩展名
String uuid=UUID.randomUUID().toString(); //生成一个随机的文件名
String path="G:\\spring\\SpringMVC\\WebContent\\img\\"+uuid+extension; //保存文件路径
uploadFile.transferTo(new File(path));
return "success";
}
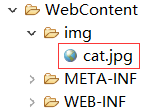
}选择本地需要上传的图片,并点击上传,选中 img 文件夹,并按 F5 刷新,可以看到已上传的文件,如下,可以看到,上传的文件名(原名为 cat.jpg)变为随机的。

相关文章
- springmvc文件上传
- springMVC文件上传(转)
- SpringMVC处理静态文件源码分析
- Spring+Mybatis+SpringMVC+Maven+MySql搭建实例
- 使用springMVC实现文件上传和下载之文件下载
- 【异常】SpringMVC请求异常JSON parse error: Unexpected character (‘}‘ (code 125)): was expecting double-quote
- SpringMVC 页面跳转指南:转发和重定向的实现与比较
- junit结合spring-test里的MockMvc来测试SpringMvc接口方法
- Java学习路线-65:整合 SSM-Spring+SpringMVC+MyBatis
- springmvc环境下使用ajaxfileupload.js进行文件上传
- springmvc 接收对象 滴灌摘要
- springMVC文件上传
- [springMVC学习]1、springmvc设置spring配置文件
- SpringMVC 【参数绑定详讲、默认支持参数类型、自定义参数绑定、RequestParam 注解】