
vue基础(五),对todos的操作
2023-09-11 14:20:08 时间
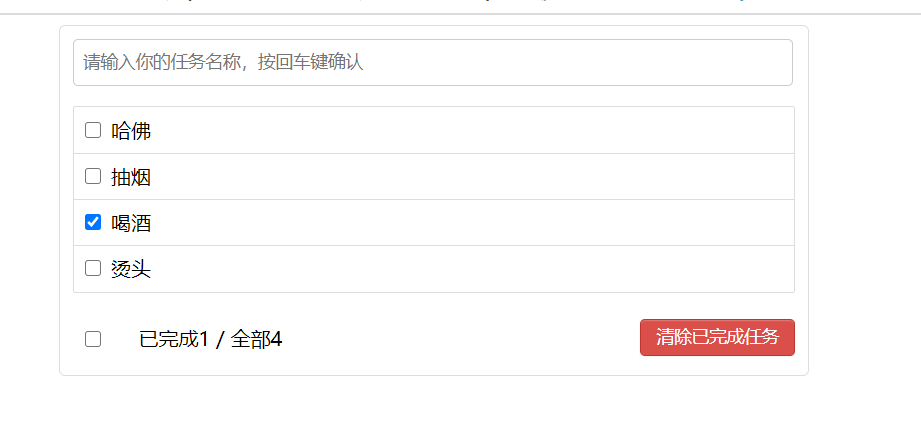
对于totos的操作
入口main.js文件
// 引入vue

import Vue from 'vue'
// 引入App
import App  from './App'

// 配置vue对象

new Vue({
  el:"#root",
  // 注册组件,渲染组件
  render : h=> h(App)

})
App组件
<template>
  <div class="todo-container">
    <div class="todo-wrap">
      <Header :todos="todos" :updateO="updateO"></Header>
      <Main
      :todos="todos"
      :changeStatus= "changeStatus"
      :dltO="dltO"
      ></Main>
      <Footer :todos="todos"  :delQc="delQc"></Footer>


    </div>
  </div>
</template>


<script>

// 引入组件
import Header  from '@/components/Header'
import Main  from  '@/components/Main'
import Footer  from  '@/components/Footer'

export default {
  name:'App',
  data() {
    return {
        todos:[
        {id:1,content:'抽烟', isOver:false},
        {id:2,content:'喝酒', isOver:true},
        {id:3,content:'烫头', isOver:false},

      ]
    };
  },

  methods:{
    //接收header的数据
    updateO(obj){
      //新增的对象的id是最后一个id加1
      let id =  this.todos[this.todos.length-1].id+1
      obj.id =id
      //数组往顶部新增一个对象
      this.todos.unshift(obj)
      console.log(this.todos)
    },

    //item组件点击单选框,改变状态
    changeStatus(index){
      //取反
      this.todos[index].isOver =  !this.todos[index].isOver

    },

    //item组件点击删除按钮
    dltO(index){
      this.todos.splice(index,1)
    },

    //对于footer组件中过滤的新数组赋值给原数组
    delQc(newTodos){
      this.todos =newTodos

    }


  },


  // 注册组件
  components:{
    Header,
    Main,
    Footer,
  }
};

</script>

<style scoped  lang="less">
/*app*/
.todo-container {
  width: 600px;
  margin: 0 auto;
}
.todo-container .todo-wrap {
  padding: 10px;
  border: 1px solid #ddd;
  border-radius: 5px;
}

</style>
Header组件
<template>
  <div class="todo-header">
    <input type="text" placeholder="请输入你的任务名称,按回车键确认"  v-model="content"  @keyup.enter="update" />
  </div>
</template>

<script>
export default {
  //输入框一个按键事件,添加li

  name:'Header',
  data() {
    return {
      content:'',
    };
  },

  // 接收父组件的数据
  props:{
    todos:Array,
    updateO:Function
  },

  methods:{
    //输入框输入数据,组成一个新对象,给父组件传递过去
    update(){
      let {content} =this
      if(content.trim()){
        //新对象
        let obj ={
          content,
          isOver:false
        }

        //传递数据给父组件
        this.updateO(obj)
        this.content=''
      }
    }
  }


};
</script>

<style scoped  lang="less">
/*header*/
.todo-header input {
  width: 560px;
  height: 28px;
  font-size: 14px;
  border: 1px solid #ccc;
  border-radius: 4px;
  padding: 4px 7px;
}

.todo-header input:focus {
  outline: none;
  border-color: rgba(82, 168, 236, 0.8);
  box-shadow: inset 0 1px 1px rgba(0, 0, 0, 0.075), 0 0 8px rgba(82, 168, 236, 0.6);
}

</style>
Main组件
<template>
  <ul class="todo-main">
    <Item
      v-for="(todo, index) in todos" :key="todo.id"
      :todo="todo"
      :index="index"
      :changeStatus= "changeStatus"
      :dltO="dltO"
    ></Item>

  </ul>
</template>

<script>
import Item from './Item'
export default {
  name:'Main',
  data() {
    return {};
  },

  props:{
    todos:Array,
     changeStatus:Function,
     dltO:Function,
  },

  //注册组件
  components:{
    Item
  }
};
</script>

<style scoped  lang="less">
/*main*/
.todo-main {
  margin-left: 0px;
  border: 1px solid #ddd;
  border-radius: 2px;
  padding: 0px;
}

.todo-empty {
  height: 40px;
  line-height: 40px;
  border: 1px solid #ddd;
  border-radius: 2px;
  padding-left: 5px;
  margin-top: 10px;
}
</style>
Item组件
<template>
  <li  @mouseenter="isShow=true"  @mouseleave="isShow=false" :class="{myClass:isShow}">
    <label>
      <input type="checkbox" :checked="todo.isOver"  @click="changeZt" />
      <span>{{todo.content}}</span>
    </label>
    <button class="btn btn-danger"
      v-show="isShow"
      @click="deleteO"


    >删除</button>
  </li>
</template>

<script>
export default {
  //1.点击li中的单选按钮,需要父组件的数据更改状态,需要传递一个index参数,定位是那个li
  //2.点击删除按钮,需要父组件操作数组的逻辑,需要传递一个index参数,定位是那个li
  //3.移入,移出事件,li变化颜色,而且删除按钮也会跟着改变


  name:"Item",
  props:{
    todo:Object,
    index:Number,
    changeStatus:Function,
    dltO:Function,
  },
  data() {
    return {
      //定义一个状态
      isShow:false
    };
  },

  methods:{
    changeZt(){
      //点击单选框,更改状态
      this.changeStatus(this.index)

    },

    //点击删除按钮
    deleteO(){
      //给组价传递index
      this.dltO(this.index)
    }
  }


};
</script>

<style scoped  lang="less">
/*item*/

.myClass{
  background-color: hotpink;
}

li {
  list-style: none;
  height: 36px;
  line-height: 36px;
  padding: 0 5px;
  border-bottom: 1px solid #ddd;
}

li label {
  float: left;
  cursor: pointer;
}

li label li input {
  vertical-align: middle;
  margin-right: 6px;
  position: relative;
  top: -1px;
}

li button {
  float: right;
  // display: none;
  margin-top: 3px;
}

li:before {
  content: initial;
}

li:last-child {
  border-bottom: none;
}

</style>
Footer组件
<template>
  <div class="todo-footer">
    <label>
      <input type="checkbox"  v-model="ischeck" />
       <!-- isCheckAll的数据是和checked属性值进行关联的 -->
      <!--
        v-model 如果input当中是有value的,那么v-model影响的就是value的值
        对于文本输入框密码输入框来说一定是有value的
        对于单选输入框和多选输入框,如果没有写value,那么影响的的是checked的值
       -->
    </label>
    <span> <span>已完成{{qcNum}}</span> / 全部{{qbNum}} </span>
    <button class="btn btn-danger"  @click="deleteQc">清除已完成任务</button>
  </div>
</template>

<script>
export default {

  //1.父组件传递todos组件,计算已完成和全部数量
  // 2.对于全选按钮,需要判断两种情况,一种是获取,一种是修改
  // 对于获取逻辑,需要判断已完成数量和全部数量是否全等,
  //对于修改逻辑,则需要对遍历todos的每个对象,状态进行修改
  //3.对于清除已完成的任务,需要判断已经状态为true的对象清除


  name:'Footer',
  props:{
    todos:Array,
    delQc:Function,
  },
  data() {
    return {};
  },

  methods:{
    deleteQc(){
      //将新数组传递父组件,让父组件对原数组跟新
      let newTodos=  this.todos.filter(item =>!item.isOver)
      this.delQc(newTodos)

    }
  },

  // 计算属性,组件中没有的属性

  computed:{
    //计算完成的数量
    qcNum(){
      return this.todos.filter(item =>item.isOver).length
    },

    //计算全部的数量
    qbNum(){
      return this.todos.length
    },

    ischeck:{

      //获取方法
      get(){
        return  this.qcNum ===this.qbNum && this.qbNum>0
      },

      //修改方法
      set(value){
        //遍历todos,将每一项的isOver都随着vlaue改变
        this.todos.forEach(item =>item.isOver = value)
      }
    }


  }


};
</script>

<style scoped  lang="less">

/*footer*/
.todo-footer {
  height: 40px;
  line-height: 40px;
  padding-left: 6px;
  margin-top: 5px;
}

.todo-footer label {
  display: inline-block;
  margin-right: 20px;
  cursor: pointer;
}

.todo-footer label input {
  position: relative;
  top: -1px;
  vertical-align: middle;
  margin-right: 5px;
}

.todo-footer button {
  float: right;
  margin-top: 5px;
}

</style>
将todos数据保存在localStorage
localStorage的简介(永久存储,关闭和刷新浏览器,数据不会丢失)
目前所有的浏览器中都会把localStorage的值类型限定为string类型,
这个在对我们日常比较常见的JSON对象类型需要一些转换
1.我们将对todos深度监视,如果todos的数据变化了,就会立刻存储在localStorage
2.然后从data中获取存储在localStorage中的数据
<template>
  <div class="todo-container">
    <div class="todo-wrap">
      <Header :todos="todos"  :recOne="recOne"></Header>
      <Main
      :todos="todos"
      :changeStaus="changeStaus"
      :deleteOne="deleteOne"
      ></Main>
      <Footer
        :todos="todos"
        :delet="delet"
      ></Footer>


    </div>
  </div>
</template>


<script>

// 引入组件
import Header  from '@/components/Header'
import Main  from  '@/components/Main'
import Footer  from  '@/components/Footer'
let id = 0
export default {
  //自定义todos
  //  todos:[
  //       {id:1,content:'抽烟', isOver:false},
  //       {id:2,content:'喝酒', isOver:true},
  //       {id:3,content:'烫头', isOver:false},

  //     ]
  name:'App',
  data(){
    return {
      todos: JSON.parse(window.localStorage.getItem('TODOS_KEY')) || []
    }
  },

   // 一般监视,当todos的数据只要发生变化,就会存储到localStorage
  //修改isOver状态,并不能存储在localStorage, 因为他修改的数组才会存储到localStorage
  // watch:{
  //   todos(newVal, oldVal){
  //     localStorage.setItem("TODOS_KEY", JSON.stringify(newVal))
  //   }

  // },

  // 深度监视,只有数组的数据变化了,包括对象元素的属性变化也会存储在localStorage
  watch:{
    todos:{
      deep:true,
      handler(newVal, oldVal){
        //赋值给localStorage
        localStorage.setItem('TODOS_KEY', JSON.stringify(newVal))
      },

    // 代表在wacth里声明了todos这个方法之后立即先去执行handler方法
    immediate: true
    }
  },

  methods:{

    //接收footer组件的数据,删除已有的数据
    delet(newTodos){
      this.todos= newTodos
    },

    //接收header组件的数据
     recOne(todo){
        // const length = this.todos.length  ? this.todos[this.todos.length - 1] : {id:1}
        // todo.id = ++length.id

        todo.id = new Date()
       //数组添加一个新对象
       this.todos.unshift(todo)

     },

    //接收item组件的数据,更改单选框状态
     changeStaus(index){
       this.todos[index].isOver = !this.todos[index].isOver
     },

     //接收item组件数据,删除一个对象
     deleteOne(index){
       this.todos.splice(index,1)
     }


  },


  // 注册组件
  components:{
    Header,
    Main,
    Footer,
  }
};

</script>

<style scoped  lang="less">
/*app*/
.todo-container {
  width: 600px;
  margin: 0 auto;
}
.todo-container .todo-wrap {
  padding: 10px;
  border: 1px solid #ddd;
  border-radius: 5px;
}

</style>
3.
todos: JSON.parse(localStorage.getItem("TODOS_KEY")) || []
如果是空的,浏览器会报错,那就搞个空数组
相关文章
- 基于 Vue.js 之 iView UI 框架非工程化实践记要 使用 Newtonsoft.Json 操作 JSON 字符串 基于.net core实现项目自动编译、并生成nuget包 webpack + vue 在dev和production模式下的小小区别 这样入门asp.net core 之 静态文件 这样入门asp.net core,如何
- 【Vue】你必须要知道的vue中v-on指令的修饰符
- 【css/vue】Vue组件中对body操作样式的一种解决方案
- vue基础篇---生命周期
- 【css/vue】Vue组件中对body操作样式的一种解决方案
- Vue 国际化之 vue-i18n 的使用
- vue基础---计算属性和侦听器
- 【Vue】Vue基础知识点介绍(入门级,简单易懂)——day01
- vue实战入门基础篇五:从零开始仿门户网站实例-关于我们实现
- vue学习笔记四:Jquery VS Vue之元素操作明细对照
- vue组件间通信传递数据的四种方式(路由传参、父子组件传参、兄弟组件传参、深层次传参)
- 推荐一款基于 SpringBoot + Vue 的前后端分离实战项目!技术主流,文档很全!
- vue基础 Vue.extend
- MintUI引入vue项目以及引入iconfont图标
- vue脚手架用axios请求本地数据
- Vue&Cesium&Ribbon界面: 将桌面GIS搬进浏览器
- 浅析Vue数据更新了但页面不更新的7种情况及vue异步更新带来的数据响应的误解
- 深入理解VUE样式style层次分析
- Vue-router路由基础总结(一)
- Vue-cli 4在vue.config.js中配置别名
- vue基础(七),同源策略以及跨域,vuex
- vue基础四(comment实例)
- Django+Vue项目学习第六篇:vue+django发送post请求,设置不同content-type,前后端如何处理参数
- Vue.js中 watch的理解以及深度监听
- vue组件懒加载(Load On Demand)
- webpack入坑之旅(六)配合vue-router实现SPA
- 【VUE】vue配置Gzip压缩