
Android+CS6:工业动画之变速变方向旋转齿轮
App中经常用到一些动画,可以借助PS工具来实现,今天介绍一种可以调速、可正反转的齿轮转动例程。众所周知,动画都是由多张静态的图片连续播放形成的,那么今天的实例用到的原始图片只有1张,PS处理完是3张。那么图片为什么是3张,是怎么计算出来的,那么又是怎么实现动画效果的呢?
下面开始介绍。
目录
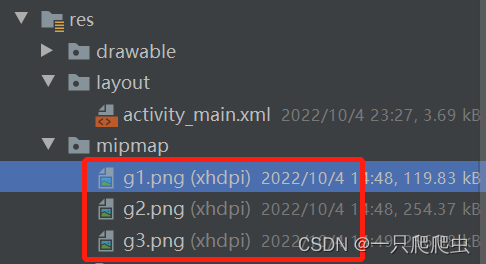
1、把g1.png、g2.png、g3.png三幅图复制到mipmap文件夹下
一、齿轮转动动画原理
1、形成齿轮转动动画的基本要求
形成齿轮转动动画的基本要求是:假如形成齿轮转动动画的静态图片为n张,那么每张图片都是以前一张图片为基准,以齿轮中心为圆点,旋转过相同角度β。第n张图片旋转角度β,与第一张图片重合。
2、如何确定旋转角度β
由形成齿轮转动动画的基本要求得知,第一张图片经过n次旋转,每次旋转角度β,又与第一张图重合了。那么要想实现齿轮重合的目的,那么只需将一个齿轮旋转到另外一个齿轮的位置即可,也就是经过n次旋转,转过的最小幅度就是转动到相邻的齿轮位置。
假设相邻齿轮中心线之间夹角为α,如图1所示。那么有:
β=α/n
假设齿轮的齿数为m,那么有:
α=360°/m
所以
β=360°/(m*n)

3、如何确定齿轮转动动画效果需要最少图片张数n?
(1)n=2
有人说,两张图连续循环播放就能生成动画,也就是n=2,那么这个答案是否正确呢?
根据图所示,齿轮齿数m=8,那么
α=360°/8=45°
β=360°/(8*2)=22.5°
α=2*β
也就是每张图片是在上一张图片的基础上转过了α/2角度,那么也就是无论顺时针转动还是逆时针转动,都会形成这个效果。反过来说,当这样的两张图片循环播放的时候,是没办法区分出是顺时针还是逆时针转的。当你眼睛盯着图的右侧看,看到的效果就是顺时针旋转,当你眼睛盯着图的左侧看,看到的效果就是逆时针旋转,当你眼睛盯着图的圆心看,那齿轮则是左转一次,右转一次,不是转动而是摆动的效果,如图2所示。

(2)n=3
那么n最小取值是多少呢?答案是n=3。
还以图为例,当n=3时
β=360°/(8*3)=15°
那么三幅图的效果如图3-图5所示。 第二张图是在第一张图的基础上旋转15°,第三张图是在第二张图的基础上旋转15°,第三张图再旋转15°,就是转过了45°,等于相邻两个齿中心线的夹角,正好与第一张图重合。


按p1、p2、p3的顺序循环播放的效果如图6所示,为顺时针旋转。按p3、p2、p1的顺序循环播放的效果如图7所示,为逆时针旋转。


二、原图生成三幅图的操作
1、从网上搜一个齿轮

2、用ps软件(CS6版本)进行处理
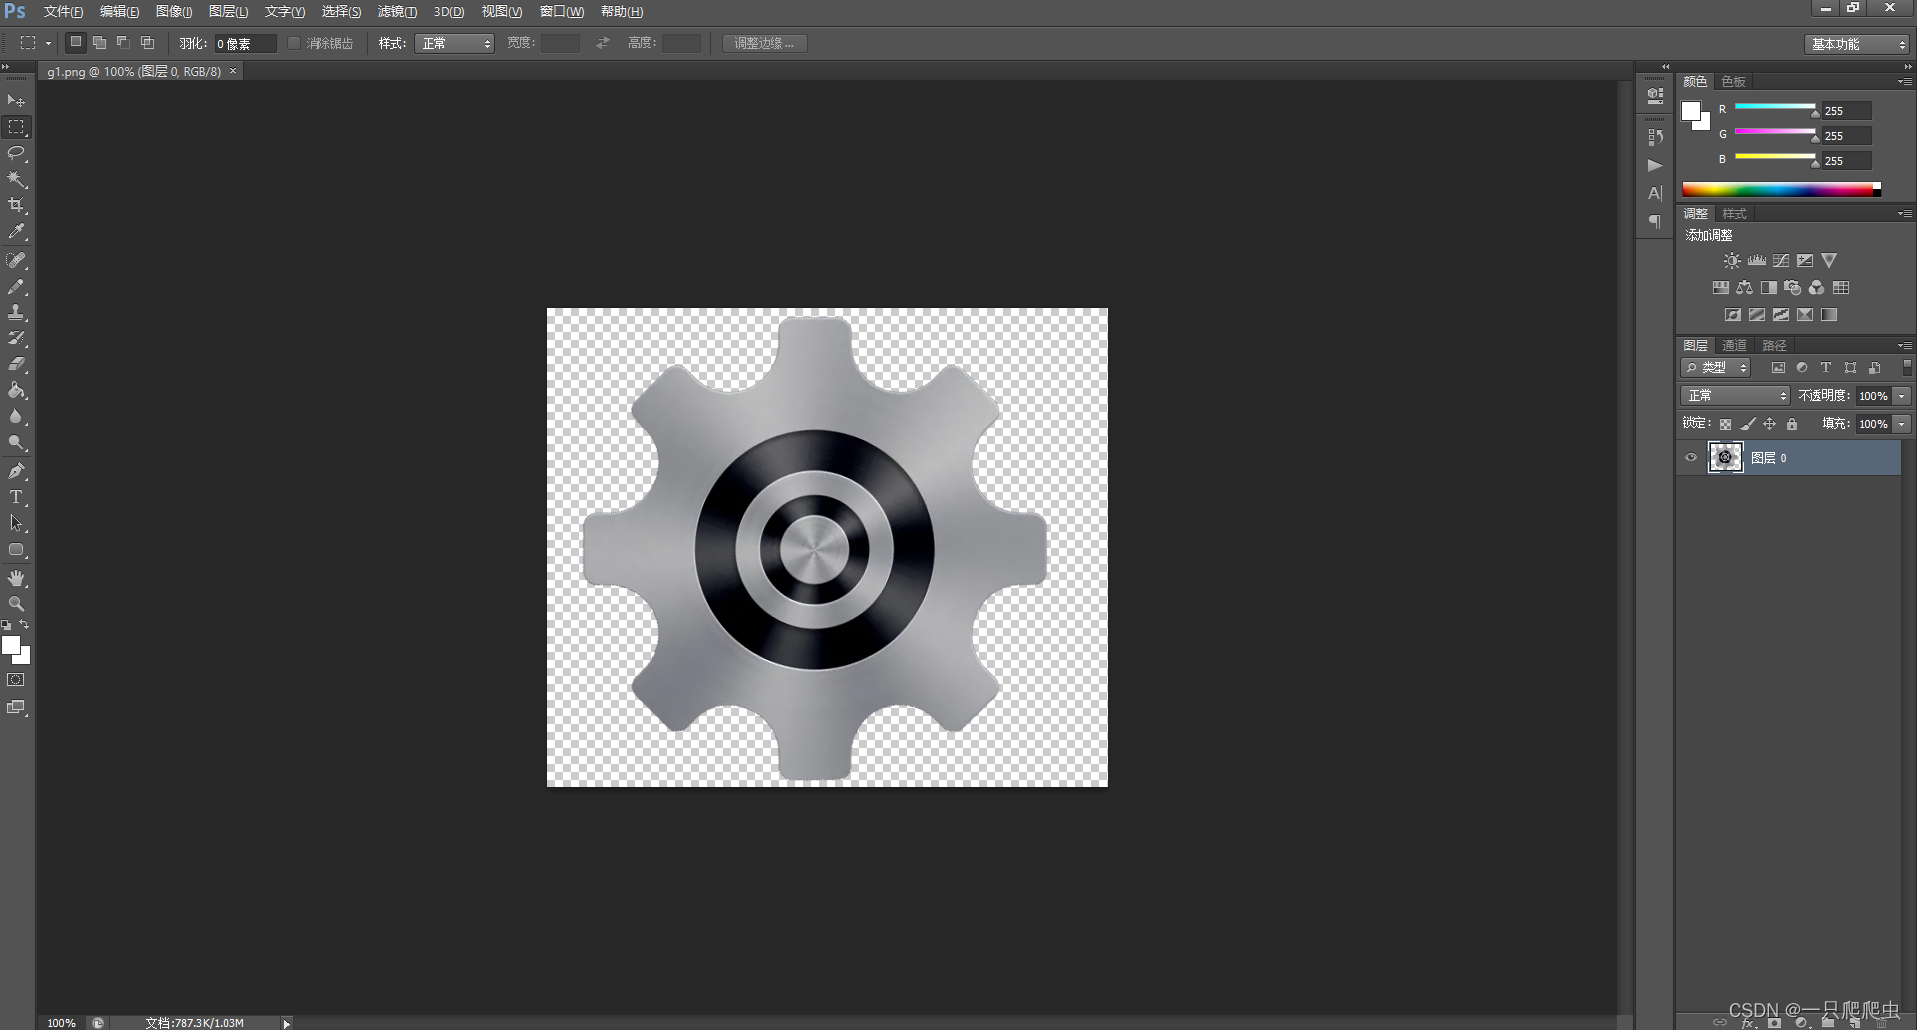
(1)用ps打开图片
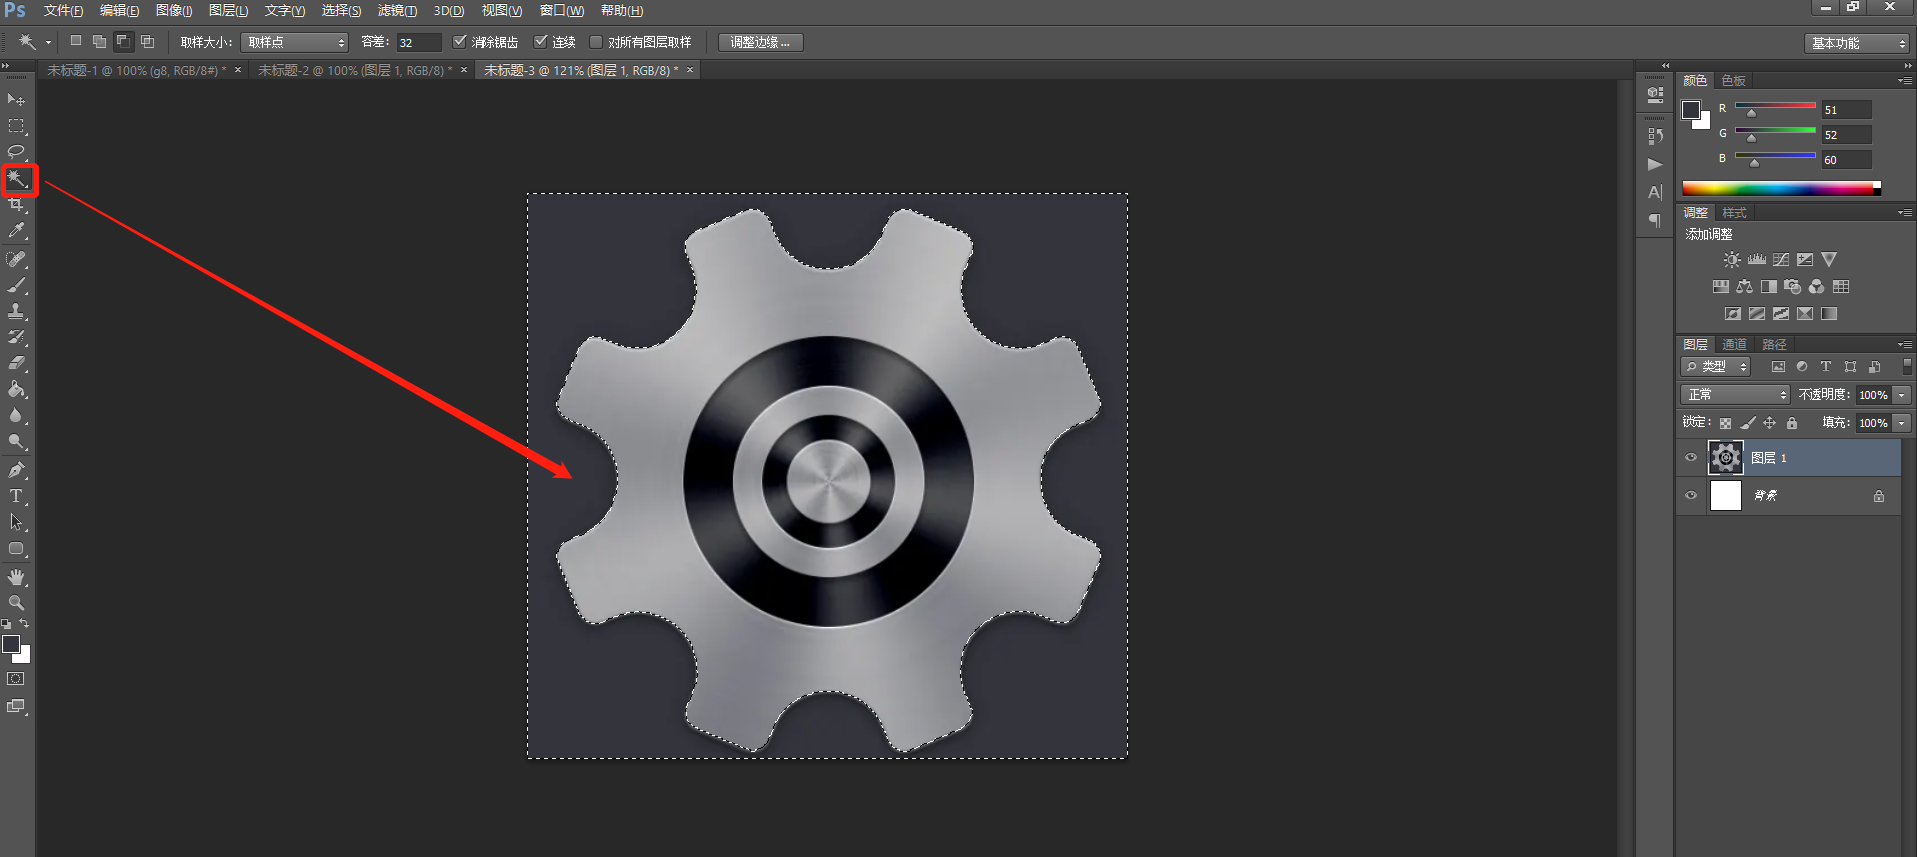
(2)抠图
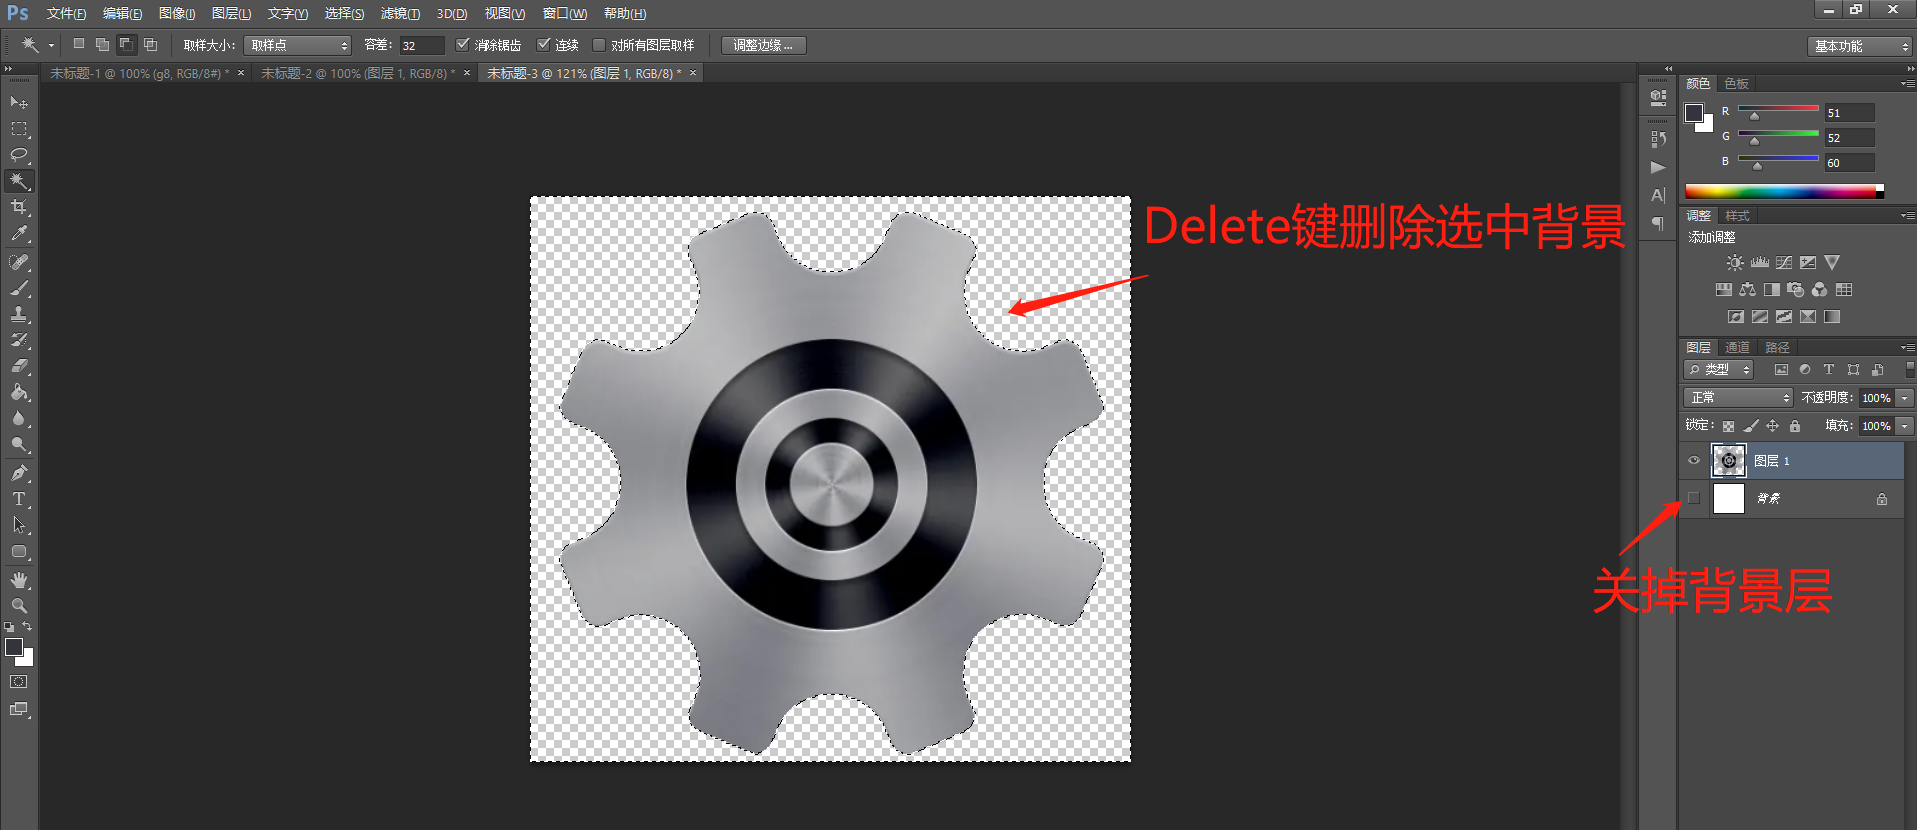
用魔术棒工具把齿轮外侧的背景选中删除,只留下齿轮部分。
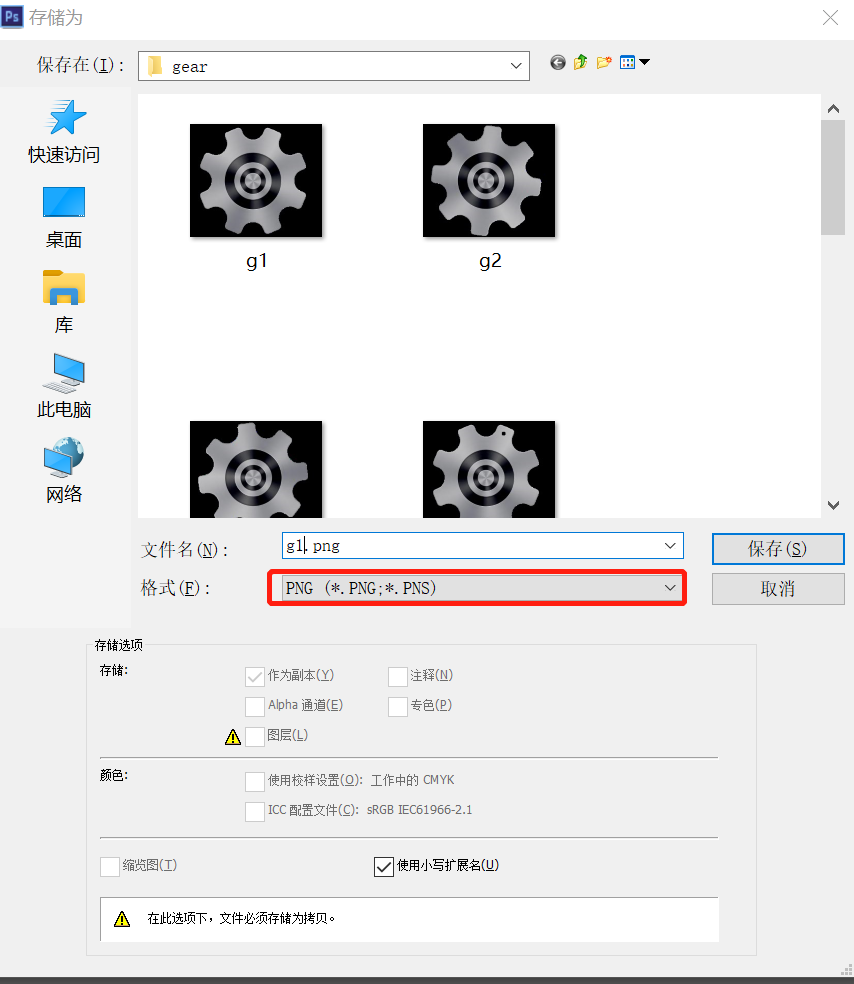
(3)存储为png格式
然后点击“文件->存储为”,文件格式选中PNG,然后保存。
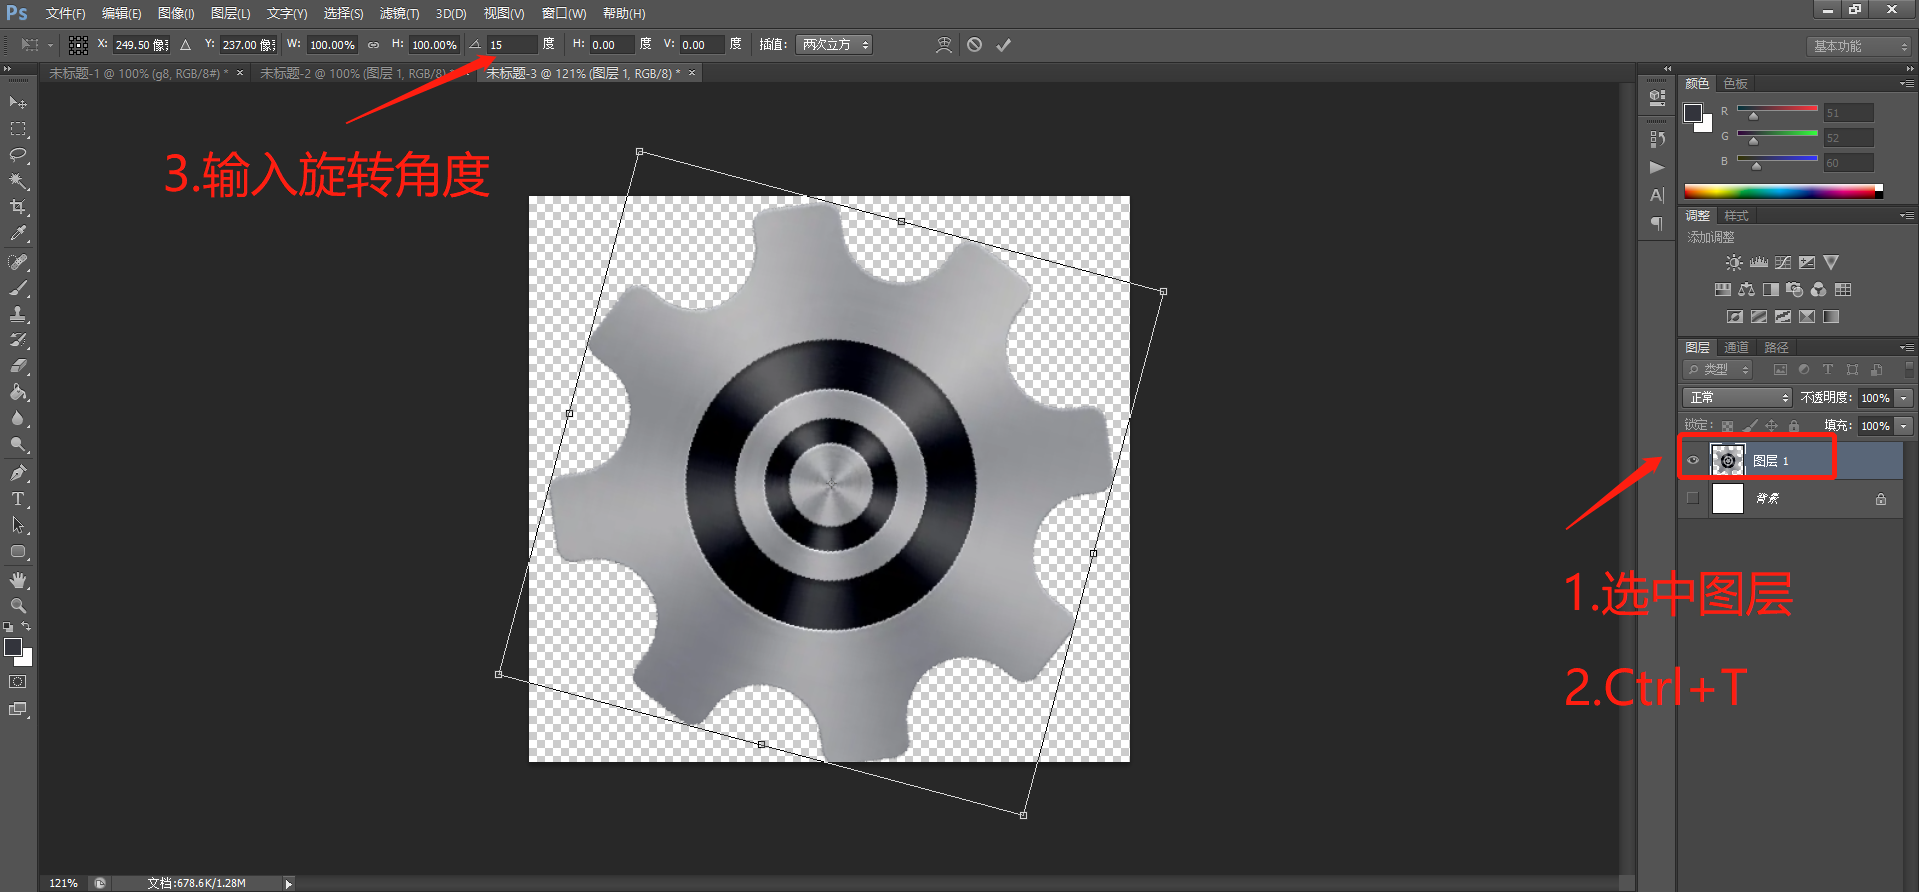
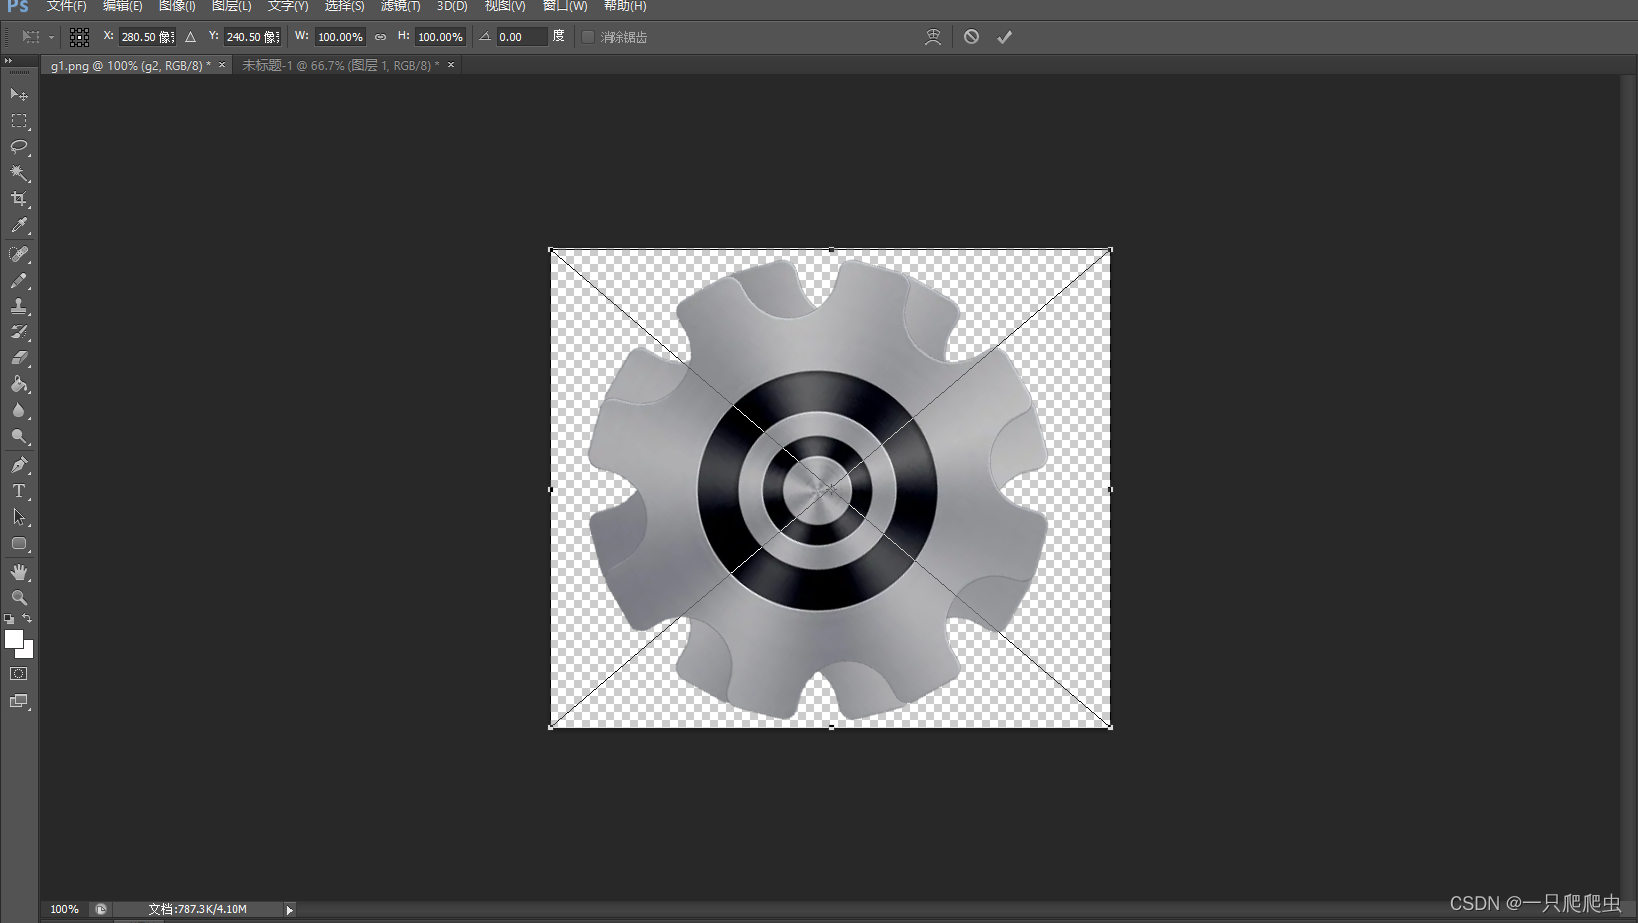
(4)旋转图片
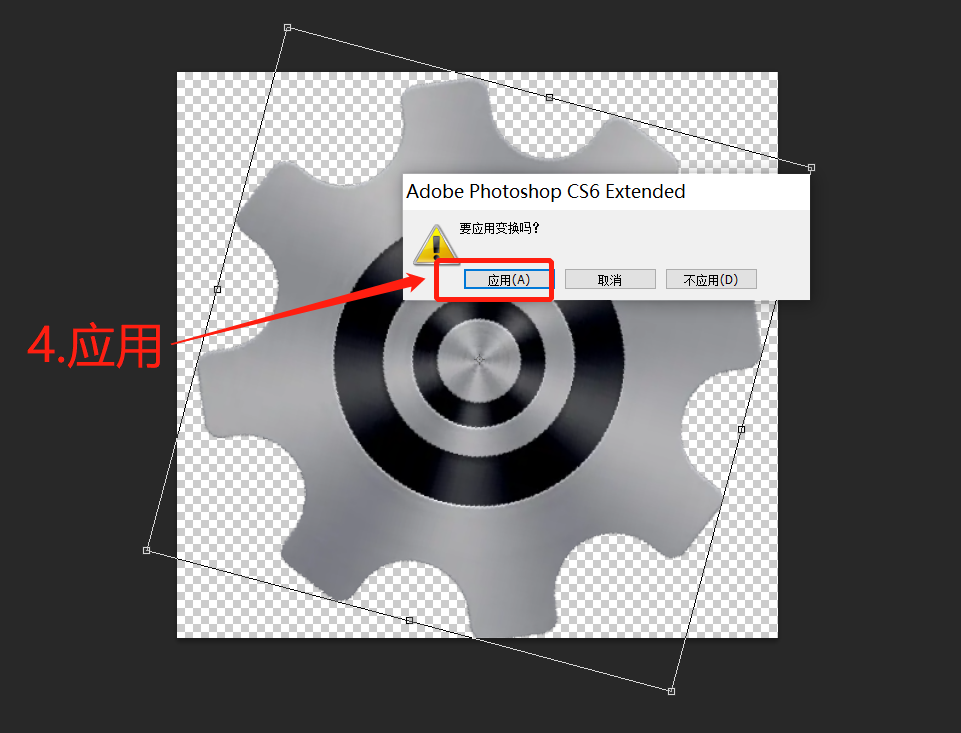
用Ctrl+T快捷键,打开自由变换功能,设置旋转角度为15°,然后保存名称为g2.png。具体操作步骤如图所示。同样,按照此方法,把g2.png再旋转15°,保存名称为g3.png
三、PS生成gif图片检验动画效果
1、打开g1.png
操作步骤:文件->打开
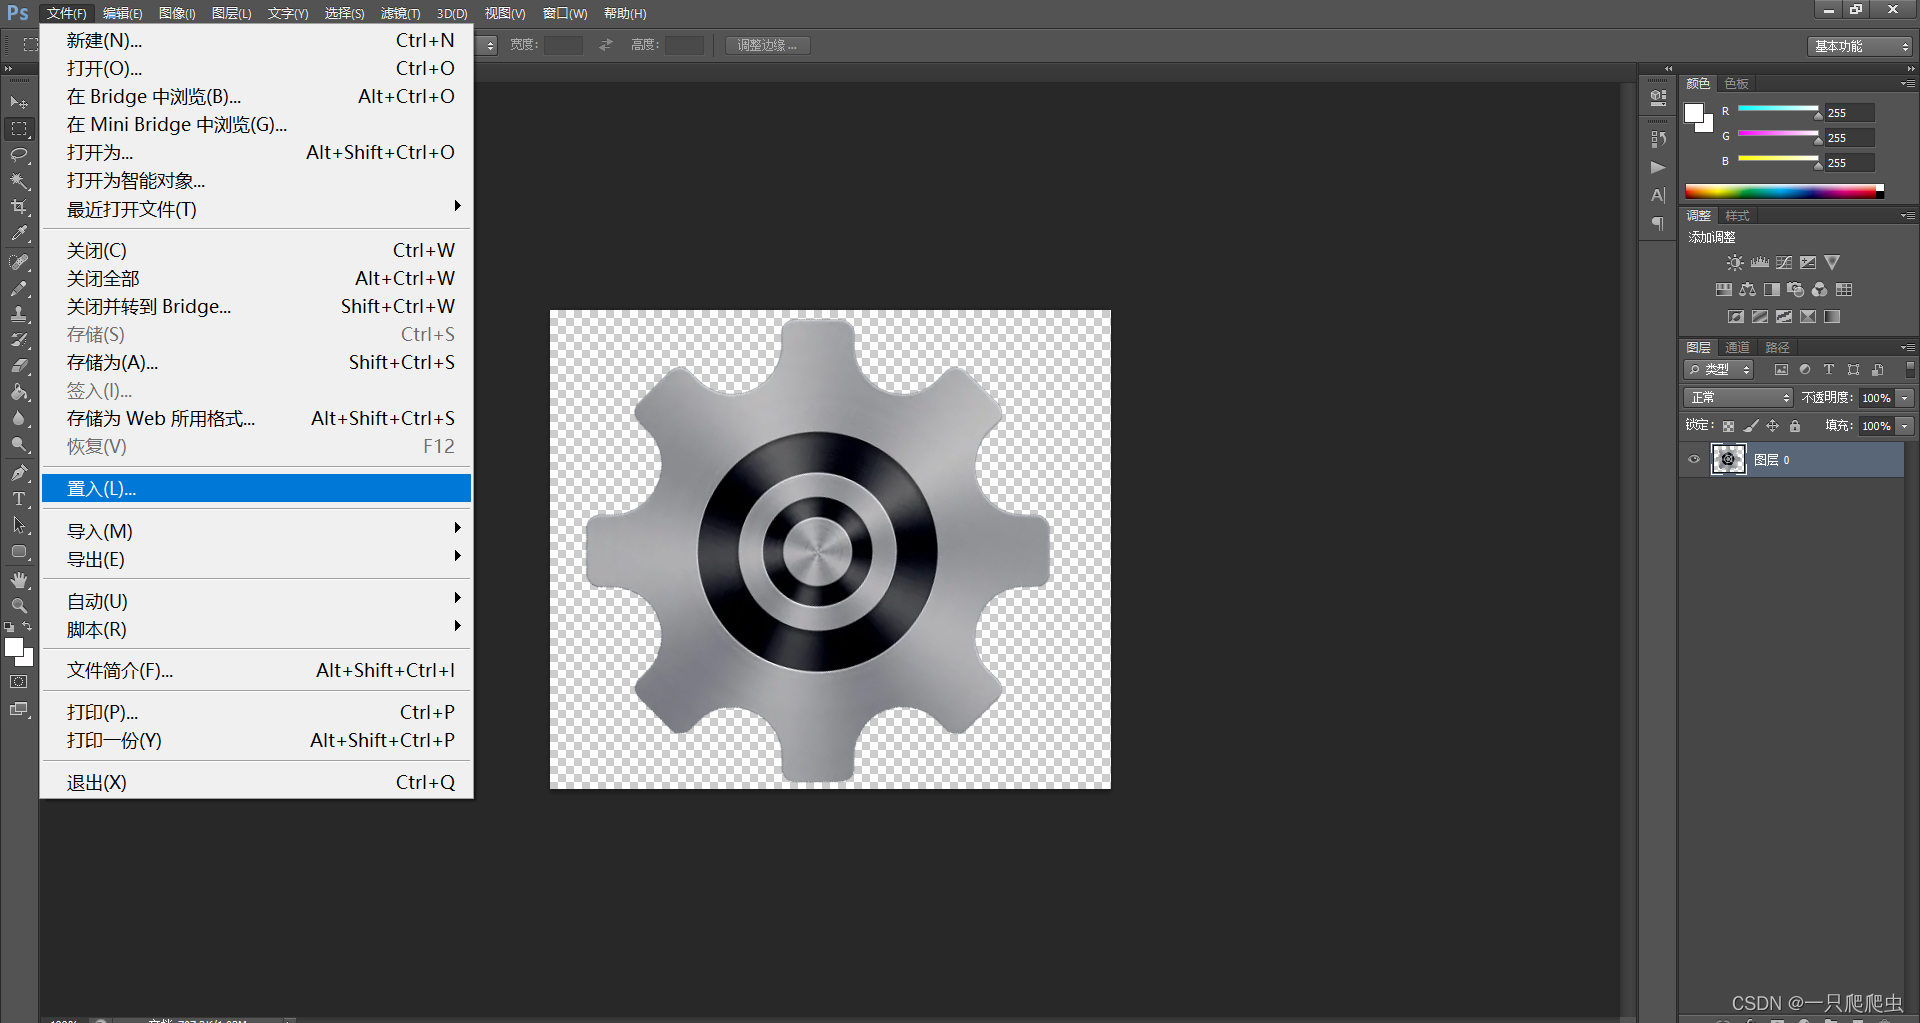
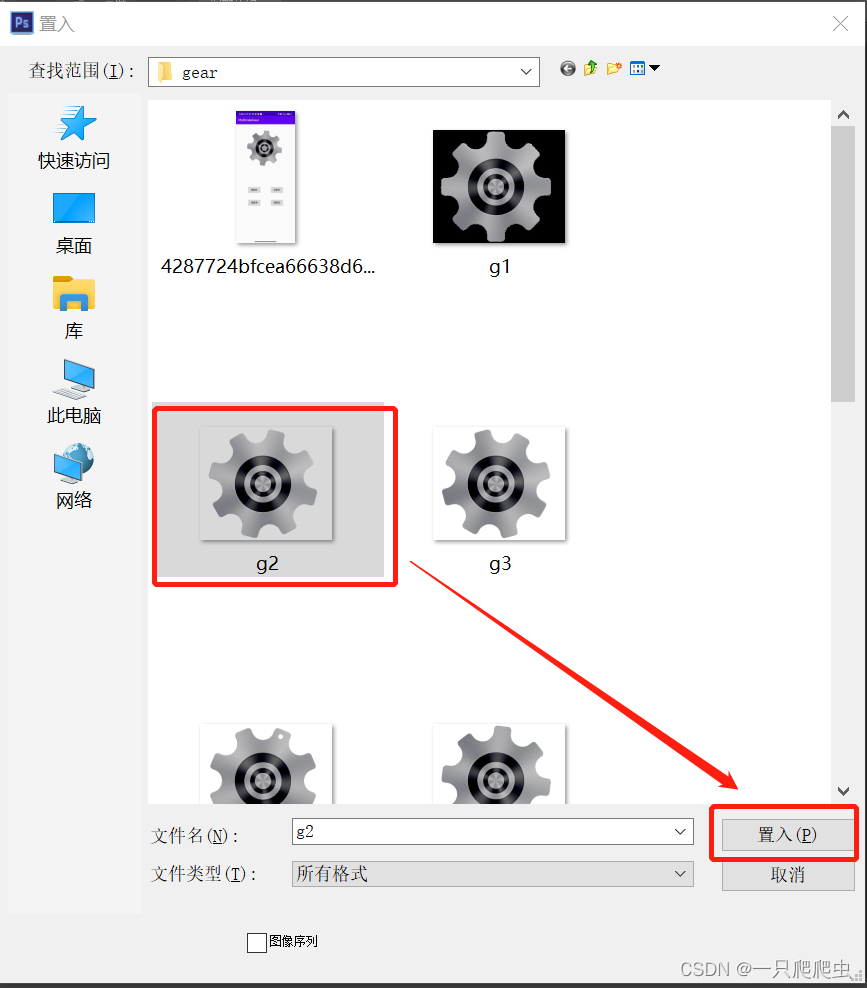
2、置入p2.png和p3.png
操作步骤:文件->置入->选择文件->置入->回车

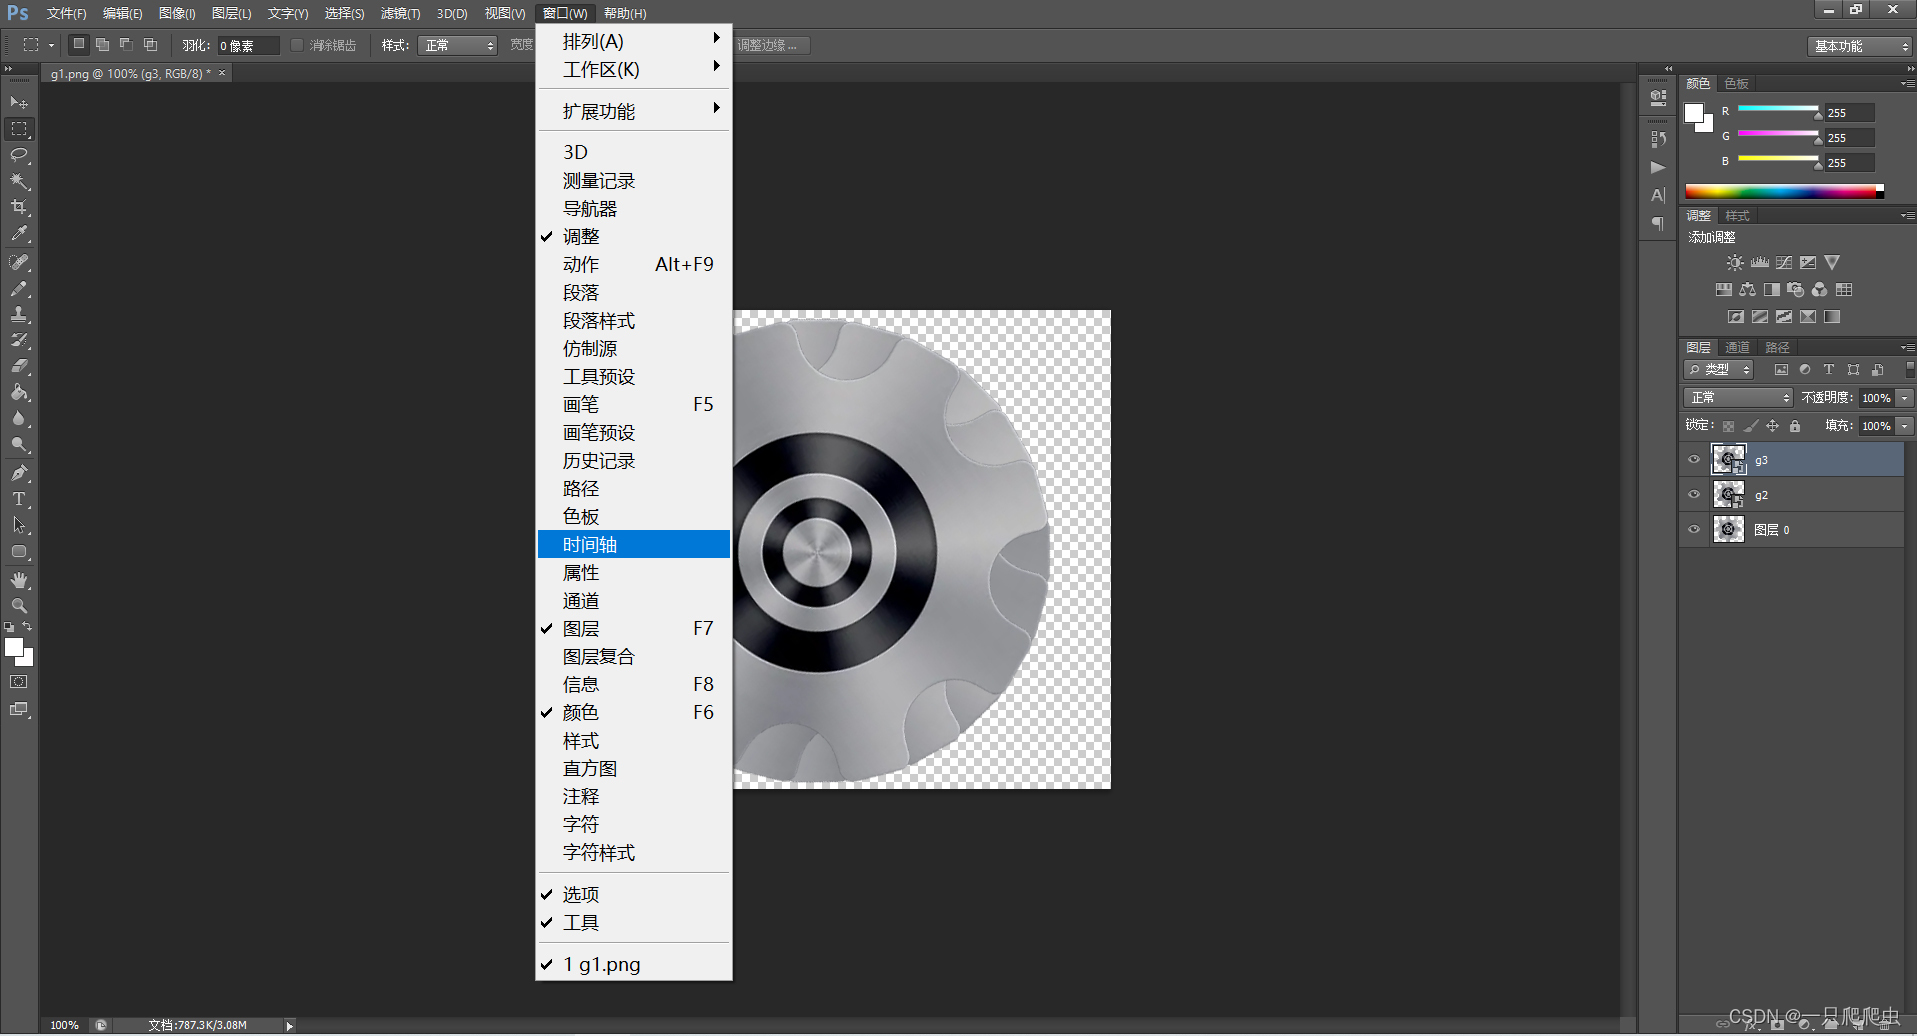
3、打开时间轴
操作步骤:窗口->时间轴
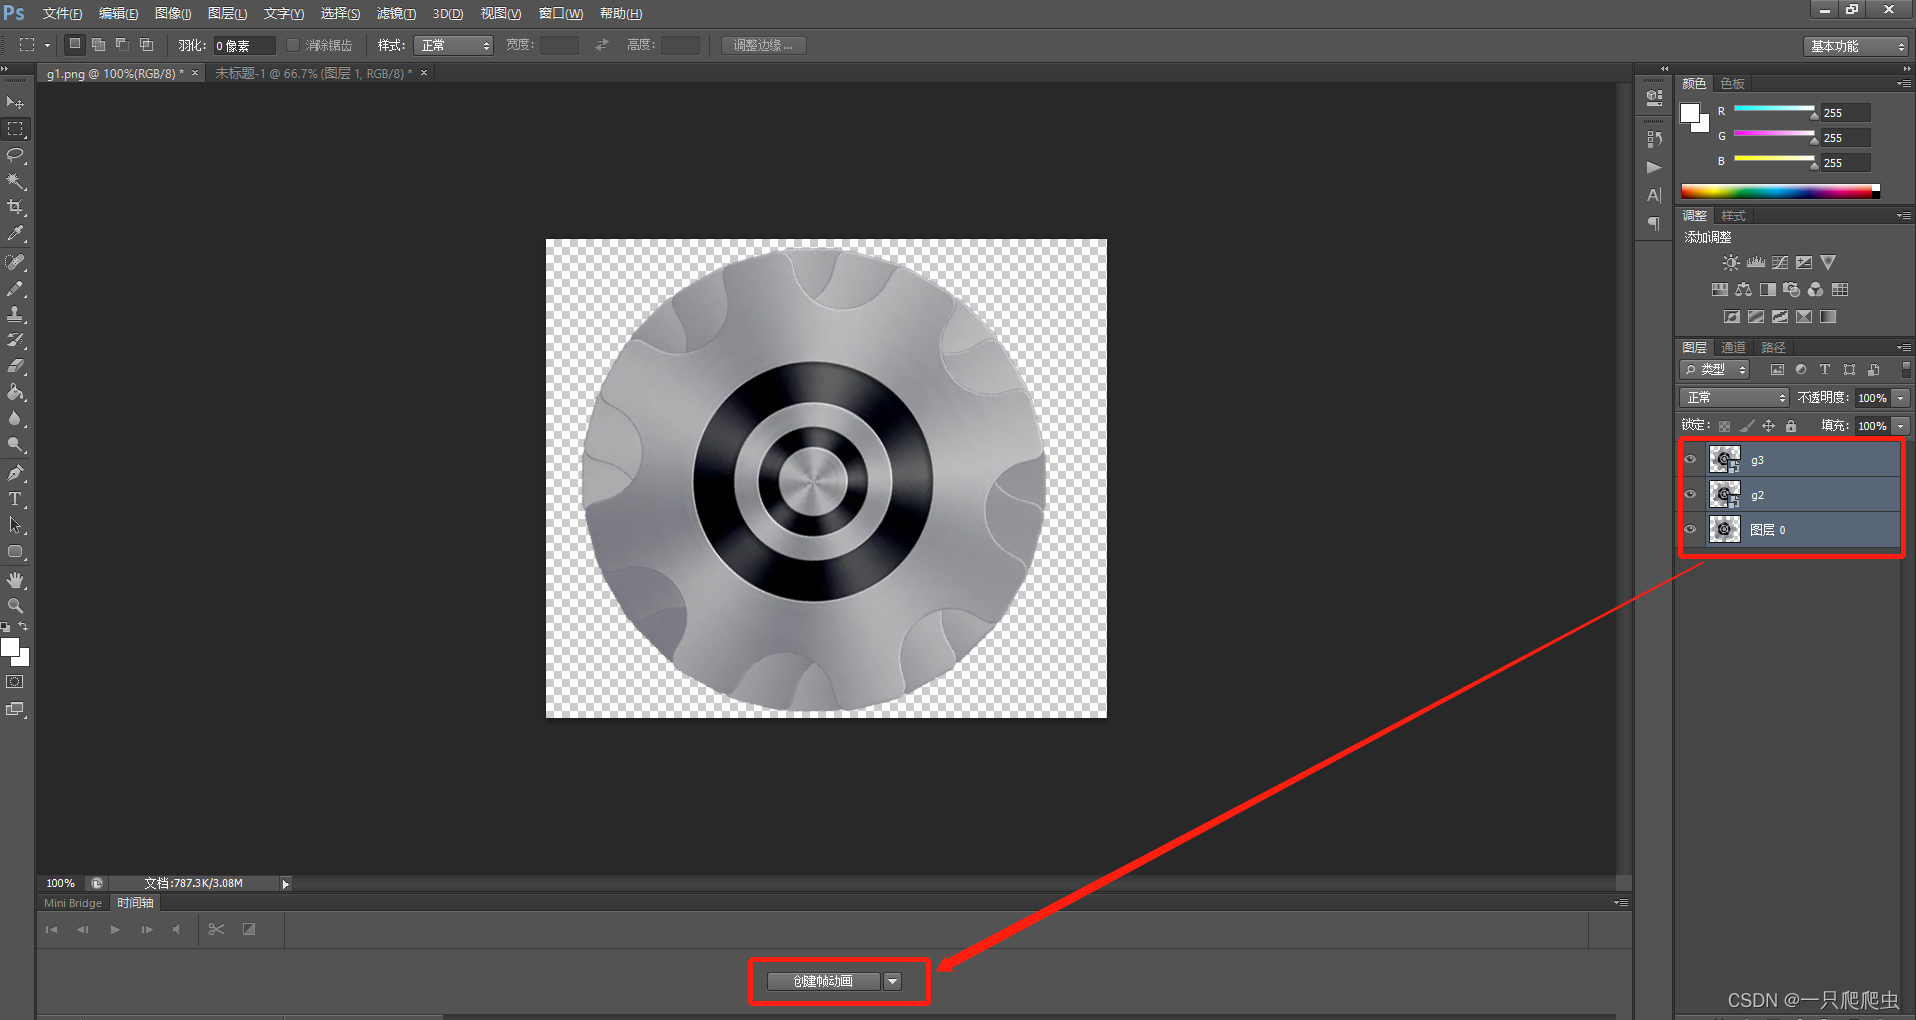
4、生成动画
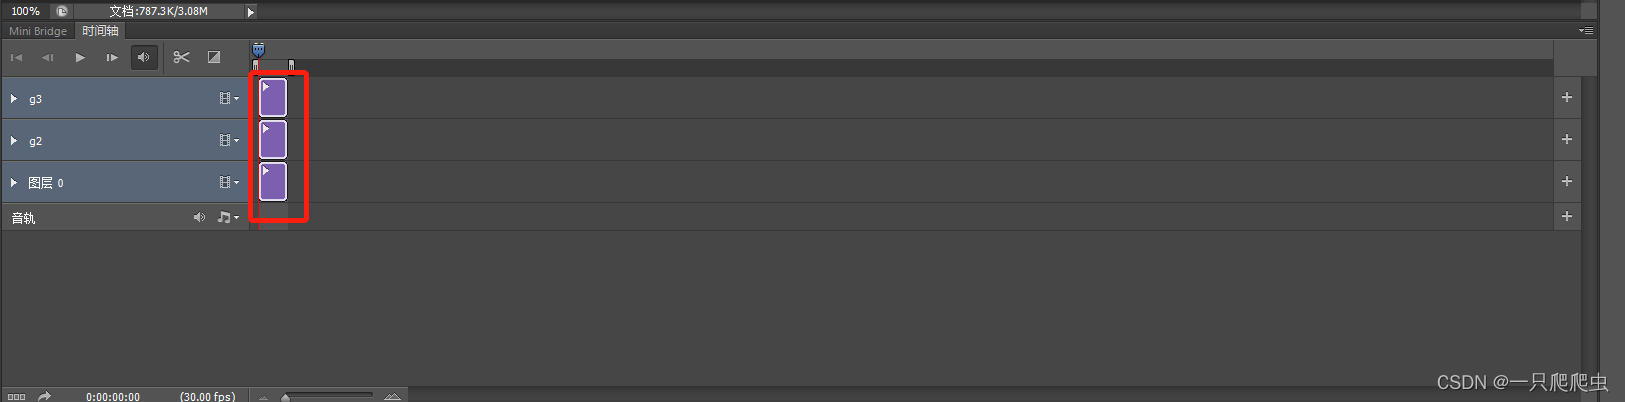
(1)创建帧动画
操作步骤:按住Ctrl键,鼠标左键选中三幅图,点“创建帧动画”
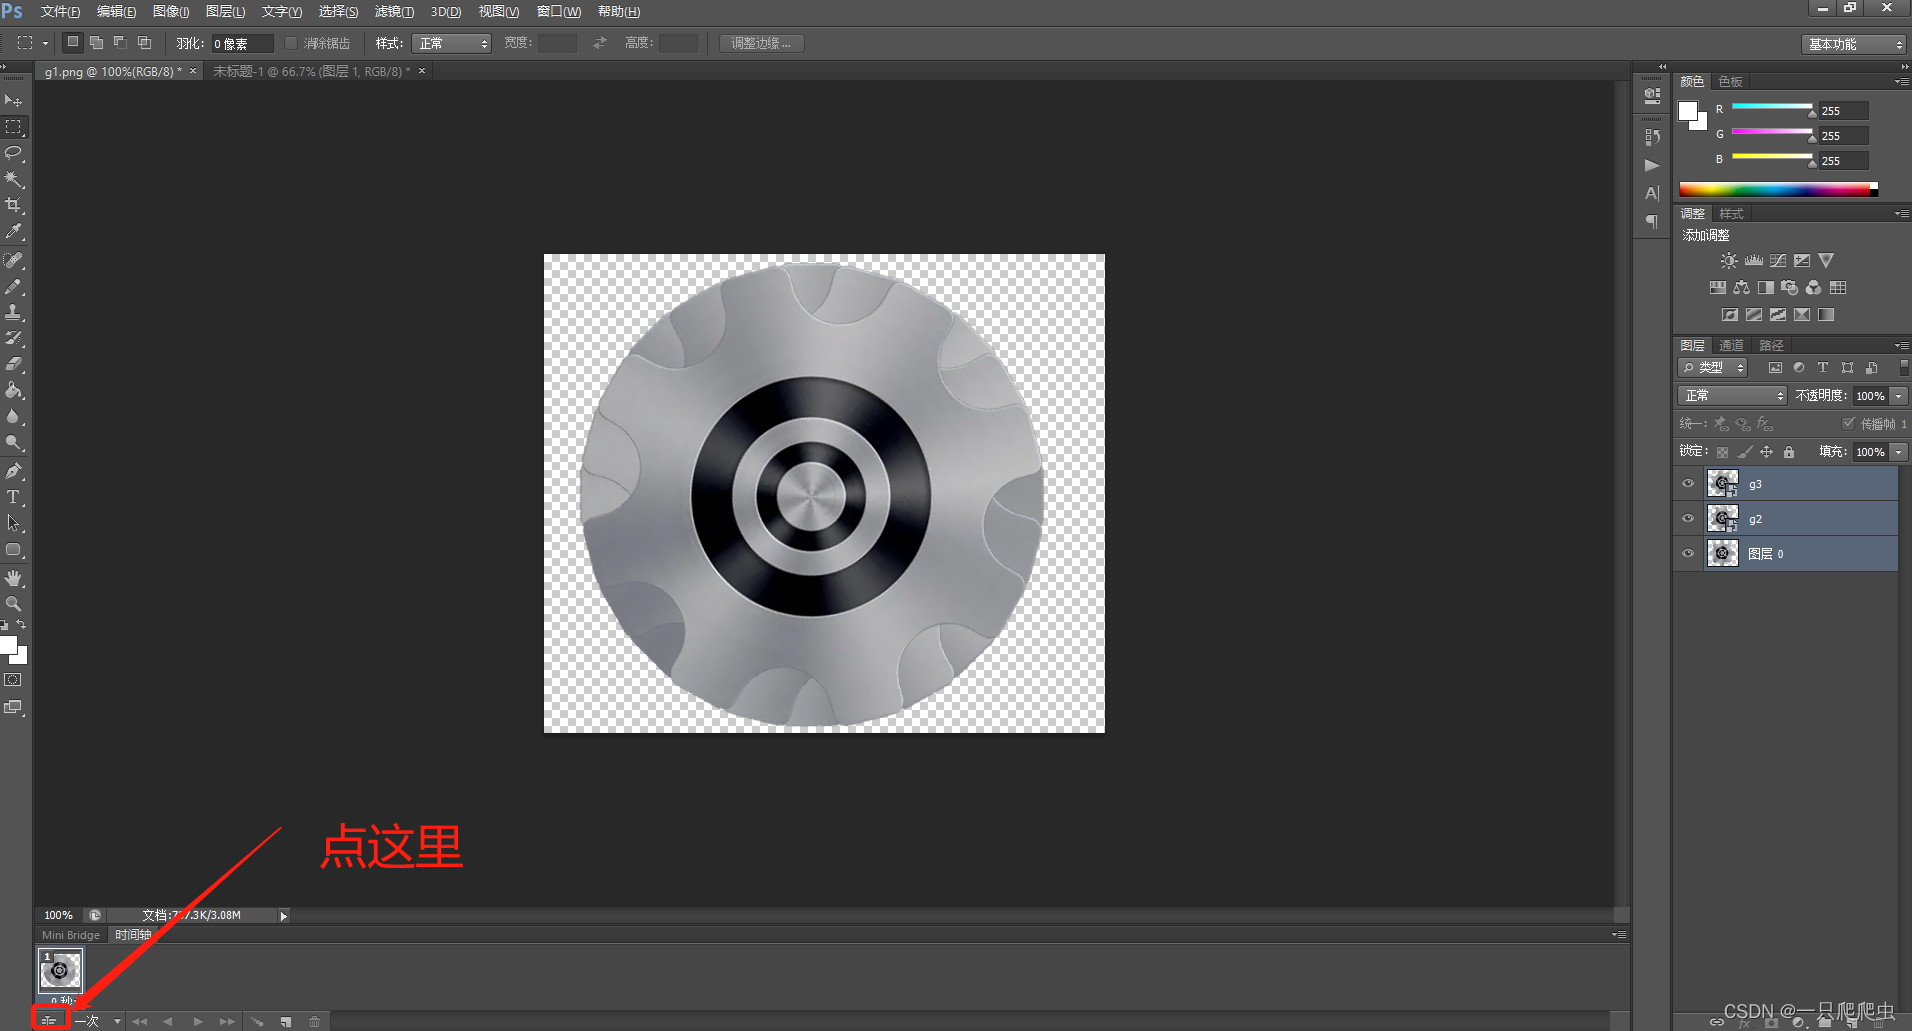
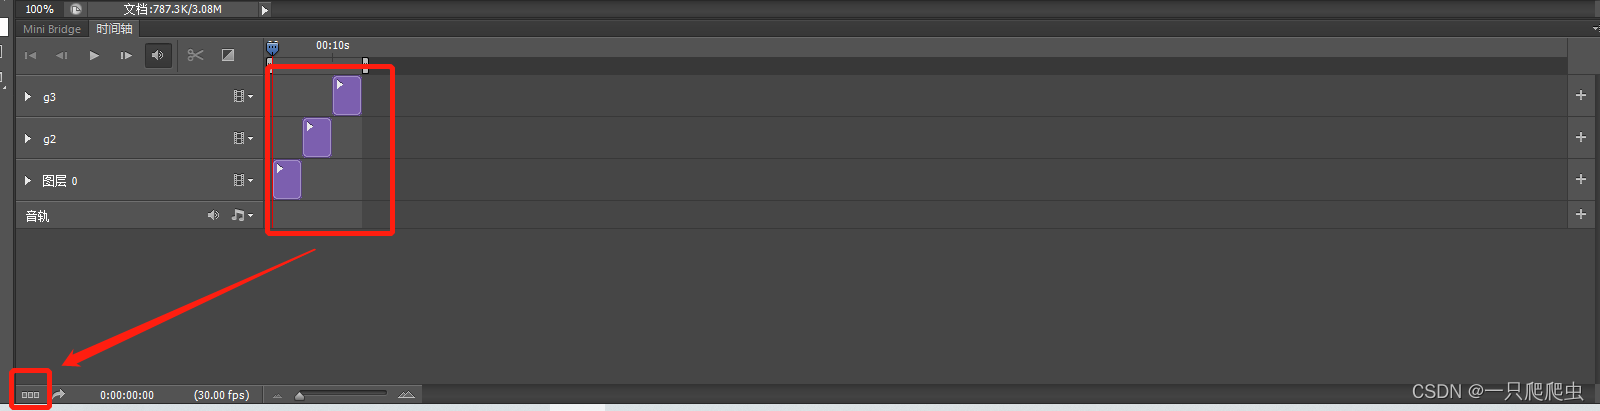
(2)点击“时间轴”图标
操作步骤:点击左下角“时间轴”图标
(3)调整动画播放时间顺序
操作步骤:拖动三幅图的播放时间块,调整顺序:p1、p2、p3。
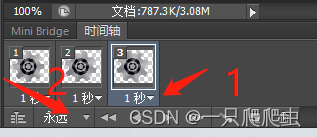
(4)调整完成返回帧动画
操作步骤:点击左下角“帧动画”图标
(5)设置播放时间和循环次数
操作步骤:三幅图的播放时间都为1秒,循环次数为永远
(6)播放动画

(7)生成gif文件
操作步骤:文件->存储为web所用格式
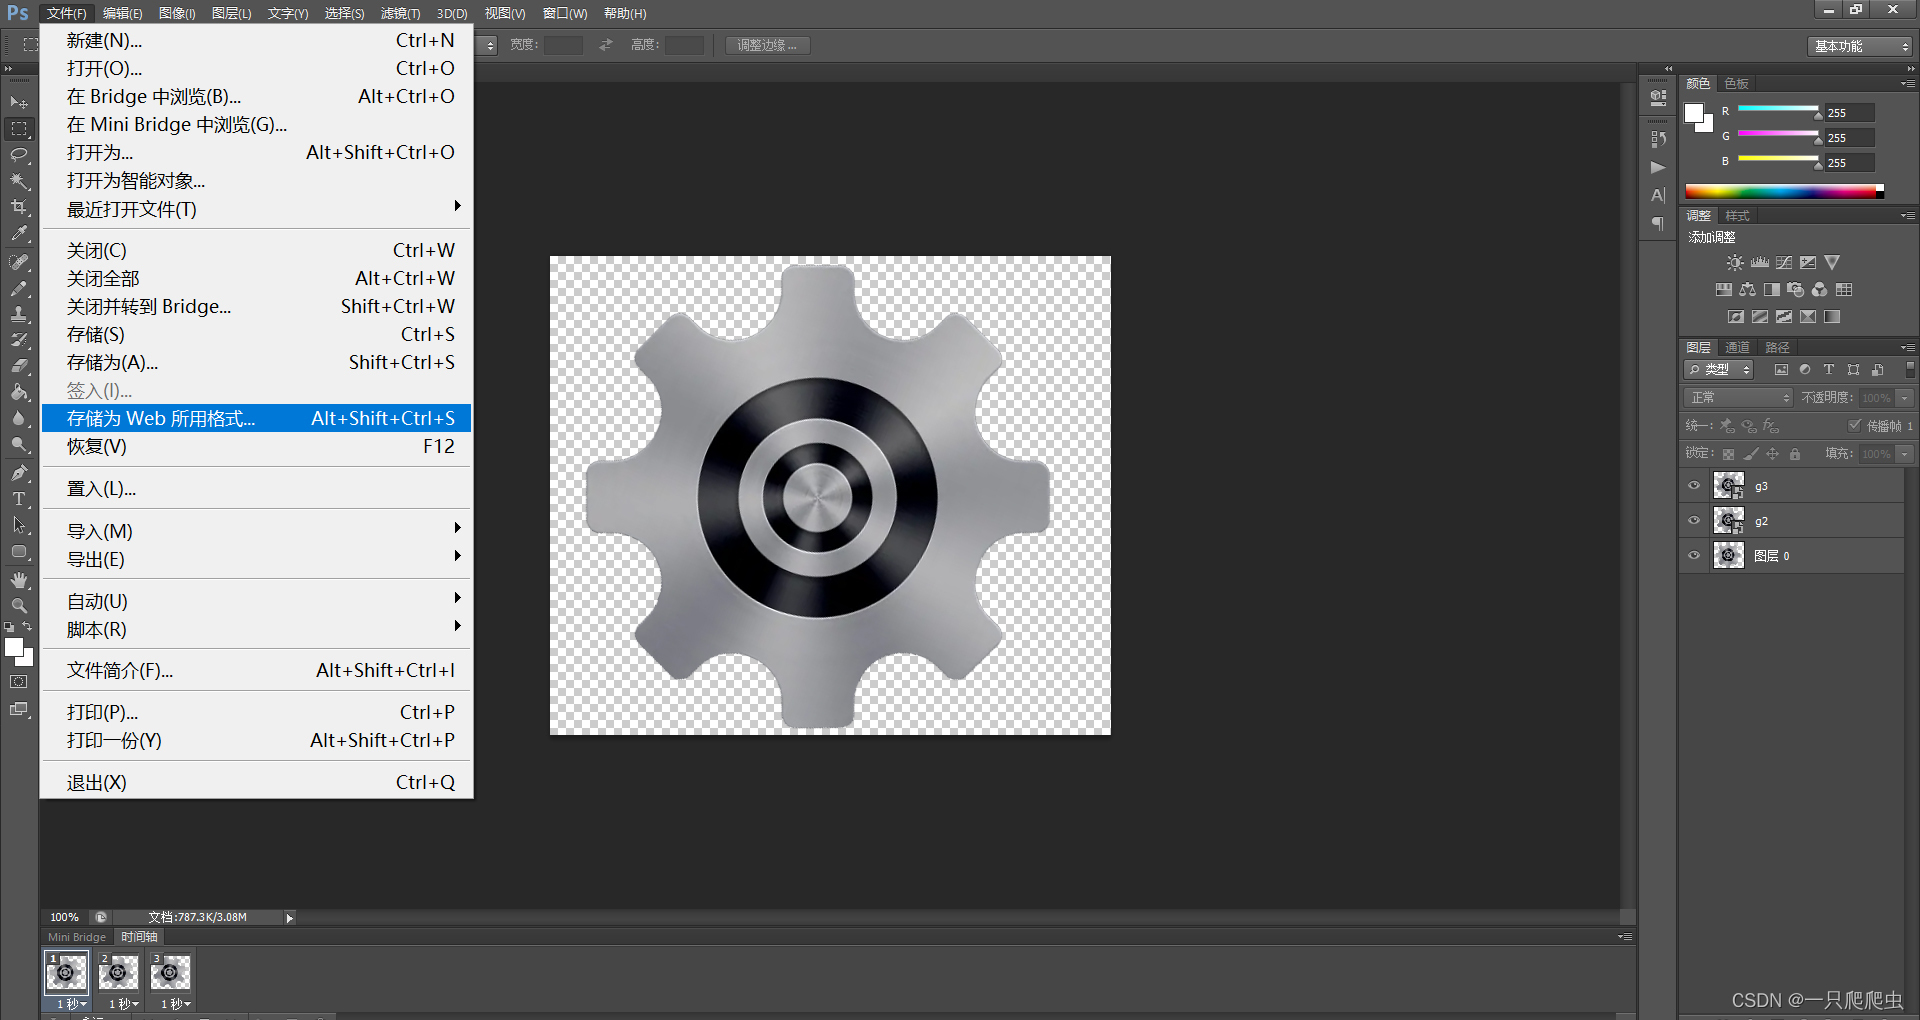
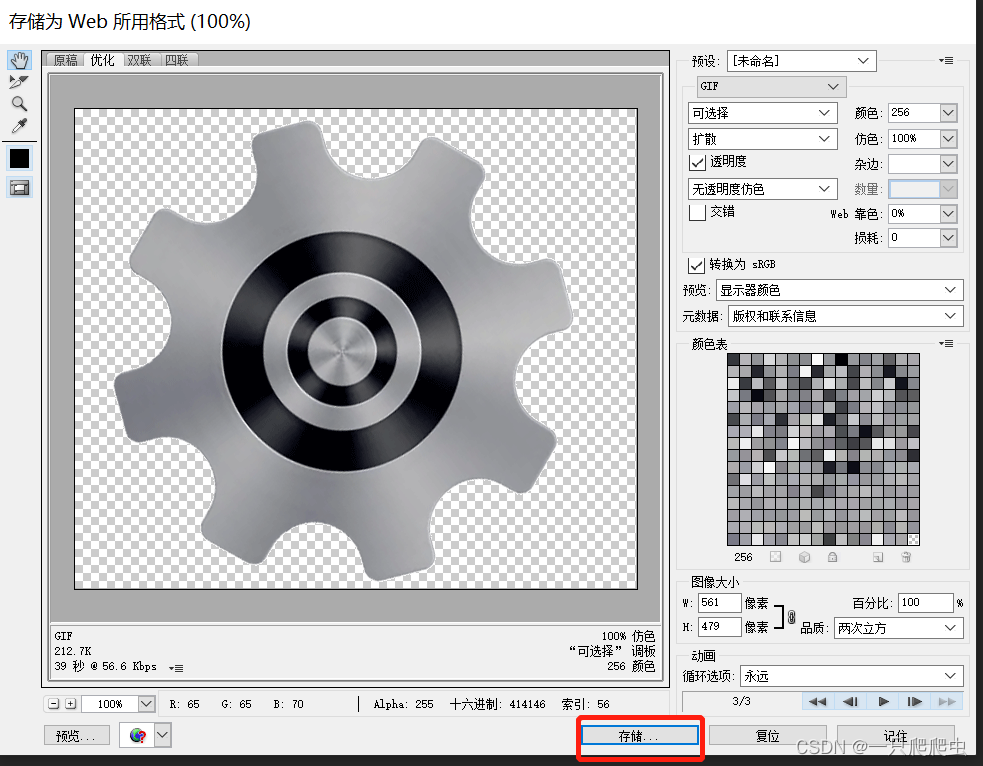
以上操作步骤实现了顺时针循环旋转动画,把三幅图的播放顺序调整成p3、p2、p1即可实现逆时针旋转动画。
四、编写Android程序
1、把g1.png、g2.png、g3.png三幅图复制到mipmap文件夹下
2、layout文件
<?xml version="1.0" encoding="utf-8"?>
<androidx.constraintlayout.widget.ConstraintLayout xmlns:android="http://schemas.android.com/apk/res/android"
    xmlns:app="http://schemas.android.com/apk/res-auto"
    xmlns:tools="http://schemas.android.com/tools"
    android:layout_width="match_parent"
    android:layout_height="match_parent"
    tools:context=".MainActivity">

    <ImageView
        android:id="@+id/g1"
        android:layout_width="wrap_content"
        android:layout_height="wrap_content"
        android:src="@mipmap/g1"
        app:layout_constraintBottom_toBottomOf="parent"
        app:layout_constraintEnd_toEndOf="parent"
        app:layout_constraintHorizontal_bias="0.5"
        app:layout_constraintStart_toStartOf="parent"
        app:layout_constraintTop_toTopOf="parent"
        app:layout_constraintVertical_bias="0.072" />

    <ImageView
        android:id="@+id/g2"
        android:layout_width="wrap_content"
        android:layout_height="wrap_content"
        android:src="@mipmap/g2"
        app:layout_constraintBottom_toBottomOf="parent"
        app:layout_constraintHorizontal_bias="0.5"
        app:layout_constraintLeft_toLeftOf="parent"
        app:layout_constraintRight_toRightOf="parent"
        app:layout_constraintTop_toTopOf="parent"
        app:layout_constraintVertical_bias="0.072" />

    <ImageView
        android:id="@+id/g3"
        android:layout_width="wrap_content"
        android:layout_height="wrap_content"
        android:src="@mipmap/g3"
        app:layout_constraintBottom_toBottomOf="parent"
        app:layout_constraintEnd_toEndOf="parent"
        app:layout_constraintHorizontal_bias="0.5"
        app:layout_constraintStart_toStartOf="parent"
        app:layout_constraintTop_toTopOf="parent"
        app:layout_constraintVertical_bias="0.072" />

    <Button
        android:id="@+id/clockwise"
        android:layout_width="wrap_content"
        android:layout_height="wrap_content"
        android:layout_marginTop="132dp"
        android:text="顺时针"
        app:layout_constraintHorizontal_bias="0.256"
        app:layout_constraintLeft_toLeftOf="parent"
        app:layout_constraintRight_toRightOf="parent"
        app:layout_constraintTop_toBottomOf="@+id/g3" />


    <Button
        android:id="@+id/anticlockwise"
        android:layout_width="wrap_content"
        android:layout_height="wrap_content"
        android:layout_marginTop="132dp"
        android:text="逆时针"
        app:layout_constraintHorizontal_bias="0.749"
        app:layout_constraintLeft_toLeftOf="parent"
        app:layout_constraintRight_toRightOf="parent"
        app:layout_constraintTop_toBottomOf="@+id/g3" />

    <Button
        android:id="@+id/reduce"
        android:layout_width="wrap_content"
        android:layout_height="wrap_content"
        android:layout_marginTop="36dp"
        android:text="速度减"
        app:layout_constraintHorizontal_bias="0.256"
        app:layout_constraintLeft_toLeftOf="parent"
        app:layout_constraintRight_toRightOf="parent"
        app:layout_constraintTop_toBottomOf="@+id/clockwise" />

    <Button
        android:id="@+id/add"
        android:layout_width="wrap_content"
        android:layout_height="wrap_content"
        android:layout_marginTop="36dp"
        android:text="速度加"
        app:layout_constraintHorizontal_bias="0.749"
        app:layout_constraintLeft_toLeftOf="parent"
        app:layout_constraintRight_toRightOf="parent"
        app:layout_constraintTop_toBottomOf="@+id/anticlockwise" />

</androidx.constraintlayout.widget.ConstraintLayout>
3、MainActivity
package com.example.myrotategear;

import androidx.appcompat.app.AppCompatActivity;

import android.annotation.SuppressLint;
import android.os.Bundle;
import android.os.Handler;
import android.os.Message;
import android.view.View;
import android.widget.Button;
import android.widget.ImageView;

import java.util.Timer;
import java.util.TimerTask;

public class MainActivity extends AppCompatActivity {
    //计数变量
    int i,j=0;

    //声明三幅图是否显示setVisibility方法的参量值,View.INVISIBLE4为不显示,值为4,View.VISIBLE为显示,值为0
    int int_image[] = {4, 4, 4};

    ImageView imageView1;
    ImageView imageView2;
    ImageView imageView3;

    Button btn_clockwise;//顺时针按钮
    Button btn_anticlockwise;//逆时针按钮
    //速度加、减按钮
    Button add,reduce;

    //定时器timer1的period为定时器的定时触发的时间,interval为图片变换显示的计数器,变换周期=period*interval;
    int interval=100;
    //定义的方向值,true为顺时针旋转,false为逆时针旋转
    boolean direction=true;

    @Override
    protected void onCreate(Bundle savedInstanceState) {
        super.onCreate(savedInstanceState);
        setContentView(R.layout.activity_main);

        imageView1=findViewById(R.id.g1);
        imageView2=findViewById(R.id.g2);
        imageView3=findViewById(R.id.g3);

        btn_clockwise=findViewById(R.id.clockwise);
        btn_anticlockwise=findViewById(R.id.anticlockwise);

        add=findViewById(R.id.add);
        reduce=findViewById(R.id.reduce);

        //启用定时器
        timer1.schedule(timertask,0,5);

        //初始化三幅图,只显示第一幅
        imageView1.setVisibility(View.VISIBLE);
        imageView2.setVisibility(View.INVISIBLE);
        imageView3.setVisibility(View.INVISIBLE);

        btn_clockwise.setOnClickListener((view)-> {

            direction=true;
        });

        btn_anticlockwise.setOnClickListener((view)-> {

            direction=false;
        });

        add.setOnClickListener((view)-> {

            interval--;
            if(interval<10)
            {
                interval=10;
            }
        });

        reduce.setOnClickListener((view)-> {

            interval++;
            if(interval>500)
            {
                interval=500;
            }
        });
    }


    Timer timer1 = new Timer();
    TimerTask timertask = new TimerTask() {
        @Override
        public void run() {
            //要推迟执行的方法
           i++;
           if(i>interval)
           {
               //j为要显示的那幅图的标号
               j++;
               i=0;
               if(j>2)
               {j=0;}

               //给三幅图setVisibility方法的参量值赋值,
               for(int k=0;k<3;k++)
               {
                   //编号为j的那幅显示,其余的图不显示。
                   if(k==j)
                   {
                       int_image[k]=0;
                   }
                   else
                   {
                       int_image[k]=4;
                   }
               }

               //当计数器i达到interval时,给mHandler发送触发信号
               mHandler.sendEmptyMessage(0);
           }
        }
    };

    @SuppressLint("HandlerLeak")
    private Handler mHandler = new Handler() {
        @Override
        public void handleMessage(Message msg) {
            super.handleMessage(msg);
            switch (msg.what) {

                case 0:

                    //正转
                    if(direction)
                    {
                        imageView1.setVisibility(int_image[0]);
                        imageView2.setVisibility(int_image[1]);
                        imageView3.setVisibility(int_image[2]);
                    }
                    //反转
                    else
                    {
                        imageView3.setVisibility(int_image[0]);
                        imageView2.setVisibility(int_image[1]);
                        imageView1.setVisibility(int_image[2]);
                    }

            }

        }

    };

}
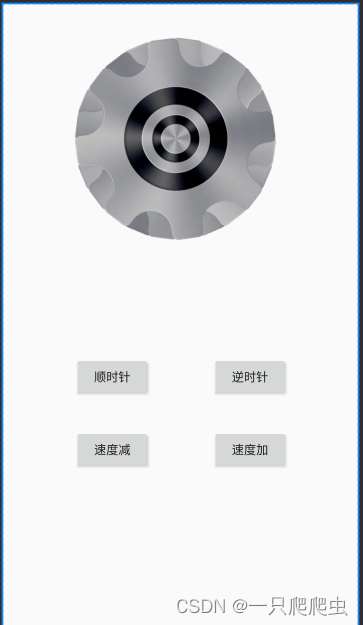
五、效果
测试效果如以下视频所示。
Android例程:可调速可正反转的齿轮
六、源代码
相关文章
- [Android]calabash-android再深入
- StatCounter:Win8 数据流量已超 Android
- Android开发之视图动画基础
- [Android Memory] android 警告:Exported activity does not require permission
- android Universal Image Loader for Android 说明文档 (1)
- android之动画popowindows
- Android API之android.content.BroadcastReceiver
- Android开发之短信
- 41、Android中当数据库需要更新时我们该怎么办?
- Android OpenGL ES(六)创建实例应用OpenGLDemos程序框架 .
- Android源码浅析(二)——Ubuntu Root,Git,VMware Tools,安装输入法,主题美化,Dock,安装JDK和配置环境
- 《android开发艺术探索》读书笔记(十五)--Android性能优化
- android studio 运行太慢了
- Android 补间动画(二)
- 【Android笔记26】Android中的动画效果之补间动画
- Weex Android 文字渲染优化
- Android 11.0 12.0去掉目前处于全屏模式的提示框
- android 9.0 10.0 framework系统api添加jni方法
- 【Android Gradle 插件】Android Library 依赖库混淆配置 ( ProductFlavor#consumerProguardFiles 配置 | 依赖库混淆配置 )
- 2014 android毕设代做 代做Android毕设 安卓毕设
- Android 实现个性的ViewPager切换动画 实战PageTransformer(兼容Android3.0下面)
- 使用Android Studio build tensorflow/examples/android——直接用android studio即可
- Android的java的报错提示:Could not find com.android.tools.build:gradle:4.2.2.
- android AudioTrack如何与AudioFlinger交换音频数据