
vue2.x使用swiper7.4.1
Vue2 使用
2023-09-11 14:19:18 时间
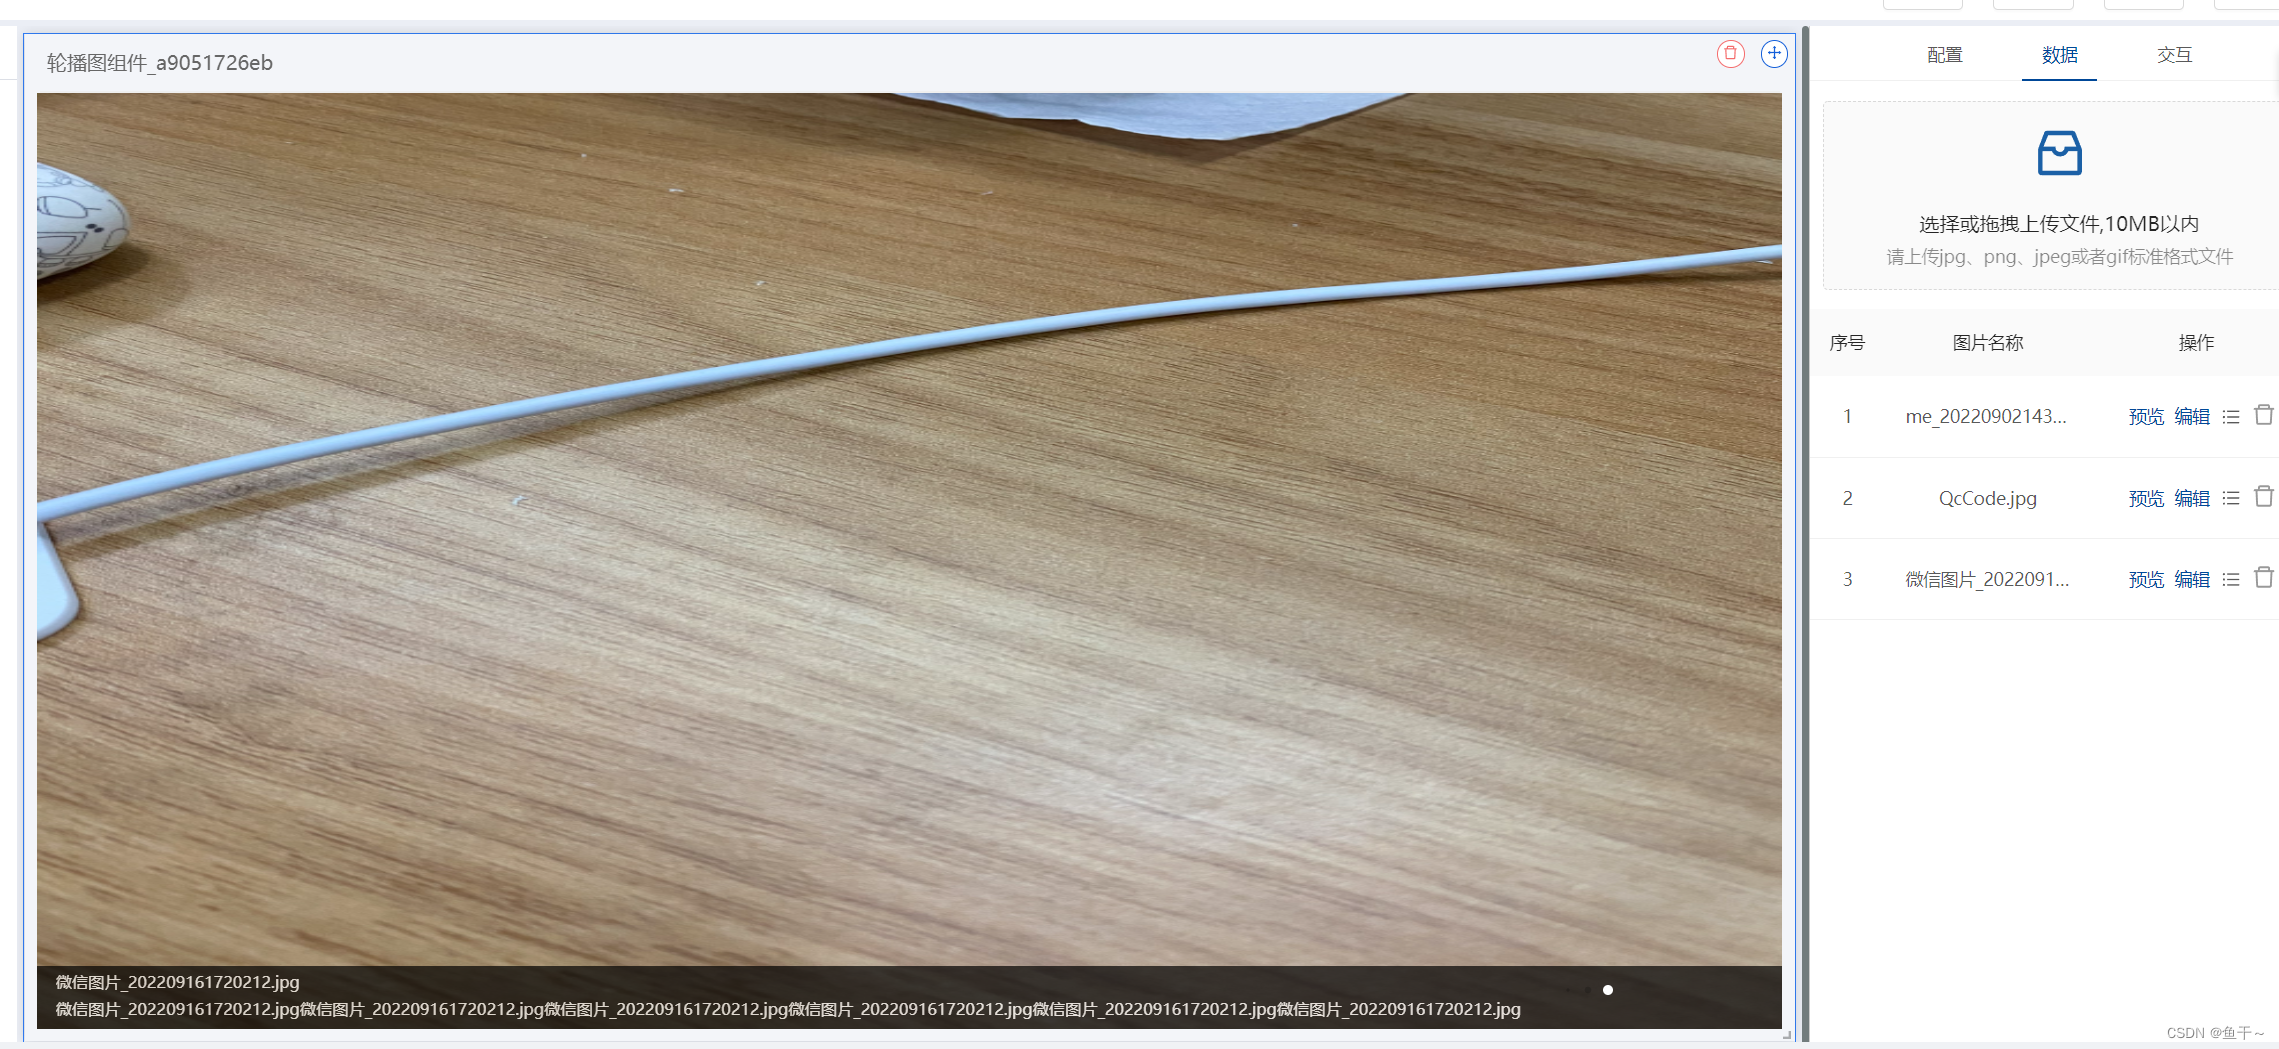
场景:需要一个图片轮播片实现自定义轮播切换时间、切换效果、图片增删改查实时同步到轮播图显示
效果图: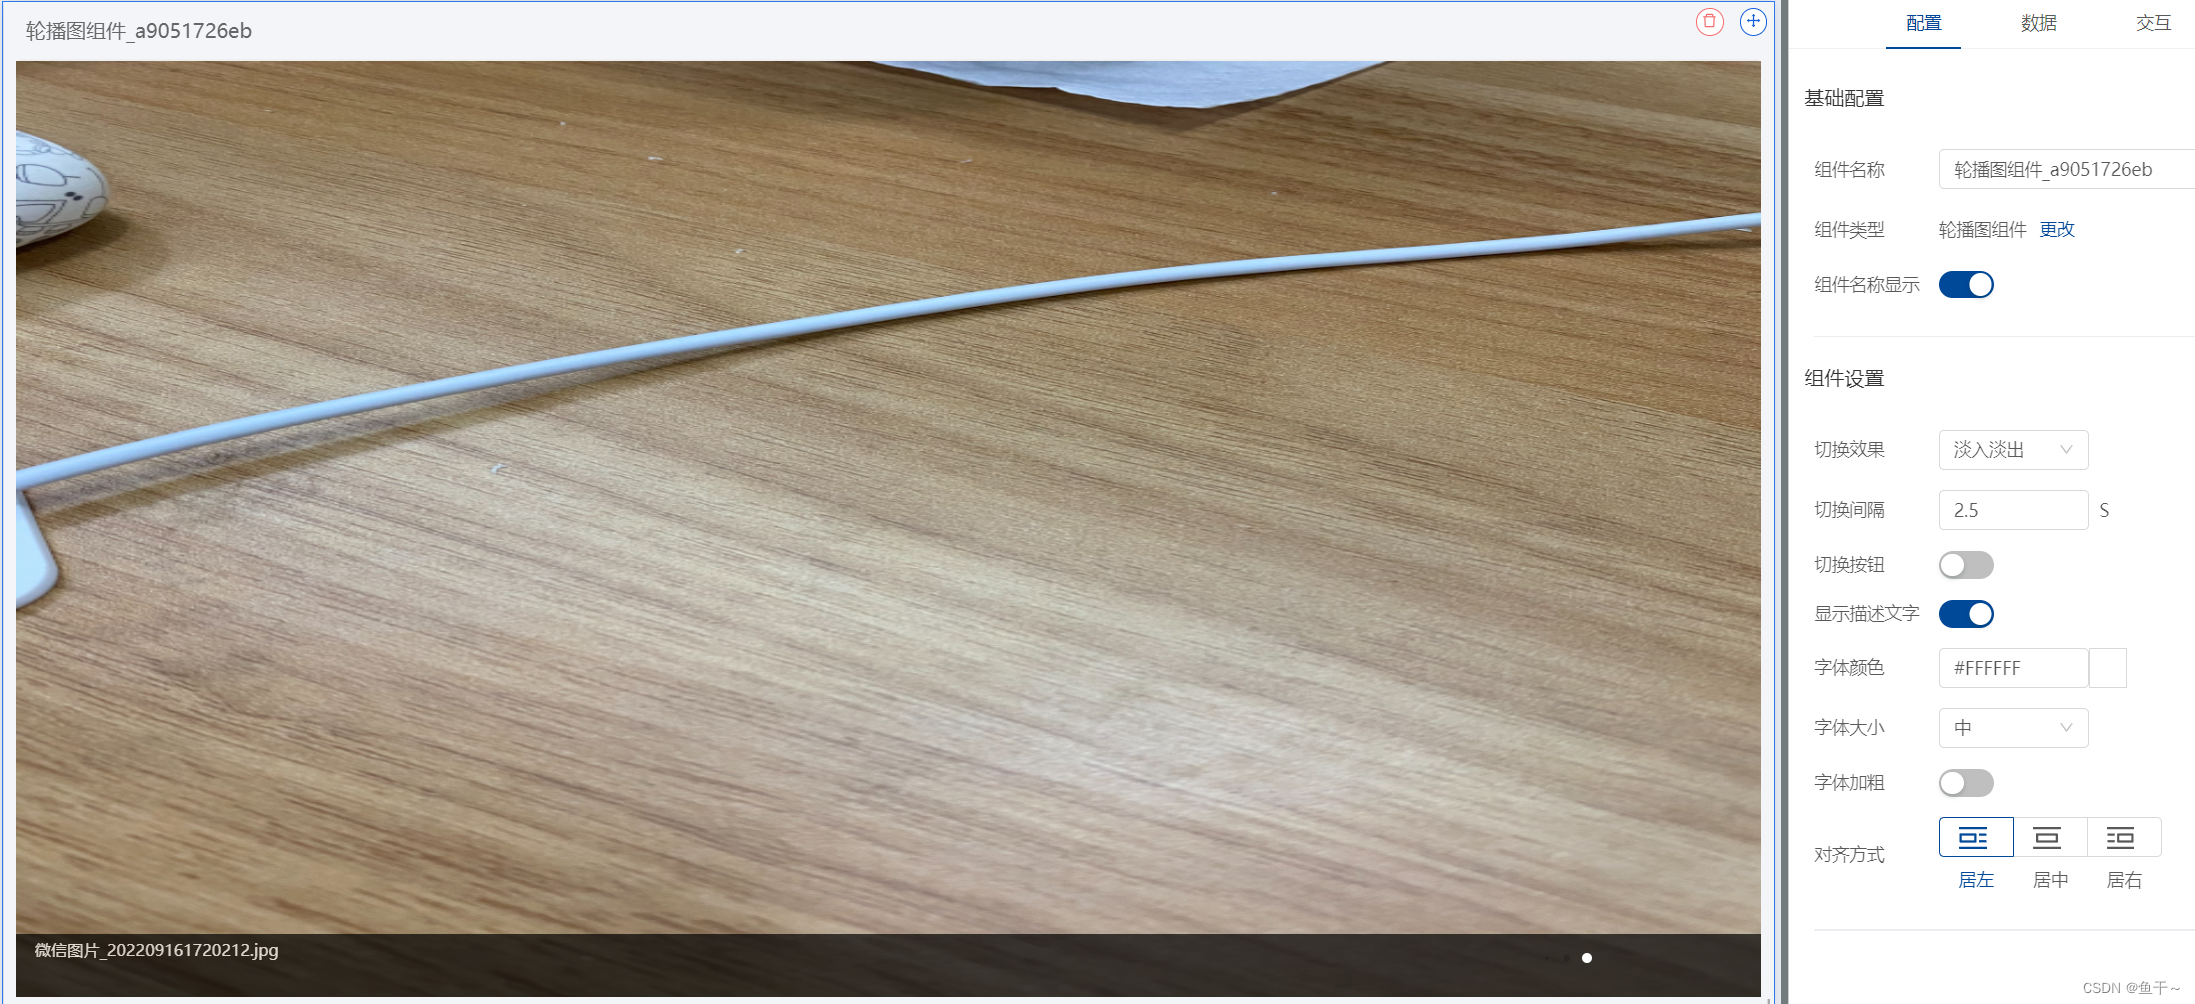
使用yarn方式引入包(也可以用npm引入)
yarn add swiper@7.4.1
template内的代码
<div class="b-wrapper">
    <div class="colvideo">
      <div class="swiper mySwiper" v-if="proPortion.length">
        <div class="swiper-wrapper">
          <div class="swiper-slide" v-for="(item, index) in proPortion" :key="index" :data-hash="item.index">
            <img :src="item.imageUrl" lazy />
            <div
              class="titlevideo"
              :style="`color:${textColor};font-size: ${textSize};font-weight:${
                textWeight ? 'bold' : 'normal'
              }; text-align:${textAlign}`"
              v-show="com.config.isShow"
            >
              <div class="txtover">{{ item.title }}</div>
              <a-tooltip>
                <template #title>
                  {{ item.remark }}
                </template>
                <div :class="[item.remark === '' ? '' : 'txtover']">
                  {{ item.remark }}
                </div>
              </a-tooltip>
            </div>
          </div>
        </div>

        <div class="swiper-pagination"></div>

        <div class="swiper-button-prev swiper-button-white" v-show="isEffectShow"></div>
        <div class="swiper-button-next swiper-button-white" v-show="isEffectShow"></div>
      </div>

      <div class="swiper backcolor" v-else><div class="titleNo">暂无数据</div></div>
    </div>
  </div>
script内的代码
var swiperSetting = {}
import 'swiper/swiper-bundle.min.css'
import 'swiper/swiper-bundle.css'
import 'swiper/swiper.min.css'
import Swiper, { Navigation, Pagination, Autoplay, EffectFade } from 'swiper' // 导入您需要的模块
export default {
  name: 'BSwiper',
  data() {
    return {
      //数据的数组
      proPortion: [],
      //切换时间间隔
      effectTime:"",
       //切换动画特效
    effect: 'cards',
    //切换按钮是否显示
    isEffectShow: false,
     //文字样式显示
    isShow: true,
    //字体颜色
    textColor: '#FFFFFF',
    //字体大小
    textSize: 'small', //medium / small / mini
    //字体加粗
    textWeight: false,
    //字体对齐方式
    textAlign: 'left',
    }
  },
  created() {
	//这里需要先加载数据,然后再执行initSwiper()方法
    this.$nextTick(() => {
      this.initSwiper()
    })
  },
  destroyed() {
    // 注销所有动作
    if (Object.getOwnPropertyNames(swiperSetting).length !== 0) swiperSetting.destroy(true, true)
  },
  methods: {
    //初始化
    initSwiper() {
    //如果没有数据则不加载new Swiper
      if (!this.proPortion.length) return
      //如果后面有新增更新数据,则需要先销毁Swiper
         if (Object.getOwnPropertyNames(swiperSetting).length !== 0) swiperSetting.destroy(true, true)
      swiperSetting = new Swiper('.mySwiper', {
        loop: true, // 循环模式选项
        //设置自动播放间隔时间
        autoplay: {
          delay: this.effectTime * 1000,  //轮播切换的时间,单位是ms
          disableOnInteraction: false,//鼠标放在轮播图上再离开是否取消轮播动画
        },
        modules: [Navigation, Pagination, Autoplay, EffectFade],//引入的插件Pagination是分页;Autoplay是自动播放、EffectFade是轮播切换特效,比如淡入淡出,3D;Navigation是点击切换的按钮
        // 轮播效果,默认为平滑轮播
        effect: this.effect,
        spaceBetween: 30,
        //分页器
        pagination: { el: '.swiper-pagination', dynamicBullets: true },//dynamicBullets当你的slide很多时,开启后,分页器小点的数量会部分隐藏
        //navigation是判断切换按钮上一张下一张
        navigation: {
          nextEl: '.swiper-button-next',
          prevEl: '.swiper-button-prev',
        },
        //懒加载
        lazy: {
          loadPrevNext: true,
        },
        //监听是否销毁
        on: {
          destroy: function () {},
        },
      })
      // 鼠标移入轮播图停止自动滚动,离开后继续自动轮播
      swiperSetting.el.onmouseover = function () {
        swiperSetting.autoplay.stop()
      }
      swiperSetting.el.onmouseout = function () {
        swiperSetting.autoplay.start()
      }
    },
  },
}
css的代码(我这里在style标签使用了 lang=“less” scoped)
.b-wrapper {
  height: 100%;
  width: 100%;

  > .colvideo {
    margin: 0;
    padding: 0;
    width: 100%;
    height: 100%;
    position: relative;

    .swiper {
      width: 100%;
      height: 100%;
      position: relative;
      .swiper-button-prev,
      .swiper-button-next {
        height: 18px;
        width: 18px;
      }
      .swiper-slide img {
        width: 100%;
        height: 100%;
        position: absolute;
      }
      .swiper-button-prev {
        background: #000;
        opacity: 0.7;
        height: 40px;
        width: 40px;
        border-radius: 40px;
      }
      .swiper-button-next {
        background: #000;
        opacity: 0.7;
        height: 40px;
        width: 40px;
        border-radius: 40px;
      }
      .swiper-button-next:after,
      .swiper-button-prev:after {
        font-size: 27px;
      }
      .swiper-button-white {
        color: #fff;
      }
      --swiper-pagination-color: #fff; /* 两种都可以 */
      /deep/ .swiper-pagination-bullets-dynamic {
        left: 90%;
        top: 95%;
      }
      .titlevideo {
        bottom: 0;
        // white-space: nowrap;
        position: absolute;
        // overflow: hidden;
        z-index: 100;
        height: auto;
        min-height: 50px;
        width: 100%;
        background-color: #000;
        opacity: 0.7;
        font-size: auto;
        padding: 1px 0 0 15px;
        font-weight: 700;
        .txtover {
          width: 85%;
          text-overflow: ellipsis;
          -webkit-line-clamp: 2;
          word-break: break-all;
          display: -webkit-box;
          overflow: hidden;
          -webkit-box-orient: vertical;
        }
      }
    }

    > .backcolor {
      background: #000;
      opacity: 0.7;
      // height: 100%;
      width: 100%;
      position: relative;
      > .titleNo {
        position: absolute;
        width: 100%;
        height: 100%;
        color: red;
        font-weight: 600;
        font-size: auto;
        text-align: center;
        top: 50%;
      }
    }
  }
}
踩坑总结:
- 需要在export default外层定义一个var swiperSetting = {}变量,然后把new Swiper赋值到swiperSetting 里,这样才能在其他方法操作Swiper
- 如果需要切换动画效果需要import EffectFade,然后在new Swiper 的modules属性里带上EffectFade,不然切换动画没有淡入淡出或3D效果
- 数据如果有更新需要先销毁Swiper,然后再重新new Swiper
- 页面初始化进来需要先赋值proPortion数据,然后this.$nextTick再执行new Swiper
- Object.getOwnPropertyNames(swiperSetting).length === 0判断swiperSetting变量是否为空,等于0则是空对象
- 官方文档都是最新的,网上很多帖子跟实际使用版本不一致,导致网上内容没有使用价值
点击跳转swiper官方api属性说明