
如何在OpenCV Python中翻转图像?
在 OpenCV 中,可以使用函数 cv2.flip() 翻转图像。使用此功能,我们可以在 X 轴、Y 轴和两个轴上翻转图像。它接受标志翻转代码作为参数,以在轴上翻转图像。
如果翻转代码设置为 0,则图像在 x 轴上翻转,如果翻转代码设置为正整数(例如 1),则图像在 Y 轴上翻转。如果 flipCode 设置为负整数(例如“-1”),则图像将在两个轴上翻转。
步骤
要翻转图像,可以按照以下步骤操作 -
-
导入所需的库。在以下所有示例中,所需的 Python 库是 OpenCV。确保您已经安装了它。
-
使用 cv2.imread() 方法读取输入图像。使用图像类型(即.png或jpg)指定图像的完整路径
-
在输入图像 img 上应用 cv2.flip() 函数。传递参数翻转代码以获得所需的翻转。我们设置 flipCode=0 以围绕 x 轴翻转。
img_v = cv2.flip(img, 0)
-
显示翻转的输出图像。
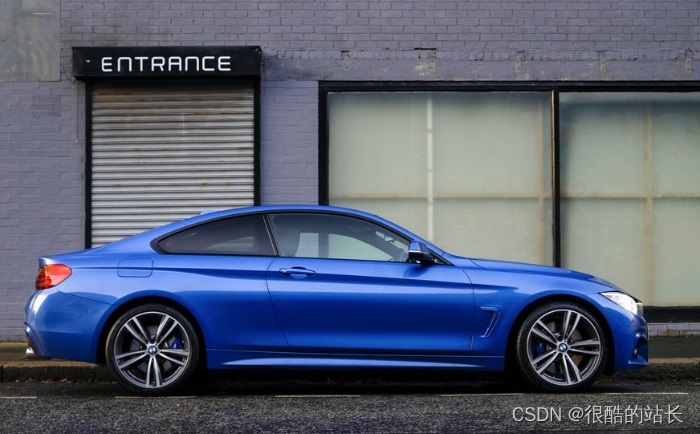
在以下示例中,我们将使用此图像作为输入文件 -

例
在这个 Python 程序中,我们将输入图像翻转到 x 轴(垂直)。
# import required library import cv2 # read input image img = cv2.imread('blue-car.jpg') # flip the image by vertically img_v = cv2.flip(img, 0) # display the rotated image cv2.imshow("Vertical Flip", img_v) cv2.waitKey(0) cv2.destroyAllWindows()
输出
当你运行上面的程序时,它将产生以下输出窗口 -
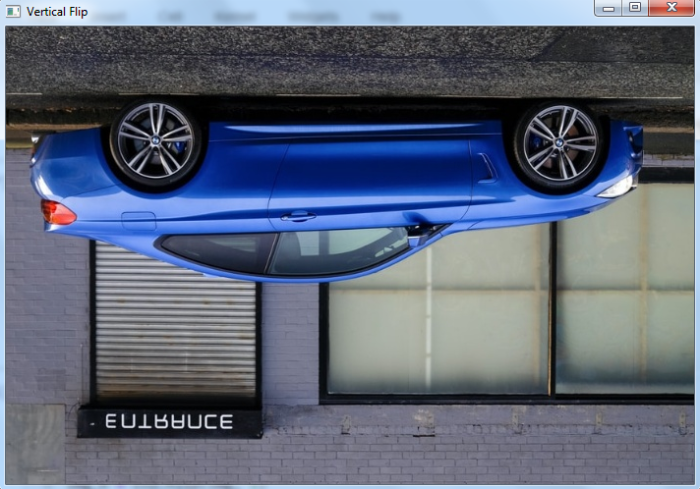
请注意,输出图像在 X 轴上翻转。
例
在这个 Python 程序中,我们将输入图像翻转到 y 轴上(水平)。
# import required library import cv2 # read input image img = cv2.imread('blue-car.jpg') # flip the image by horizontally img_h = cv2.flip(img, 1) # display the rotated image cv2.imshow("Horizontal Flip", img_h) cv2.waitKey(0) cv2.destroyAllWindows()
输出
当你运行上面的程序时,它将产生以下输出窗口 -
请注意,输出图像在 Y 轴上翻转。
例
在这个 Python 程序中,我们在两个轴上(垂直和水平)翻转输入图像。
# import required library import cv2 # read input image img = cv2.imread('blue-car.jpg') # rotate the image both vertically and horizontally img_vh = cv2.flip(img, -1) # display the rotated image cv2.imshow("Both vertical and horizontal flip", img_vh) cv2.waitKey(0) cv2.destroyAllWindows()
输出
当你运行上面的程序时,它将产生以下输出窗口 -
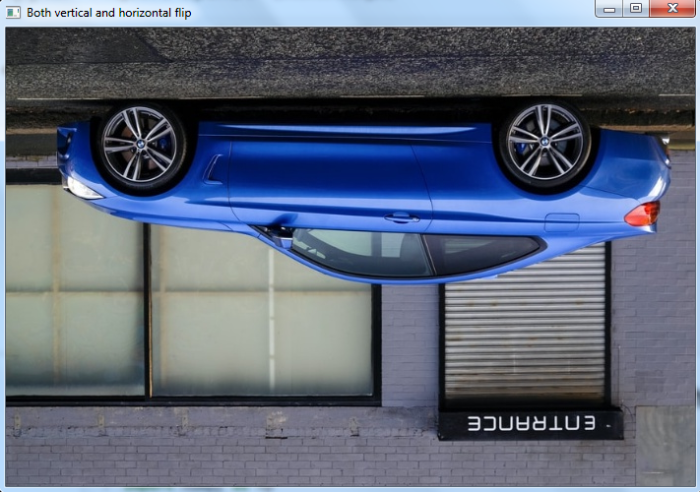
请注意,输出图像在 X 轴和 Y 轴上翻转。
相关文章
- Python语法基础_03.字符串、列表、字典
- python安装python-lzf包,报错lzf_module.c:3:20: fatal error: Python.h: No such file or directory
- python执行脚本加参数_命令行运行Python脚本时传入参数的三种方式详解以及argparse子命令subparsers()方法
- python - 如何使用 Docker 运行多个 Python 脚本和一个可执行文件?
- Python任意参数的数量/预习课python基础
- 零基础Python学习路线,小白成长逆袭大牛之路!
- 如何快速学习python,学好python?能通过Python赚到的第一笔钱,有哪些经验可以分享吗?
- 《python 与数据挖掘 》一 第2章 Python基础入门
- Python中python-nmap模块的使用
- 【python】+704个常用工具Python库
- Python编程-基础知识-python项目包和文件的管理以及如何引用相对路径的包和模块
- Python OpenCV实现鼠标绘制矩形框和多边形
- Python数据可视化 Pyecharts 图表的渲染
- 如何在OpenCV Python中规范化图像?
- OpenCV Python – 如何找到图像中的点和轮廓之间的最短距离?
- 如何使用Python在OpenCV中检测图像中的猫脸?
- Python 教程大全之 Power BI使用 Python 的 Live Stock 仪表板
- Python之旅本地环境搭建
- Python 工具 之 Windows 上 python 虚拟环境的搭建与简单使用的相关说明
- Python学习十四:filter()
- nyoj 204-Coin Test (python count)
- python基础方法系列
- Python实现APP UI自动化以及OpenCV图像识别元素
- Python下获取视频的旋转角度信息