
zabbix源码安装
2023-09-11 14:16:42 时间
第1章 ZABBIX安装
注:本文将监控安装在管理机mo1上面(10.0.0.61),其他的每台机器都作为客户端受管理机监控。
1.1 服务端zabbix安装(一)
zabbix server是一个C语言写的服务命令,可以单独运行,专门收集监控数据
LAMP或LNMP只是提供一个网页监控平台的使用环境。(编译安装,一些老服务期建议yum安装;要求系统纯净)
1.1.1 使用yum安装前检查环境
[root@m01 ~]# cat /etc/redhat-release
CentOS release 6.8 (Final)
[root@m01 ~]# getenforce
Disabled
[root@m01 ~]# /etc/init.d/iptables status
iptables: Firewall is not running.
1.1.2 下载软件解压
[root@m01 ~]# cd /home/oldboy/tools/
[root@mao tools]# rz -E
rz waiting to receive.
[root@mao tools]# tar xfP zabbix3.0.9_yum.tar.gz
上传下载的zabbix软件到当前目录,P参数表示解压到相应的目录中,打包时加上"/"
1.1.3 安装LAMP环境
yum -y --nogpgcheck -C install httpd zabbix-web zabbix-server-mysql zabbix-web-mysql zabbix-get mysql-server php55w php55w-mysql php55w-common php55w-gd php55w-mbstring php55w-mcrypt php55w-devel php55w-xml php55w-bcmath zabbix-get zabbix-java-gateway wqy-microhei-fonts net-snmp net-snmp-utils
1.2 客户端zabbix安装(二)
1.2.1 安装软件
在客户端和服务端都要安装软件。
yum -y localinstall http://mirrors.aliyun.com/zabbix/zabbix/3.0/rhel/6/x86_64/zabbix-agent-3.0.9-1.el6.x86_64.rpm
1.2.2 修改配置文件
sed -i 's#Server=127.0.0.1#Server=172.16.1.61#' /etc/zabbix/zabbix_agentd.conf

在客户端和服务器上执行上面的替换语句
1.3 zabbix服务端配置
1.3.1 配置mysql
首先检查/tmp目录权限1777,然后启动mysql,配置

[root@mao tools]# ll -d /tmp/
drwxrwxrwt. 4 root root 4096 Apr 23 23:27 /tmp/
[root@mao tools]#

\cp /usr/share/mysql/my-medium.cnf /etc/my.cnf
/etc/init.d/mysqld start

mysql -uroot -e"create database zabbix character set utf8 collate utf8_bin;"
mysql -uroot -e"grant all on zabbix.* to zabbix@'localhost' identified by 'zabbix';"
mysql -uroot -e"flush privileges;"
1.3.2 导入mysql数据文件
cd /usr/share/doc/zabbix-server-mysql-3.0.9/
[root@mao zabbix-server-mysql-3.0.9]# ls
AUTHORS  ChangeLog  COPYING  create.sql.gz  NEWS  README
[root@mao zabbix-server-mysql-3.0.9]#

查看压缩包内容
zcat create.sql.gz

导入数据库
zcat create.sql.gz |mysql -uzabbix -pzabbix zabbix
注意:如果数据库重复导入会导致下面错误
导入失败的同学的解决办法:
删库
mysql -uroot -e"drop database zabbix;"
mysql -uroot -e"create database zabbix character set utf8 collate utf8_bin;"
mysql -uroot -e"grant all on zabbix.* to zabbix@'localhost' identified by 'zabbix';"
mysql -uroot -e"flush privileges;"
zcat /usr/share/doc/zabbix-server-mysql-3.0.9/create.sql.gz|mysql -uzabbix -pzabbix zabbix
1.3.3 php相关数据修改
[root@mao zabbix-server-mysql-3.0.9]# sed -i 's#max_execution_time = 30#max_execution_time = 300#;s#max_input_time = 60#max_input_time = 300#;s#post_max_size = 8M#post_max_size = 16M#;910a date.timezone = Asia/Shanghai' /etc/php.ini

[root@mao zabbix-server-mysql-3.0.9]#
1.3.4 配置zabbix server
sed -i '115a DBPassword=zabbix' /etc/zabbix/zabbix_server.conf

说明:修改zabbix配置文件,加入zabbix数据库密码
1.3.5 网页文件配置
[root@mao zabbix-server-mysql-3.0.9]# id apache
uid=48(apache) gid=48(apache) groups=48(apache)
[root@mao zabbix-server-mysql-3.0.9]#
cp -R /usr/share/zabbix/ /var/www/html/

chmod -R 755 /etc/zabbix/web
chown -R apache.apache /etc/zabbix/web
echo "ServerName 127.0.0.1:80">>/etc/httpd/conf/httpd.conf
1.4 zabbix服务端启动
1.4.1 启动服务
[root@mao zabbix-server-mysql-3.0.9]# /etc/init.d/mysqld start
Starting mysqld:                                           [  OK  ]
[root@mao zabbix-server-mysql-3.0.9]# /etc/init.d/httpd start
Starting httpd:                                            [  OK  ]
[root@mao zabbix-server-mysql-3.0.9]# /etc/init.d/zabbix-server start
Starting Zabbix server:                                    [  OK  ]
[root@mao zabbix-server-mysql-3.0.9]#
mysql必须第一个启动,在开机启动中加入下面三行开机启动
1.4.2 开机自启动
[root@mao zabbix-server-mysql-3.0.9]# vim /etc/rc.local
#!/bin/sh
#
# This script will be executed *after* all the other init scripts.
# You can put your own initialization stuff in here if you don't
# want to do the full Sys V style init stuff.


touch /var/lock/subsys/local
/etc/init.d/mysqld start
/etc/init.d/httpd start
/etc/init.d/zabbix-server start

~

"/etc/rc.local" 10L, 301C written
[root@mao zabbix-server-mysql-3.0.9]#
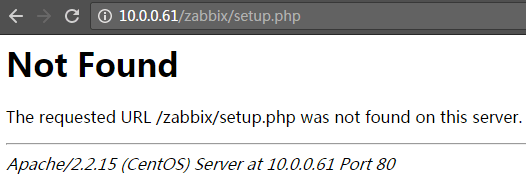
如果出现下面错误,说明Apache安装目录不存在
[root@mao zabbix-server-mysql-3.0.9]# ls /var/www/html/
1.txt  2.txt  3.txt  4.txt  5.txt  6.txt  7.txt  zabbix
[root@mao zabbix-server-mysql-3.0.9]#
1.4.3 启动
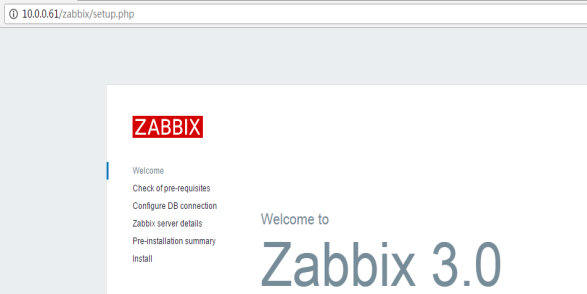
浏览器中输入:http://10.0.0.61/zabbix/ 出现下面节目就说明配置成功。
1.5 zabbix客户端启动
1.5.1 启动zabbix
[root@web01 ~]# /etc/init.d/zabbix-agent start
Starting Zabbix agent:                                     [  OK  ]
[root@web01 ~]#
在客户端和服务器上启动zabbix。
1.5.2 zabbix启动测试
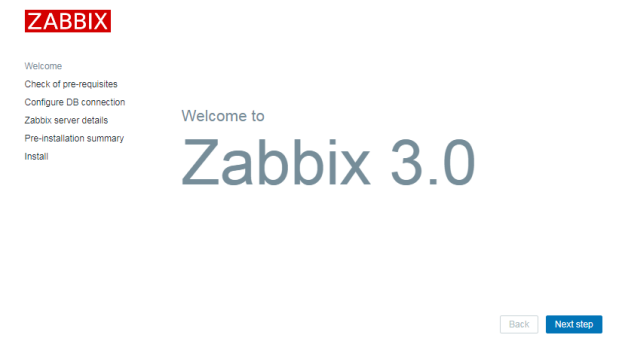
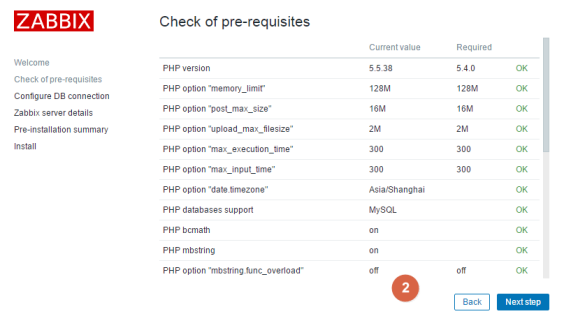
1.6 网页安装
第一步:
第二步:
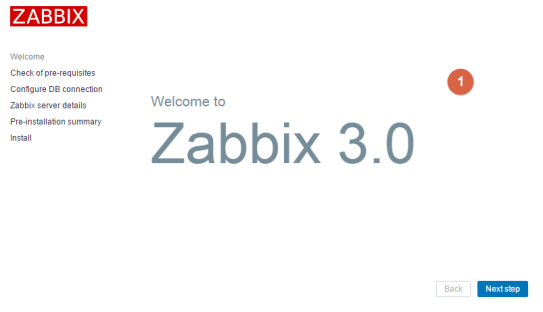
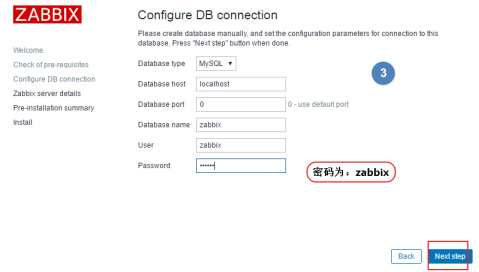
第三步:
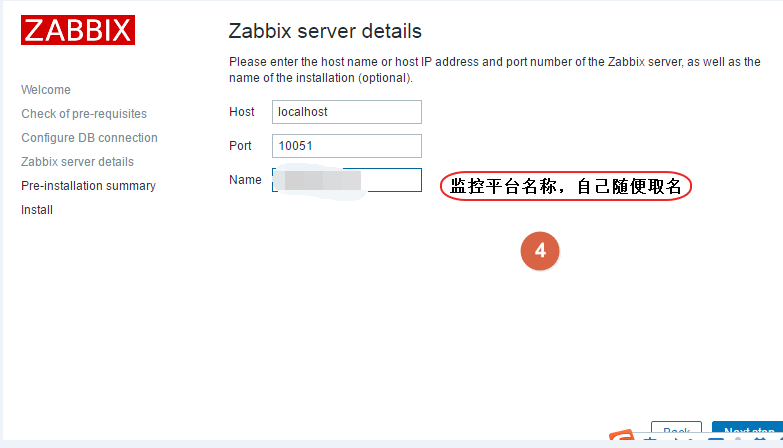
第四步:
第五步:

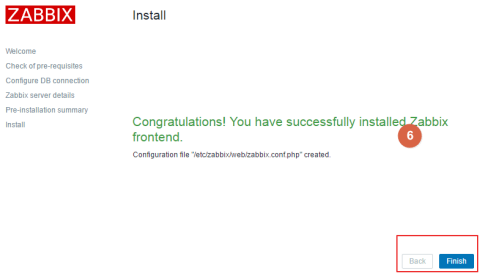
第六步:
第七步:登录

相关文章
- hbase安装配置
- adt安装慢解决
- iOS-UI分析利器--Reveal安装破解以及简单使用
- 在亚马逊Red Hat 7.1 linux上安装mysql
- Linux MySQL源码安装缺少ncurses-devel包
- gulp和npm等安装
- CentOS安装zip unzip命令
- Go编程基础(介绍和安装)
- centos 7 下 rabbitmq 3.8.0 & erlang 22.1 源码编译安装
- 优麒麟20版安装teamviewer和向日葵软件
- php5.6源码安装与apache集成
- 大数据基础之Marathon(1)简介、安装、使用
- [转]Linux下Nagios的安装与配置
- adb安装软件命令
- 已解决(Python安装报错)Visit python.org to download an earlier version of Python.
- 【ubuntu】openssl版本查询源码编译安装
- pycharm安装其它库包,报错提示error:can‘t find Rust compiler,错误:找不到Rust编译器
- centos 7 源码安装openresty
- 004-nginx简介、安装配置【源码安装和mac安装】、基本使用
- Python一行命令安装ipopt工具集
- ubuntu 18.04-desktop 安装ros 机器人开发环境——筑梦之路
- ubuntu 安装 lotus 1.14.1
- Linux meson + ninja编译安装源码(八)
- Ubuntu 安装adb/fastboot工具(二十三)
- Centos 5.5 安装Mysql5.5过程
- Linux下源码包安装Swoole及基本使用 转
- 安装beautifulsoup4
- 编译安装时出现报错 No package ** found的一种解决方法附带PHP-7.4.6的实战源码编译安装
- Zabbix之zabbix-server源码安装
- libvirt零知识学习7 —— libvirt源码编译安装(5)
- libvirt零知识学习6 —— libvirt源码编译安装(4)
- acl源码安装
- Python之源码安装python3.10及有道词典依赖PyQt5问题(二十三)