
CDH安装(一)
- 下载包:
https://archive.cloudera.com/cdh6/6.2.1/parcels/
https://archive.cloudera.com/cm6/6.2.1/redhat7/yum/RPMS/x86_64/ - 安装依赖包
yum install -y cyrus-sasl-plain cyrus-sasl-gssapi portmap fuse-libs bind-utils libxslt fuse
yum install -y /lib/lsb/init-functions createrepo deltarpm python-deltarpm
yum install -y mod_ssl openssl-devel python-psycopg2 MySQL-python - 安装httpd(只需要在部署本地yum源的机器上安装即可,不用三台全部安装)
yum install httpd
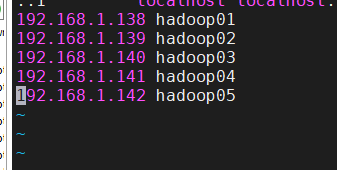
yum install createrepo - 配置host
vim /etc/hosts
- 关闭防火墙
查看防火墙状态: systemctl status firewalld.service
绿的running表示防火墙开启
执行关闭命令: systemctl stop firewalld.service
再次执行查看防火墙命令:systemctl status firewalld.service
执行开机禁用防火墙自启命令 : systemctl disable firewalld.service
完成 - 关闭selinux(在配置文件中第一次设置时需要重启服务器)
setenforce 0
vim /etc/selinux/config
将SELINUX=enforcing改为SELINUX=disabled
reboot
- 安装httpd服务
yum install httpd -y(已安装过)
systemctl start httpd.service
cd /var/www/html/
mkdir -p cm6/6.2.1/redhat7/yum/RPMS/x86_64/
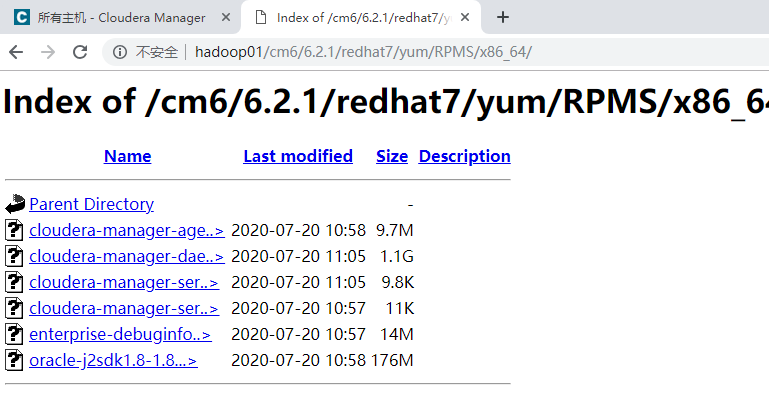
上传cmd6中的文件到此目录,上传allkeys.asc文件到/var/www/html/cm6/6.2.1/目录下
访问测试:http://hadoop01/cm6/6.2.1/redhat7/yum/RPMS/x86_64/
-
生成repodata目录
cd /var/www/html/cm6/6.2.1/redhat7/yum
createrepo . -
配置本地yum源
cd /etc/yum.repos.d/
vim cloudera-manager.repo
填写:
[cloudera-manager]
name=Cloudera Manager
baseurl=http://hadoop01/cm6/6.2.1/redhat7/yum/
gpgcheck=0
enabled=1
执行命令:
yum clean all
yum list | grep cloudera
-
创建cloudera-scm用户(centos7要求必须有,centos6没有要求)
useradd cloudera-scm
passwd cloudera-scm
test123456
--免密钥登录
echo "cloudera-scm ALL=(root)NOPASSWD:ALL" >> /etc/sudoers
su - cloudera-scm
exit -
安装mysql服务
第一步:下载repo,并安装mysql-server
wget -i -c http://dev.mysql.com/get/mysql57-community-release-el7-10.noarch.rpm
yum -y install mysql57-community-release-el7-10.noarch.rpm
yum -y install mysql-community-server
这个步骤需要网络,并根据网速会花些时间,安装完成后会覆盖之前的mariadb。
如果提示-bash: wget: 未找到命令,则:yum -y install wget
第二步:mysql设置
启动:
systemctl start mysqld.service
查看运行情况:
systemctl status mysqld.service
第三步:登录mysql
查看mysql密码
grep "password" /var/log/mysqld.log
登录mysql
mysql -uroot -p
第四步:修改密码
取消mysql密码规范限制
set global validate_password_policy=0;
set global validate_password_length=1;
重设密码
alter user 'root'@'localhost' identified by '123456';
flush privileges;
第五步:卸载repo包
此时还有一个问题,因为安装了yum repository,以后每次yum都会自动更新,耗费时间,所以卸载掉:
yum -y remove mysql57-community-release-el7-10.noarch
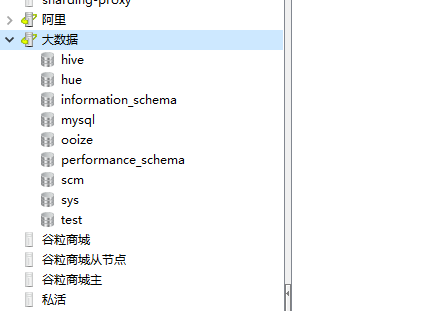
第六步:安装mysql(后续作为元数据库)
create database scm DEFAULT CHARACTER SET utf8;
grant all PRIVILEGES on . TO 'root'@'%' IDENTIFIED BY '123456' WITH GRANT OPTION;
grant all PRIVILEGES on . TO 'root'@'localhost' IDENTIFIED BY '123456' WITH GRANT OPTION;
grant all PRIVILEGES on . TO 'root'@'hadoop01' IDENTIFIED BY '123456' WITH GRANT OPTION;
flush privileges;
相关文章
- 通过Cloudera Manager安装CDH
- 手动安装Cloudera Hive CDH
- 手动安装Cloudera Hadoop CDH
- 【华为云技术分享】CentOS7.4系统下,手动安装MySQL5.7的方法
- ubuntu21.10:编译安装php8.1.1
- 采用Cloudera-Manager安装CDH时,采用内嵌数据库各数据库用户密码的保存位置
- rdesktop 源码安装
- Python:利用pip/conda命令导出/安装当前环境所有的依赖包及其对应的版本号、在新的环境中安装导出的包之详细攻略
- pipx在隔离环境中安装并且运行Python应用
- VMware® Workstation 16 Pro 安装 VMwareTools
- linux安装jdk
- gcc 4.8安装
- 【Deepin 20系统】Linux系统Anaconda安装Pytorch
- 基于JAVA实现的WEB端UI自动化 - WebDriver框架篇 - ant使用 - ant安装、环境变量配置、ant实例及运行Ant Build 出现问题的解决方法
- CentOS7安装CDH(十三):CDH资源池配置
- CentOS7安装CDH(十一):离线升级CDH版本
- CentOS7安装CDH(六):CDH的管理-CDH5.12
- Centos 7 安装 tomcat