
Spring Boot 整合分布式缓存 Memcached
2023-09-11 14:14:53 时间
Memcached是一个开源、高性能,将数据分布于内存中并使用key-value存储结构的缓存系统。它通过在内存中缓存数据来减少向数据库的频繁访问连接的次数,可以提高动态、数据库驱动之类网站的运行速度。
Memcached在使用是比较简单的,在操作上基本就类似于操作字典结构的对象一样
1 添加依赖
这里需要添加上web、swagger和spymemcached的依赖,Swagger是为了方便接口测试。
对于spymemcached的支持,其实只要如下这个依赖包就可以了。
<!-- https://mvnrepository.com/artifact/net.spy/spymemcached -->
<dependency>
    <groupId>net.spy</groupId>
    <artifactId>spymemcached</artifactId>
    <version>2.12.3</version>
</dependency>
2 添加相关配置
2.1 添加swagger 配置
添加一个swagger 配置类,在工程下新建 config 包并添加一个 SwaggerConfig 配置类,除了常规配置外,加了一个令牌属性,可以在接口调用的时候传递令牌。
import org.springframework.context.annotation.Bean;
import org.springframework.context.annotation.Configuration;
import springfox.documentation.builders.ApiInfoBuilder;
import springfox.documentation.builders.PathSelectors;
import springfox.documentation.builders.RequestHandlerSelectors;
import springfox.documentation.service.ApiInfo;
import springfox.documentation.spi.DocumentationType;
import springfox.documentation.spring.web.plugins.Docket;
import springfox.documentation.swagger2.annotations.EnableSwagger2;

@Configuration
@EnableSwagger2
public class SwaggerConfig {

    @Bean
    public Docket createRestApi(){
        return new Docket(DocumentationType.SWAGGER_2).apiInfo(apiInfo())
                .select()
                .apis(RequestHandlerSelectors.any())
                .paths(PathSelectors.any()).build();
    }

    private ApiInfo apiInfo(){
        return new ApiInfoBuilder()
                .title("Swagger API Doc")
                .description("This is a restful api document of Swagger.")
                .version("1.0")
                .build();
    }

}
2.2.在配置文件添加memcache的主机端口信息
application.properties
memcache.ip=127.0.0.1
memcache.port=11211
application.yml
memcache:
  ip: 127.0.0.1
  port: 11211
2.3.添加一个MemcacheConfig配置类,读取主机端口并构造一个MemcachedClient。
MemcacheConfig.java
import java.io.IOException;
import java.net.InetSocketAddress;
import org.springframework.beans.factory.annotation.Value;
import org.springframework.context.annotation.Bean;
import org.springframework.context.annotation.Configuration;
import net.spy.memcached.MemcachedClient;

@Configuration
public class MemcacheConfig {

    @Value("${memcache.ip}")
    private String ip;

    @Value("${memcache.port}")
    private int port;


    @Bean
    public MemcachedClient getClient() {
        MemcachedClient memcachedClient = null;
        try {
            memcachedClient  = new MemcachedClient(new InetSocketAddress(ip, port));
        } catch (IOException e) {
            e.printStackTrace();
        }
        return memcachedClient;
    }
}
2.4 编写业务接口
编写一个业务控制器,通过MemcachedClient实现对缓存的设置和读取。
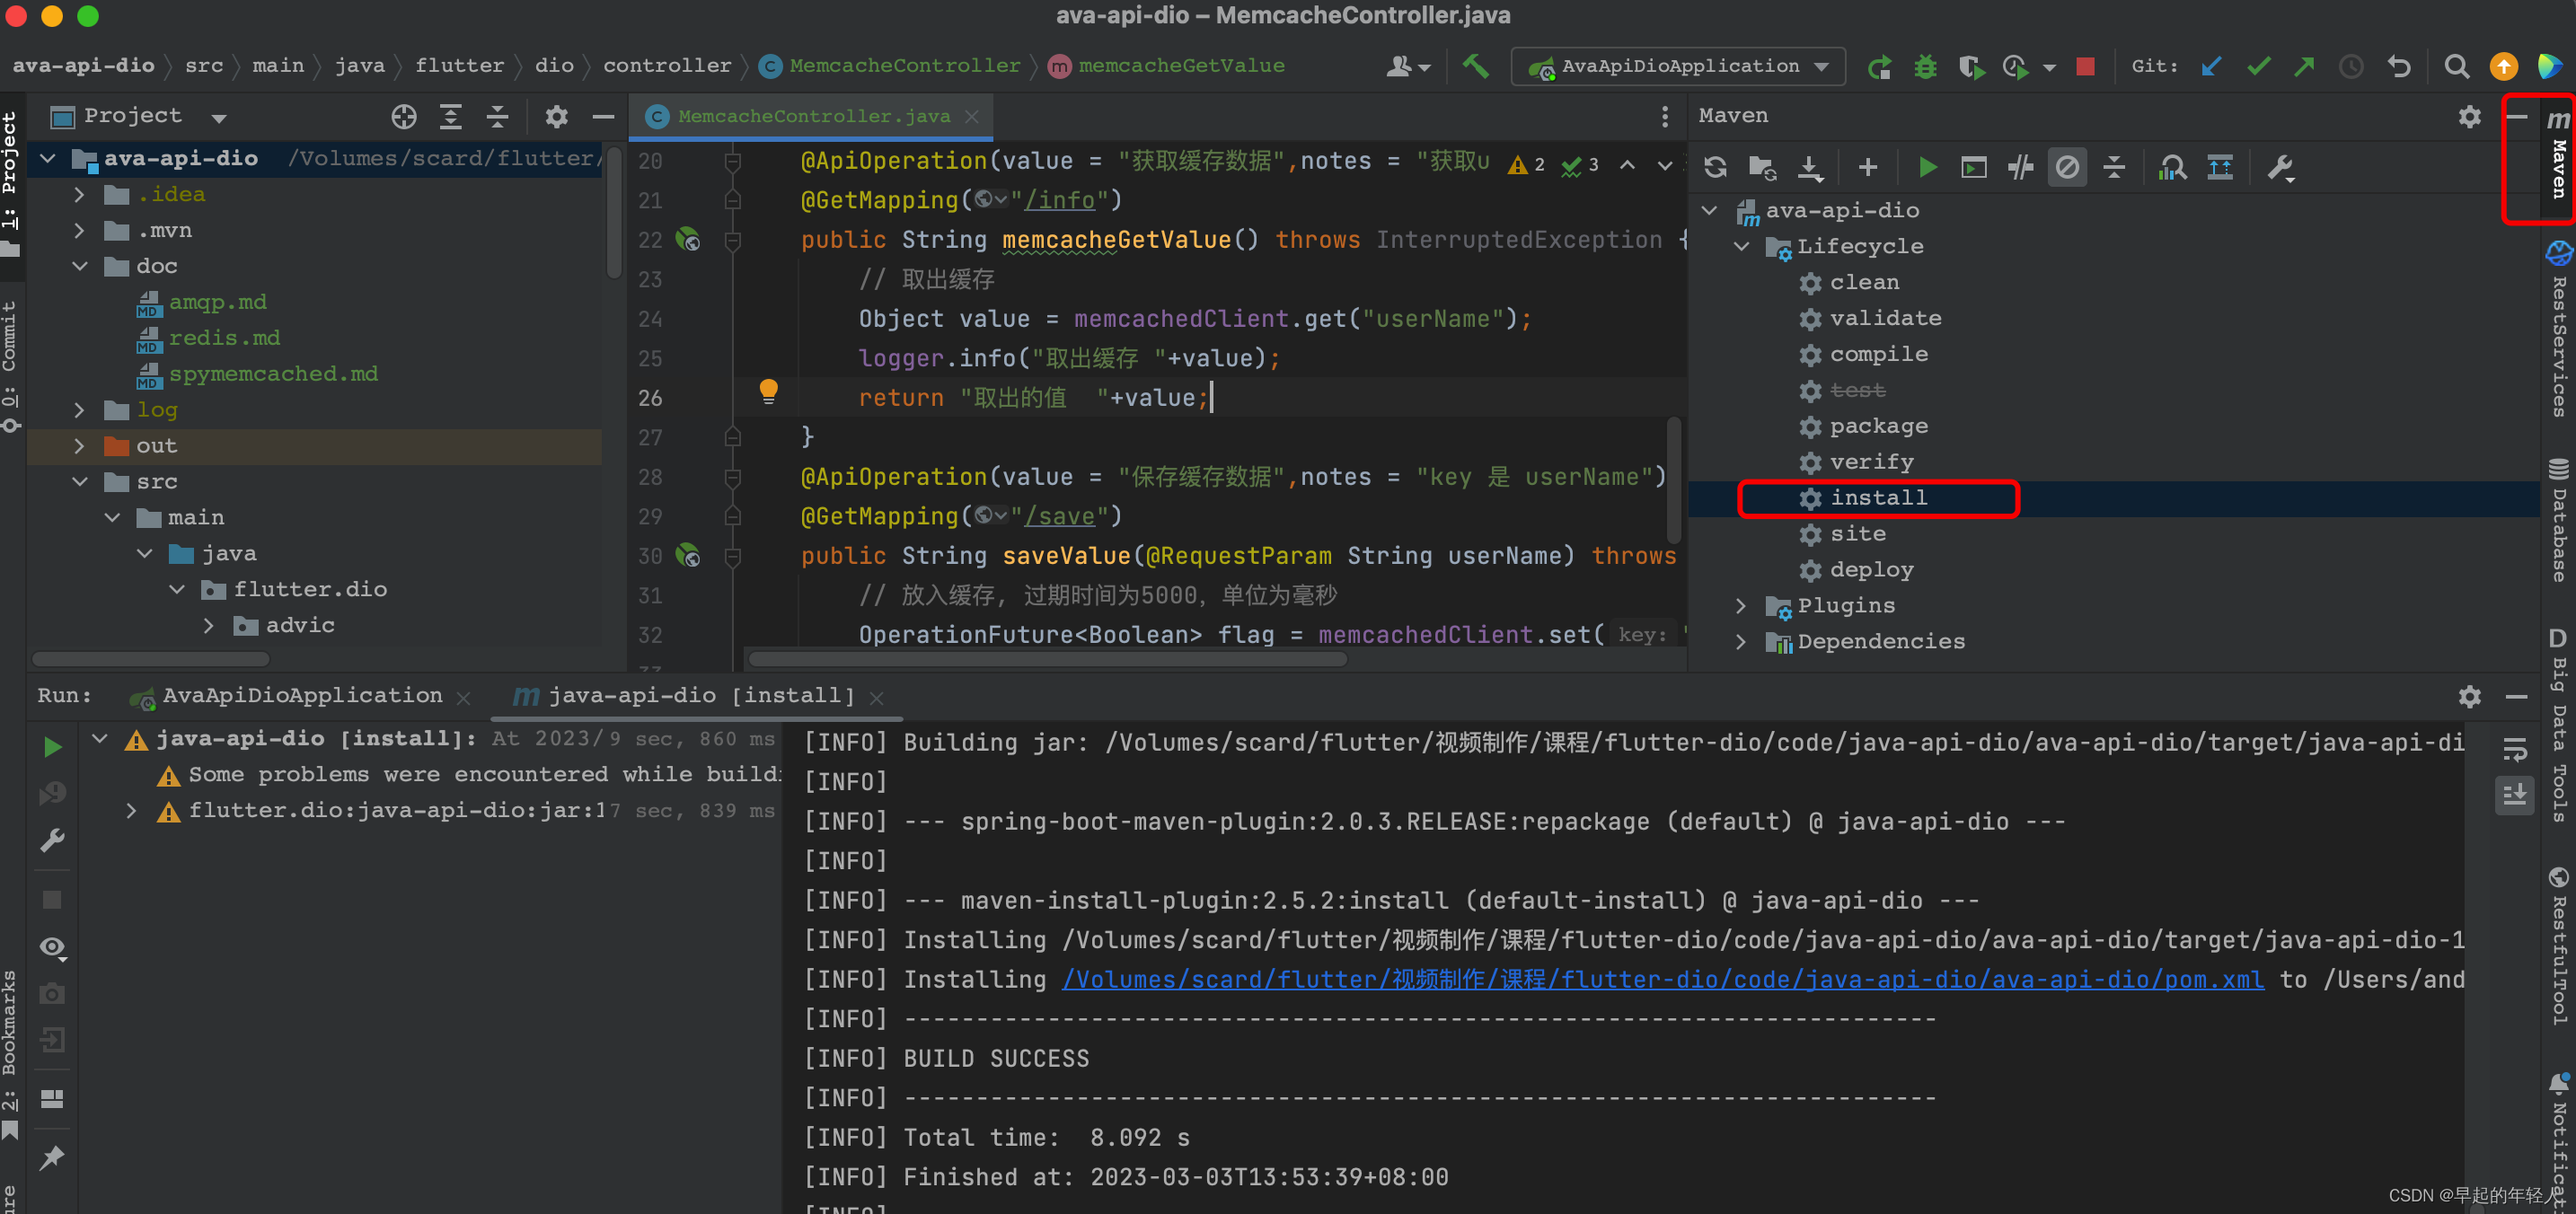
MemcacheController.java
import org.springframework.beans.factory.annotation.Autowired;
import org.springframework.web.bind.annotation.GetMapping;
import org.springframework.web.bind.annotation.RestController;
import net.spy.memcached.MemcachedClient;
import net.spy.memcached.internal.OperationFuture;


@RestController
public class MemcacheController {
    private Logger logger = LoggerFactory.getLogger(getClass());
    @Autowired
    private MemcachedClient memcachedClient;

    @GetMapping("/info")
    public String memcacheGetValue() throws InterruptedException {
        // 取出缓存
        Object value = memcachedClient.get("userName");
        logger.info("取出缓存 "+value);
        return "取出的值  "+value;
    }

    @GetMapping("/save")
    public String saveValue(@RequestParam String userName) throws InterruptedException {
        // 放入缓存, 过期时间为5000,单位为毫秒
        OperationFuture<Boolean> flag = memcachedClient.set("userName", 5000, userName);
        return "保存成功";
    }
}
3 编译运行测试
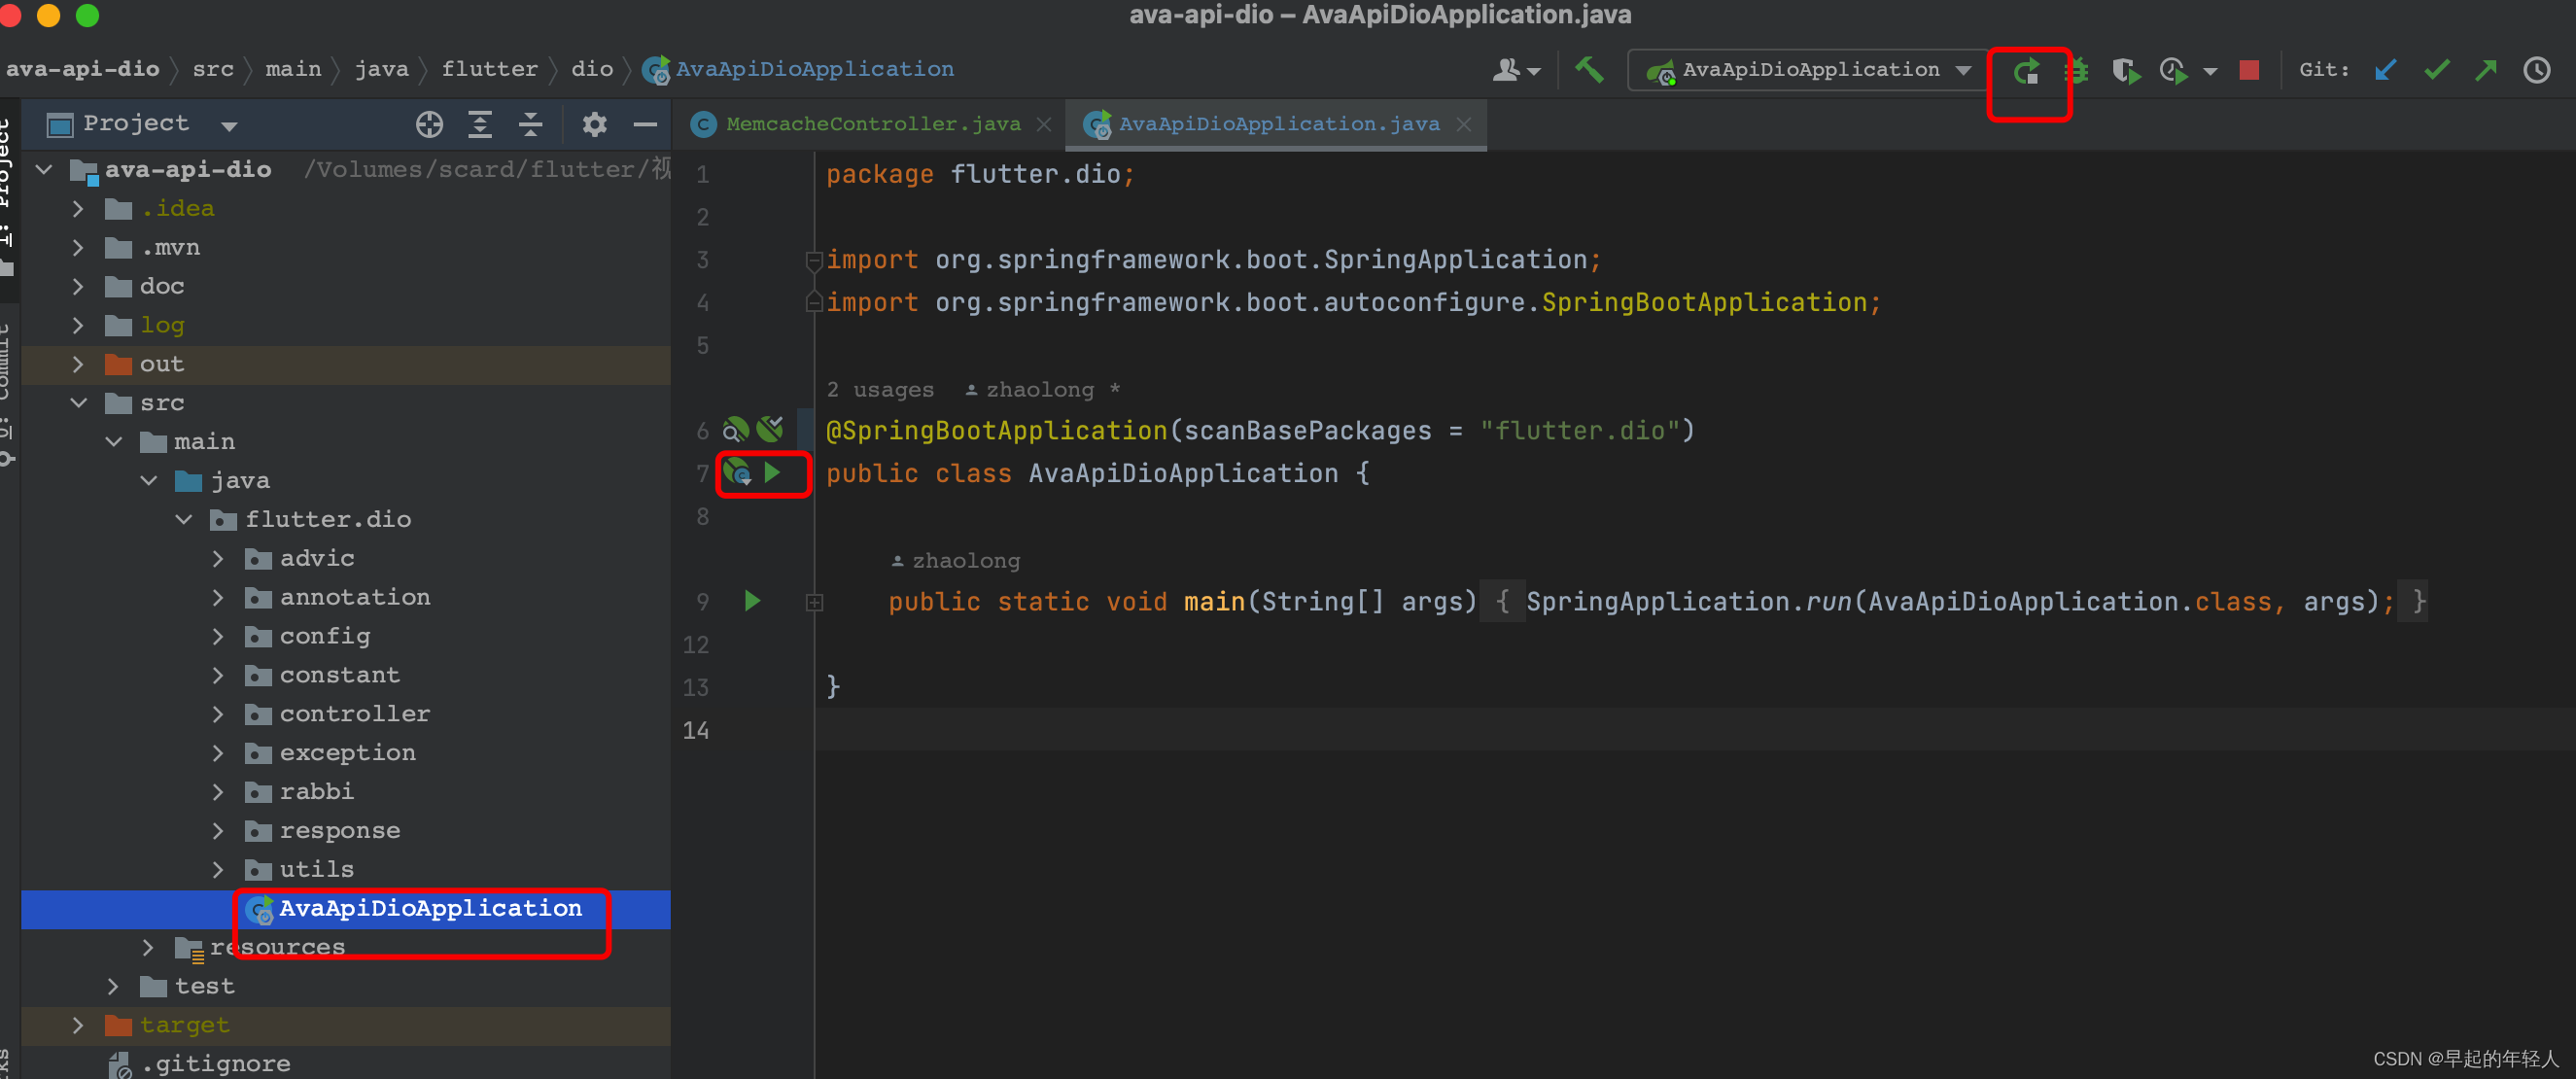
3.1. 右键项目 -> Run as -> Maven install,开始执行Maven构建,第一次会下载Maven依赖,可能需要点时间
3.2. 右键文件 DemoApplication.java -> Run as -> Java Application,开始启动应用
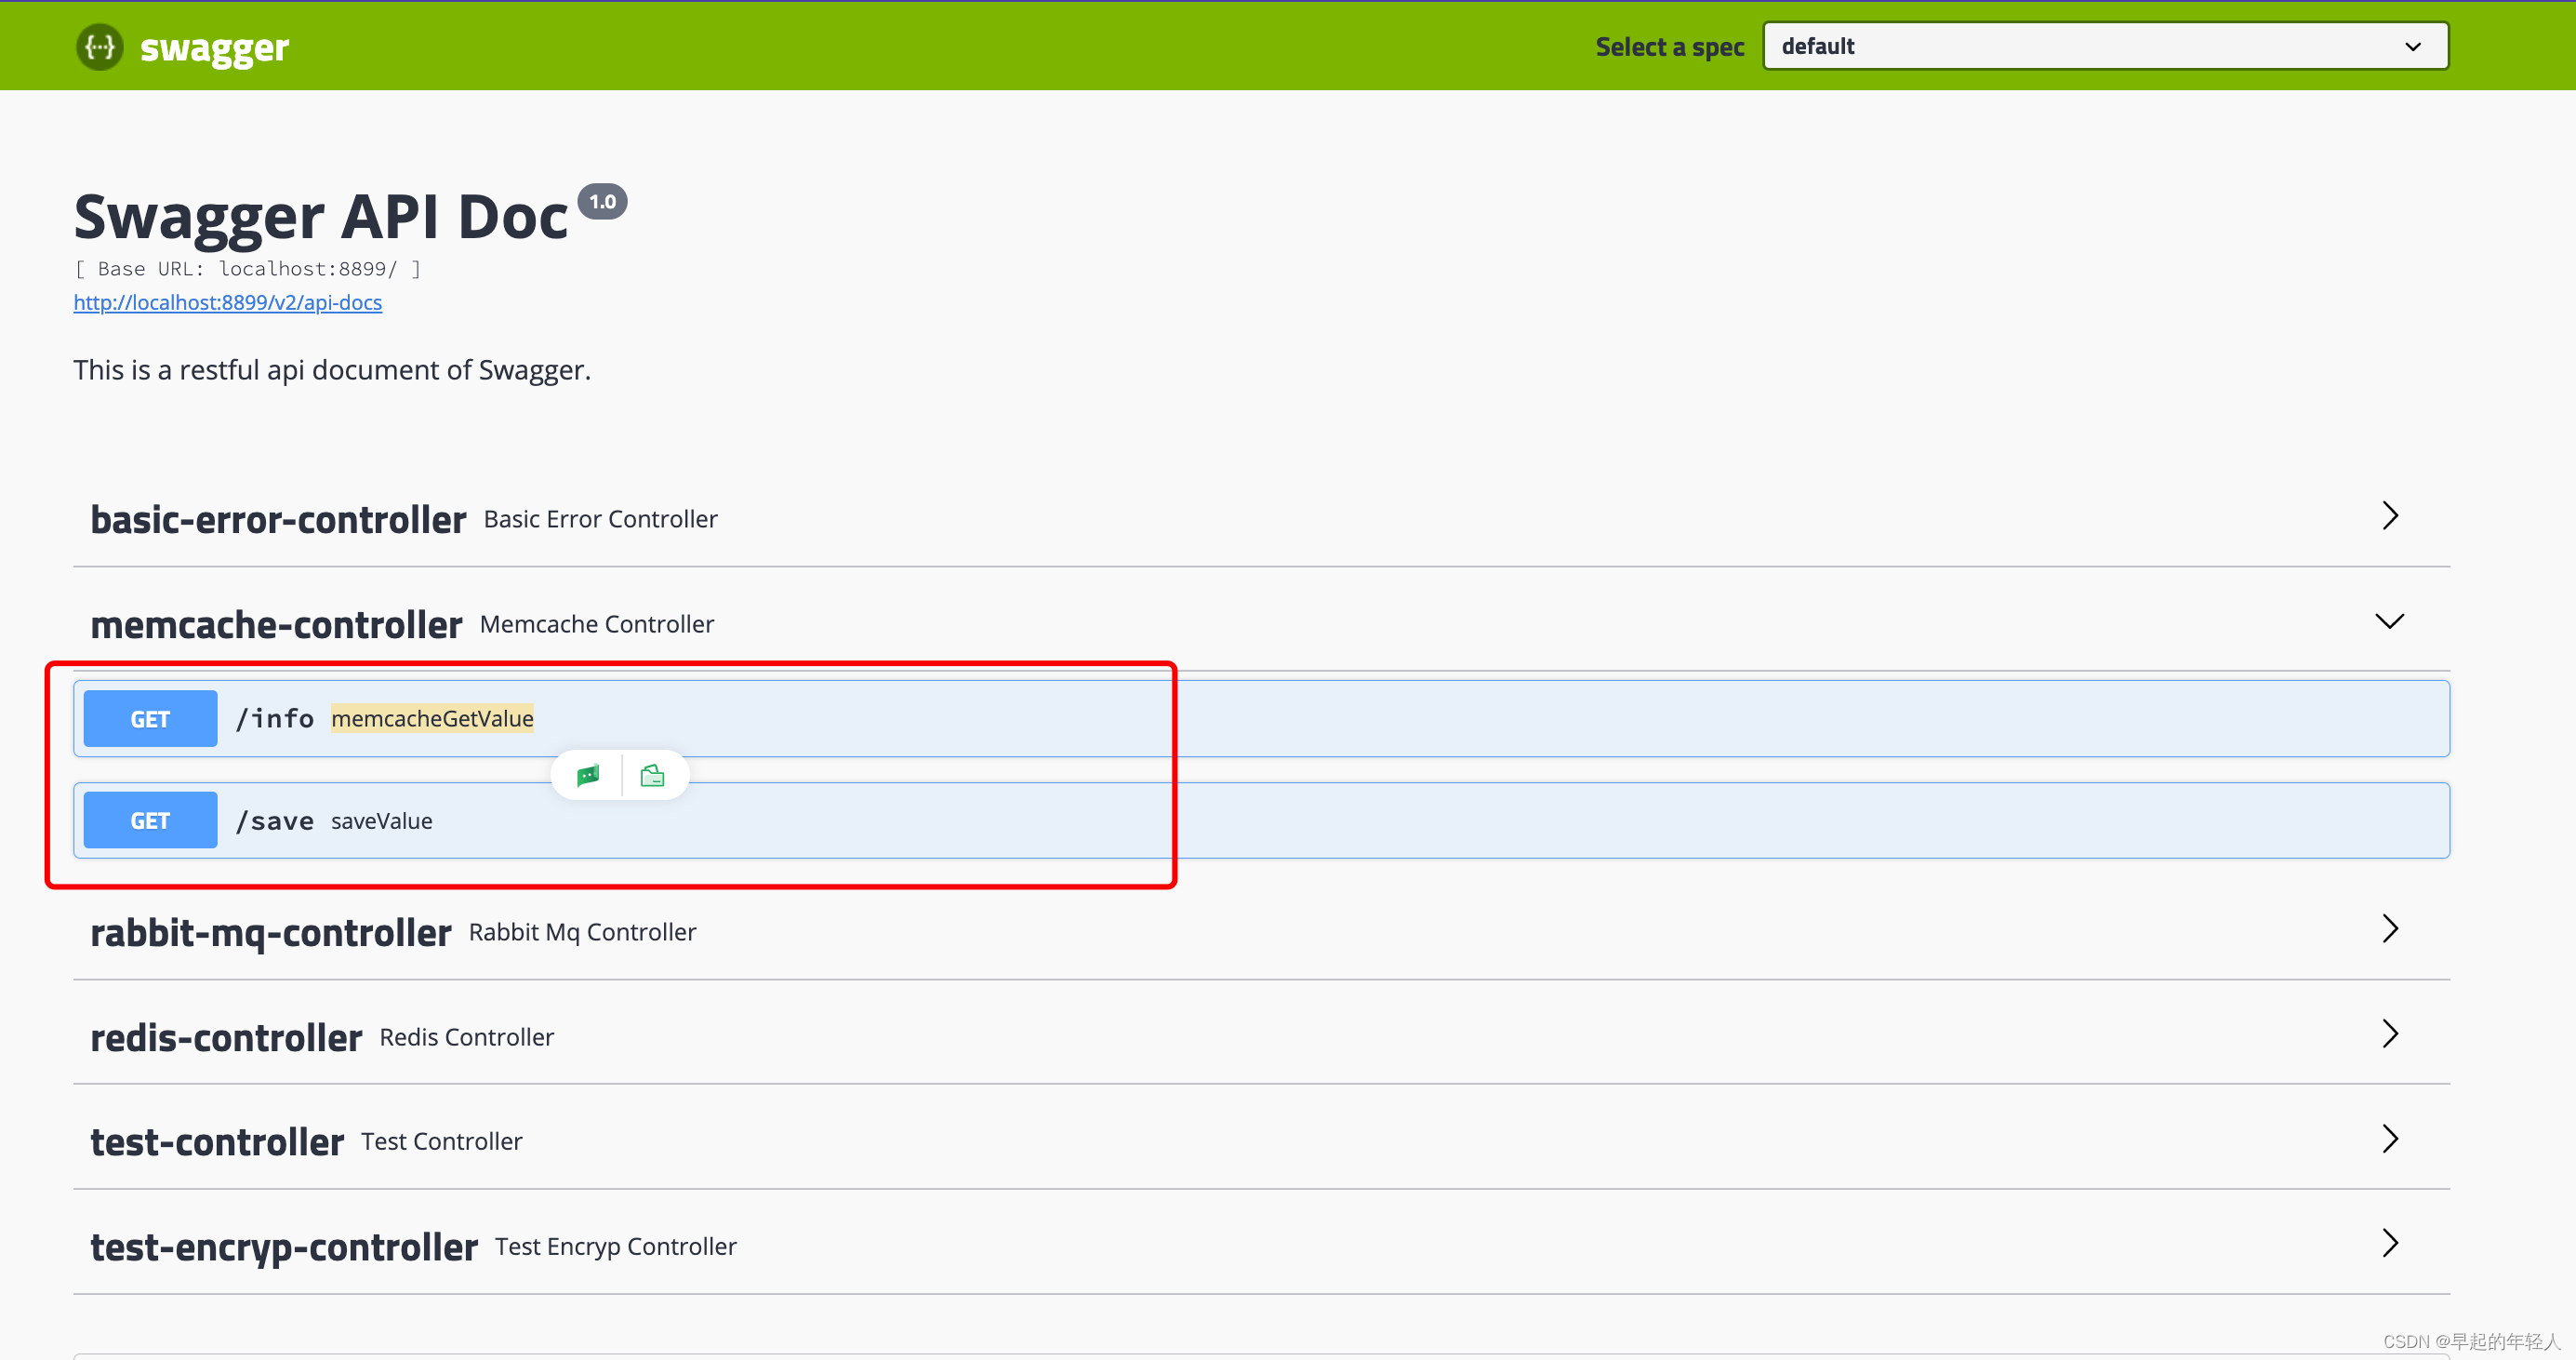
3.3. 打开浏览器,访问:http://localhost:8899/swagger-ui.html,进入swagger接口文档界面。
这里的端口根据具体的项目启动来查看,我这里是 8899
相关文章
- spring boot tomcat 打本地包成war,通过Tomcat启动时出现问题: ZipException: error in opening zip file
- Spring Cloud Gateway 突发高危漏洞,下一代云原生网关恰逢其时?
- Spring Boot 2.x :通过 spring-boot-starter-hbase 集成 HBase
- Spring Boot 整合 Redis 实现缓存操作
- spring boot:使用spring cache+caffeine做进程内缓存(本地缓存)(spring boot 2.3.1)
- intellij idea 无法启动或调试 spring-boot
- spring boot配置静态资源及其缓存
- Spring boot后台搭建二为Shiro权限控制添加缓存
- [Spring boot] CommandLineRunner and Autowired
- spring boot: 用redis的消息订阅功能更新应用内的caffeine本地缓存(spring boot 2.3.2)
- spring boot:用redis+lua限制短信验证码的发送频率(spring boot 2.3.2)
- spring boot:使用spring cache+caffeine做进程内缓存(本地缓存)(spring boot 2.3.1)
- spring boot:给接口增加签名验证(spring boot 2.3.1)
- 高效实现Web开发:掌握Spring Boot 2高级模块Thymeleaf的神奇妙用
- 学习Spring Boot:(二十一)使用 EhCache 实现数据缓存
- JavaAgent 应用(spring-loaded 热部署)
- Spring实战——无需一行xml配置实现自动化注入
- Spring Boot构建系统
- Spring Boot简介
- Spring Cloud Alibaba微服务第24章之Docker部署
- 【Spring Boot】缓存预热与缓存清除--原理、作用和目的
- 【java】Spring Boot --深入SpringBoot注解原理及使用