
人脸识别5.4- insightface安装包预测源码,整体阅读分析和调试
1、python @property的介绍与使用
1.修饰方法,是方法可以像属性一样访问
2.与所定义的属性配合使用,这样可以防止属性被修改。
@property
    def embedding_norm(self):
        if self.embedding is None:
            return None
        return l2norm(self.embedding)
2、Python isinstance() 函数/Python setattr() 函数/Python getattr() 函数
    def __setattr__(self, name, value):
        if isinstance(value, (list, tuple)):
            value = [self.__class__(x)
                    if isinstance(x, dict) else x for x in value]
        elif isinstance(value, dict) and not isinstance(value, self.__class__):
            value = self.__class__(value)
        super(Face, self).__setattr__(name, value)
        super(Face, self).__setitem__(name, value)
>>> class Test():
  		name = "victor"
  		def run(self):
  			return "Hello Python!"
>>> t = Test()
>>> getattr(t, 'name') # 获取对象t是否存在"name"这个字符串对应的值,并返回
'victor'
>>> getattr(t, 'run') # 获取对象t是否存在"run"这个字符串对应的方法的内存地址,并返回
<bound method test.run of <__main__.test instance at 0x0269C878>>
>>> getattr(t, "run")()  #获取run方法,后面加括号可以将这个方法运行
Hello Python!
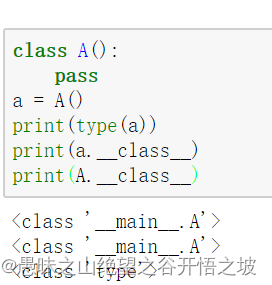
3、__setattr__函数相关介绍和魔法函数
__class__是类的一个内置属性,表示类的类型,返回<type ‘type’> ;
也是类的实例的属性,表示实例对象的类。
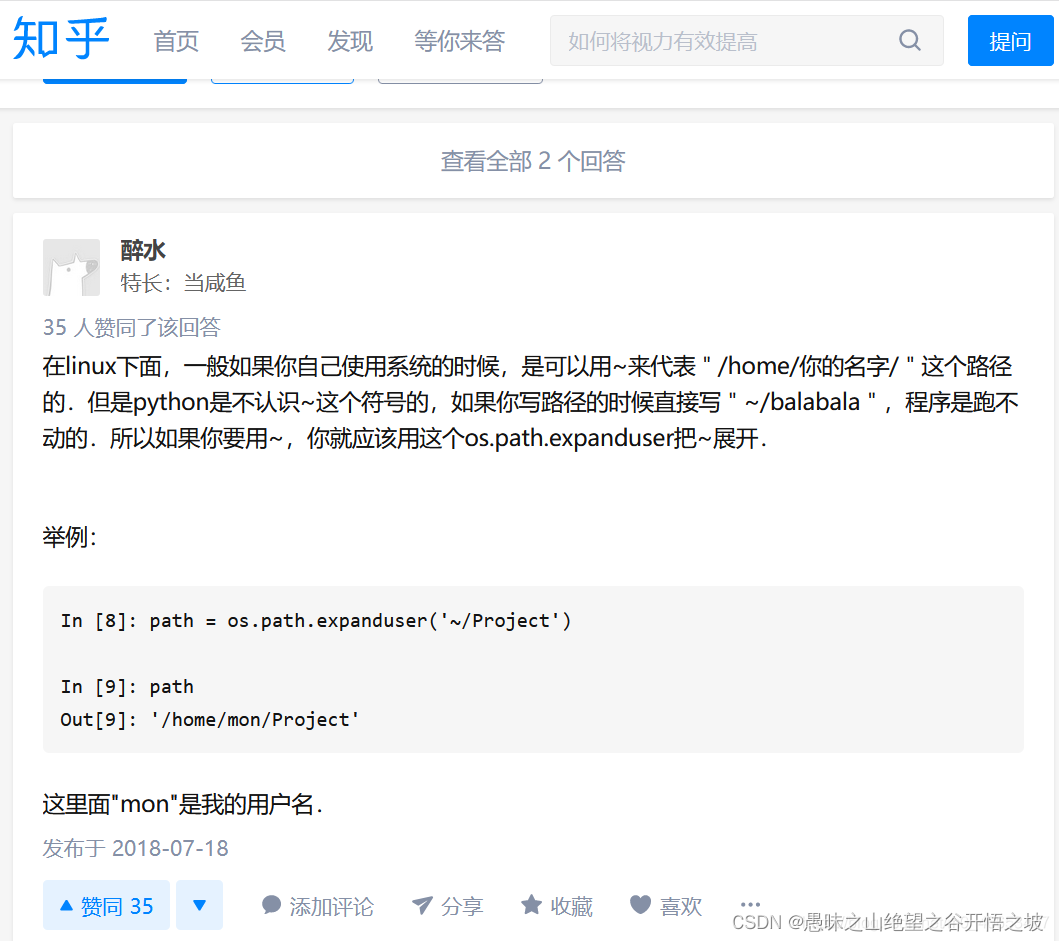
4、os.path.expanduser
5、glob.glob() 函数
参考:https://blog.csdn.net/GeorgeAI/article/details/81035422
mport glob

#获取指定目录下的所有图片
print (glob.glob(r"/home/qiaoyunhao/*/*.png"),"\n")#加上r让字符串不转义

#获取上级目录的所有.py文件
print (glob.glob(r'../*.py')) #相对路径
6、str() 方法,在print对象的时候触发
参考:https://blog.csdn.net/Zhongjie1986/article/details/91732434
str__方法和__init__方法类似,都是一些特殊方法,所以前后都有双下划线,它用来返回对象的字符串表达式
如果要把一个类的实例变成 str,就需要实现特殊方法__str_():
不使用__str__()方法
不使用__str__()方法
class Student(object):
    def __init__(self,id,name,age):
        self.id=id
        self.name=name
        self.age=age

s=Student(111,"Bob",18)
print(s)
输出结果:<main.Student object at 0x0362EBF0>
使用__str__()方法
class Student(object):
    def __init__(self,id,name,age):
        self.id=id
        self.name=name
        self.age=age

    def __str__(self):
        return "学号:{}--姓名:{}--年龄{}".format(self.id,self.name,self.age)

s=Student(111,"Bob",18)
print(s)
输出结果:学号:111–姓名:Bob–年龄18
7、 __dict__属性详解
参考:https://blog.csdn.net/mr_hui_/article/details/82941038
参考:http://c.biancheng.net/view/2374.html
1、由此可见, 类的静态函数、类函数、普通函数、全局变量以及一些内置的属性都是放在类__dict__里的
对象的__dict__中存储了一些self.xxx的一些东西
2、int, list, dict等这些常用的数据类型是没有__dict__属性的,其实这是可预料的,就算给了它们dict属性也没啥用,毕竟它们只是用来做数据容器的。
3、1)上段输出结果中,用红色字体标出的是类变量和函数,由结果可知,每个类的类变量、函数名都放在自己的__dict__中
2) 再来看一下实力变量的__dict__中,由蓝色字体标识,父类和子类对象的__dict__是公用的
总结:
1) 内置的数据类型没有__dict__属性
2) 每个类有自己的__dict__属性,就算存着继承关系,父类的__dict__ 并不会影响子类的__dict__
3) 对象也有自己的__dict__属性, 存储self.xxx 信息,父子类对象公用__dict__
8、 python魔术方法之__setstate__和__getstate__
pickle.dumps(obj)序列化对象obj的属性,若该对象的类没有__getstate__方法, 则属性内容由__dict__提供,否则由__getstate__提供,使用__getstate__可自定义序列化对象的属性或其他任意内容;
pickle.loads(bytes)反序列化时,会调用__setstate__方法,该方法所需参数为序列化时__dict__或__getstate__提供的,前者提供为字典格式,后者提供格式具体看其返回值。
import pickle

class DemoState:
    def __init__(self, name="origin", age=23):
        self.name = name
        self.age = age

    def __str__(self):
        return f"name: {self.name}\nage: {self.age}"

    # 反序列化时调用, state 是 __getstate__ 的返回对象,
    # 若没有__getstate__ 这个方法,则state为该类的__dict__的值(字典格式{field: value})
    def __setstate__(self, state):
        print("经过 __setstate__")
        self.name = state["name"]
        self.age = state["age"]

    # 序列化时调用
    def __getstate__(self):
        print("经过__getstate__")
        return dict(name="我是getstate", age=31)


if __name__ == '__main__':
    demo1 = DemoState()
    byte = pickle.dumps(demo1)
    print(byte)
    string = pickle.loads(byte)
    print(string)
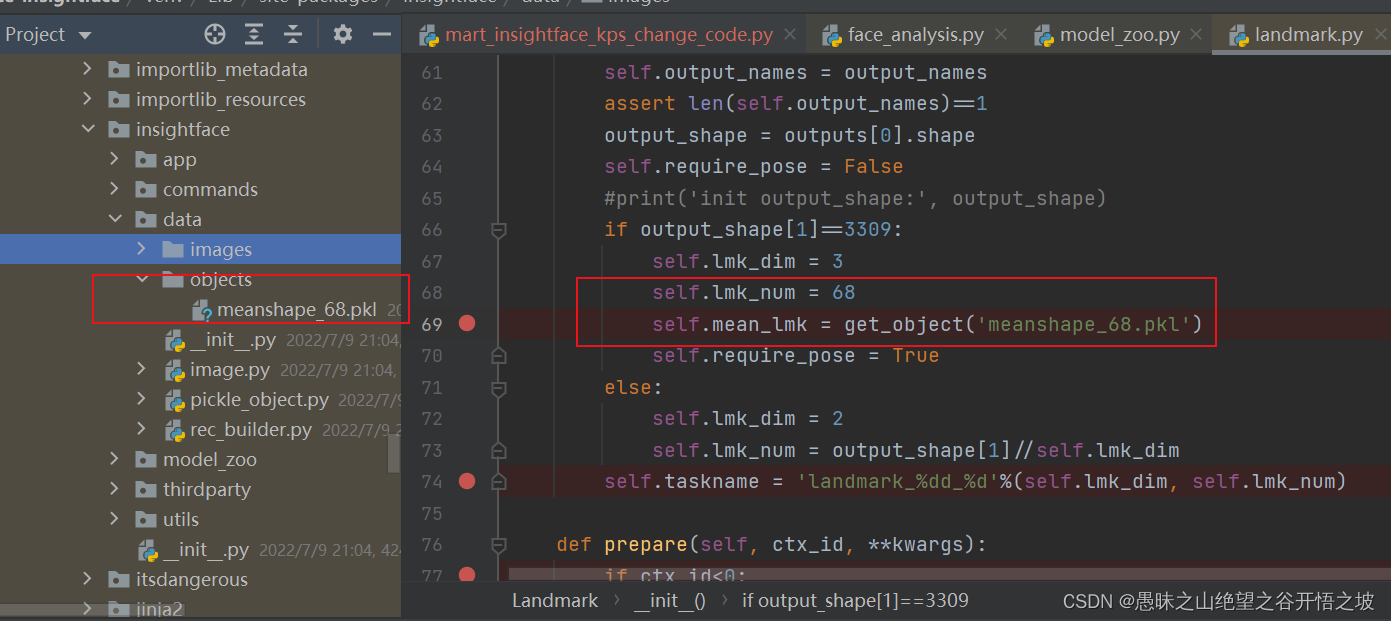
9、 3维68个关键点检测,是有内置的文件在安装包 meanshape_68.pkl
10、设定cpu或者gpu运行
app.prepare(ctx_id=0, det_thresh=0.5, det_size=(640, 640))

11、cv2.dnn.blobFromImage
参考:https://docs.opencv.org/4.6.0/d6/d0f/group__dnn.html#ga29f34df9376379a603acd8df581ac8d7
Creates 4-dimensional blob from image. Optionally resizes and crops image from center, subtract mean values, scales values by scalefactor, swap Blue and Red channels.

Parameters
image	input image (with 1-, 3- or 4-channels).
size	spatial size for output image
mean	scalar with mean values which are subtracted from channels. Values are intended to be in (mean-R, mean-G, mean-B) order if image has BGR ordering and swapRB is true.
scalefactor	multiplier for image values.
swapRB	flag which indicates that swap first and last channels in 3-channel image is necessary.
crop	flag which indicates whether image will be cropped after resize or not
ddepth	Depth of output blob. Choose CV_32F or CV_8U.
if crop is true, input image is resized so one side after resize is equal to corresponding dimension in size and another one is equal or larger. Then, crop from the center is performed. If crop is false, direct resize without cropping and preserving aspect ratio is performed.

Returns
4-dimensional Mat with NCHW dimensions order.
Examples:
samples/dnn/classification.cpp, samples/dnn/colorization.cpp, samples/dnn/object_detection.cpp, samples/dnn/openpose.cpp, and samples/dnn/segmentation.cpp.
scores_list = []
bboxes_list = []
kpss_list = []
input_size = tuple(img.shape[0:2][::-1])
blob = cv2.dnn.blobFromImage(img, 1.0/self.input_std, input_size, (self.input_mean, self.input_mean, self.input_mean), swapRB=True)
net_outs = self.session.run(self.output_names, {self.input_name : blob})
12、◆ warpAffine()
#include <opencv2/imgproc.hpp>

Applies an affine transformation to an image.

The function warpAffine transforms the source image using the specified matrix:

dst(x,y)=src(M11x+M12y+M13,M21x+M22y+M23)
when the flag WARP_INVERSE_MAP is set. Otherwise, the transformation is first inverted with invertAffineTransform and then put in the formula above instead of M. The function cannot operate in-place.

Parameters
src	input image.
dst	output image that has the size dsize and the same type as src .
M	2×3 transformation matrix.
dsize	size of the output image.
flags	combination of interpolation methods (see InterpolationFlags) and the optional flag WARP_INVERSE_MAP that means that M is the inverse transformation ( dst→src ).
borderMode	pixel extrapolation method (see BorderTypes); when borderMode=BORDER_TRANSPARENT, it means that the pixels in the destination image corresponding to the "outliers" in the source image are not modified by the function.
borderValue	value used in case of a constant border; by default, it is 0.
See also
warpPerspective, resize, remap, getRectSubPix, transform
Examples:
samples/cpp/image_alignment.cpp.
    t = t1 + t2 + t3 + t4
    M = t.params[0:2]
    cropped = cv2.warpAffine(data,
                             M, (output_size, output_size),
                             borderValue=0.0)
    return cropped, M
13、◆ invertAffineTransform()
#include <opencv2/imgproc.hpp>

Inverts an affine transformation.

The function computes an inverse affine transformation represented by 2×3 matrix M:

[a11a21a12a22b1b2]
The result is also a 2×3 matrix of the same type as M.

Parameters
M	Original affine transformation.
iM	Output reverse affine transformation.
14、总结
本质上就是,把业务数据预处理成模型需要的输入形式,然后运行模型得到模型的输出,再把模型的输出转换成业务需要的输出,原理就是这样,不同的数据前处理和数据后处理,跟具体的模型有关。
类别人也是如此,不同的人,前后处理自然大部分都不一样。
Applied providers: ['CPUExecutionProvider']
find model: ./models\buffalo_l_old\1k3d68.onnx landmark_3d_68 ['None', 3, 192, 192] 0.0 1.0
Applied providers: ['CPUExecutionProvider']
find model: ./models\buffalo_l_old\2d106det.onnx landmark_2d_106 ['None', 3, 192, 192] 0.0 1.0
Applied providers: ['CPUExecutionProvider']
find model: ./models\buffalo_l_old\det_10g.onnx detection [1, 3, '?', '?'] 127.5 128.0
Applied providers: ['CPUExecutionProvider']
find model: ./models\buffalo_l_old\genderage.onnx genderage ['None', 3, 96, 96] 0.0 1.0
Applied providers: ['CPUExecutionProvider']
find model: ./models\buffalo_l_old\w600k_r50.onnx recognition ['None', 3, 112, 112] 127.5 127.5
相关文章
- 在 Peach 中使用发布者进行调试
- .NET Core快速入门教程 5、使用VS Code进行C#代码调试的技巧
- c++ gdb调试的基本使用
- ONS C++ Windows SDK 调试方法及注意事项
- 【BZOJ4428】[Nwerc2015]Debugging调试 记忆化搜索+分块
- bmon:Linux 下一个强大的网络带宽监视和调试工具
- 【Node】Webpack调试启动
- 【AGC】使用云调试优惠扣费、华为设备上触发崩溃、无法下载华为应用市场问题小结
- c# VS.NET 中的调试工具
- IOS 内存优化和调试技巧
- Linux下GDB调试C/C++
- Eclipse集成PDT+XDebug调试PHP脚本 https://svn.jcxsoftware.com/node?page=5 [转]
- Flutter中,idevice_id和iproxy无法打开的问题(真机调试卡在启动页进不去)