
普罗米修斯监控mysql数据库实战
目录
前言
前前文讲了如何在Linux服务器上安装mysql数据库,那么,今天就用prometheus来监控mysql数据库服务。
一 实验环境
1.1 前期准备
本实验需要准备两台服务器
第一台服务器配置prometheus监控;
第二台服务器配置mysql和mysqld_exporter,给prometheus提供监控样本数据;
1.2 确认IP地址
[root@localhost ~]# hostname -I   #第一台IP
192.168.212.166 192.168.122.1
[root@localhost ~]# cat /etc/redhat-release
CentOS Linux release 7.9.2009 (Core)     #系统centos 7.9


[root@mysql_export ~]# hostname -I
192.168.212.23 192.168.122.1 172.17.0.1    #第二台IP
[root@mysql_export ~]# hostnamectl set-hostname mysql_23
[root@mysql_export ~]# bash
[root@mysql_23 ~]# cat /etc/redhat-release
CentOS Linux release 7.9.2009 (Core)    #系统centos 7.9
1.3 关闭SELinux和防火墙
两台服务器均是此操作
setenforce 0
iptables -F
systemctl stop firewalld.service
二 配置prometheus监控
到这里开始操作是在第一台服务器上开始
2.1 使用rz上传prometheus压缩包
若在VM虚拟机上,rz命令无法使用,要连接Xshell上远程登录后方可用rz命令,没有rz命令可下载lrzsz软件包。
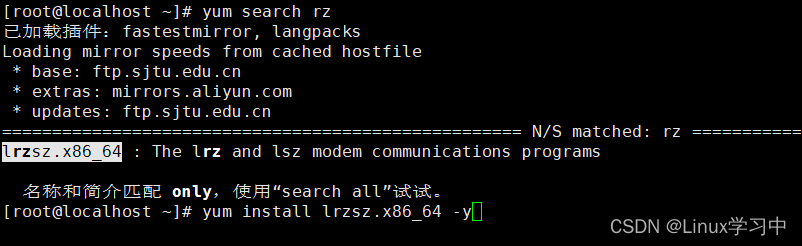
下面继续开始上传程序压缩包
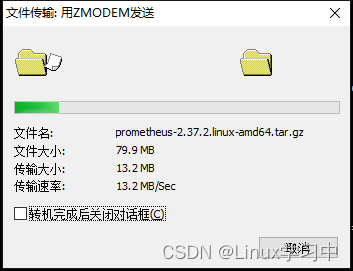 等待片刻......
2.2 解压包并进入目录
[root@localhost ~]# ll prometheus-2.37.2.linux-amd64.tar.gz
-rw-r--r--. 1 root root 83879445 11月  9 19:54 prometheus-2.37.2.linux-amd64.tar.gz
[root@localhost ~]# tar xf prometheus-2.37.2.linux-amd64.tar.gz
#使用xf参数解压,也可以显示执行过程-zxvf参数
[root@localhost ~]# mv prometheus-2.37.2.linux-amd64 prometheus
到这里prometheus已经配置好一大半了,接下来./prometheus就可以直接启动了,然后在浏览器上输入IP+端口即可访问,可参考上上上个文章- prometheus监控本地主机及监控远程主机;
现在先不启动,开始第二台配置安装MySQL数据库。
三 安装MySQL数据库
由于centos7以上的版本安装MySQL会与mariadb之间有冲突,想要成功安装MySQL数据库,必须先卸载与mariadb相关的服务和文件。
3.1配置网络源
提前备份自带的repo源,下载阿里网络源替换掉当前软件源。
[root@mysql_23 ~]# cd /etc/yum.repos.d/
[root@mysql_23 yum.repos.d]# mv CentOS-Base.repo CentOS-Base.repo.bak
阿里云网络源地址--阿里源下载点
wget -O /etc/yum.repos.d/CentOS-Base.repo https://mirrors.aliyun.com/repo/Centos-7.repo
yum clean all   #清理缓存
yum makecache    #重新生成缓存
下载MySQL5.7 rpm包
wget -c https://dev.mysql.com/get/mysql57-community-release-el7-9.noarch.rpm

[root@mysql_23 ~]# ll mysql57-community-release-el7-9.noarch.rpm
-rw-r--r--. 1 root root 9224 9月  12 2016 mysql57-community-release-el7-9.noarch.rpm
3.2 删除mariadb相关文件
搜索与mariadb相关的软件包
[root@mysql_23 ~]# rpm -qa | grep mariadb
mariadb-libs-5.5.68-1.el7.x86_64
[root@mysql_23 ~]# rpm -qa | grep mysql
[root@mysql_23 ~]# rpm -e mariadb-libs-5.5.68-1.el7.x86_64
错误:依赖检测失败:
	libmysqlclient.so.18()(64bit) 被 (已安裝) postfix-2:2.10.1-9.el7.x86_64 需要
	libmysqlclient.so.18(libmysqlclient_18)(64bit) 被 (已安裝) postfix-2:2.10.1-9.el7.x86_64 需要
删除软件若提示依赖检测失败,那就需要加上--nodeps,表示强制删除。
[root@mysql_23 ~]# rpm -e mariadb-libs-5.5.68-1.el7.x86_64 --nodeps
[root@mysql_23 ~]# echo $?
0
搜索与mariadb相关的文件
[root@mysql_23 ~]# find / -name mariadb
[root@mysql_23 ~]# find / -name mysql
/etc/selinux/targeted/active/modules/100/mysql
/usr/lib64/mysql
[root@mysql_23 ~]# rm -rf /etc/selinux/targeted/active/modules/100/mysql
[root@mysql_23 ~]# rm -rf /usr/lib64/mysql
3.3 安装MySQL
安装含有mysql5.7的源
rpm -ivh mysql57-community-release-el7-9.noarch.rpm有这两个repo文件表示安装成功

使用yum安装mysql-57和相关依赖包
yum install mysql-community-server -y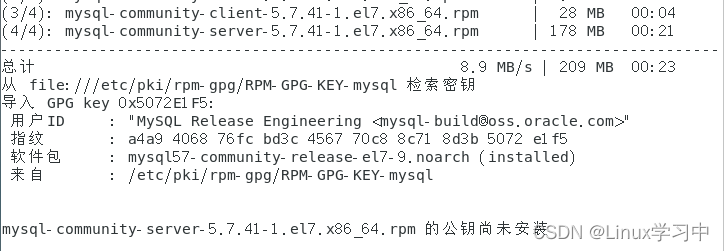
若安装完后显示公钥尚未安装,有两个解决思路
1 将要下载的mysql包的gpgcheck的1改成0
[root@localhost ~]# vim /etc/yum.repos.d/mysql-community.repo
[mysql57-community]
name=MySQL 5.7 Community Server
baseurl=http://repo.mysql.com/yum/mysql-5.7-community/el/7/$basearch/
enabled=1
gpgcheck=0    #这个 1改成0
gpgkey=file:///etc/pki/rpm-gpg/RPM-GPG-KEY-mysql
[root@localhost ~]# cat /etc/yum.repos.d/mysql-community.repo
2 把gpgkey改成mysql的gpgkey
rpm --import https://repo.mysql.com/RPM-GPG-KEY-mysql-2022重新安装就可以了
[root@localhost ~]# yum install mysql-community-server -y四 配置MySQL数据库
4.1启动数据库并查找旧密码
[root@mysql_23 ~]# systemctl start mysqld
[root@mysql_23 ~]# grep "password" /var/log/mysqld.log
2023-02-19T08:59:32.117275Z 1 [Note] A temporary password is generated for root@localhost: )yjbkb=jp9GY
4.2 设置MySQL新密码
[root@mysql_23 ~]# mysql -uroot -p
Enter password:     #输入旧密码
Welcome to the MySQL monitor.  Commands end with ; or \g.
Your MySQL connection id is 2
Server version: 5.7.41

Copyright (c) 2000, 2023, Oracle and/or its affiliates.

Oracle is a registered trademark of Oracle Corporation and/or its
affiliates. Other names may be trademarks of their respective
owners.

Type 'help;' or '\h' for help. Type '\c' to clear the current input statement.

mysql> alter user 'root'@'localhost' identified by 'GUANzhu123//';   #修改新密码
Query OK, 0 rows affected (0.00 sec)
五 配置mysqld_exporter
5.1上传软件包并解压
[root@mysql_23 ~]# rz

[root@mysql_23 ~]# ll mysqld_exporter-0.14.0.linux-amd64.tar.gz
-rw-r--r--. 1 root root 7450991 11月  9 19:53 mysqld_exporter-0.14.0.linux-amd64.tar.gz
[root@mysql_23 ~]# tar xf mysqld_exporter-0.14.0.linux-amd64.tar.gz
[root@mysql_23 ~]# mv mysqld_exporter-0.14.0.linux-amd64 mysqld_exporter
5.2 进入该目录并设置数据库账户
[root@mysql_23 ~]# cd mysqld_exporter/
[root@mysql_23 mysqld_exporter]# ll
总用量 14824
-rw-r--r--. 1 3434 3434    11357 3月   5 2022 LICENSE
-rwxr-xr-x. 1 3434 3434 15163162 3月   5 2022 mysqld_exporter
-rw-r--r--. 1 3434 3434       65 3月   5 2022 NOTICE
[root@mysql_23 mysqld_exporter]# mysql -uroot -p
Enter password:
Welcome to the MySQL monitor.  Commands end with ; or \g.
Your MySQL connection id is 3
Server version: 5.7.41 MySQL Community Server (GPL)

Copyright (c) 2000, 2023, Oracle and/or its affiliates.

Oracle is a registered trademark of Oracle Corporation and/or its
affiliates. Other names may be trademarks of their respective
owners.

Type 'help;' or '\h' for help. Type '\c' to clear the current input statement.

mysql> grant select,replication client,process ON *.* to 'mysql_monitor'@'localhost' identified by 'GUANzhu123//';
Query OK, 0 rows affected, 1 warning (0.00 sec)

mysql> flush privileges;
Query OK, 0 rows affected (0.00 sec)

mysql> exit
Bye
5.3 创建配置文件将账户密码写入
[root@mysql_23 mysqld_exporter]# vim .my.cnf
[root@mysql_23 mysqld_exporter]# cat .my.cnf
[client]
user=mysql_monitor
password=GUANzhu123//
5.4 启动mysqld_exporter
[root@mysql_23 mysqld_exporter]# nohup ./mysqld_exporter --config.my-cnf=/root/mysqld_exporter/.my.cnf &
[1] 4961
nohup表示即使当前终端关闭也不会影响服务的运行。
[root@mysql_23 ~]# netstat -antup | grep mysqld
tcp6       0      0 :::3306                 :::*                    LISTEN      3052/mysqld
tcp6       0      0 :::9104                 :::*                    LISTEN      4961/./mysqld_expor
查看服务mysqld_expor端口为9104,到这里mysqld_exporter已经配置完成了。
六、启动prometheus监控
回到第一台服务器上修改配置文件
6.1 配置prometheus文件
[root@localhost prometheus]# vim prometheus.yml
[root@localhost prometheus]# tail  prometheus.yml
  - job_name: "prometheus"

    # metrics_path defaults to '/metrics'
    # scheme defaults to 'http'.

    static_configs:
      - targets: ["localhost:9090"]
  - job_name: "mysql"
    static_configs:
      - targets: ["192.168.212.23:9104"]
6.2 启动监控服务
[root@localhost prometheus]# ./prometheus &
[1] 3351
......
ts=2023-02-19T09:35:07.323Z caller=main.go:1177 level=info msg="Loading configuration file" filename=prometheus.yml
ts=2023-02-19T09:35:07.324Z caller=main.go:1214 level=info msg="Completed loading of configuration file" filename=prometheus.yml totalDuration=1.22585ms db_storage=670ns remote_storage=3.01µs web_handler=380ns query_engine=800ns scrape=864.824µs scrape_sd=47.44µs notify=30.411µs notify_sd=8.26µs rules=2.67µs tracing=39.131µs
ts=2023-02-19T09:35:07.324Z caller=main.go:957 level=info msg="Server is ready to receive web requests."
ts=2023-02-19T09:35:07.324Z caller=manager.go:941 level=info component="rule manager" msg="Starting rule manager..."
6.3 在官网打开prometheus
使用ip+端口进行访问:192.168.212.166:9090 ,这里的IP修改为配置prometheus的那一台机器。


总结
以上就是prometheus+MySQL的所有内容了,写了这么多内容真的不容易;如果这篇文章对你有帮助,觉得还行的,可以点赞支持一下!

相关文章
- mysql数据库监控工具-MONyog的配置和基本使用项
- mysql sql慢查询监控脚本
- Mysql远程连接数据库报错排查:pymysql.err.OperationalError: (2003, "Can't connect to MySQL server on '**.**.**.**' (timed out)")
- 【MySQL】批量删除mysql中数据库中的表
- 【MySql】mysql 数据库数据订正
- MySql通过数据库文件恢复数据库
- MySQL配置文件mysql.ini参数详解、MySQL性能优化
- MySQL选择数据库use与mysql_select_db使用详解
- ef和mysql使用(一)
- 在MySQL中使用init-connect与binlog来实现用户操作追踪记录
- 数据库基础之Mysql(3)mysql删除历史binlog
- 数据库内核月报 - 2015 / 11-MySQL · 社区见闻 · OOW 2015 总结 MySQL 篇
- MySQL · TokuDB · 日志子系统和崩溃恢复过程
- Can’t connect to local MySQL server through socket ‘/var/lib/mysql/mysql.sock’
- mysql启动时报错:Starting MySQL... ERROR! The server quit without updating PID file (/opt/mysql/data/mysql.pid) 的解决方法
- PHP连接MySQL数据库的三种方式(mysql、mysqli、pdo)
- MySQL、HBase、ES的特点和区别
- 云数据库RDS_MySQL购买流程_以及购买步骤的建议
- Python:mysql-replication监控MySQL的binlog变动
- Python:mysql-connector-python模块对MySQL数据库进行增删改查
- 详解MySQL information_schema数据库常用的表信息以及各表对应的字段信息;以及如何登录mysql和创建视图
- mysql_22 _ MySQL有哪些“饮鸩止渴”提高性能的方法?
- mysql 数据库 分表后 怎么进行分页查询?Mysql分库分表方案?
- Mysql报错:Can't connect to local MySQL server through socket '/tmp/mysql.sock'
- MySQL数据库篇之mysql的快速启动和停止
- MySQL + MyBatis 批量插入时存在则忽略或更新记录