
Jenkins+Docker+SpringCloud微服务持续集成(中)
2023-09-14 09:13:35 时间
Jenkins+Docker+SpringCloud微服务持续集成(中)
微服务持续集成
- 准备一个简单的微服务项目
- 项目代码上传到对应的diam仓库中,如: gitee,github,gitlab等
这里大家可以选用我给出的SpringCloud小书项目进行学习和测试:
https://gitee.com/DaHuYuXiXi/spring-cloud-book
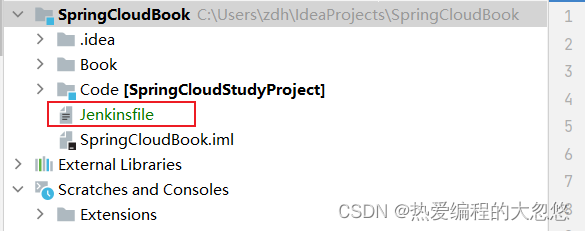
- 在Jenkins中新建和微服务同名的流水线项目

- 创建Jenkinsfile文件
    //定义git凭证ID
    def git_auth = 'cde7fe8a-f426-4f93-9f05-e96e60177952'
    //git的url地址
    def git_url = 'https://gitee.com/DaHuYuXiXi/spring-cloud-book.git'

    stages {
        stage('拉取代码') {
           checkout([$class: 'GitSCM', branches: [[name: '*/master']], extensions: [], userRemoteConfigs: [[credentialsId: "${git_auth}", url: "${git_url}"]]])
        }
    }
脚本采用的是声明式脚本语法编写
提交到SonarQube代码审查
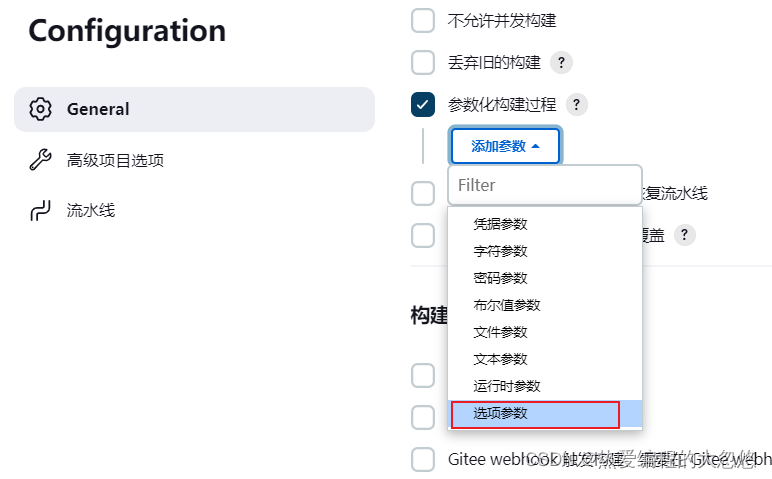
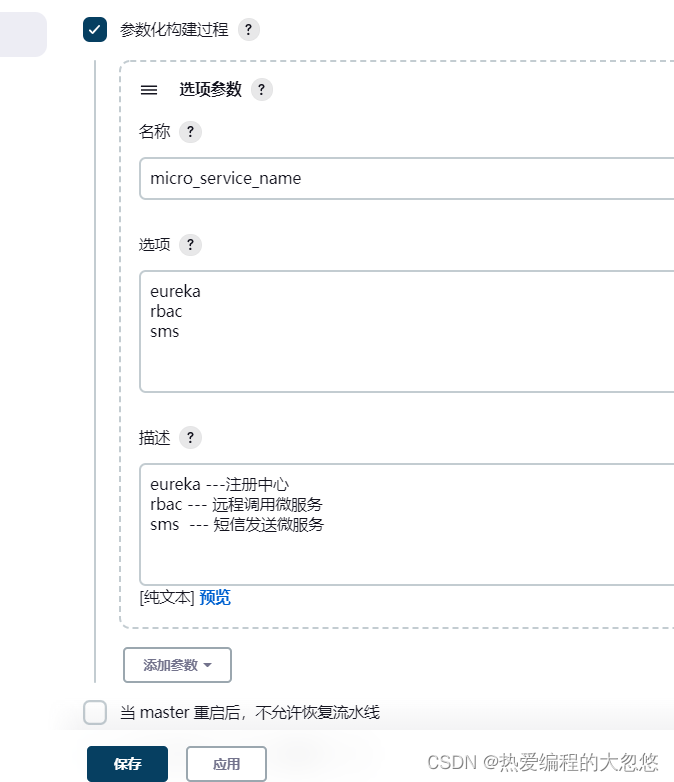
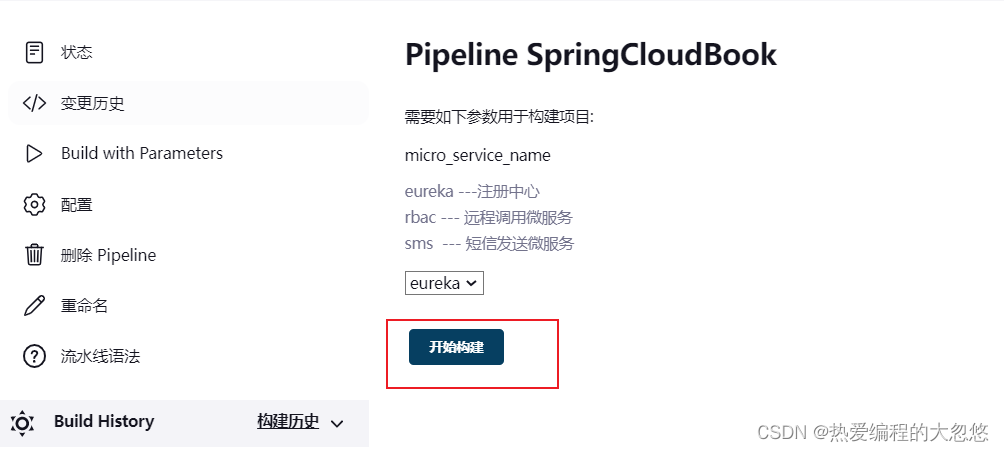
在Jenkins的项目中添加一个参数
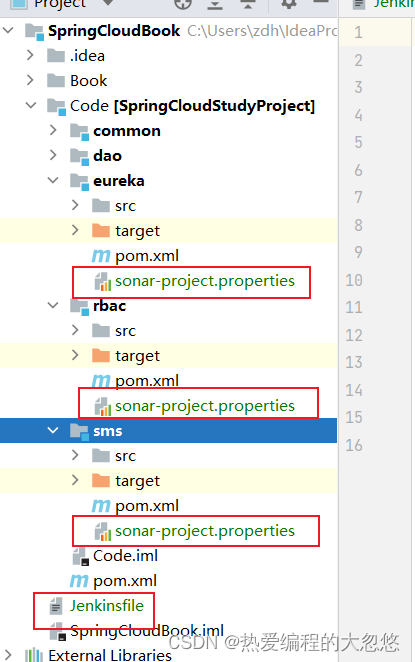
在每个微服务的根目录中添加sonar-project.properties文件
- eureka微服务的根目录添加sonar-project.properties文件,内容如下:
# must be unique in a given SonarQube instance
sonar.projectKey=eureka
# this is the name and version displayed in the SonarQube UI. Was mandatory prior to SonarQube 6.1.
sonar.projectName=SpringCloudBook-eureka
sonar.projectVersion=1.0
# Path is relative to the sonar-project.properties file. Replace "\" by "/" on Windows.
# This property is optional if sonar.modules is set.
sonar.sources=.
sonar.exclusions=**/test/**,**/target/**
sonar.java.binaries=.

sonar.java.source=11
sonar.java.target=11
# sonar.java.libraries=**/target/classes/**
# Encoding of the source code. Default is default system encoding
sonar.sourceEncoding=UTF-8
- rbac微服务的根目录添加sonar-project.properties文件,内容如下:
# must be unique in a given SonarQube instance
sonar.projectKey=rbac
# this is the name and version displayed in the SonarQube UI. Was mandatory prior to SonarQube 6.1.
sonar.projectName=SpringCloudBook-rbac
sonar.projectVersion=1.0
# Path is relative to the sonar-project.properties file. Replace "\" by "/" on Windows.
# This property is optional if sonar.modules is set.
sonar.sources=.
sonar.exclusions=**/test/**,**/target/**
sonar.java.binaries=.

sonar.java.source=11
sonar.java.target=11
# sonar.java.libraries=**/target/classes/**
# Encoding of the source code. Default is default system encoding
sonar.sourceEncoding=UTF-8
- sms微服务的根目录添加sonar-project.properties文件,内容如下:
# must be unique in a given SonarQube instance
sonar.projectKey=sms
# this is the name and version displayed in the SonarQube UI. Was mandatory prior to SonarQube 6.1.
sonar.projectName=SpringCloudBook-sms
sonar.projectVersion=1.0
# Path is relative to the sonar-project.properties file. Replace "\" by "/" on Windows.
# This property is optional if sonar.modules is set.
sonar.sources=.
sonar.exclusions=**/test/**,**/target/**
sonar.java.binaries=.

sonar.java.source=11
sonar.java.target=11
# sonar.java.libraries=**/target/classes/**
# Encoding of the source code. Default is default system encoding
sonar.sourceEncoding=UTF-8
修改Jenkins构建脚本
//定义git凭证ID
def git_auth = 'cde7fe8a-f426-4f93-9f05-e96e60177952'
//git的url地址
def git_url = 'https://gitee.com/DaHuYuXiXi/spring-cloud-book.git'

node {
       stage('拉取代码') {
           checkout([$class: 'GitSCM', branches: [[name: '*/master']], extensions: [], userRemoteConfigs: [[credentialsId: "${git_auth}", url: "${git_url}"]]])
        }

       stage('代码审查') {
        //定义当前Jenkins的SonarQubeScanner工具的环境
        def scannerHome = tool 'sonarqube-scanner'
        //引用当前Jenkins的SonarQube环境
        withSonarQubeEnv('sonarqube-8.6.0') {
          sh """
               cd ${project_name}
               ${scannerHome}/bin/sonar-scanner
          """
         }
       }

       //公共子工程编译打包--如果有需要则添加
       //stage('编译,安装公共的子工程') {
         //  sh "mvn -f Code/common clean install"
         //  sh "mvn -f Code/dao clean install"
       //}
}
如果有common公共子工程,那么需要将spring-boot-maven-plugin插件从总工程移动到各个微服务工程,否则common公共子工程继承了总工程之后,spring-boot-maven-plugin插件会报错,因为找不到启动类。
编译打包微服务工程
//定义git凭证ID
def git_auth = 'cde7fe8a-f426-4f93-9f05-e96e60177952'
//git的url地址
def git_url = 'https://gitee.com/DaHuYuXiXi/spring-cloud-book.git'

node {
       stage('拉取代码') {
           checkout([$class: 'GitSCM', branches: [[name: '*/master']], extensions: [], userRemoteConfigs: [[credentialsId: "${git_auth}", url: "${git_url}"]]])
        }

       stage('代码审查') {
        //定义当前Jenkins的SonarQubeScanner工具的环境
        def scannerHome = tool 'sonarqube-scanner'
        //引用当前Jenkins的SonarQube环境
        withSonarQubeEnv('sonarqube-8.6.0') {
          sh """
               cd ${project_name}
               ${scannerHome}/bin/sonar-scanner
          """
         }
       }

       //直接通过父项目编译打包所有的微服务模块
       stage('编译,打包微服务工程') {
           sh "mvn -f Code clean install"
       }
}
需要将每个微服务工程都编译打包。
使用Docker编译、生成镜像并自动推送到harbor
前提说明
● 利用dockerfile-maven-plugin插件来构建Docker镜像。
● 因为我用的是JDK11,而JDK9以上就移除了javax.activation.activation的jar包,所以需要在每个微服务工程都加上依赖:
<dependency>
    <groupId>javax.xml.bind</groupId>
    <artifactId>jaxb-api</artifactId>
    <version>2.3.0</version>
</dependency>
<dependency>
    <groupId>com.sun.xml.bind</groupId>
    <artifactId>jaxb-core</artifactId>
    <version>2.3.0</version>
</dependency>
<dependency>
    <groupId>com.sun.xml.bind</groupId>
    <artifactId>jaxb-impl</artifactId>
    <version>2.3.0</version>
</dependency>
<dependency>
    <groupId>javax.activation</groupId>
    <artifactId>activation</artifactId>
    <version>1.1.1</version>
</dependency>
在每个微服务的pom.xml中加入dockerfile-maven-plugin插件
- 父项目写一个模板
    <build>
        <pluginManagement>
            <plugins>
                <plugin>
                    <groupId>com.spotify</groupId>
                    <artifactId>dockerfile-maven-plugin</artifactId>
                    <version>1.4.13</version>
                   <!--      构建时机     -->
                    <executions>
                        <execution>
                            <id>my-hub</id>
                           <!--    执行mvn package时,自动触发docker build和docker push     -->
                            <phase>package</phase>
                            <goals>
                                <goal>build</goal>
                                <goal>push</goal>
                            </goals>
                        </execution>
                    </executions>
                    <configuration>
                     <!--  harbor是私有仓库需要登录的话   -->
                        <username>dhy</username>
                        <password>126433zdh</password>
                         <!--           dockerfile当前项目根路径下              -->
                        <contextDirectory>${project.basedir}</contextDirectory>
                        <!--  要上传的远程镜像仓库地址   -->
                        <repository>${docker.repostory}/${docker.registry.name}/${project.artifactId}</repository>
                       <!--     要构建的jar包地址配置   -->
                        <buildArgs>
                            <JAR_FILE>target/${project.build.finalName}.jar</JAR_FILE>
                        </buildArgs>
                    </configuration>
                </plugin>
            </plugins>
        </pluginManagement>
- 子项目只需要覆盖其中部分实现即可
    <properties>
        <!--Docker镜像的标签,也就是版本-->
        <docker.image.tag>v1.0.0</docker.image.tag>
    </properties>

    <build>
        <!--  设置生成的jar包名       -->
        <finalName>sms</finalName>
        <plugins>
            <plugin>
                <groupId>com.spotify</groupId>
                <artifactId>dockerfile-maven-plugin</artifactId>
                <version>1.4.13</version>
                <configuration>
                    <tag>${docker.image.tag}</tag>
                </configuration>
            </plugin>
        </plugins>
    </build>
在每个微服务根目录下新建Dockerfile文件
FROM openjdk:8
ARG JAR_FILE
COPY ${JAR_FILE} app.jar
# 注意每个项目公开的端口不一样
EXPOSE 9000
ENTRYPOINT ["java","-jar","/app.jar"]
修改Jenkinsfile
//定义git凭证ID
def git_auth = 'cde7fe8a-f426-4f93-9f05-e96e60177952'
//git的url地址
def git_url = 'https://gitee.com/DaHuYuXiXi/spring-cloud-book.git'

node {
       stage('拉取代码') {
           checkout([$class: 'GitSCM', branches: [[name: '*/master']], extensions: [], userRemoteConfigs: [[credentialsId: "${git_auth}", url: "${git_url}"]]])
        }

       stage('编译,打包微服务工程') {
          // docker:build 可以触发插件的执行
          //因为是直接构建父模块来构建所有子模块,所以这里不能直接加docker:build命令
          // sh "mvn -f Code clean install docker:build"
          //每个子模块的pom文件已经指定了对应docker插件的触发时机
          sh "mvn -f Code clean install"
       }
}
如果到这里编译打包没报错,并且镜像正常上传到harbor私有仓库,则说明没有问题,否则可以尝试下面的方式。
手动上传镜像到Harbor镜像仓库
- 准备命令文件,放在项目根路径下
#!/bin/bash

#登录docker
docker login -u dhy -p xxx xxx

#进入项目根目录下
cd /var/lib/jenkins/workspace/SpringCloudBook/Code

#通过命令文件启动项目
cd sms
# docker push xxx/springcloudbook/REPOSITORY[:TAG]
docker rm -f xxx/springcloudbook/sms:1.0
docker build -t xxx/springcloudbook/sms:1.0 .
docker push xxx/springcloudbook/sms:1.0
cd ..

cd rbac
# docker push xxx/springcloudbook/REPOSITORY[:TAG]
docker rm -f xxx/springcloudbook/rbac:1.0
docker build -t xxx/springcloudbook/rbac:1.0 .
docker push xxx/springcloudbook/rbac:1.0
cd ..

cd eureka
# docker push xxx/springcloudbook/REPOSITORY[:TAG]
docker rm -f xxx/springcloudbook/eureka:1.0
docker build -t xxx/springcloudbook/eureka:1.0 .
docker push xxx/springcloudbook/eureka:1.0
cd ..

- 修改jenkinsfile文件
//定义git凭证ID
def git_auth = 'cde7fe8a-f426-4f93-9f05-e96e60177952'
//git的url地址
def git_url = 'https://gitee.com/DaHuYuXiXi/spring-cloud-book.git'
//定义tag
def tag = "1.0"
// 定义Harbor的URL地址
def harbor_url = "xxx"
// 镜像库项目名称
def harbor_project = "springcloudbook"
// Harbor的登录凭证id
def harbor_auth = "767a60c2-c423-4737-a455-228a7e38ead7"

node {
       stage('拉取代码') {
           checkout([$class: 'GitSCM', branches: [[name: '*/master']], extensions: [], userRemoteConfigs: [[credentialsId: "${git_auth}", url: "${git_url}"]]])
        }

       stage('编译,打包微服务工程') {
           // 修改部分
          // dockerfile:build 可以触发插件的执行
           sh "mvn -f Code clean install"
       }


       stage('上传镜像') {
           sh 'chmod +x /var/lib/jenkins/workspace/SpringCloudBook/Code/start.bash'
           sh '/var/lib/jenkins/workspace/SpringCloudBook/Code/start.bash'
       }
}

拉取镜像和发布应用
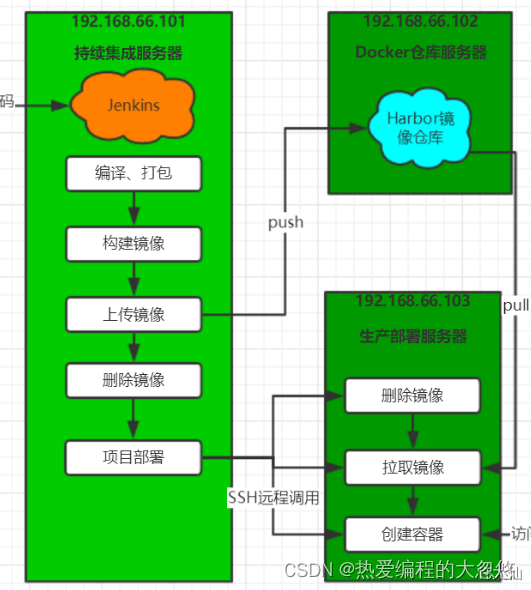
当jenkins所在服务器完成了镜像上传后,下一步就是通过 Publish Over SSH插件,发送命令给生产部署服务器,让他去拉取harbo镜像仓库的最新镜像,然后创建容器。
配置远程部署服务器
- 在192.168.18.101中配置远程部署服务器(192.168.18.103):
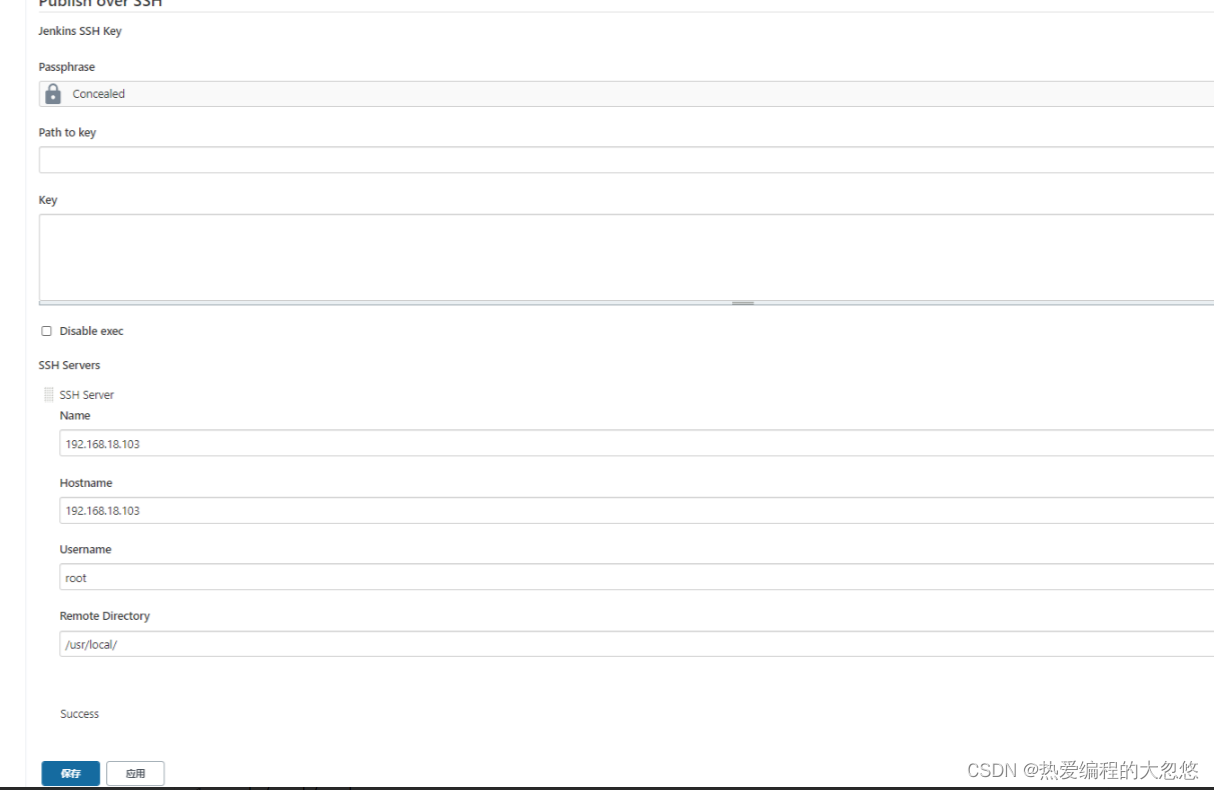
因为我将所有服务器的防火墙关闭,但是在实际生产环境下,需要通过ssh公钥和私钥来匹配使用,前面已经生成过公钥和私钥,将公钥发给部署服务器。操作步骤如下:
- 进入/root/.ssh目录:
- 将公钥发给部署服务器:
- 在配置远程部署服务器的Path to key中配置私钥的路径:
cd /root/.ssh
ssh-copy-id 192.168.18.103
/root/.ssh/id_rsa
在远程部署服务器创建部署的脚本
- 进入/usr/local目录:
cd /usr/local
- 编写deploy.sh脚本:
vim deploy.sh
#! /bin/sh
#接收外部参数
harbor_url=$1
harbor_project_name=$2
project_name=$3
tag=$4
port=$5

imageName=$harbor_url/$harbor_project_name/$project_name:$tag

echo "$imageName"

#查询容器是否存在,存在则删除
containerId=`docker ps -a | grep -w ${project_name}:${tag}  | awk '{print $1}'`
if [ "$containerId" !=  "" ] ; then
    #停掉容器
    docker stop $containerId

    #删除容器
    docker rm $containerId

	echo "成功删除容器"
fi

#查询镜像是否存在,存在则删除
imageId=`docker images | grep -w $project_name  | awk '{print $3}'`

if [ "$imageId" !=  "" ] ; then

    #删除镜像
    docker rmi -f $imageId

	echo "成功删除镜像"
fi

# 登录Harbor
docker login -u xudaxian -p Xudaxian12345678 $harbor_url

# 下载镜像
docker pull $imageName

# 启动容器
docker run -di -p $port:$port $imageName

echo "容器启动成功"
- 设置权限:
chmod +x deploy.sh
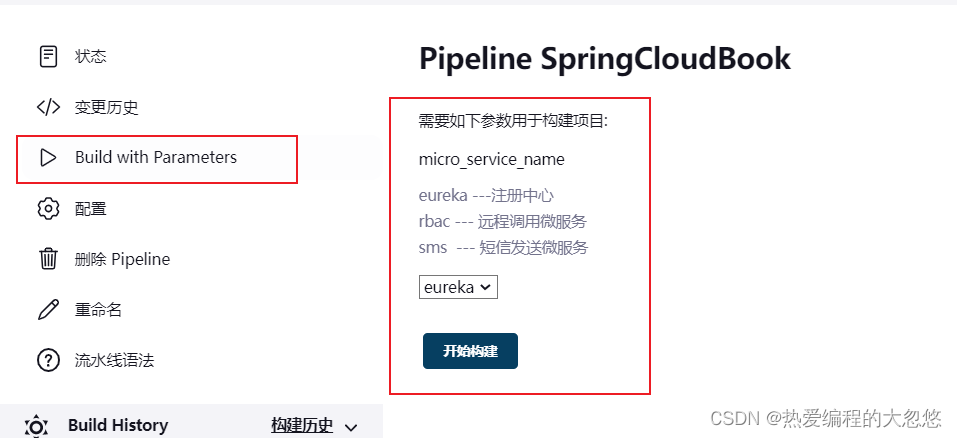
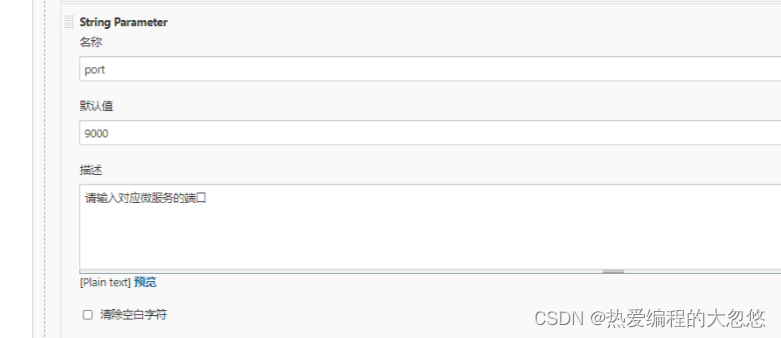
在Jenkins中设置参数
- 将端口作为外部的参数,在Jenkins中配置。
修改Jenkinsfile文件添加拉取镜像和发布应用的部署
- Jenkinfile:
//定义git凭证ID
def git_auth = "7d5c4945-2533-41e2-bd47-5dd97eb37f38"
//git的url地址
def git_url = "git@192.168.18.100:develop_group/jenkinscloud.git"
//定义tag
def tag = "1.0"
// 定义Harbor的URL地址
def harbor_url = "192.168.18.102:85"
// 镜像库项目名称
def harbor_project = "xudaxian-mall"
// Harbor的登录凭证id
def harbor_auth = "b6cf3cb5-8a33-457d-93da-65c46f0135b2"
// 定义远程执行命令
def execCommand = "/usr/local/deploy.sh $harbor_url $harbor_project $project_name $tag $port"
node {
    stage('拉取代码') {
        checkout([$class: 'GitSCM', branches: [[name: '*/master']], doGenerateSubmoduleConfigurations: false, extensions: [], submoduleCfg: [], userRemoteConfigs: [[credentialsId: "${git_auth}", url: "${git_url}"]]])
    }
    stage('代码审查') {
        //定义当前Jenkins的SonarQubeScanner工具的环境
        def scannerHome = tool 'sonarqube-scanner'
        //引用当前Jenkins的SonarQube环境
        withSonarQubeEnv('sonarqube-8.6.0') {
          sh """
               cd ${project_name}
               ${scannerHome}/bin/sonar-scanner
          """
        }
    }
    //如果有公共子工程
//     stage('编译,安装公共的子工程') {
//        sh "mvn -f jenkinscloud-common clean install"
//     }
    stage('编译,打包微服务工程') {
       // dockerfile:build 可以触发插件的执行
       sh "mvn -f ${project_name} clean install dockerfile:build "
    }

    stage('上传镜像') {
       //定义镜像的名称
       def imageName = "${project_name}:${tag}"
       //给镜像打上标签
       sh "docker tag ${imageName} ${harbor_url}/${harbor_project}/${imageName}"
       //把镜像推送到Harbor
       withCredentials([usernamePassword(credentialsId: "${harbor_auth}", passwordVariable: 'password', usernameVariable: 'username')]) {
           // 登录到Harbor
           sh "docker login -u ${username} -p ${password} ${harbor_url}"
           //镜像的上传
           sh "docker push ${harbor_url}/${harbor_project}/${imageName}"

           sh "echo '镜像上传到Harbor仓库中成功'"
       }

    }

    //删除本地镜像
    sh "docker rmi -f ${imageName}"
    sh "docker rmi -f ${harbor_url}/${arbor_project}/${imageName}"

    stage('拉取镜像和发布应用') {
        // 远程部署调用进行项目部署
        sshPublisher(publishers: [sshPublisherDesc(configName: '192.168.18.103', transfers: [sshTransfer(cleanRemote: false, excludes: '', execCommand: "${execCommand}", execTimeout: 120000, flatten: false, makeEmptyDirs: false, noDefaultExcludes: false, patternSeparator: '[, ]+', remoteDirectory: '', remoteDirectorySDF: false, removePrefix: '', sourceFiles: '')], usePromotionTimestamp: false, useWorkspaceInPromotion: false, verbose: false)])
    }
}
相关文章
- [Jenkins]开发jenkins插件第一步
- [Jenkins]详解jenkins几个有用的插件如何使用(emma,findbugs)
- 微服务SpringCloud之GateWay路由
- 【Docker】docker安装Jenkins
- Docker+Jenkins持续集成环境(2)使用docker+jenkins构建nodejs前端项目
- SpringBoot+SpringCloud
- 跟我学SpringCloud | 第十五篇:微服务利剑之APM平台(一)Skywalking
- 跟我学SpringCloud | 第九篇:服务网关Zuul初
- 跟我学SpringCloud | 第五篇:熔断监控Hystrix Dashboard和Turbine
- 跟我学SpringCloud | 第一篇:介绍
- SpringCloud--alibliba--Nacos--上
- SpringCloud集成Bus消息总线
- 【项目实战】一文看懂SpringCloud Gateway中的响应式编程Spring Reactor的应用
- SpringCloud微服务电商系统在Kubernetes集群中上线详细教程
- SpringCloud Feign 踩到的坑(一)
- SpringCloud架构设计
- Jenkins+Docker+SpringCloud微服务持续集成(下)
- SpringCloud Alibaba微服务第10章之Gateway
- SpringCloud 组件 网关组件Zuul
- 基于Istio服务治理网格的SpringCloud大型微服务项目部署流程