建木(Jianmu)----建木系统中基于并发网关节点的流程Workflow
2023-09-14 09:12:53 时间
【原文链接】
1 流程workflow的定义
name: 流程名称
description: 流程描述

workflow:
2 流程workflow的理解
流程workflow跟管道pipeline的区别就是workflow支持多个上游或者多个下游,因此workflow需要指定start和end节点,同时需要使用sources指定上游节点和targets指定下游节点
3 基于并发网关节点的流程workflow实践
(1)登录建木后,点击【创建项目】
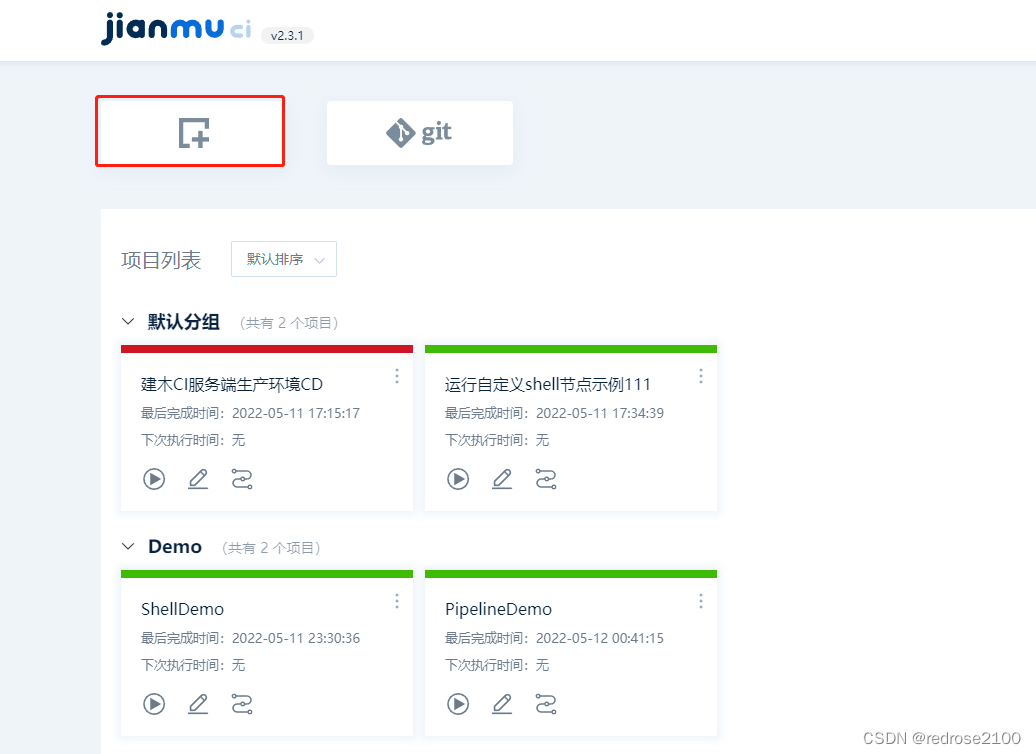
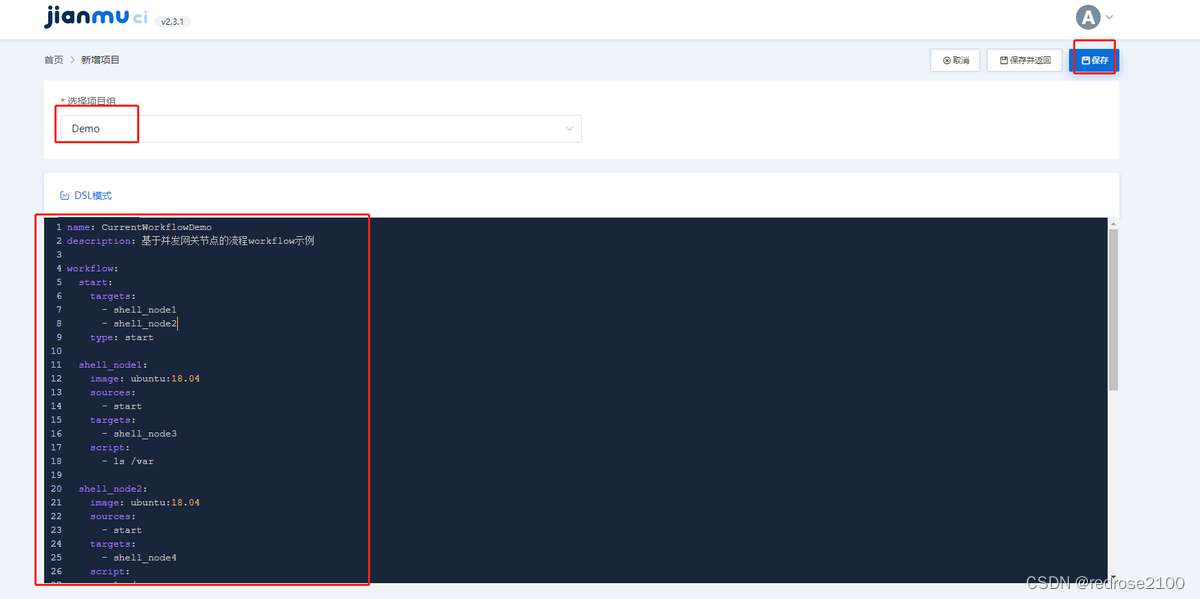
(2)选择项目组,然后编写yaml文件,然后点保存
name: CurrentWorkflowDemo
description: 基于并发网关节点的流程workflow示例

workflow:
  start:
    targets:
      - shell_node1
      - shell_node2
    type: start

  shell_node1:
    image: ubuntu:18.04
    sources:
      - start
    targets:
      - shell_node3
    script:
      - ls /var

  shell_node2:
    image: ubuntu:18.04
    sources:
      - start
    targets:
      - shell_node4
    script:
      - ls /var

  shell_node3:
    image: ubuntu:18.04
    sources:
      - shell_node1
    targets:
      - end
    script:
      - ls /var

  shell_node4:
    image: ubuntu:18.04
    sources:
      - shell_node2
    targets:
      - end
    script:
      - ls /var

  end:
    sources:
      - shell_node3
      - shell_node4
    type: end
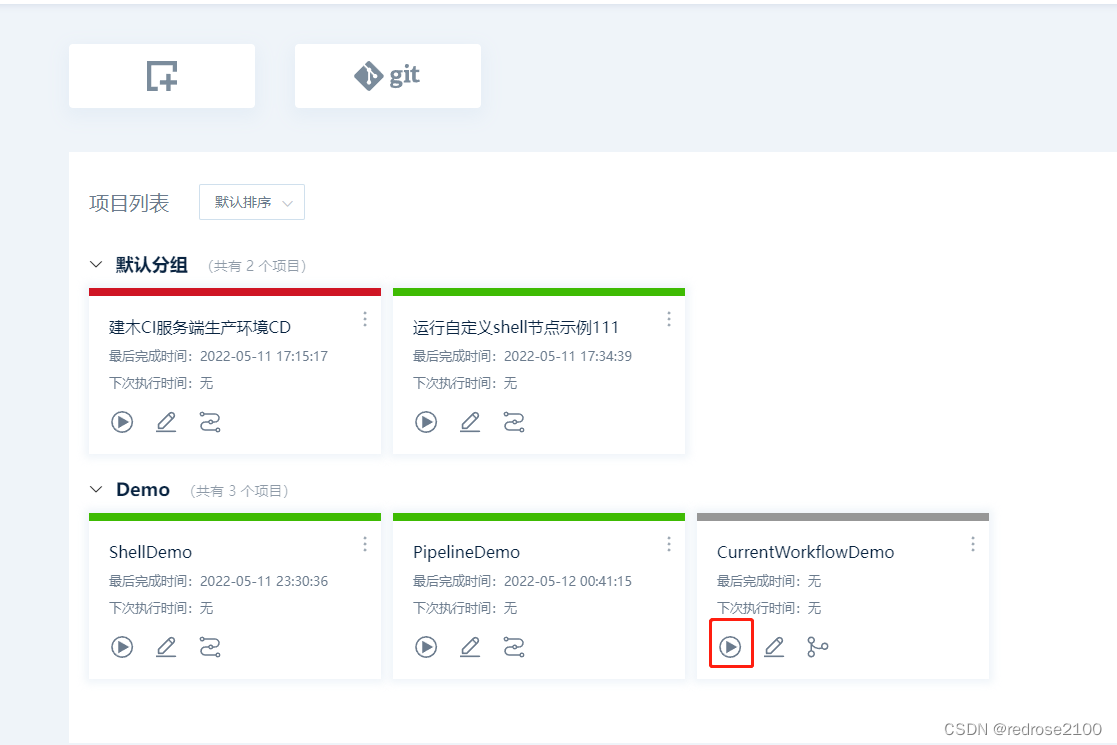
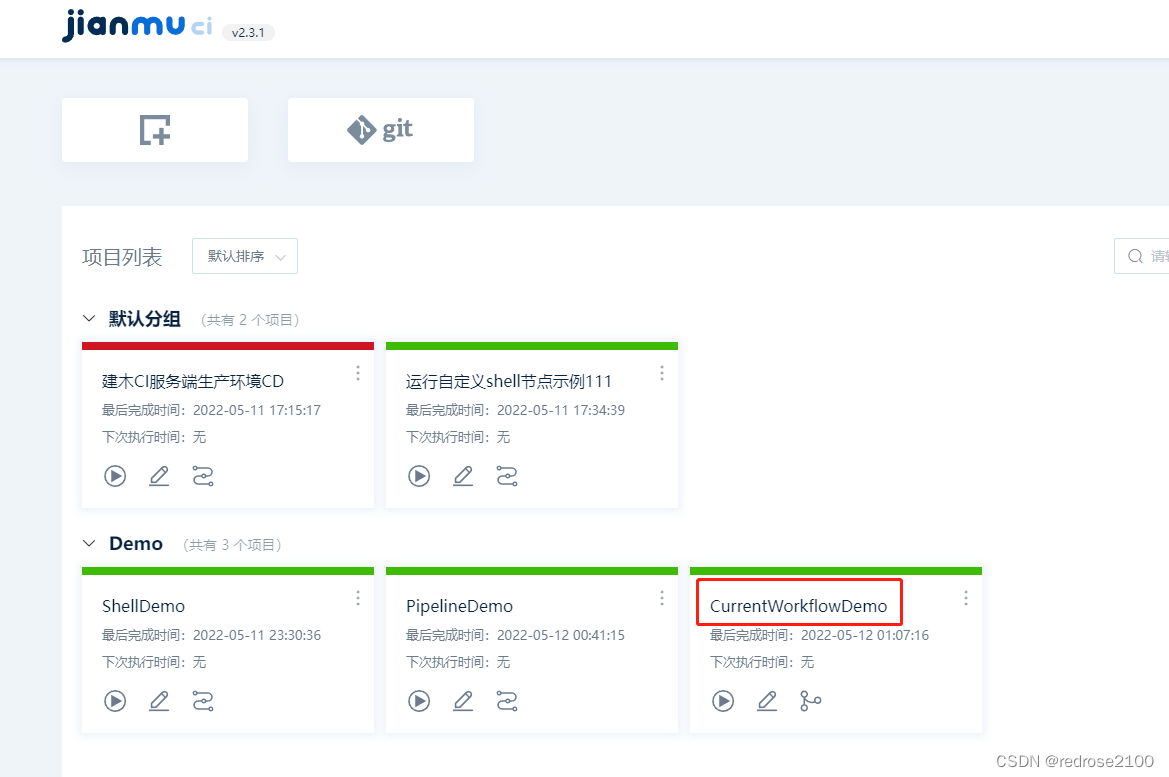
(3)回到首页,点击如下按钮运行
(4)点击项目名称进入执行页面
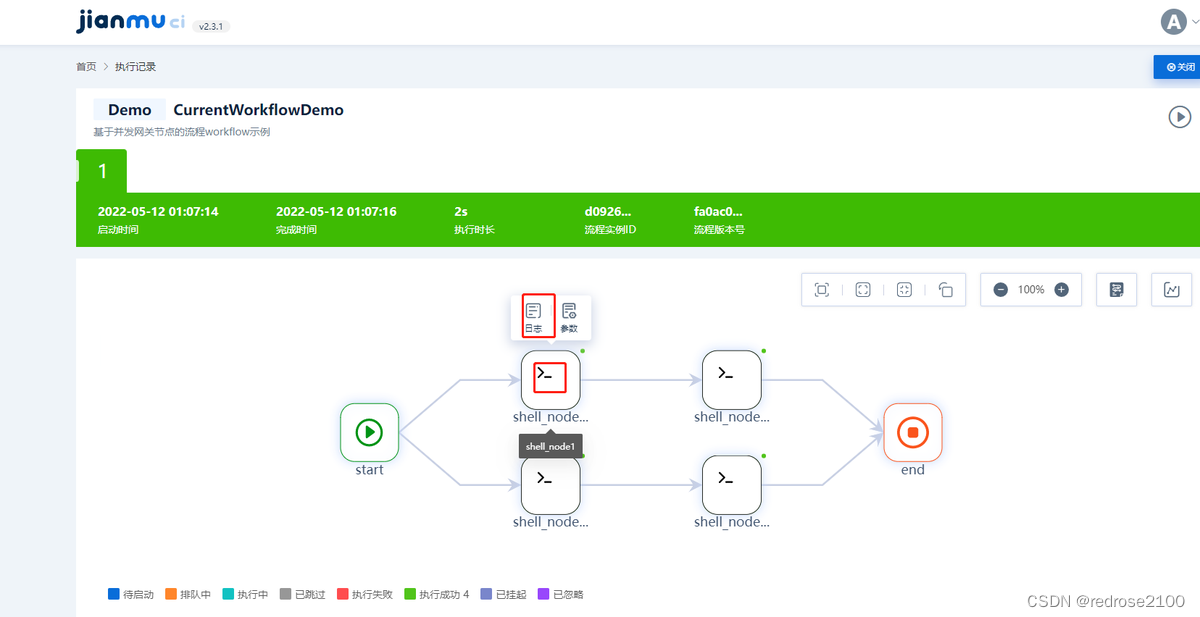
(5)然后可以看到执行的步骤关系如下,同时将鼠标点到节点上即会出现日志按钮,点击【日志】即可查看该节点的执行结果