
【云原生 | Kubernetes 系列】Volume
1. Volume
将数据和镜像解耦,以及容器间数据共享.不将数据打包到镜像中可以减小镜像大小.
k8s抽象出一个对象,用来保存数据.
常用的卷有:
emptyDir: 本地临时卷,容器删除数据跟着删除
hostPath: 本地卷,容器删除数据不被删除
nfs: nfs共享卷,容器删除数据不被删除
configmap: 配置文件
其他:https://kubernetes.io/zh-cn/docs/concepts/workloads/controllers/deployment/#scaling-a-deployment
1.1 emptyDir
当pod被创建时,会先创建emptyDir卷.只要该pod在该节点上运行,这个卷就会一直存在.被创建的时候这个卷是空的.pod中的容器可以读写该emptyDir卷中的文件.当pod被删除时,emptyDir将被永久删除.可以放一些缓存或日志等不重要的文件.
#apiVersion: extensions/v1beta1
apiVersion: apps/v1
kind: Deployment
metadata:
  name: nginx-deployment
spec:
  replicas: 1
  selector:
    matchLabels: #rs or deployment
      app: ng-deploy-80
  template:
    metadata:
      labels:
        app: ng-deploy-80
    spec:
      containers:
      - name: ng-deploy-80
        image: nginx
        ports:
        - containerPort: 80
        volumeMounts:
        - mountPath: /cache
          name: empty-volume
      volumes:
      - name: empty-volume
        emptyDir: {}
pod创建后写入文件到/cache/abc.txt

刚创建的时候目录是空的,写入文件后可以在node节点上读取到该文件内容.


当pod被删除后,emptyDir一并消失
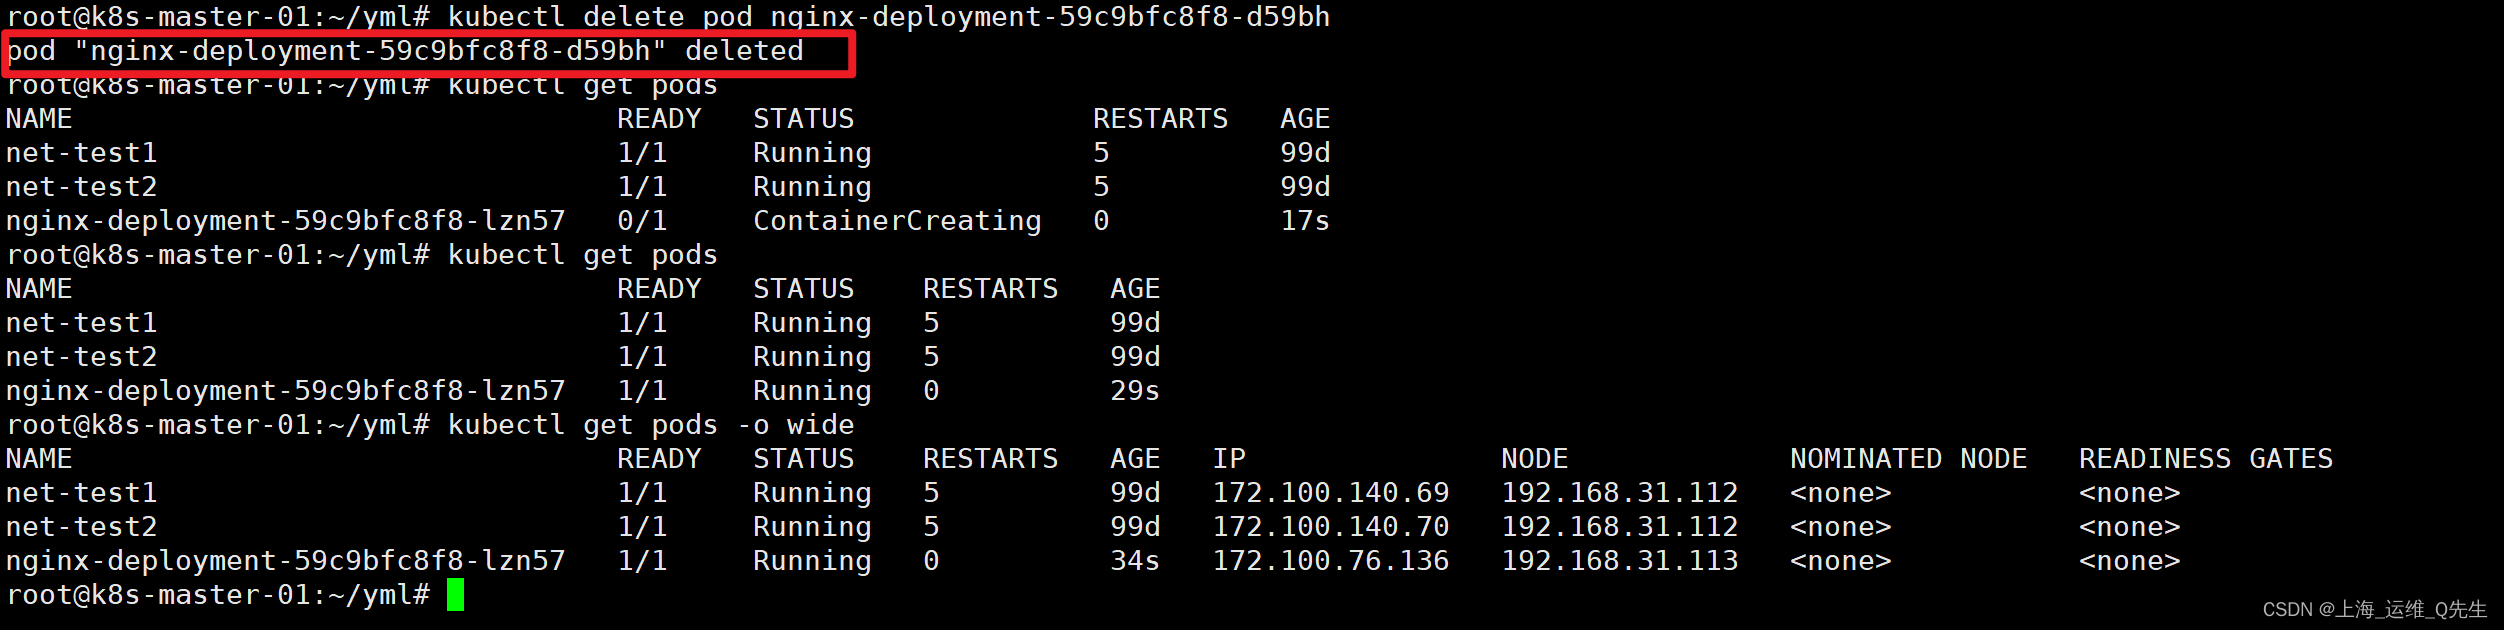
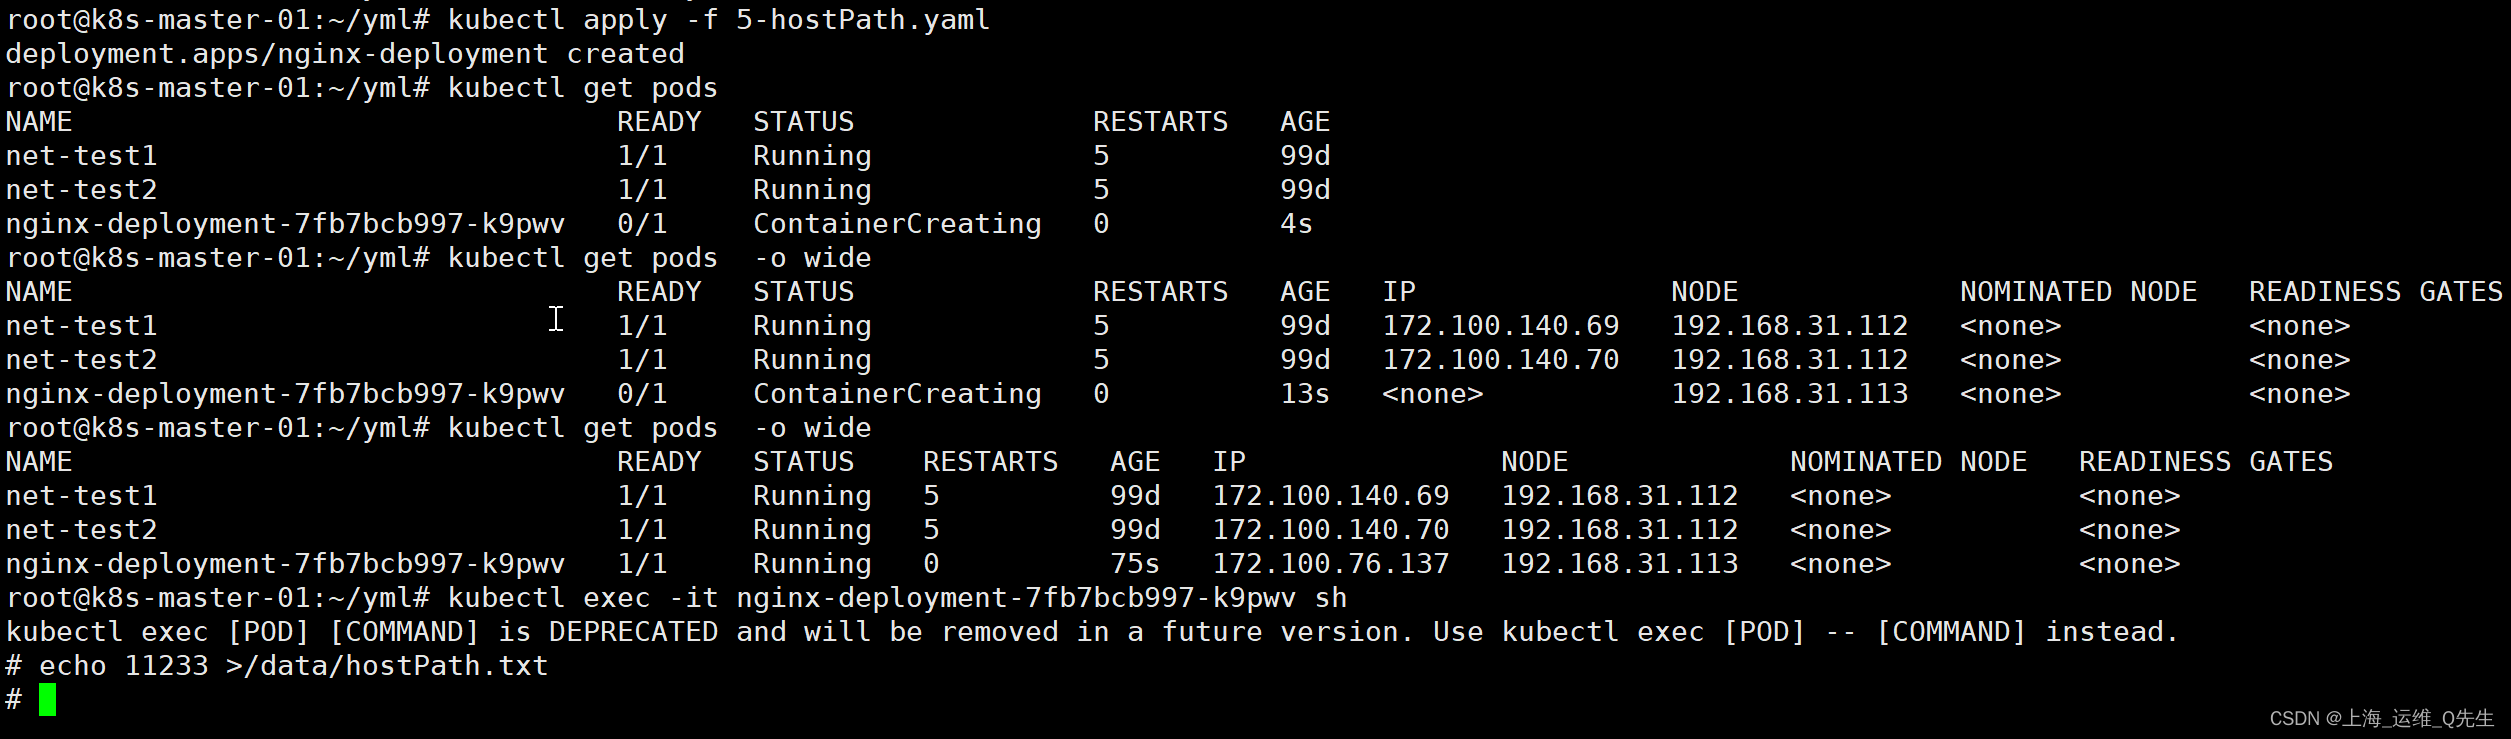
1.2 hostPath
和docker的-v效果比较类似,即使容器被删除,该路径下的数据任然会被保存下来.但发生节点切换就会造成数据丢失.
apiVersion: apps/v1
kind: Deployment
metadata:
  name: nginx-deployment
spec:
  replicas: 1
  selector:
    matchLabels:
      app: ng-deploy-80
  template:
    metadata:
      labels:
        app: ng-deploy-80
    spec:
      containers:
      - name: ng-deploy-80
        image: nginx
        ports:
        - containerPort: 80
        volumeMounts:
        - mountPath: /data
          name: cache-volume
      volumes:
      - name: cache-volume
        hostPath:
          path: /tmp/cache
创建hostPath

1.3 nfs
1.3.1 nfs 环境准备
apt update
apt install nfs-server
mkdir /data/k8s/ -p
echo '/data/k8s *(rw,sync,no_root_squash)' >> /etc/exports
systemctl enable --now nfs-server
systemctl restart nfs-server
1.3.2 node节点测试是否可以正常访问到nfs
root@k8s-node-1:~# apt install nfs-common
root@k8s-node-1:~# showmount -e 192.168.31.109
Export list for 192.168.31.109:
/data/k8s *
root@k8s-node-1:~#
1.3.3 单个nfs的yaml

apiVersion: apps/v1
kind: Deployment
metadata:
  name: nginx-deployment
spec:
  replicas: 1
  selector:
    matchLabels:
      app: ng-deploy-80
  template:
    metadata:
      labels:
        app: ng-deploy-80
    spec:
      containers:
      - name: ng-deploy-80
        image: nginx
        ports:
        - containerPort: 80
        volumeMounts:
        - mountPath: /usr/share/nginx/html/mysite
          name: my-nfs-volume
      volumes:
      - name: my-nfs-volume
        nfs:
          server: 192.168.31.109
          path: /data/k8s
---
apiVersion: v1
kind: Service
metadata:
  name: ng-deploy-80
spec:
  ports:
  - name: http
    port: 81
    targetPort: 80
    nodePort: 30016
    protocol: TCP
  type: NodePort
  selector:
    app: ng-deploy-80
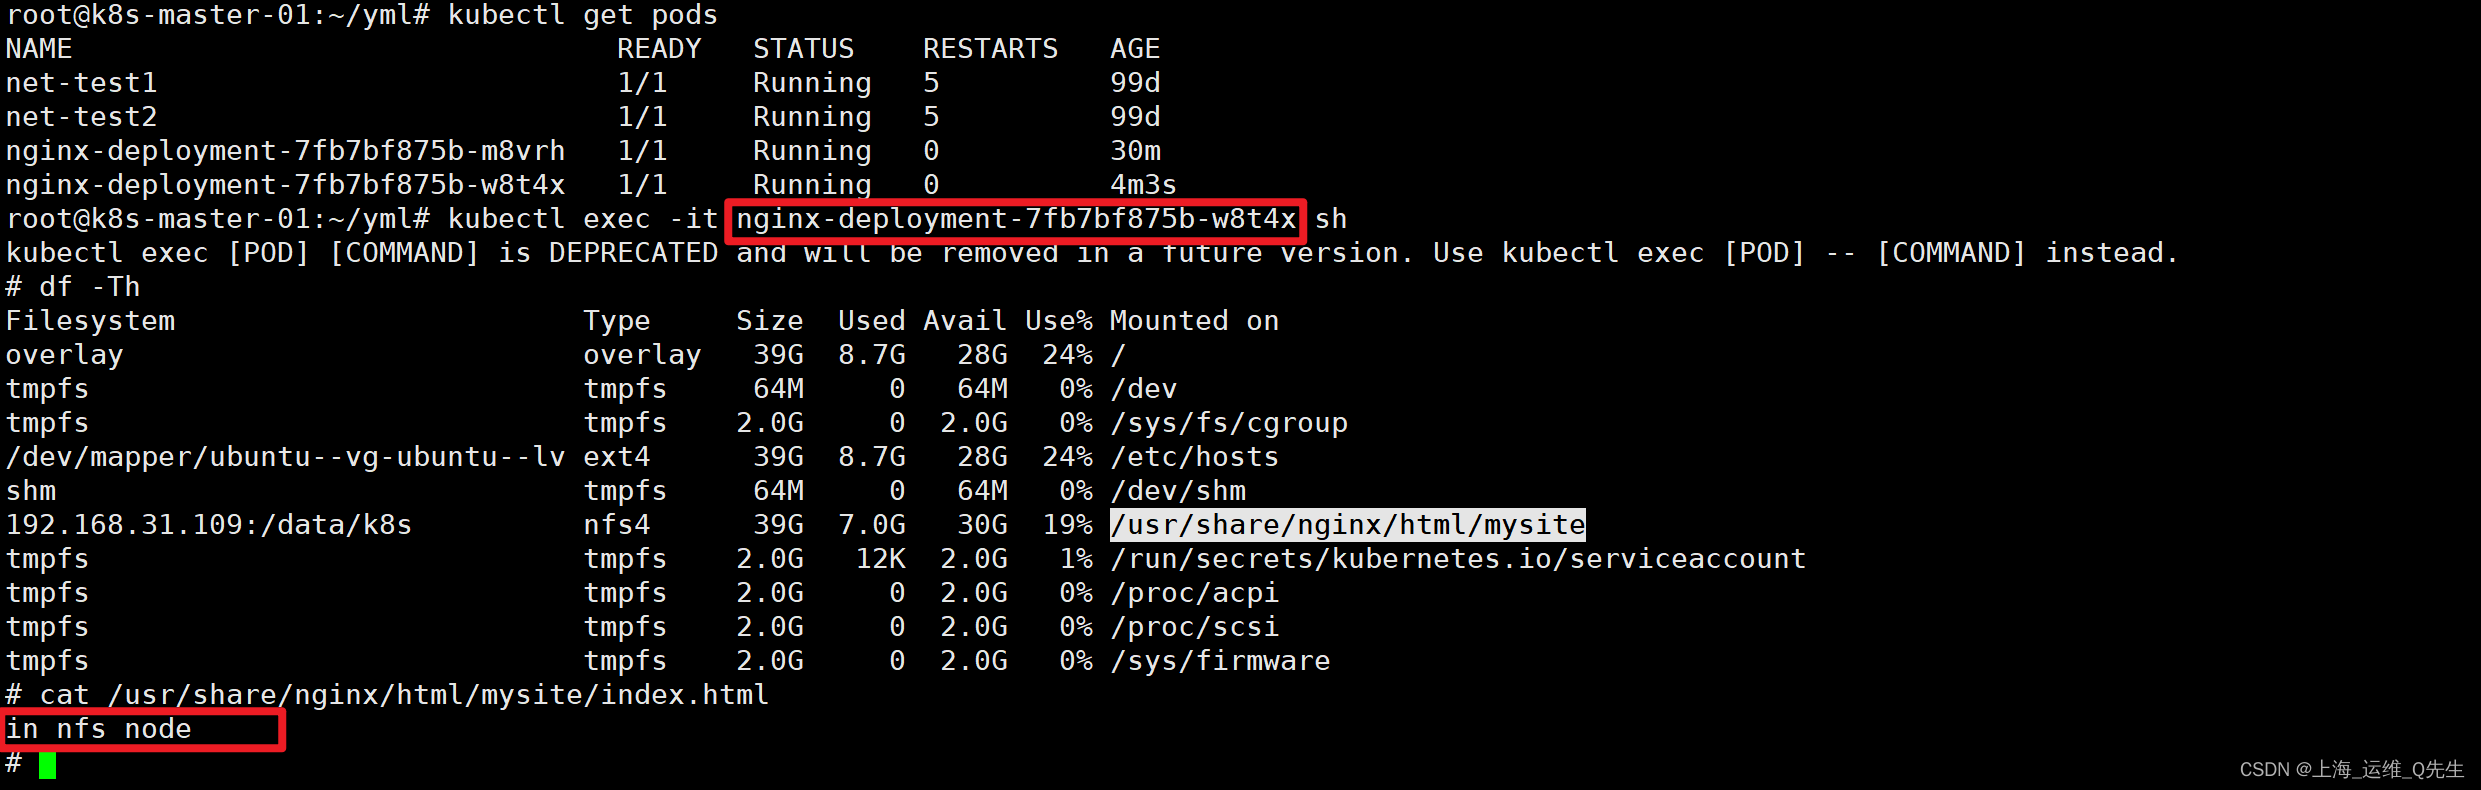
宿主机上,nfs被挂载到容器的目录,最后被联合挂载到容器中

在pod内,nfs已经被挂载
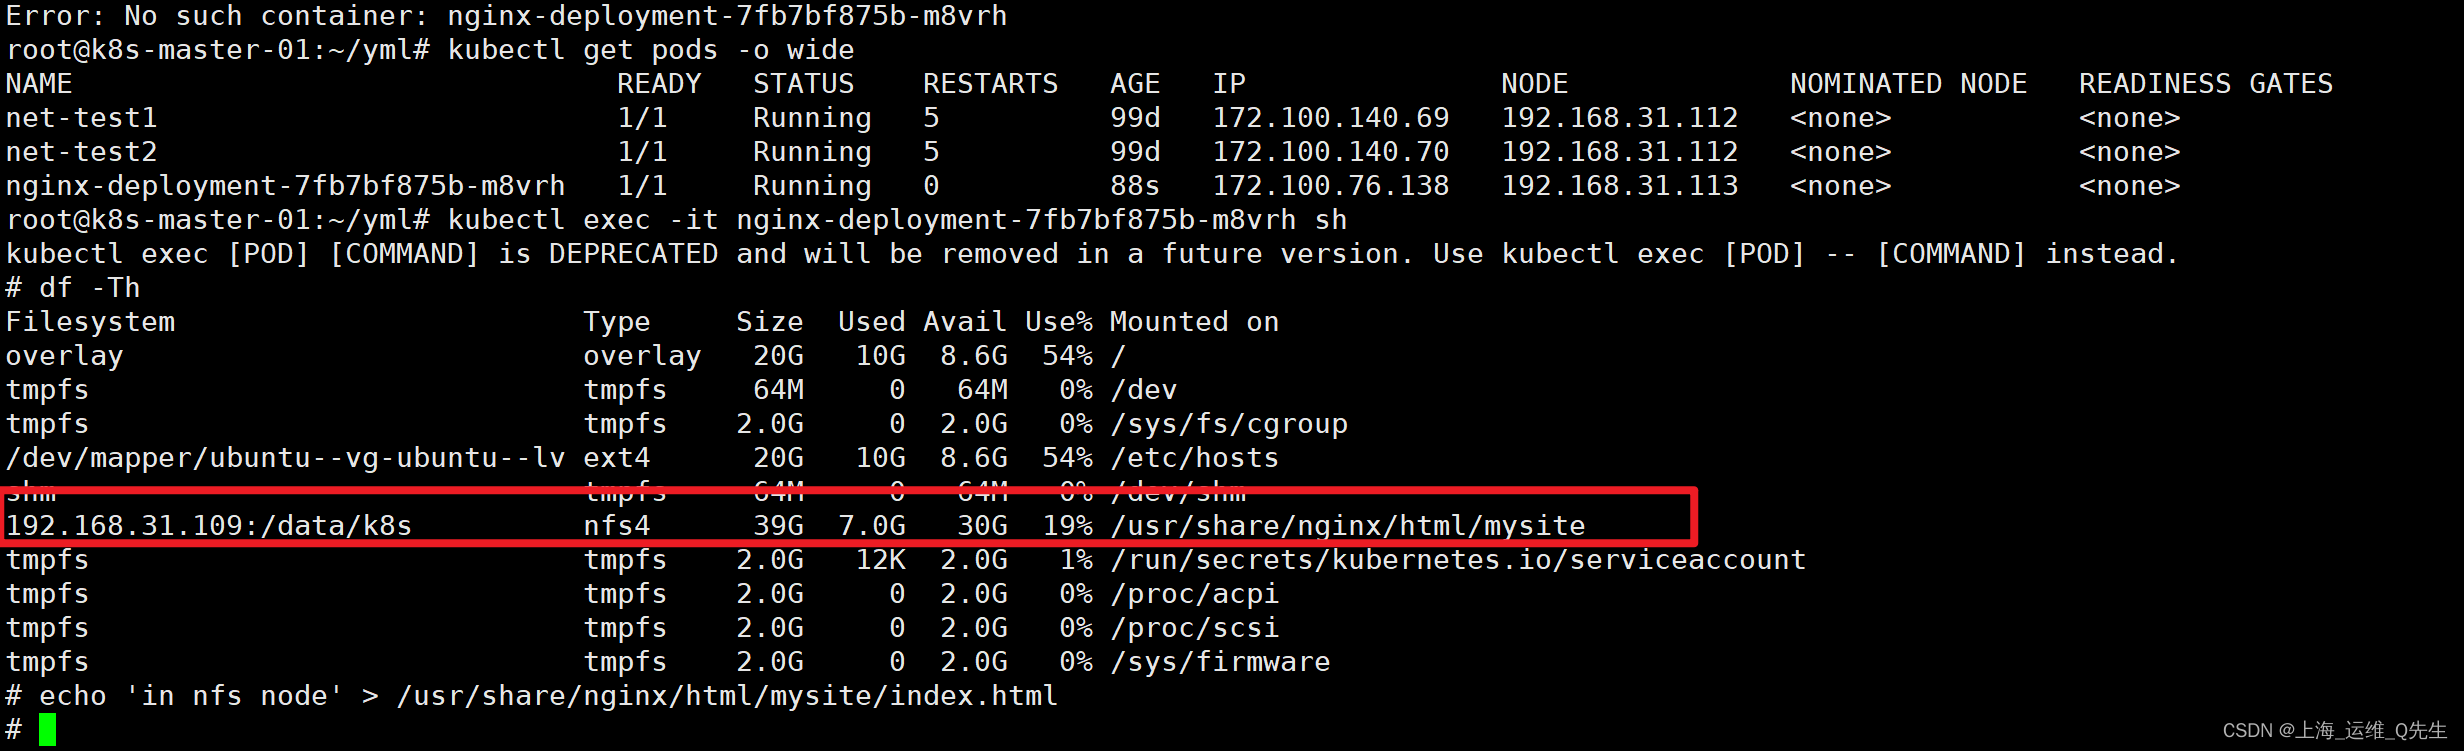
在nfs服务器上也可以看到这个文件

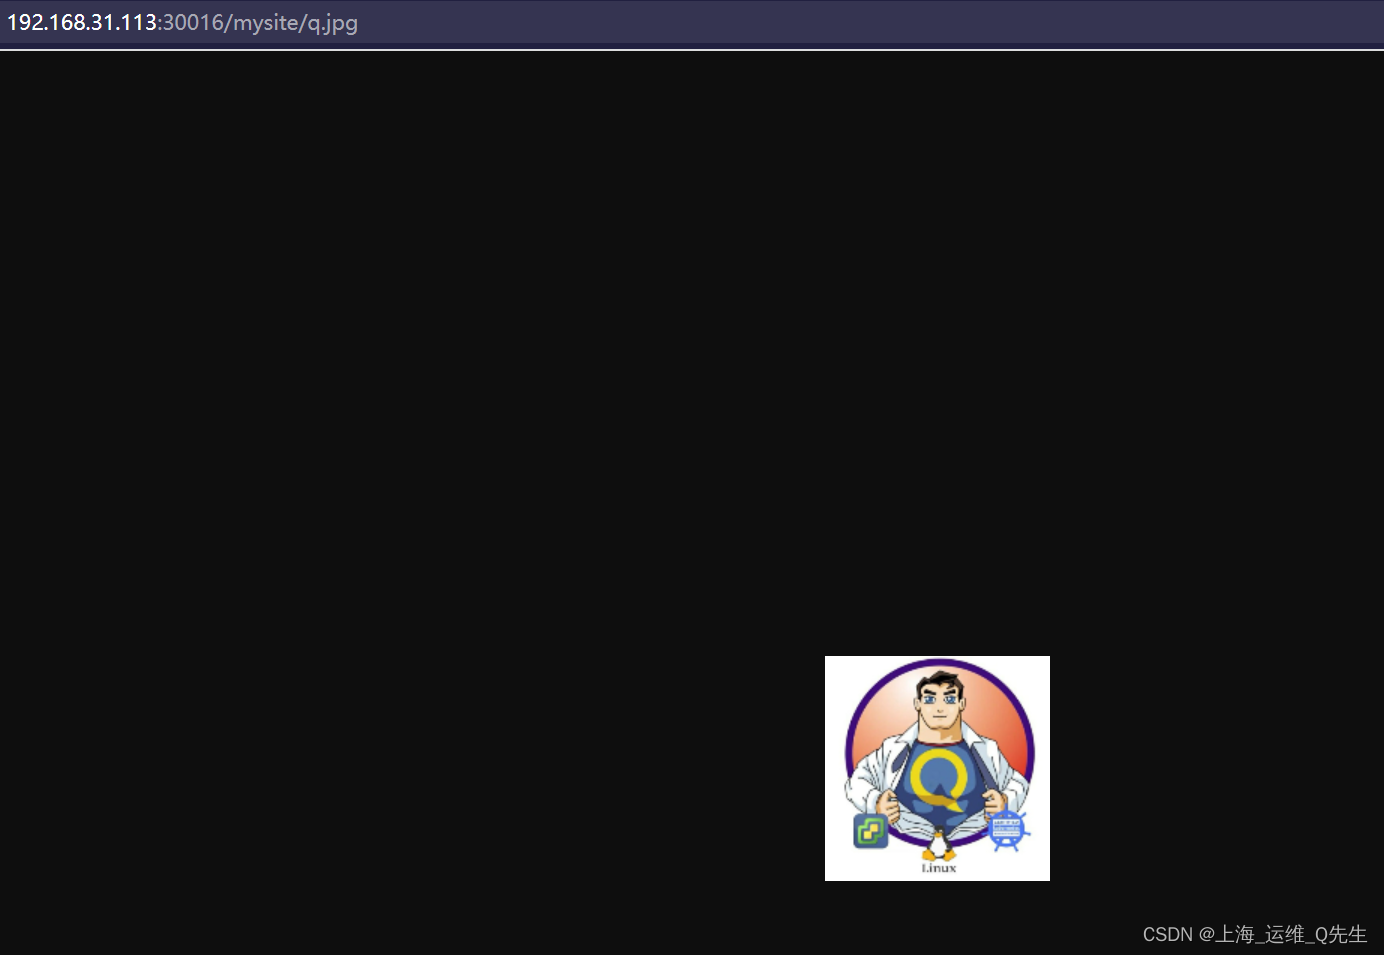
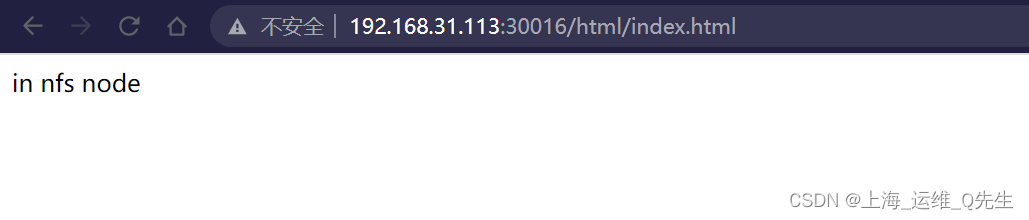
一般这个都是放图片的,我们也放个图片试试看
把副本数调整成2个

可以看到新建的pod也自动挂载了相同的内容,数据也是完全相同的
1.3.3 多个nfs的yaml
apiVersion: apps/v1
kind: Deployment
metadata:
  name: nginx-deployment
spec:
  replicas: 1
  selector:
    matchLabels:
      app: ng-deploy-80
  template:
    metadata:
      labels:
        app: ng-deploy-80
    spec:
      containers:
      - name: ng-deploy-80
        image: nginx
        ports:
        - containerPort: 80
        volumeMounts:
        - mountPath: /usr/share/nginx/html/html
          name: nfs-volume-html
        - mountPath: /usr/share/nginx/html/jpg
          name: nfs-volume-jpg
        - mountPath: /usr/share/nginx/html/yml
          name: nfs-volume-yml
      volumes:
      - name: nfs-volume-html
        nfs:
          server: 192.168.31.109
          path: /data/k8s
      - name: nfs-volume-jpg
        nfs:
          server: 192.168.31.110
          path: /data/k8s
      - name: nfs-volume-yml
        nfs:
          server: 192.168.31.104
          path: /data/k8s
---
apiVersion: v1
kind: Service
metadata:
  name: ng-deploy-80
spec:
  ports:
  - name: http
    port: 81
    targetPort: 80
    nodePort: 30016
    protocol: TCP
  type: NodePort
  selector:
    app: ng-deploy-80
分别在192.168.31.109,192.168.31.110,192.168.31.104创建目录,并映射到pod中不同的目录
yaml被当普通文件下载
最后实现pod挂载3个不同的nfs路径
1.4 Configmap
1.4.1 configmap作为配置文件
存在的意义:使得镜像和配置解耦,将配置信息放入configmap,在pod的对象中导入configmap,实现配置导入
apiVersion: v1
kind: ConfigMap
metadata:
  name: nginx-config
data:
 default: |
    server {
       listen       80;
       server_name  www.mysite.com;
       index        index.html;
       location / {
           root /data/nginx/html;
           if (!-e $request_filename) {
               rewrite ^/(.*) /index.html last;
           }
       }
    }
---
apiVersion: apps/v1
kind: Deployment
metadata:
  name: nginx-deployment
spec:
  replicas: 1
  selector:
    matchLabels:
      app: ng-deploy-80
  template:
    metadata:
      labels:
        app: ng-deploy-80
    spec:
      containers:
      - name: ng-deploy-80
        image: nginx
        ports:
        - containerPort: 80
        volumeMounts:
        - mountPath: /data/nginx/html
          name: my-nfs-volume
        - name: nginx-config
          mountPath:  /etc/nginx/conf.d/
      volumes:
      - name: nginx-config
        configMap:
          name: nginx-config
          items:
             - key: default
               path: mysite.conf
      - name: my-nfs-volume
        nfs:
          server: 192.168.31.109
          path: /data/k8sdata
---
apiVersion: v1
kind: Service
metadata:
  name: ng-deploy-80
spec:
  ports:
  - name: http
    port: 81
    targetPort: 80
    nodePort: 30019
    protocol: TCP
  type: NodePort
  selector:
    app: ng-deploy-80
此时访问不存在的页面,会直接将首页返回.
明显configmap配置已经生效
root@k8s-master-01:~/yml# curl 192.168.31.113:30019
in nfs node
root@k8s-master-01:~/yml# curl 192.168.31.113:30019/dak.dkaj
in nfs node
root@k8s-master-01:~/yml# curl 192.168.31.113:30019/dak.jpg
in nfs node
再看下pod下文件,可以看到/etc/nginx/conf.d/mysite.conf的内容正是configmap中default的内容
root@k8s-master-01:~/yml# kubectl exec -it nginx-deployment-7c94b5fcb7-rnj7g sh
kubectl exec [POD] [COMMAND] is DEPRECATED and will be removed in a future version. Use kubectl exec [POD] -- [COMMAND] instead.
# cat /etc/nginx/nginx.conf

user  nginx;
worker_processes  auto;

error_log  /var/log/nginx/error.log notice;
pid        /var/run/nginx.pid;


events {
    worker_connections  1024;
}


http {
    include       /etc/nginx/mime.types;
    default_type  application/octet-stream;

    log_format  main  '$remote_addr - $remote_user [$time_local] "$request" '
                      '$status $body_bytes_sent "$http_referer" '
                      '"$http_user_agent" "$http_x_forwarded_for"';

    access_log  /var/log/nginx/access.log  main;

    sendfile        on;
    #tcp_nopush     on;

    keepalive_timeout  65;

    #gzip  on;

    include /etc/nginx/conf.d/*.conf;
}
# cat /etc/nginx/conf.d/mysite.conf
server {
   listen       80;
   server_name  www.mysite.com;
   index        index.html;
   location / {
       root /data/nginx/html;
       if (!-e $request_filename) {
           rewrite ^/(.*) /index.html last;
       }
   }
}
1.4.2 configmap作为变量传递参数
configMap的data中
创建key:username,val:user1
通过env将来源就是来源名为nginx-config的configMap,key为username的值至传递给容器的MY_USERNAME变量,
yaml部分详见下:
apiVersion: v1
kind: ConfigMap
metadata:
  name: nginx-config
data:
  username: user1

---
#apiVersion: extensions/v1beta1
apiVersion: apps/v1
kind: Deployment
metadata:
  name: nginx-deployment
spec:
  replicas: 1
  selector:
    matchLabels:
      app: ng-deploy-80
  template:
    metadata:
      labels:
        app: ng-deploy-80
    spec:
      containers:
      - name: ng-deploy-80
        image: nginx
        env:
        - name: "mykey"
          value: "myvalue"
        - name: MY_USERNAME
          valueFrom:
            configMapKeyRef:
              name: nginx-config
              key: username
        ports:
        - containerPort: 80
可以看到MY_USERNAME,mykey值就是我们传入的value
root@k8s-master-01:~/yml# kubectl apply -f 8-2-configmap.yaml
root@k8s-master-01:~/yml# kubectl get pods
NAME                                READY   STATUS    RESTARTS   AGE
net-test1                           1/1     Running   6          102d
net-test2                           1/1     Running   6          102d
nginx-deployment-6fb568ff7f-gdjqq   1/1     Running   0          35s
root@k8s-master-01:~/yml# kubectl exec -it nginx-deployment-6fb568ff7f-gdjqq sh
kubectl exec [POD] [COMMAND] is DEPRECATED and will be removed in a future version. Use kubectl exec [POD] -- [COMMAND] instead.
# echo $MY_USERNAME
user1
# echo $mykey
myvalue
1.5 pv/pvc
持久卷(PersistentVolume,PV) 是集群中的一块存储,可以由管理员事先制备, 或者使用存储类(Storage Class)来动态制备。 持久卷是集群资源,就像节点也是集群资源一样。PV 持久卷和普通的 Volume 一样, 也是使用卷插件来实现的,只是它们拥有独立于任何使用 PV 的 Pod 的生命周期。 此 API 对象中记述了存储的实现细节,无论其背后是 NFS、iSCSI 还是特定于云平台的存储系统。
持久卷申领(PersistentVolumeClaim,PVC) 表达的是用户对存储的请求。概念上与 Pod 类似。 Pod 会耗用节点资源,而 PVC 申领会耗用 PV 资源。Pod 可以请求特定数量的资源(CPU 和内存);同样 PVC 申领也可以请求特定的大小和访问模式 (例如,可以要求 PV 卷能够以 ReadWriteOnce、ReadOnlyMany 或 ReadWriteMany 模式之一来挂载,参见访问模式)。
pv是对底层网络存储的抽象,将存储定义为一种资源,将一个整体的存储资源拆分成多份后给不同的业务使用.
pvc是对pv资源的申请调用.就像POD消费NODE节点一样,POD通过PVC将数据保存至PV,PV在保存数据至存储.
pv和存储对接,全局资源,不需要指定namespace.
pvc和pod对接,需要指定namespace
https://kubernetes.io/zh-cn/docs/concepts/storage/persistent-volumes/
1.5.1 PV 持久卷类型
PV 持久卷是用插件的形式来实现的。Kubernetes 目前支持以下插件:
| 持久卷类型 | 含义 |
|---|---|
| awsElasticBlockStore | AWS 弹性块存储(EBS) |
| azureDisk | Azure Disk |
| azureFile | Azure File |
| cephfs | CephFS volume |
| csi | 容器存储接口 (CSI) |
| fc | Fibre Channel (FC) 存储 |
| gcePersistentDisk | GCE 持久化盘 |
| glusterfs | Glusterfs 卷 |
| hostPath | HostPath 卷 (仅供单节点测试使用;不适用于多节点集群;请尝试使用 local 卷作为替代) |
| iscsi | iSCSI (SCSI over IP) 存储 |
| local | 节点上挂载的本地存储设备 |
| nfs | 网络文件系统 (NFS) 存储 |
| portworxVolume | Portworx 卷 |
| rbd | Rados 块设备 (RBD) 卷 |
| vsphereVolume | vSphere VMDK 卷 |
1.5.2 访问模式
PersistentVolume 卷可以用资源提供者所支持的任何方式挂载到宿主系统上。 如下表所示,提供者(驱动)的能力不同,每个 PV 卷的访问模式都会设置为对应卷所支持的模式值。 例如,NFS 可以支持多个读写客户,但是某个特定的 NFS PV 卷可能在服务器上以只读的方式导出。 每个 PV 卷都会获得自身的访问模式集合,描述的是特定 PV 卷的能力。
访问模式有:
-
ReadWriteOnce卷可以被一个节点以读写方式挂载。 ReadWriteOnce 访问模式也允许运行在同一节点上的多个 Pod 访问卷。
-
ReadOnlyMany卷可以被多个节点以只读方式挂载。
-
ReadWriteMany卷可以被多个节点以读写方式挂载。
-
ReadWriteOncePod卷可以被单个 Pod 以读写方式挂载。 如果你想确保整个集群中只有一个 Pod 可以读取或写入该 PVC, 请使用 ReadWriteOncePod 访问模式。这只支持 CSI 卷以及需要 Kubernetes 1.22 以上版本。
在命令行接口(CLI)中,访问模式也使用以下缩写形式:
- RWO - ReadWriteOnce 卷可以被一个节点以读写方式挂载
- ROX - ReadOnlyMany 卷可以被多个节点以只读方式挂载
- RWX - ReadWriteMany 卷可以被多个节点以读写方式挂载
- RWOP - ReadWriteOncePod 卷可以被单个 Pod 以读写方式挂载
| 卷插件 | ReadWriteOnce | ReadOnlyMany | ReadWriteMany | ReadWriteOncePod |
|---|---|---|---|---|
| AWSElasticBlockStore | ✓ | - | - | - |
| AzureFile | ✓ | ✓ | ✓ | - |
| AzureDisk | ✓ | - | - | - |
| CephFS | ✓ | ✓ | ✓ | - |
| Cinder | ✓ | - | (如果多次挂接卷可用) | - |
| CSI | 取决于驱动 | 取决于驱动 | 取决于驱动 | 取决于驱动 |
| FC | ✓ | ✓ | - | - |
| FlexVolume | ✓ | ✓ | 取决于驱动 | - |
| Flocker | ✓ | - | - | - |
| GCEPersistentDisk | ✓ | ✓ | - | - |
| Glusterfs | ✓ | ✓ | ✓ | - |
| HostPath | ✓ | - | - | - |
| iSCSI | ✓ | ✓ | - | - |
| Quobyte | ✓ | ✓ | ✓ | - |
| NFS | ✓ | ✓ | ✓ | - |
| RBD | ✓ | ✓ | - | - |
| VsphereVolume | ✓ | - | - (Pod 运行于同一节点上时可行) | - |
| PortworxVolume | ✓ | - | ✓ | - |
| StorageOS | ✓ | - | - | - |
1.5.3 PV创建方式
- 自动创建
1.1 管理员创建存储类(StorageClass)
1.2 用户创建持久化存储卷声明
1.3 调用存储类,通知系统使用存储类创建PV
1.4 获取存储类信息
1.5 基于存储类创建PV
1.6 用户创建使用PVC的POD
1.7 指定POD使用哪个PVC
1.8 PVC使用PV存储数据 - 手动创建
1.5.4 pv参数
PersistentVolume参数:
Capacity: 当前pv空间大小
accessModes: 访问模式
  ReadWriteOnce	PV可以被一个节点以读写方式挂载
  ReadOnlyMany      PV可以被多个节点以只读方式挂载
  ReadWriteMany   PV可以被多个节点以读写方式挂载
persistentVolumeReclaimPolicy 删除机制删除数据存储的时候,已经创建好的卷由以下删除操作.
   Retain -- 手动回收
   Recycle -- 基本擦除 (`rm -rf /thevolume/*`) 仅支持NFS和HostPath
   Delete -- 诸如 AWS EBS、GCE PD、Azure Disk 或 OpenStack Cinder 卷这类关联存储资产也被删除
volumeMode	#卷类型
  定义存储卷使用的文件系统是块设备还是文件系统,默认文件系统
mountOptions  附加的挂载选项列表,实现更精细的权限控制
  ro 等
1.5.5 回收策略
当用户不再使用其存储卷时,他们可以从 API 中将 PVC 对象删除, 从而允许该资源被回收再利用。PersistentVolume 对象的回收策略告诉集群, 当其被从申领中释放时如何处理该数据卷。 目前,数据卷可以被 Retained(保留)、Recycled(回收)或 Deleted(删除)。
目前的回收策略有:
- Retain – 手动回收
- Recycle – 基本擦除 (
rm -rf /thevolume/*) 仅支持NFS和HostPath - Delete – 诸如 AWS EBS、GCE PD、Azure Disk 或 OpenStack Cinder 卷这类关联存储资产也被删除
每个卷会处于以下阶段(Phase)之一:
Available(可用)-- 卷是一个空闲资源,尚未绑定到任何申领;
Bound(已绑定)-- 该卷已经绑定到某申领;
Released(已释放)-- 所绑定的申领已被删除,但是资源尚未被集群回收;
Failed(失败)-- 卷的自动回收操作失败。
1.5.6 PersistentVolumeClaims
pvc的访问模式:
- RWO - ReadWriteOnce PVC可以被一个节点以读写方式挂载
- ROX - ReadOnlyMany PVC可以被多个节点以只读方式挂载
- RWX - ReadWriteMany PVC可以被多个节点以读写方式挂载
pvc创建参数
accessModes:
  ReadWriteOnce	PVC可以被一个节点以读写方式挂载
  ReadOnlyMany      PVC可以被多个节点以只读方式挂载
  ReadWriteMany   PVC可以被多个节点以读写方式挂载

resources:  定义pvc创建存储卷的空间大小

selector: 标签选择器,选择要绑定的pv
  matchLables  匹配标签名称
  matchExpressions  基于正则匹配
volumeName  要绑定的pv名称
volumeMode  卷类型
	定义pvc使用文件系统是块设备还是文件系统,默认是文件系统
相关文章
- 【Kubernetes系列】Kubernetes相关概念介绍
- 【Kubernetes系列】Container(容器)
- kubernetes | metrics-server部署
- 【Kubernetes系列】Pod
- Kubernetes 领进门 | 安装 kubernetes-dashboard 可视化面板
- Flagger 在 Kubernetes 集群上是如何工作的?
- 如何使用 Kubernetes 资源配额
- harbor高可用方案,基于kubernetes
- 基于kubernetes安装rabbitmq集群
- kubernetes安装prometheus监控集群状态
- 2022 年 Kubernetes 使用现状报告
- Mesos 和 Kubernetes:不是竞争者
- 为什么容器和 Kubernetes 有潜力运行一切
- 2020 年对 Kubernetes 的 5 个预测