
Vue学习之--------组件自定义事件(绑定、解绑)(2022/8/21)
2023-09-14 09:07:25 时间
文章目录
1、基础知识
-
一种组件间通信的方式,适用于:子组件 ===> 父组件
-
使用场景:A是父组件,B是子组件,B想给A传数据,那么就要在A中给B绑定自定义事件(事件的回调在A中)。
-
绑定自定义事件:
-
第一种方式,在父组件中:
<Demo @zyz="test"/>或<Demo v-on:zyz="test"/> -
第二种方式,在父组件中:
<Demo ref="demo"/> ...... mounted(){ this.$refs.xxx.$on('zyz',this.test) } -
若想让自定义事件只能触发一次,可以使用
once修饰符,或$once方法。
-
-
触发自定义事件:
this.$emit('zyz',数据) -
解绑自定义事件
this.$off('zyz') -
组件上也可以绑定原生DOM事件,需要使用
native修饰符。 -
注意:通过
this.$refs.xxx.$on('zyz',回调)绑定自定义事件时,回调要么配置在methods中,要么用箭头函数,否则this指向会出问题!
2、代码实例
2.1 App.vue
<template>
  <div class="app">
    <h1>{{ msg }},学生姓名是:{{ studentName }}</h1>

    <!-- 通过父组件给子组件传递函数类型的props实现:子给父传递数据 -->
    <School :getSchoolName="getSchoolName" />

    <!-- 通过父组件给子组件绑定一个自定义事件实现:子给父传递数据(第一种写法,使用@或v-on) -->
    <!-- <Student @atguigu="getStudentName" @demo="m1"/> -->

    <!-- 通过父组件给子组件绑定一个自定义事件实现:子给父传递数据(第二种写法,使用ref) -->
    <Student ref="student" @click.native="show" />
  </div>
</template>

<script>
import Student from "./components/Student";
import School from "./components/School";

export default {
  name: "App",
  components: { School, Student },
  data() {
    return {
      msg: "你好啊!",
      studentName: "",
    };
  },
  methods: {
    getSchoolName(name) {
      console.log("App收到了学校名:", name);
    },
    getStudentName(name, ...params) {
      console.log("App收到了学生名:", name, params);
      this.studentName = name;
    },
    m1() {
      console.log("demo事件被触发了!");
    },
    show() {
      alert(123);
    },
  },
  mounted() {
    this.$refs.student.$on("atguigu", this.getStudentName); //绑定自定义事件
    // this.$refs.student.$once('atguigu',this.getStudentName) //绑定自定义事件(一次性)
  },
};
</script>

<style scoped>
.app {
  background-color: gray;
  padding: 5px;
}
</style>
2.2 school.vue
<template>
  <div class="school">
    <h2>学校名称:{{ name }}</h2>
    <h2>学校地址:{{ address }}</h2>
    <button @click="sendSchoolName">把学校名给App</button>
  </div>
</template>

<script>
export default {
  name: "School",
  props: ["getSchoolName"],
  data() {
    return {
      name: "尚硅谷",
      address: "北京",
    };
  },
  methods: {
    sendSchoolName() {
      this.getSchoolName(this.name);
    },
  },
};
</script>

<style scoped>
.school {
  background-color: skyblue;
  padding: 5px;
}
</style>
2.3 student.vue
<template>
  <div class="student">
    <h2>学生姓名:{{ name }}</h2>
    <h2>学生性别:{{ sex }}</h2>
    <h2>当前求和为:{{ number }}</h2>
    <button @click="add">点我number++</button>
    <button @click="sendStudentlName">把学生名给App</button>
    <button @click="unbind">解绑atguigu事件</button>
    <button @click="death">销毁当前Student组件的实例(vc)</button>
  </div>
</template>

<script>
export default {
  name: "Student",
  data() {
    return {
      name: "张三",
      sex: "男",
      number: 0,
    };
  },
  methods: {
    add() {
      console.log("add回调被调用了");
      this.number++;
    },
    sendStudentlName() {
      //触发Student组件实例身上的atguigu事件
      this.$emit("atguigu", this.name, 666, 888, 900);
      // this.$emit('demo')
      // this.$emit('click')
    },
    unbind() {
      this.$off("atguigu"); //解绑一个自定义事件
      // this.$off(['atguigu','demo']) //解绑多个自定义事件
      // this.$off() //解绑所有的自定义事件
    },
    death() {
      this.$destroy(); //销毁了当前Student组件的实例,销毁后所有Student实例的自定义事件全都不奏效。
    },
  },
};
</script>

<style lang="less" scoped>
.student {
  background-color: pink;
  padding: 5px;
  margin-top: 30px;
}
</style>
3、测试效果(略)
简单的组件间数据传递
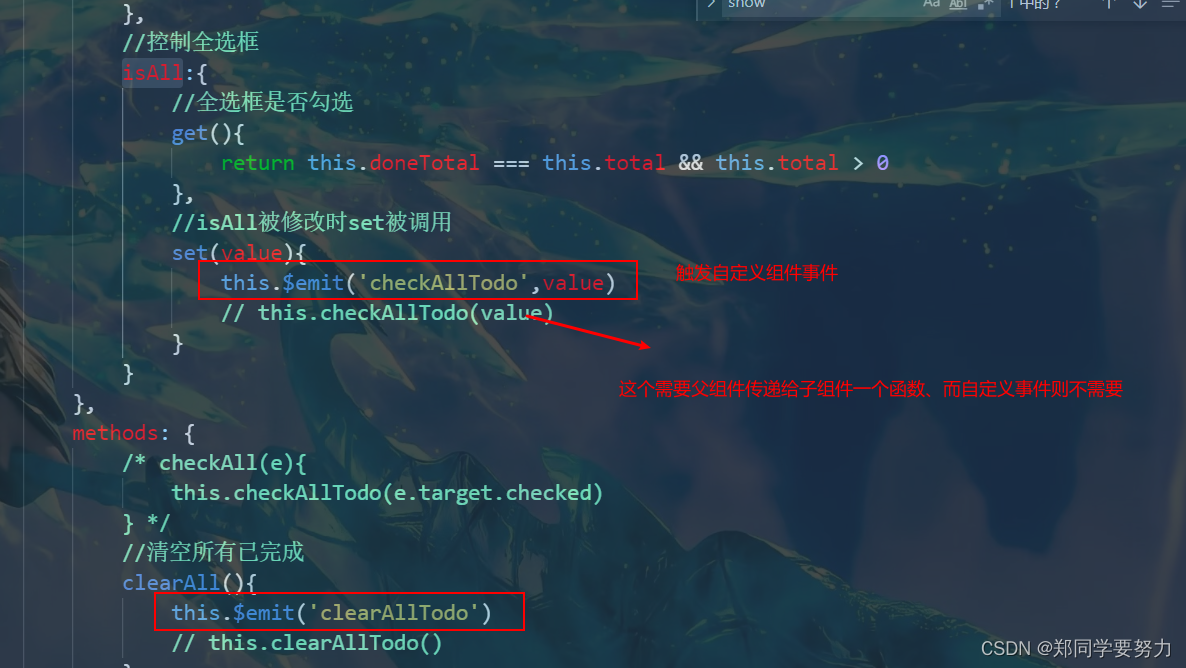
4、实际应用(在组件化编码实战三的基础上改进)
组件化编码实战(三):https://blog.csdn.net/weixin_43304253/article/details/126256518
4.1 改进的部分说明
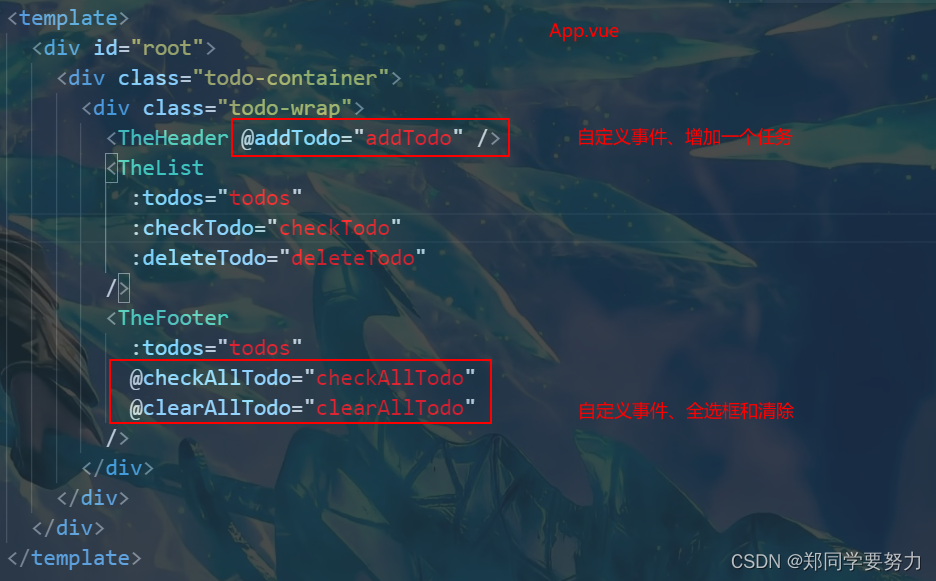
子组件中触发事件

4.2 如何查看触发的自定义事件的详细信息

相关文章
- Vue笔记:vue-router
- 【华为云技术分享】三大前端技术(React,Vue,Angular)探密(下)
- vue子组件的自定义事件
- [Vue + TS] Using Route events inside Vue
- EasyDSS RTMP流媒体服务器web前端:vue组件之间的传值,父组件向子组件传值
- 4-restfulapi的介绍,vue代码结构
- vue.js3:用mitt发送接收事件消息(vue@3.2.6 / mitt@3.0.0)
- vue事件修饰符:v-once只执行一次
- vue事件修饰符:@click.capture捕获内层事件,从而改变默认的冒泡执行顺序
- 【视频】vue指令v-on绑定事件
- Vue 3 Composition API,你真的需要吗?
- 如何解决Vue项目中使用echarts,宽度变化导致图不能resize问题
- vue - chunk-vendors.js文件太大,实现拆分打包的具体配置
- 事件监听 & 页面滚动(页面滚动到某一位置时显示/隐藏某元素,Vue环境)
- 【表格动态列】Vue + ElementUI实现表格多行表头以及表格动态列的功能