
Python Flask框架学习16:Flask 消息闪现
2023-09-14 09:06:14 时间
Flask 消息闪现
一个好的基于GUI的应用程序会向用户提供有关交互的反馈。例如,桌面应用程序使用对话框或消息框,JavaScript使用警报用于类似目的。
在Flask Web应用程序中生成这样的信息性消息很容易。Flask框架的闪现系统可以在一个视图中创建消息,并在名为next的视图函数中呈现它。
Flask模块包含flash()方法。它将消息传递给下一个请求,该请求通常是一个模板。
flash(message, category)其中,
-
message参数是要闪现的实际消息。
-
category参数是可选的。它可以是“error”,“info”或“warning”。
为了从会话中删除消息,模板调用get_flashed_messages()。
get_flashed_messages(with_categories, category_filter)两个参数都是可选的。如果接收到的消息具有类别,则第一个参数是元组。第二个参数仅用于显示特定消息。
以下闪现在模板中接收消息。
{% with messages = get_flashed_messages() %}
   {% if messages %}
      {% for message in messages %}
         {{ message }}
      {% endfor %}
   {% endif %}
{% endwith %}让我们看一个简单的例子,演示Flask中的闪现机制。在以下代码中,'/' URL显示登录页面的链接,没有消息闪现。
@app.route('/')
def index():
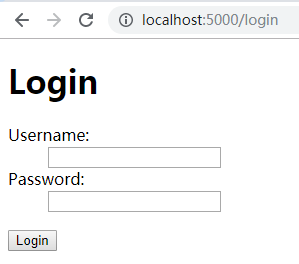
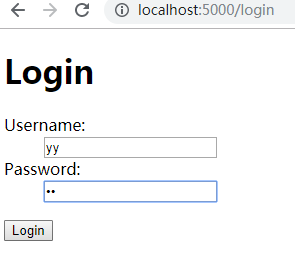
return render_template('index.html')该链接会将用户引导到'/ login' URL,该URL显示登录表单。提交时,login()视图函数验证用户名和密码,并相应闪现'success'消息或创建'error'变量。
@app.route('/login', methods = ['GET', 'POST'])
def login():
error = None
if request.method == 'POST':
if request.form['username'] != 'admin' or \
request.form['password'] != 'admin':
error = 'Invalid username or password. Please try again!'
else:
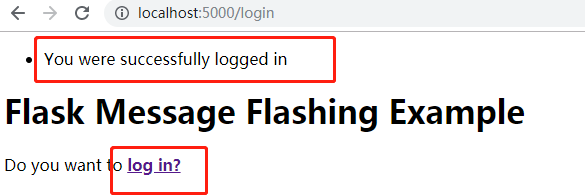
flash('You were successfully logged in')
return redirect(url_for('index'))
return render_template('login.html', error = error)如果出现错误,则会重新显示登录模板,并显示错误消息。
整体代码如下:
from flask import Flask, render_template, request, make_response, session, redirect, url_for, escape, request, flash
from werkzeug.exceptions import abort

app = Flask(__name__)
app.secret_key = 'any random string'


@app.route('/')
def index():
    return render_template('login.html')


@app.route('/login', methods=['POST', 'GET'])
def login():
    error = None
    if request.method == 'POST':
        if request.form['username'] != 'admin' or request.form['password'] != 'admin':
            error = 'Invalid username or password. Please try again!'
        else:
            flash('You were successfully logged in')
            return render_template('index1.html')

    return render_template('login.html', error=error)


if __name__ == '__main__':
    app.run(debug=True)
login.html
<!DOCTYPE html>
<html lang="en">
<head>
    <meta charset="UTF-8">
    <title>Title</title>
</head>
<body>

 <h1>Login</h1>

  {% if error %}
  <p><strong>Error:</strong> {{ error }}
  {% endif %}


  <form action = "/login" method = post >
     <dl>
        <dt>Username:</dt>
    <dd>
       <input type = text name = username value = {{ request.form.username }} >
    </dd>

    <dt>Password:</dt>
    <dd> <input type = password name = password > </dd>
   </dl>
   <p> <input type = submit value = Login > </p>
  </form>

</body>
</html>
index1.html
<!DOCTYPE html>
<html lang="en">
<head>
    <meta charset="UTF-8">
    <title>Title</title>
</head>
<body>

 {% with messages = get_flashed_messages() %}
     {% if messages %}
        <ul>
           {% for message in messages %}
           <li>{{ message }}</li>
           {% endfor %}
        </ul>
     {% endif %}
 {% endwith %}

  <h1>Flask Message Flashing Example</h1>
  <p>Do you want to <a href = "{{ url_for('login') }}">
     <b>log in?</b></a></p>

</body>
</html>
执行上述代码后,您将看到如下所示的界面。


更多内容,可关注作者的微信公众号:胖哥真不错。

相关文章
- [Python爬虫] Selenium获取百度百科旅游景点的InfoBox消息盒
- Python flask 基于 Flask 提供 RESTful Web 服务
- python之rabbitMQ二:队列、消息持久化
- python实现飞书创建机器人发送消息
- 【转载】Python简介
- python正则表达式
- Python ❤️有没有羡慕别人家做的排序动图?❤️
- Python 符号*的特殊用法
- python数据分析岗的学习路线该如何规划?
- Py之pyserial:Python的pyserial库的简介、安装、使用方法之详细攻略
- Python基础——PyCharm版本——第一章、PyCharm工具的安装与使用
- 已解决(Python报错)ModuleNotFoundError: No module named…
- 十个小项目带你学会python编程,很简单,识字就行
- python二级考试考生必看
- 哈哈哈,用 Python 实现微信自动回复真香啊
- python实现QQ机器人(自己主动登录,获取群消息,发送群消息)
- python发送消息到ipmsg
- 【华为OD机试 2023】 分奖金(C++ Java JavaScript Python)
- python之手把手教你制作ota格式包(亲测可用)
- python 读csv文件时,在csv类型上执行类型转换
- appium===Python+Appium环境部署教程
- 基于Python语言使用RabbitMQ消息队列(二)
- 基于Python语言使用RabbitMQ消息队列(一)
- python redis 消息队列