
Android ListView + ArrayAdapter、SimpleAdapter、BaseAdapter实现列表
2023-09-14 09:04:24 时间
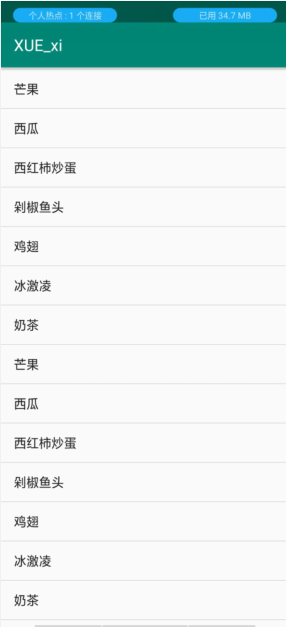
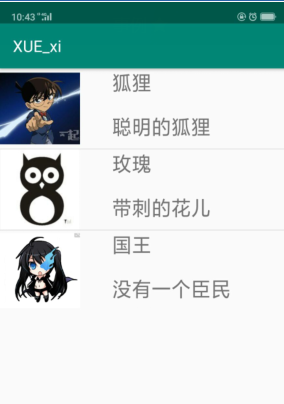
效果图:
ListView 与 ArrayAdapter 之间的配合:
activity_main.xml
<?xml version="1.0" encoding="utf-8"?>
<LinearLayout xmlns:android="http://schemas.android.com/apk/res/android"
xmlns:app="http://schemas.android.com/apk/res-auto"
xmlns:tools="http://schemas.android.com/tools"
android:layout_width="match_parent"
android:layout_height="match_parent"
android:orientation="vertical"
tools:context=".MainActivity">

    <ListView
        android:id="@+id/ls_view"
        android:layout_width="match_parent"
        android:layout_height="match_parent"></ListView>

</LinearLayout>
MainActivity.java
public class MainActivity extends AppCompatActivity  {

    @Override
    protected void onCreate(Bundle savedInstanceState) {
        super.onCreate(savedInstanceState);
        setContentView(R.layout.activity_main);
        ListView listView  = findViewById(R.id.ls_view);
        //  创造数据源
        String[]  data = {"冰激凌","奶茶","芒果","西瓜","西红柿炒蛋","剁椒鱼头","鸡翅","冰激凌","奶茶","芒果","西瓜","西红柿炒蛋","剁椒鱼头","鸡翅","冰激凌","奶茶","芒果","西瓜","西红柿炒蛋","剁椒鱼头","鸡翅"};
        /**
         *      创建ArrayAdapter 适配器      —   把数据源放入适配器中
         *      第一个参数是:     context
         *      第二个参数是:     每一条数据显示的布局item,这里用系统默认的就行
         *      第三个参数是:     放入刚刚创建好的数据源
         */
        ArrayAdapter adapter = new ArrayAdapter<String>(this,android.R.layout.simple_list_item_1,data);

        listView.setAdapter(adapter);       //  再让列表与适配器产生联系

    }

}
ListView 与 SimpleAdapter 之间的配合:

activity_main.xml:
<?xml version="1.0" encoding="utf-8"?>
<LinearLayout xmlns:android="http://schemas.android.com/apk/res/android"
xmlns:app="http://schemas.android.com/apk/res-auto"
xmlns:tools="http://schemas.android.com/tools"
android:layout_width="match_parent"
android:layout_height="match_parent"
android:orientation="horizontal"
tools:context=".MainActivity">

    <ListView
        android:id="@+id/lv_list"
        android:layout_width="match_parent"
        android:layout_height="wrap_content"></ListView>

</LinearLayout>
ly_item.xml:
<?xml version="1.0" encoding="utf-8"?>
<LinearLayout xmlns:android="http://schemas.android.com/apk/res/android"
    xmlns:app="http://schemas.android.com/apk/res-auto"
    xmlns:tools="http://schemas.android.com/tools"
    android:layout_width="match_parent"
    android:layout_height="match_parent"
    android:orientation="horizontal"
    tools:context=".MainActivity">


    <ImageView
        android:id="@+id/img_view"
        android:layout_width="80dp"
        android:layout_height="80dp" />

    <LinearLayout
        android:layout_width="match_parent"
        android:layout_height="wrap_content"
        android:orientation="vertical">

    <TextView
        android:id="@+id/tv_name"
        android:layout_width="match_parent"
        android:layout_height="0dp"
        android:layout_weight="1"
        android:layout_marginLeft="40dp"
        android:textSize="25dp"
        android:text="你好"
        />

    <TextView
        android:id="@+id/tv_info"
        android:layout_width="match_parent"
        android:layout_height="0dp"
        android:layout_weight="1"
        android:layout_marginTop="10dp"
        android:layout_marginLeft="40dp"
        android:textSize="25dp"
        android:text="你好"></TextView>

    </LinearLayout>


</LinearLayout>
MainActivity.java:
public class MainActivity extends AppCompatActivity  {
    private String[] name = {"狐狸","玫瑰","国王"};                       //  名字
    private String[] info = {"聪明的狐狸","带刺的花儿","没有一个臣民"};     //  介绍
    private int[] image = {R.mipmap.ic_one,R.mipmap.ic_two,R.mipmap.ic_three};      //  每一个item对应的图标
    List<Map<String,Object>> list = new ArrayList<>();      //  创建 数据源 list

    @Override
    protected void onCreate(Bundle savedInstanceState) {
        super.onCreate(savedInstanceState);
        setContentView(R.layout.activity_main);

        //  给数据源装配数据
        for (int i=0;i<name.length;i++){
            Map<String,Object> map = new HashMap<>();       //  在创建一个map集合
            map.put("image",image[i]);
            map.put("name",name[i]);
            map.put("info",info[i]);
            list.add(map);              //  将每一组map对象的值,加入到list集合中
        }

        /**
         *      创建 SimpleAdapter 适配器
         *      第一个参数: context
         *      第二个参数: 放入数据源
         *      第三个参数: 每一个item的布局
         *      第四个参数: 创建map的键对象,并放入相应的值,因为要从数据源中识别对应值,每一个键对象对应着一个值对象
         *      第五个参数: 创建一个int对象,放入item布局中 每一个控件对应的id,这个id与刚才的键对象位置要对应
         */
        SimpleAdapter adapter = new SimpleAdapter(MainActivity.this,list,R.layout.ly_item,new String[]{"image","name","info"},new int[]{R.id.img_view,R.id.tv_name,R.id.tv_info});

        //  得到listView 对象
        ListView listView = findViewById(R.id.lv_list);

        //  让listview 与 SimpleAdapter 适配器产生联系
        listView.setAdapter(adapter);

    }

}
ListView 与 BaseAdapter 之间的配合【推荐】:
activity_main.xml:
<?xml version="1.0" encoding="utf-8"?>
<LinearLayout xmlns:android="http://schemas.android.com/apk/res/android"
xmlns:app="http://schemas.android.com/apk/res-auto"
xmlns:tools="http://schemas.android.com/tools"
android:layout_width="match_parent"
android:layout_height="match_parent"
android:orientation="horizontal"
tools:context=".MainActivity">

    <ListView
        android:id="@+id/lv_list"
        android:layout_width="match_parent"
        android:layout_height="wrap_content"></ListView>

</LinearLayout>
ly_item.xml:
<?xml version="1.0" encoding="utf-8"?>
<LinearLayout xmlns:android="http://schemas.android.com/apk/res/android"
    xmlns:app="http://schemas.android.com/apk/res-auto"
    xmlns:tools="http://schemas.android.com/tools"
    android:layout_width="match_parent"
    android:layout_height="match_parent"
    android:orientation="horizontal"
    tools:context=".MainActivity">

    <ImageView
        android:id="@+id/img_view"
        android:layout_width="100dp"
        android:layout_height="100dp" />

    <LinearLayout
        android:layout_width="match_parent"
        android:layout_height="100dp"
        android:orientation="vertical">

    <TextView
        android:id="@+id/tv_name"
        android:layout_width="match_parent"
        android:layout_height="0dp"
        android:layout_weight="1"
        android:layout_marginLeft="40dp"
        android:textSize="25dp"
        android:text="你好"
        />

    <TextView
        android:id="@+id/tv_info"
        android:layout_width="match_parent"
        android:layout_height="0dp"
        android:layout_weight="1"
        android:layout_marginTop="10dp"
        android:layout_marginLeft="40dp"
        android:textSize="25dp"
        android:text="你好"></TextView>

    </LinearLayout>

</LinearLayout>
MainActivity.java:
public class MainActivity extends AppCompatActivity  {


    @Override
    protected void onCreate(Bundle savedInstanceState) {
        super.onCreate(savedInstanceState);
        setContentView(R.layout.activity_main);
        ListView listView = findViewById(R.id.lv_list);
        List<CostBean> costBeanList = new ArrayList<>();	//创建封装好的bean对象

		//	装配数据源
        costBeanList.add(new CostBean(R.mipmap.ic_one,"狐狸","聪明的狐狸"));
        costBeanList.add(new CostBean(R.mipmap.ic_two,"玫瑰","带刺的花儿"));
        costBeanList.add(new CostBean(R.mipmap.ic_three,"国王","没有一个臣民"));

		//	因为 MyAdapter 继承了 BaseAdapter,所以这里直接让 listView 与 Myadapter产生联系
        listView.setAdapter(new MyAdapter(this,costBeanList));
    }

}
CostBean.java:
**
 *      CostBean ——  封装数据源
 */

public class CostBean {

    private int imgId;
    private String name;
    private String info;

    public CostBean(int imgId, String name, String info) {
        this.imgId = imgId;
        this.name = name;
        this.info = info;
    }

    public int getImgId() {
        return imgId;
    }


    public String getName() {
        return name;
    }
MyAdapter.java:
**
 *      BaseAdapter ——  适配器管理数据源
 */

public class MyAdapter extends BaseAdapter {
    private List<CostBean> costBeanList;
    private LayoutInflater inflater;

    //  通过构造方法关联数据源与适配器
    public MyAdapter(Context context,List<CostBean> costBeanList) {
        this.costBeanList = costBeanList;

        //  context:要使用当前的Adapter的界面对象mInflater:布局 装载器对象
        this.inflater = LayoutInflater.from(context);
    }

    @Override
    public int getCount() {
        return costBeanList.size();
    }

    @Override
    public Object getItem(int position) {
        return costBeanList.get(position);
    }

    @Override
    public long getItemId(int position) {
        return position;
    }

    @Override
    public View getView(int position, View convertView, ViewGroup parent) {
        ViewHolder holder;
        //第一次创建view即可,以免给程序带来太多负担
        if (convertView == null){
            holder = new ViewHolder();
            //            由于我们只需要将XML转化为View,并不涉及到具体的布局,所以第二个参数通常设置为null
            convertView = inflater.inflate(R.layout.ly_item,null);
            holder.imageView = convertView.findViewById(R.id.img_view);
            holder.title = convertView.findViewById(R.id.tv_name);
            holder.content = convertView.findViewById(R.id.tv_info);
            //这句话的意思就是,让convertView与holder产生关联,通过set保存在Tag中
            convertView.setTag(holder);
        }else{
            holder = (ViewHolder) convertView.getTag();
            //通过getTag,取出上面绑定的holder,以免多次绑定,造成资源浪费
        }

        //设置控件的数据,可以理解为从封装的数据中取出一个一个对应的值
        CostBean costBean = costBeanList.get(position);
        holder.imageView.setImageResource(costBean.getImgId());
        holder.title.setText(costBean.getName());
        holder.content.setText(costBean.getInfo());
        return convertView;
    }

    class ViewHolder{
        public ImageView imageView;
        public TextView title;
        public TextView content;
    }
}
相关文章
- 深入 Android 系统 - Android 的 JNI
- android scaleanimation动画,【Android动画九章】-RotateAnimation(旋转动画)和ScaleAnimation(尺寸动画)…[通俗易懂]
- Android telephony_android获取真实时间
- 加密狗android,Android系统加密狗的设计与实现
- android 混淆不起作用,Android代码混淆的写法总结
- android 混淆规则作用,Android代码混淆详解
- android 读取本地数据库db文件(Android sqlite)
- Android layout属性之gravity和layout_gravity「建议收藏」
- Android listview 实现列表多选
- android短信验证码方案,Android之短信验证码
- 【Android布局】在程序中设置android gravity 和 android layout Gravity属性
- Android angle_android 界面悬停
- android登录注册跳转的代码_Android开发代码
- Android触摸事件_android设置按钮点击事件
- android两级分类列表且子列表item不同布局实现
- 【Android从零单排系列六】《Android视图控件——TextView》
- Yolov5 Android tf-lite方式集成
- 【Android 文件管理】分区存储 ( 分区存储机制 和 文件索引数据 )
- 【Android 插件化】“ 插桩式 “ 插件化框架 ( 注入上下文的使用 )
- 【Android 屏幕适配】异形屏适配 ② ( 需要异形屏适配情况 | 需要异形屏适配的 Android 系统版本 | 刘海屏状态判定 | 异形屏适配调试 - 华为云调试 )
- 【Android Gradle 插件】组件化中的 Gradle 构建脚本实现 ⑤ ( 优化 Gradle 构建脚本 | 构建脚本结构 | 闭包定义及用法 | 依赖配置 | android 块配置 )
- android Universal Image Loader for Android 说明文档 (1)详解手机开发
- android JNI学习详解手机开发
- 使用Android实现连接MySQL数据库:实现快速数据交互与管理(android连接mysql数据库)
- Android系统基于Linux内核,实现移动设备突破极限。(android linux内核)
- Android列表实现(1)_数组列表实例介绍
- android二级listview列表实现代码
- android支持的语言列表(汇总)
- Android中AsyncTask的用法实例分享
- android开发教程之wifi开发示例