
Java多线程学习笔记 - 十二、并发工具
一、Atomic Variable
原子变量在java.util.concurrent.atomic包下,包含AtomicBoolean、AtomicInteger、AtomicLong、AtomicIntegerArray、AtomicLongArray等等。
它们被设计为在多线程上下文中安全使用。它们被称为原子变量,因为它们提供了一些不受多线程干扰的操作。
使用原子变量有助于避免单个原始变量上的同步开销,因此它比使用同步/锁定机制更有效。
参考代码
二、Semaphore
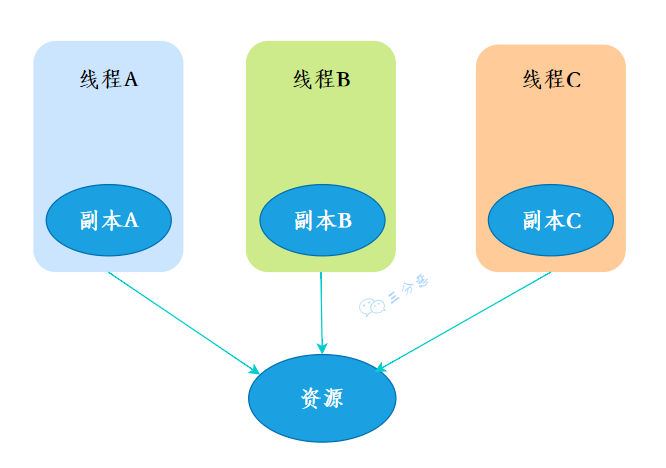
信号量,此类的主要作用就是限制线程并发的数量。信号量通过使用计数器来控制对共享资源的访问。如果计数器大于零,则允许访问。如果为零,则拒绝访问。计数器计数的是允许访问共享资源的许可。因此,要访问资源,线程必须从信号量中获得许可。
参考代码
// java program to demonstrate
// use of semaphores Locks
import java.util.concurrent.*;

//A shared resource/class.
class Shared
{
	static int count = 0;
}

class MyThread extends Thread
{
	Semaphore sem;
	String threadName;
	public MyThread(Semaphore sem, String threadName)
	{
		super(threadName);
		this.sem = sem;
		this.threadName = threadName;
	}

	@Override
	public void run() {

		// run by thread A
		if(this.getName().equals("A"))
		{
			System.out.println("Starting " + threadName);
			try
			{
				// First, get a permit.
				System.out.println(threadName + " is waiting for a permit.");

				// acquiring the lock
				sem.acquire();

				System.out.println(threadName + " gets a permit.");

				// Now, accessing the shared resource.
				// other waiting threads will wait, until this
				// thread release the lock
				for(int i=0; i < 5; i++)
				{
					Shared.count++;
					System.out.println(threadName + ": " + Shared.count);

					// Now, allowing a context switch -- if possible.
					// for thread B to execute
					Thread.sleep(10);
				}
			} catch (InterruptedException exc) {
					System.out.println(exc);
				}

				// Release the permit.
				System.out.println(threadName + " releases the permit.");
				sem.release();
		}

		// run by thread B
		else
		{
			System.out.println("Starting " + threadName);
			try
			{
				// First, get a permit.
				System.out.println(threadName + " is waiting for a permit.");

				// acquiring the lock
				sem.acquire();

				System.out.println(threadName + " gets a permit.");

				// Now, accessing the shared resource.
				// other waiting threads will wait, until this
				// thread release the lock
				for(int i=0; i < 5; i++)
				{
					Shared.count--;
					System.out.println(threadName + ": " + Shared.count);

					// Now, allowing a context switch -- if possible.
					// for thread A to execute
					Thread.sleep(10);
				}
			} catch (InterruptedException exc) {
					System.out.println(exc);
				}
				// Release the permit.
				System.out.println(threadName + " releases the permit.");
				sem.release();
		}
	}
}

// Driver class
public class SemaphoreDemo
{
	public static void main(String args[]) throws InterruptedException
	{
		// creating a Semaphore object
		// with number of permits 1
		Semaphore sem = new Semaphore(1);

		// creating two threads with name A and B
		// Note that thread A will increment the count
		// and thread B will decrement the count
		MyThread mt1 = new MyThread(sem, "A");
		MyThread mt2 = new MyThread(sem, "B");

		// stating threads A and B
		mt1.start();
		mt2.start();

		// waiting for threads A and B
		mt1.join();
		mt2.join();

		// count will always remain 0 after
		// both threads will complete their execution
		System.out.println("count: " + Shared.count);
	}
}
三、Exchanger
类Exchanger的功能可以使2个线程之间传输数据,它比生产者/消费者模式使用的wait/notify要更加方便。
它通过创建同步点来促进一对线程之间的元素交换。它简化了两个线程之间的数据交换。它的操作很简单:它只是等待两个单独的线程调用它的exchange()方法。发生这种情况时,它会交换线程提供的数据。它也可以看作是一个双向的 SynchronousQueue。
类Exchanger中的exchange()方法具有阻塞的特色,也就是此方法被调用后等待其他线程来取得数据,如果没有其他线程取得数据,则一直阻塞等待。
示例代码
import java.util.concurrent.Exchanger;
import java.util.concurrent.TimeUnit;
import java.util.concurrent.TimeoutException;

public class ExchangerDemo {
	public static void main(String[] args)
	{
		Exchanger<String> exchanger = new Exchanger<>();

		new UseString(exchanger);
		new MakeString(exchanger);
	}
}

// A thread that makes a string
class MakeString implements Runnable {
	Exchanger<String> ex;
	String str;

	MakeString(Exchanger<String> ex)
	{
		this.ex = ex;
		str = new String();

		new Thread(this).start();
	}

	public void run()
	{
		char ch = 'A';
		try {
			for (int i = 0; i < 3; i++) {
				for (int j = 0; j < 5; j++) {
					str += ch++;
				}
				if (i == 2) {
					// Exchange the buffer and
					// only wait for 250 milliseconds
					str
						= ex.exchange(str,
									250,
									TimeUnit.MILLISECONDS);
					continue;
				}

				// Exchange a full buffer for an empty one
				str = ex.exchange(str);
			}
		}
		catch (InterruptedException e) {
			System.out.println(e);
		}
		catch (TimeoutException t) {
			System.out.println("Timeout Occurred");
		}
	}
}

// A thread that uses a string
class UseString implements Runnable {

	Exchanger<String> ex;
	String str;

	UseString(Exchanger<String> ex)
	{
		this.ex = ex;

		new Thread(this).start();
	}

	public void run()
	{
		try {
			for (int i = 0; i < 3; i++) {
				if (i == 2) {
					// Thread sleeps for 500 milliseconds
					// causing timeout
					Thread.sleep(500);
					continue;
				}

				// Exchange an empty buffer for a full one
				str = ex.exchange(new String());
				System.out.println("Got: " + str);
			}
		}
		catch (InterruptedException e) {
			System.out.println(e);
		}
	}
}
四、CountDownLatch
CountDownLatch 用于确保任务在开始之前等待其他线程。
当我们创建一个 CountDownLatch 的对象时,我们指定它应该等待的线程数,一旦它们完成或准备好工作,所有这些线程都需要通过调用 CountDownLatch.countDown() 来进行倒计时。一旦计数达到零,等待任务开始运行。
示例代码
import java.util.concurrent.CountDownLatch;

public class CountDownLatchDemo
{
	public static void main(String args[])
				throws InterruptedException
	{
		// Let us create task that is going to
		// wait for four threads before it starts
		CountDownLatch latch = new CountDownLatch(4);

		// Let us create four worker
		// threads and start them.
		Worker first = new Worker(1000, latch,
								"WORKER-1");
		Worker second = new Worker(2000, latch,
								"WORKER-2");
		Worker third = new Worker(3000, latch,
								"WORKER-3");
		Worker fourth = new Worker(4000, latch,
								"WORKER-4");
		first.start();
		second.start();
		third.start();
		fourth.start();

		// The main task waits for four threads
		latch.await();

		// Main thread has started
		System.out.println(Thread.currentThread().getName() +
						" has finished");
	}
}

// A class to represent threads for which
// the main thread waits.
class Worker extends Thread
{
	private int delay;
	private CountDownLatch latch;

	public Worker(int delay, CountDownLatch latch,
									String name)
	{
		super(name);
		this.delay = delay;
		this.latch = latch;
	}

	@Override
	public void run()
	{
		try
		{
			Thread.sleep(delay);
			latch.countDown();
			System.out.println(Thread.currentThread().getName()
							+ " finished");
		}
		catch (InterruptedException e)
		{
			e.printStackTrace();
		}
	}
}
五、CyclicBarrier
类CyclicBarrier不仅有CountDownLatch所具有的功能,还可以实现屏障等待的功能,也就是阶段性同步,它在使用上的意义在于可以循环地实现线程要一起做任务的目标,而不是像类CountDownLatch一样,仅仅支持一次线程与同步点阻塞的特性。
参考代码
import java.util.concurrent.TimeUnit;
import java.util.concurrent.TimeoutException;
import java.util.concurrent.BrokenBarrierException;
import java.util.concurrent.CyclicBarrier;

class Computation1 implements Runnable
{
	public static int product = 0;
	public void run()
	{
		product = 2 * 3;
		try
		{
			Tester.newBarrier.await();
		}
		catch (InterruptedException | BrokenBarrierException e)
		{
			e.printStackTrace();
		}
	}
}

class Computation2 implements Runnable
{
	public static int sum = 0;
	public void run()
	{
		// check if newBarrier is broken or not
		System.out.println("Is the barrier broken? - " + Tester.newBarrier.isBroken());
		sum = 10 + 20;
		try
		{
			Tester.newBarrier.await(3000, TimeUnit.MILLISECONDS);

			// number of parties waiting at the barrier
			System.out.println("Number of parties waiting at the barrier "+
			"at this point = " + Tester.newBarrier.getNumberWaiting());
		}
		catch (InterruptedException | BrokenBarrierException e)
		{
			e.printStackTrace();
		}
		catch (TimeoutException e)
		{
			e.printStackTrace();
		}
	}
}


public class Tester implements Runnable
{
	public static CyclicBarrier newBarrier = new CyclicBarrier(3);

	public static void main(String[] args)
	{
		// parent thread
		Tester test = new Tester();

		Thread t1 = new Thread(test);
		t1.start();
	}
	public void run()
	{
		System.out.println("Number of parties required to trip the barrier = "+
		newBarrier.getParties());
		System.out.println("Sum of product and sum = " + (Computation1.product +
		Computation2.sum));

		// objects on which the child thread has to run
		Computation1 comp1 = new Computation1();
		Computation2 comp2 = new Computation2();

		// creation of child thread
		Thread t1 = new Thread(comp1);
		Thread t2 = new Thread(comp2);

		// moving child thread to runnable state
		t1.start();
		t2.start();

		try
		{
			Tester.newBarrier.await();
		}
		catch (InterruptedException | BrokenBarrierException e)
		{
			e.printStackTrace();
		}

		// barrier breaks as the number of thread waiting for the barrier
		// at this point = 3
		System.out.println("Sum of product and sum = " + (Computation1.product +
		Computation2.sum));

		// Resetting the newBarrier
		newBarrier.reset();
		System.out.println("Barrier reset successful");
	}
}
六、Phaser
类Phaser提供了动态增减parties计数,这点比CyclicBarrier类操作parties更加方便,通过若干个方法来控制多个线程之间同步运行的效果,还可以实现针对某一个线程取消同步运行的效果,而且支持在指定屏障处等待,在等待时还支持中断或非中断等功能,使用Java并发类对线程进行分组同步控制时,Phaser比CyclicBarrier类功能更加强大。
参考代码
import java.util.concurrent.Phaser;

// A thread of execution that uses a phaser.
class MyThread implements Runnable {
	Phaser phaser;
	String title;

	public MyThread(Phaser phaser, String title)
	{
		this.phaser = phaser;
		this.title = title;

		phaser.register();
		new Thread(this).start();
	}

	@Override public void run()
	{
		System.out.println("Thread: " + title
						+ " Phase Zero Started");
		phaser.arriveAndAwaitAdvance();

		// Stop execution to prevent jumbled output
		try {
			Thread.sleep(10);
		}
		catch (InterruptedException e) {
			System.out.println(e);
		}

		System.out.println("Thread: " + title
						+ " Phase One Started");
		phaser.arriveAndAwaitAdvance();

		// Stop execution to prevent jumbled output
		try {
			Thread.sleep(10);
		}
		catch (InterruptedException e) {
			System.out.println(e);
		}

		System.out.println("Thread: " + title
						+ " Phase Two Started");
		phaser.arriveAndDeregister();
	}
}

public class PhaserExample {
	public static void main(String[] args)
	{
		Phaser phaser = new Phaser();
		phaser.register();
		int currentPhase;

		System.out.println("Starting");

		new MyThread(phaser, "A");
		new MyThread(phaser, "B");
		new MyThread(phaser, "C");

		// Wait for all threads to complete phase Zero.
		currentPhase = phaser.getPhase();
		phaser.arriveAndAwaitAdvance();
		System.out.println("Phase " + currentPhase
						+ " Complete");
		System.out.println("Phase Zero Ended");

		// Wait for all threads to complete phase One.
		currentPhase = phaser.getPhase();
		phaser.arriveAndAwaitAdvance();
		System.out.println("Phase " + currentPhase
						+ " Complete");
		System.out.println("Phase One Ended");

		currentPhase = phaser.getPhase();
		phaser.arriveAndAwaitAdvance();
		System.out.println("Phase " + currentPhase
						+ " Complete");
		System.out.println("Phase Two Ended");

		// Deregister the main thread.
		phaser.arriveAndDeregister();
		if (phaser.isTerminated()) {
			System.out.println("Phaser is terminated");
		}
	}
}
七、CompletableFuture
Java8并发API改进引入的CompletableFuture类。CompletableFuture 提供了一套广泛的方法来创建多个 Futures、链接和组合。它还具有全面的异常处理支持。
示例代码
import java.util.Arrays;
import java.util.List;
import java.util.concurrent.CompletableFuture;
public class CompletableFutureExample1
{
public static void main(String[] args)
{
try
{
    List<Integer> list = Arrays.asList(5,9,14);
    list.stream().map(num->CompletableFuture.supplyAsync(()->getNumber(num))).map(CompletableFuture->CompletableFuture.thenApply(n-
>n*n)).map(t->t.join()).forEach(s->System.out.println(s));
}
catch (Exception e)
{
e.printStackTrace();
}
}
private static int getNumber(int a)
{
return a*a;
}
}
八、ThreadLocal
此类提供线程局部变量。这些变量不同于它们的正常对应变量,因为每个访问一个(通过它的 get 或 set 方法)的线程都有它自己的、独立初始化的变量副本。
ThreadLocal有一个静态内部类ThreadLocalMap,ThreadLocalMap又包含了一个Entry数组,Entry本身是一个弱引用,他的key是指向ThreadLocal的弱引用,Entry具备保存key – value键值对的能力。
在使用完之后调用remove方法删除Entry对象,避免出现内存泄露。
Object get():此方法返回此线程局部变量的当前线程副本中的值。如果变量没有当前线程的值,则首先将其初始化为调用 initialValue() 方法返回的值。
void set(Object value):此方法将此线程局部变量的当前线程副本设置为指定值。大多数子类不需要重写此方法,仅依赖于 initialValue() 方法来设置线程局部变量的值。
void remove():此方法删除此线程局部变量的当前线程值。如果这个线程局部变量随后被当前线程读取,它的值将通过调用它的 initialValue() 方法重新初始化,除非它的值是由当前线程在中间设置的。这可能会导致在当前线程中多次调用 initialValue 方法。
Object initialValue():此方法返回此线程局部变量的当前线程的初始值。
九、ThreadLocalRandom
java.util 包中的ThreadLocalRandom 类也用于生成伪随机数流。它是上面讨论的 Random 类的子类。顾名思义,这个类生成与当前线程隔离的随机数。ThreadLocalRandom 使用内部生成的种子值进行初始化,该种子值不可修改。
参考代码
import java.util.concurrent.ThreadLocalRandom;


class ThreadLocalRandomNumbers extends Thread {

	// Method 1
	// The run() method of the Thread class
	// Must be defined by every class that extends it
	public void run()
	{

		// Try block to check for exceptions
		try {

			// Initializing a seed value to
			// some random integer value
			int seed = 10;

			// Getting the current seed by
			// calling over ThreadLocalRandom class and
			// storing it in a integer variable
			int r
				= ThreadLocalRandom.current().nextInt(seed);

			// Printing the generated number r
			// The thread id is obtained using getId()
			System.out.println(
				"Thread " + Thread.currentThread().getId()
				+ " generated " + r);
		}

		// Catch block to catch the exceptions
		catch (Exception e) {

			// Display message on the console if
			// the exception/s occur
			System.out.println("Exception");
		}
	}

	// Method 2
	// Main driver method
	public static void main(String[] args)
	{

		// Create two threads
		ThreadLocalRandomNumbers t1
			= new ThreadLocalRandomNumbers();
		ThreadLocalRandomNumbers t2
			= new ThreadLocalRandomNumbers();

		// Starting th above created threads
		// using the start() method
		t1.start();
		t2.start();
	}
}
相关文章
- JAVA多线程和并发基础面试问答
- Java实现 LeetCode 403 青蛙过河
- Java实现 LeetCode 318 最大单词长度乘积
- Java实现 蓝桥杯 猜算式
- Java实现 蓝桥杯 算法提高 矩阵翻转
- Java实现 蓝桥杯 算法提高 复数四则运算
- Java实现 蓝桥杯 算法提高 上帝造题五分钟
- Java 多线程编程(2-异步中包含同步)
- 多线程之java内存模型
- Java垃圾收集学习笔记
- Java并发容器--DelayQueue延迟队列使用示例
- Java多线程 -join用法
- Java //PP2.8 编写一个应用程序,以小时、分、秒读取时间长度,然后全部换算成秒并打印输出结果(例如,1小时28分42秒等于5322秒)
- Struts2.5.6版本文件下载问题Can not find a java.io.InputStream with the name [downloadFile] in the invocation stack
- 【java】Java并发编程--Java实现多线程的4种方式