
【深度学习】c++部署onnx模型(Yolov5、PP-HumanSeg、GoogLeNet)
2023-02-18 16:27:17 时间
这两天部署了好多模型,记录一下。代码链接。
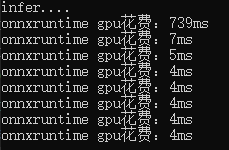
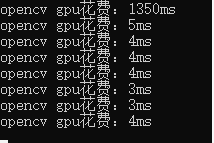
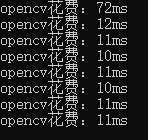
- onnxruntime在第一张图的推理上比opencv快很多,但在后面的图上略微慢了一点。

- 不同的模型的部署时的输出不同,处理时需要对输出比较了解,下面分别处理了目标检测、语义分割和分类模型的输出。
onnxruntime模型部署
例1:onnxruntime部署PP-HumanSeg语义分割模型
根据博客的代码做了一点补充:多图并行推理
1. 生成模型时更改inputshape,想要并行推理几张图就写几。
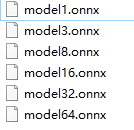
2. 加载模型时选择对应的.onnx
3. 改输入维度
HumanSeg human_seg(model_path, 1, { 3, 3, 192, 192 });//3张
HumanSeg human_seg(model_path, 1, { 8, 3, 192, 192 });//8张
4. 在推理前,将多张图放入vector,后处理时多一层遍历
void HumanSeg::predict_images_together(const std::string& imgpath) {
    std::vector<std::string> filenames;
    cv::glob(imgpath, filenames);
    cv::Mat src, dst;
    std::vector<cv::Mat> src_images;
    std::vector<cv::Mat> in_images;
    int image_count = filenames.size();
    clock_t start{ clock() }, end;
  //预处理
    for (size_t i = 0; i < image_count; ++i) {
        src = cv::imread(filenames[i]);
        src_images.push_back(src);
        dst = preprocess(src);
        in_images.push_back(dst);
    }
    cv::Mat blob = cv::dnn::blobFromImages(in_images, 1, input_size, cv::Scalar(0, 0, 0), false, true);
  //推理
    auto memory_info = Ort::MemoryInfo::CreateCpu(OrtArenaAllocator, OrtMemTypeDefault);
    input_tensors_.emplace_back(Ort::Value::CreateTensor<float>(memory_info, blob.ptr<float>(), blob.total(), input_node_dims_.data(), input_node_dims_.size()));
    std::vector<Ort::Value> output_tensors_ = session_.Run(
        Ort::RunOptions{ nullptr },
        input_node_names_.data(),
        input_tensors_.data(),
        input_node_names_.size(),
        out_node_names_.data(),
        out_node_names_.size()
    );
    int64* floatarr = output_tensors_.front().GetTensorMutableData<int64>();

    //后处理
    std::vector<cv::Mat> out_images;
    for(int k=0;k< image_count;k++){
        cv::Mat mask = cv::Mat::zeros(input_size, CV_8UC1);
        for (int i{ 0 }; i < static_cast<int>(input_node_dims_[2]); i++) {
            for (int j{ 0 }; j < static_cast<int>(input_node_dims_[3]); ++j) {
                mask.at<uchar>(i, j) = static_cast<uchar>(floatarr[i * static_cast<int>(input_node_dims_[3]) + j + k * 192 * 192]);
            }
        }
        cv::resize(mask, mask, cv::Size(image_w, image_h));
        cv::Mat mask1 = mask * 255;

        cv::Mat predict_image;
        cv::bitwise_and(src_images[k], src_images[k], predict_image, mask = mask);
        out_images.push_back(predict_image);
        cv::imwrite(imgpath +"\\" +std::to_string(k) + ".jpg", predict_image);
    }

    end = clock();
    std::cout << (end - start)/ image_count*1.0 << std::endl;
    input_tensors_.clear();
    return;
}
例2:onnxruntime部署googlenet 4分类模型
void onnxruntime::predict(cv::Mat& blob)
{
    clock_t start{ clock() }, end;
    auto memory_info = Ort::MemoryInfo::CreateCpu(OrtArenaAllocator, OrtMemTypeDefault);

    input_tensors_.emplace_back(Ort::Value::CreateTensor<float>(memory_info, blob.ptr<float>(), blob.total(), input_node_dims_.data(), input_node_dims_.size()));

    std::vector<Ort::Value> output_tensors_ = session_.Run(
        Ort::RunOptions{ nullptr },
        input_node_names_.data(),
        input_tensors_.data(),
        input_node_names_.size(),
        out_node_names_.data(),
        out_node_names_.size());
    float* floatarr = output_tensors_[0].GetTensorMutableData<float>();
    end = clock();
    std::cout << "onnxruntime:" << end - start << "ms" << std::endl;
    for (int i = 0; i < 4; i++) {
        std::cout << *floatarr++ << std::endl;
    }
}
结果:(最大数的索引就是类别)

opencv::dnn模型部署
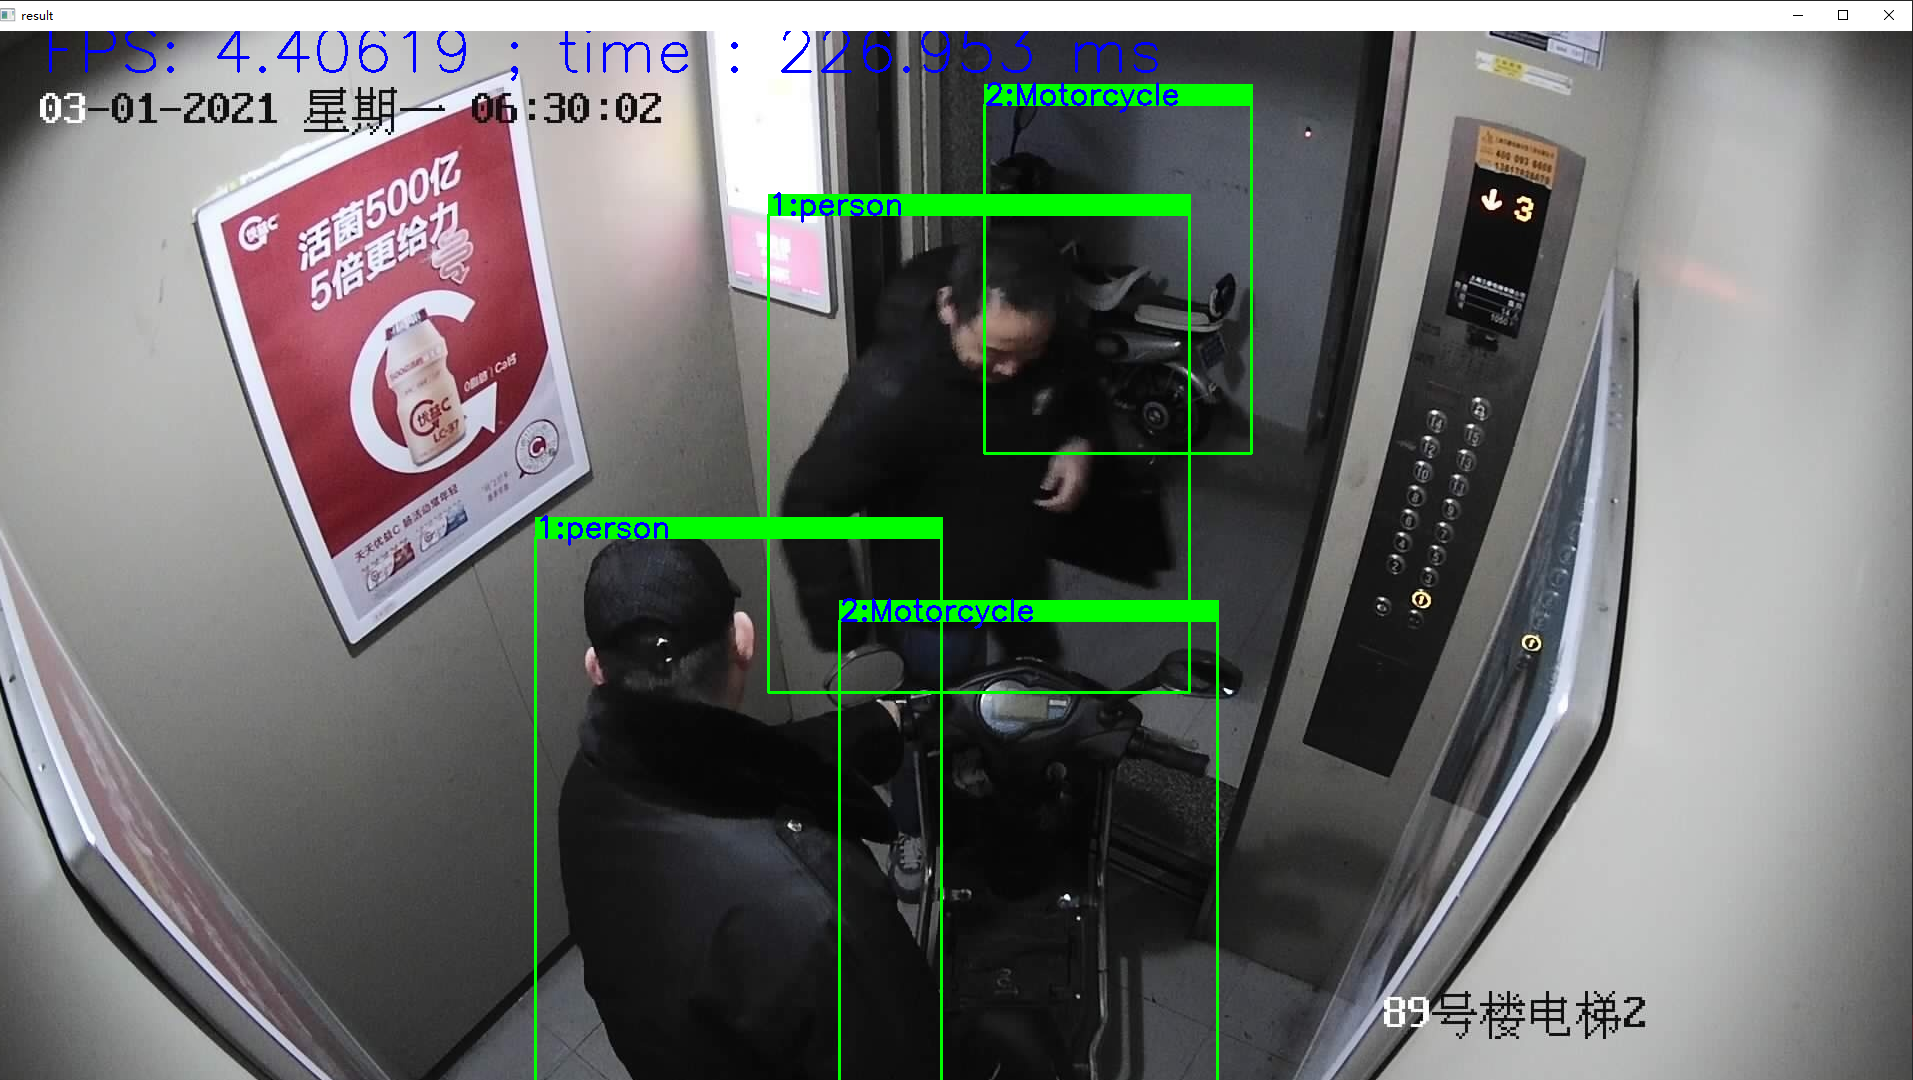
例1:Yolov5 3分类检测模型部署
#include"yolov5_dnn.h"
using namespace cv;

//初始化网络,classname
void YOLOv5Detector::initConfig(std::string onnxpath, string classpath, int iw, int ih, float threshold) {
    this->input_w = iw;
    this->input_h = ih;
    this->threshold_score = threshold;
    this->net = cv::dnn::readNetFromONNX(onnxpath);
    this->class_list = readClassNames(classpath);
}

//检测
void YOLOv5Detector::detect(cv::Mat& frame, std::vector<DetectResult>& results) {

    //图像预处理
    int w = frame.cols;
    int h = frame.rows;
    int _max = std::max(h, w);
    cv::Mat image = cv::Mat::zeros(cv::Size(_max, _max), CV_8UC3);
    cv::Rect roi(0, 0, w, h);
    frame.copyTo(image(roi));

    float x_factor = image.cols / 640.0f;
    float y_factor = image.rows / 640.0f;

    // 推理
    cv::Mat blob = cv::dnn::blobFromImage(image, 1 / 255.0, cv::Size(this->input_w, this->input_h), cv::Scalar(0, 0, 0), true, false);
    this->net.setInput(blob);
    cv::Mat preds = this->net.forward();

    // 后处理, 1x25200x8
    std::cout << "rows: "<< preds.size[1]<< " data: " << preds.size[2] << std::endl;
    cv::Mat det_output(preds.size[1], preds.size[2], CV_32F, preds.ptr<float>());
    float confidence_threshold = 0.5;
    std::vector<cv::Rect> boxes;
    std::vector<int> classIds;
    std::vector<float> confidences;
    for (int i = 0; i < det_output.rows; i++) {
        float confidence = det_output.at<float>(i, 4);

        if (confidence < 0.4) {
            continue;
        }

        cv::Mat classes_scores = det_output.row(i).colRange(5, 8);//此处改动了,因为是三分类,所以输出中先是xywh,confidence,然后是3个类别的分数
        cv::Point classIdPoint;
        double score;
        minMaxLoc(classes_scores, 0, &score, 0, &classIdPoint);

        // 置信度 0~1之间
        if (score > this->threshold_score)
        {
            float cx = det_output.at<float>(i, 0);
            float cy = det_output.at<float>(i, 1);
            float ow = det_output.at<float>(i, 2);
            float oh = det_output.at<float>(i, 3);
            int x = static_cast<int>((cx - 0.5 * ow) * x_factor);
            int y = static_cast<int>((cy - 0.5 * oh) * y_factor);
            int width = static_cast<int>(ow * x_factor);
            int height = static_cast<int>(oh * y_factor);
            cv::Rect box;
            box.x = x;
            box.y = y;
            box.width = width;
            box.height = height;

            boxes.push_back(box);
            classIds.push_back(classIdPoint.x);
            confidences.push_back(score);
        }
    }

    // NMS
    std::vector<int> indexes;
    cv::dnn::NMSBoxes(boxes, confidences, 0.25, 0.45, indexes);
    for (size_t i = 0; i < indexes.size(); i++) {
        DetectResult dr;
        int index = indexes[i];
        int idx = classIds[index];
        dr.box = boxes[index];
        dr.classId = idx;
        dr.score = confidences[index];
        cv::rectangle(frame, boxes[index], cv::Scalar(0, 255, 0), 2, 8);
        cv::rectangle(frame, cv::Point(boxes[index].tl().x, boxes[index].tl().y - 20),
            cv::Point(boxes[index].br().x, boxes[index].tl().y), cv::Scalar(0, 255, 0), -1);
        cv::putText(frame, class_list[idx], cv::Point(boxes[index].tl().x, boxes[index].tl().y), cv::FONT_HERSHEY_SIMPLEX, 1, cv::Scalar(255, 0, 0),2);
        results.push_back(dr);
    }

    std::ostringstream ss;
    std::vector<double> layersTimings;
    double freq = cv::getTickFrequency() / 1000.0;
    double time = net.getPerfProfile(layersTimings) / freq;
    ss << "FPS: " << 1000 / time << " ; time : " << time << " ms";
    putText(frame, ss.str(), cv::Point(50, 40), cv::FONT_HERSHEY_SIMPLEX, 2.0, cv::Scalar(255, 0, 0), 2, 8);
    imshow("result", frame);
    waitKey();
}

// 读取txt文件
vector<string> YOLOv5Detector::readClassNames(string classpath)
{
    vector<String> classNames;
    ifstream fp(classpath);
    if (!fp.is_open())
    {
        printf("could not open file...\n");
        exit(-1);
    }
    std::string name;
    while (!fp.eof())
    {
        std::getline(fp, name);
        if (name.length())
            classNames.push_back(name);
    }
    fp.close();
    return classNames;
}
结果:
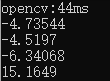
例2:opencv部署googlenet 4分类模型


做的是点胶的四分类,用的googlenet,准确率98.6%。
代码:
int main() {
    string modelpath = "../googlenet.onnx";
    try {
        Mat img = imread("../3.jpg");
        resize(img, img, Size(128, 128));
        cvtColor(img, img, cv::COLOR_BGR2RGB);
        img.convertTo(img, CV_32F, 1.0 / 255.0);
        cv::Scalar default_mean(0.5, 0.5, 0.5);
        cv::Scalar default_std(0.5, 0.5, 0.5);
        cv::subtract(img, default_mean, img);
        cv::divide(img, default_std, img);

        Mat inputBlob = dnn::blobFromImage(img);
        //opencv
        Net net = readNetFromONNX(modelpath);
        clock_t start{ clock() }, end;
        net.setInput(inputBlob);
        Mat prob = net.forward();
        end = clock();
        std::cout << "opencv:"<<end - start<<"ms" << std::endl;
        float* pData = (float*)prob.data;

        softmax(prob, prob);
        Point maxLoc;
        double maxValue = 0;
        minMaxLoc(prob, 0, &maxValue, 0, &maxLoc);
        int labelIndex = maxLoc.x;
        double probability = maxValue;
        string cla;
        switch (labelIndex)
        {
        case 0:
            cla = "断胶";
            break;
        case 1:
            cla = "多胶";
            break;
        case 2:
            cla = "少胶";
            break;
        case 3:
            cla = "正常";
            break;
        }
        cout << cla << ":" << probability;
    }
    catch (exception ex) {

    }
}
结果:和onnxruntime的一样
参考文献
相关文章
- 《痞子衡嵌入式半月刊》 第 69 期
- 痞子衡嵌入式:对比恩智浦全系列MCU(包含Kinetis/LPC/i.MXRT/MCX)的GPIO电平中断设计差异
- 痞子衡嵌入式:我被邀请做科锐国际旗下数科同道主办的技术沙龙嘉宾
- 痞子衡嵌入式:低功耗&高性能边缘人工智能应用的新答案 - MCXN947
- 《痞子衡嵌入式半月刊》 第 68 期
- 痞子衡嵌入式:我为2021 TencentOS Tiny AIoT应用创新大赛做了场直播培训
- 痞子衡嵌入式:我被邀请做贸泽电子&与非网联合推出的《对话工程师》节目嘉宾
- 痞子衡嵌入式:存储器大厂Micron的NOR Flash芯片特殊丝印设计(FBGA代码)
- 痞子衡嵌入式:国内外串行NOR Flash厂商官网Cross Reference功能使用体验
- 痞子衡嵌入式:MCUXpresso IDE下高度灵活的FreeMarker链接文件模板机制
- 《痞子衡嵌入式半月刊》 第 67 期
- 《痞子衡嵌入式半月刊》 第 66 期
- 《痞子衡嵌入式半月刊》 第 65 期
- 痞子衡嵌入式:i.MXRT中FlexSPI外设不常用的读选通采样时钟源 - loopbackFromSckPad
- 痞子衡嵌入式:RT-MFB - 一种灵活的i.MXRT下多串行NOR Flash型号选择的量产方案
- 《痞子衡嵌入式半月刊》 第 64 期
- 痞子衡嵌入式:浅谈i.MXRT10xx系列MCU外接24MHz晶振的作用
- 痞子衡嵌入式:一个关于Segger J-Flash在Micron Flash固定区域下载校验失败的故事(SR寄存器BP[x:0]位)
- 痞子衡嵌入式:MCUXpresso IDE下生成镜像文件的方法及其与IAR,MDK差异
- 《痞子衡嵌入式半月刊》 第 63 期