SpringCloud Alibaba学习(五):Sentinel的介绍与搭建
一、概述
1、官网
英文: https://github.com/alibaba/Sentinel
中文: https://github.com/alibaba/Sentinel/wiki/%E4%BB%8B%E7%BB%8D
2、Sentinel是什么
用一句话来概述:Sentinel是一个轻量级的流量控制、熔断降级的Java库。
直白点说:就是阿里版的Hystrix 。
3、Hystrix的缺点
(1)需要程序员手工搭建监控平台
(2)没有一套web界面可以给我们进行更加细粒度化的配置流控、速率控制、服务熔断、服务降级……
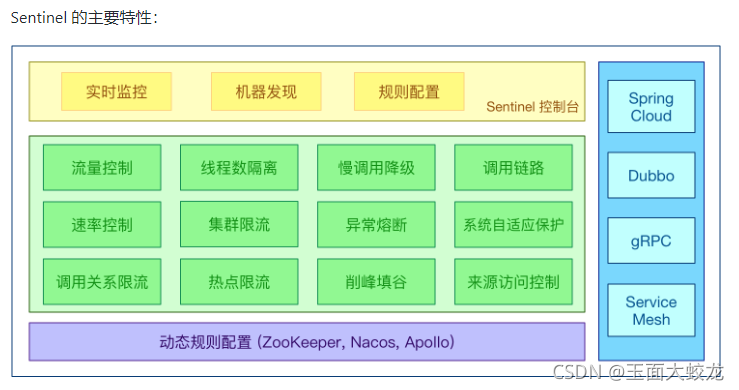
4、Sentinel能做什么
二、安装Sentinel控制台

1、下载sentinel
下载地址 : Release v1.7.0 · alibaba/Sentinel · GitHub

2、运行
首先要保证有Java8 环境,并且8080端口不被占用。
在sentinel的jar包所在的位置打开命令行,输入命令:
java -jar sentinel-dashboard-1.7.0.jar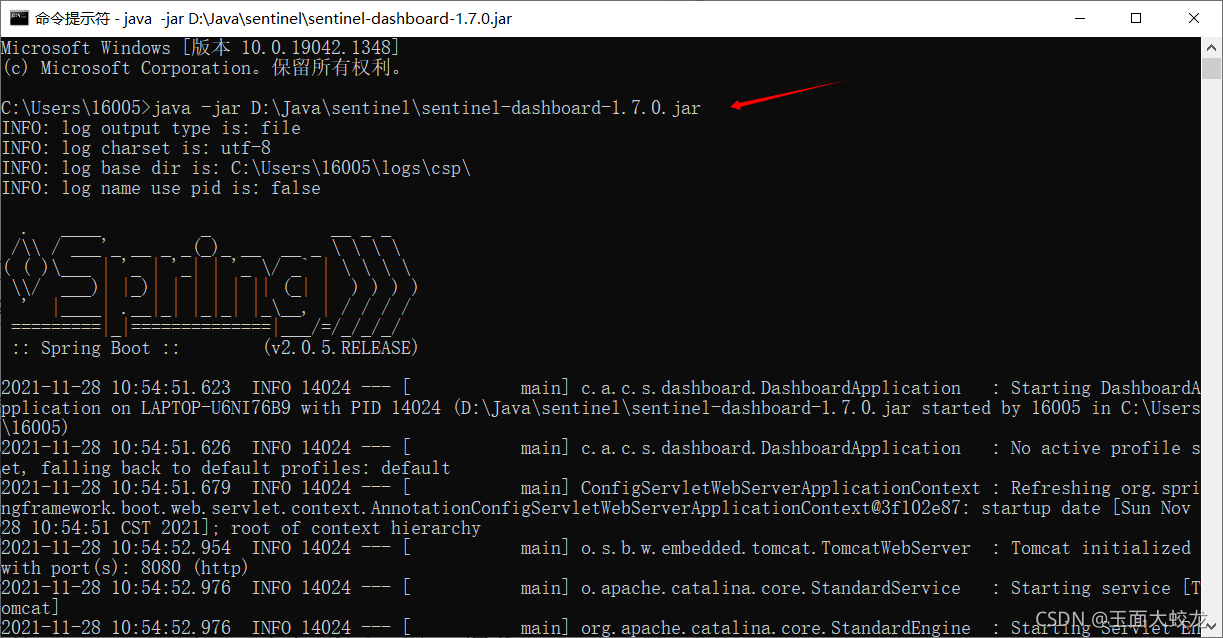
3、访问sentinel管理界面
出现登陆界面,账号密码均为sentinel。
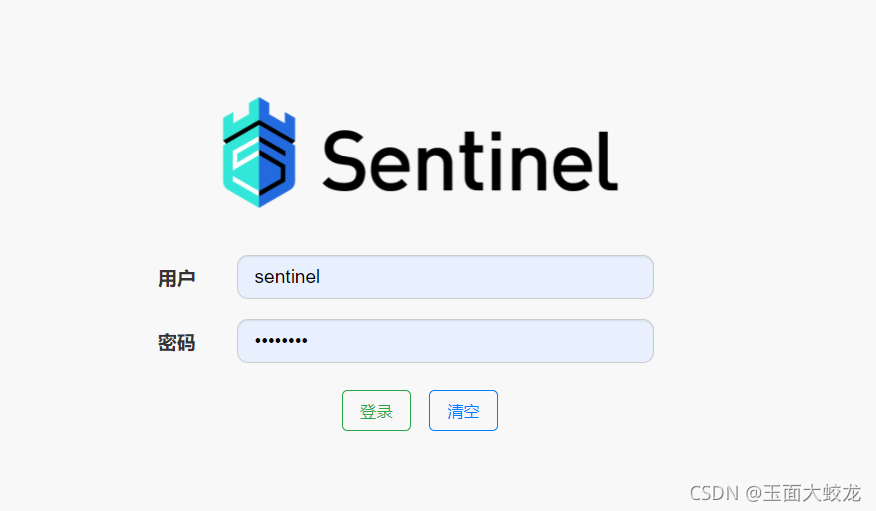

这样sentinel就搭建起来了,一行代码都不用写,而Hystrix还要搭建自己的微服务。两者比较来看,可以说sentinel是相当方便了。
三、初始化演示工程
1、运行Nacos
将Nacos运行起来。
访问: http://localhost:8848/nacos/#/login
2、在IDEA中新建微服务模块
(1)创建模块
新建普通maven模块 cloudalibaba-sentinel-service8401
(2)修改pom文件
<?xml version="1.0" encoding="UTF-8"?>
<project xmlns="http://maven.apache.org/POM/4.0.0"
         xmlns:xsi="http://www.w3.org/2001/XMLSchema-instance"
         xsi:schemaLocation="http://maven.apache.org/POM/4.0.0 http://maven.apache.org/xsd/maven-4.0.0.xsd">
    <parent>
        <artifactId>cloud</artifactId>
        <groupId>com.shang.cloud</groupId>
        <version>1.0-SNAPSHOT</version>
    </parent>
    <modelVersion>4.0.0</modelVersion>

    <artifactId>cloudalibaba-sentinel-service8401</artifactId>

    <dependencies>
        <!--SpringCloud ailibaba nacos -->
        <dependency>
            <groupId>com.alibaba.cloud</groupId>
            <artifactId>spring-cloud-starter-alibaba-nacos-discovery</artifactId>
        </dependency>
        <!--SpringCloud ailibaba sentinel-datasource-nacos 后续做持久化用到-->
        <dependency>
            <groupId>com.alibaba.csp</groupId>
            <artifactId>sentinel-datasource-nacos</artifactId>
        </dependency>
        <!--SpringCloud ailibaba sentinel -->
        <dependency>
            <groupId>com.alibaba.cloud</groupId>
            <artifactId>spring-cloud-starter-alibaba-sentinel</artifactId>
        </dependency>
        <!--openfeign-->
        <dependency>
            <groupId>org.springframework.cloud</groupId>
            <artifactId>spring-cloud-starter-openfeign</artifactId>
        </dependency>
        <!-- SpringBoot整合Web组件+actuator -->
        <dependency>
            <groupId>org.springframework.boot</groupId>
            <artifactId>spring-boot-starter-web</artifactId>
        </dependency>
        <dependency>
            <groupId>org.springframework.boot</groupId>
            <artifactId>spring-boot-starter-actuator</artifactId>
        </dependency>
        <!--日常通用jar包配置-->
        <dependency>
            <groupId>org.springframework.boot</groupId>
            <artifactId>spring-boot-devtools</artifactId>
            <scope>runtime</scope>
            <optional>true</optional>
        </dependency>
        <dependency>
            <groupId>cn.hutool</groupId>
            <artifactId>hutool-all</artifactId>
            <version>4.6.3</version>
        </dependency>
        <dependency>
            <groupId>org.projectlombok</groupId>
            <artifactId>lombok</artifactId>
            <optional>true</optional>
        </dependency>
        <dependency>
            <groupId>org.springframework.boot</groupId>
            <artifactId>spring-boot-starter-test</artifactId>
            <scope>test</scope>
        </dependency>

    </dependencies>


    <properties>
        <maven.compiler.source>8</maven.compiler.source>
        <maven.compiler.target>8</maven.compiler.target>
    </properties>

</project>
(3)编写yml文件
server:
  port: 8401

spring:
  application:
    name: cloudalibaba-sentinel-service
  cloud:
    nacos:
      discovery:
        #Nacos服务注册中心地址
        server-addr: localhost:8848
    sentinel:
      transport:
        #配置Sentinel dashboard地址
        dashboard: localhost:8080
        #默认8719端口,假如被占用会自动从8719开始依次+1扫描,直至找到未被占用的端口
        port: 8719

management:
  endpoints:
    web:
      exposure:
        include: '*'
(4)编写主启动类
@EnableDiscoveryClient
@SpringBootApplication
public class MainApp8401 {
    public static void main(String[] args) {
        SpringApplication.run(MainApp8401.class, args);
    }
}
(5)编写业务逻辑代码
@RestController
public class FlowLimitController {

    @GetMapping("/testA")
    public String testA() {
        return "------testA";
    }

    @GetMapping("/testB")
    public String testB() {
        return "------testB";
    }
}
3、运行
先启动Nacos(前面已经启动)
再启动Sentinel (前面已经启动)
最后启动微服务8401
然后看看sentinel控制界面,发现啥也没有:
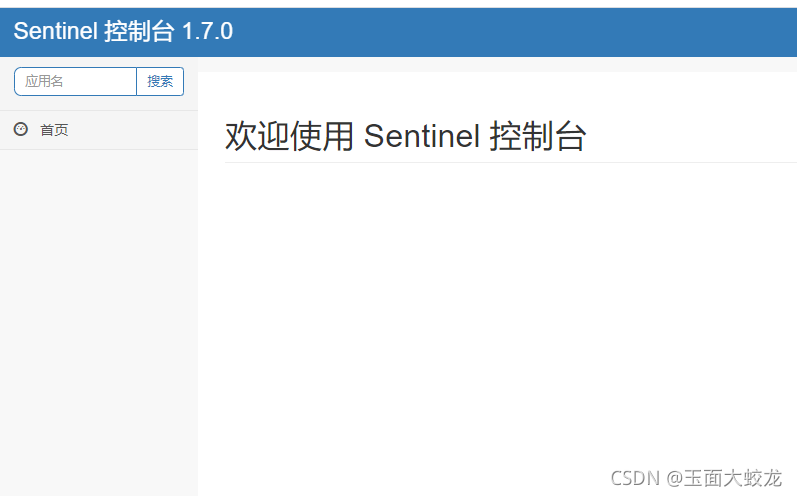
因为sentinel采用的是懒加载机制,需要访问一次才能显示出来(相当于打个卡就能够记录了):
访问 http://localhost:8401/testA
访问 http://localhost:8401/testB
然后就可以看到我们的微服务了:
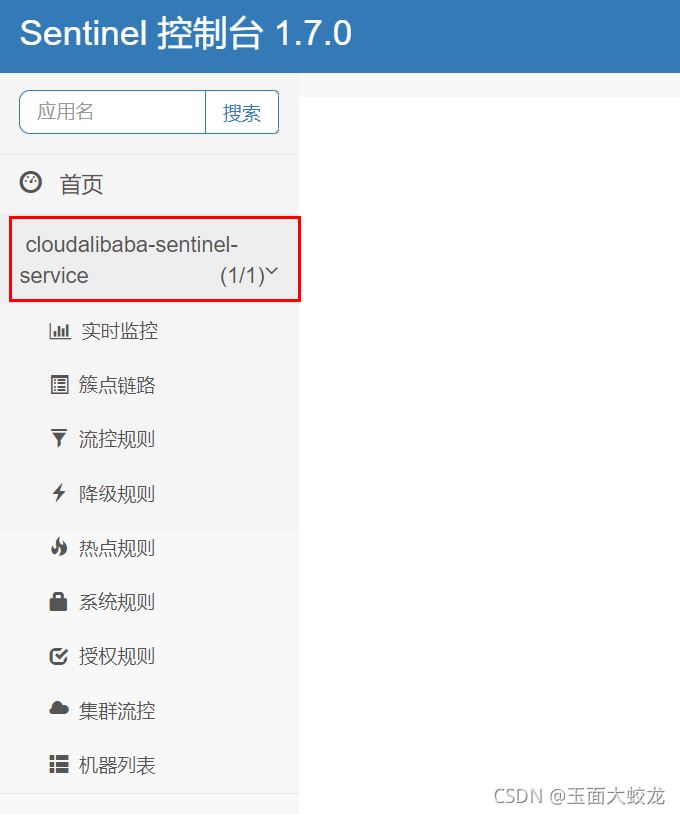
这说明sentinel8080正在监控微服务8401
相关文章
- 发现 Linux SpaceFM 文件管理器的威力
- 夯实数据智能底座 共筑数字经济发展“新基石”
- 五分钟教你使用console.log发布公司的招聘信息
- 微软发布 Windows 11 Beta 预览版 Build 22621.1250 和 22623.1250 (KB5023008)
- Windows 11 学院:在 Windows 11 Build 25290 上如何为文件管理器启用标签页拖拽支持
- 微软Windows 11 Dev 预览版 Build 25290 发布:带来新的开始菜单提醒角标
- 微软正用全屏通知提醒 Windows 10 用户免费升级 Windows 11,要点击 5 次才能退出
- Linux Mint 21.2 将于 6 月发布:改进登录屏幕,优化 Pix 图像管理程序等等
- 字节面试也会问SPI机制?
- 微软正式停售 Windows 10 产品密钥 / 许可证:继续提供 ISO 镜像下载,推荐用户升级 Windows 11
- 用复古电脑程序 Toy CPU 学习低级编程
- Windows 11 新功能泄露:现代音量合成器、实验工具和新的文件管理器
- 微软 Windows 11 文件资源管理器全新设计曝光:UI 迎来大修,整合 Microsoft 365
- 对比Pandas,学习PySpark大数据处理
- 微软宣布为Windows 11 21H2设备开启自动更新到22H2版本
- 互联网都在说降本增效,小红书技术团队是怎么做的?
- 微软将继续提供 Windows 10 ISO 镜像下载,即将停售产品密钥 / 许可证
- 微软宣布为Windows 11 21H2 设备开启自动更新到 22H2 版本
- 面试突击:Properties和Yml有什么区别?
- 微软 Windows 11 Beta 预览版 22621.1245 和 22623.1245 (KB5022358) 发布

