
您现在的位置是:首页 > Javascript
当前栏目
Mybatis Insert后返回主键ID实现方法及源码分析
2023-03-09 22:05:33 时间

本文转载自微信公众号「肌肉码农」,作者邹学。转载本文请联系肌肉码农公众号。
引子:
mybatis这类ORM在往数据库insert对象后,会顺带将数据库中的自增主键值赋值给对象的id,这个功能给我们的开发带来了很多方便,那它是怎么实现的呢?
源码分析:
利用mybatis实现这一功能非常简单,网络上有一大把资料,今天我们主要看它是怎么实现的?
通过断点insert可以跟踪到这个类:PreparedStatementHandler.java的update方法。
- public int update(Statement statement) throws SQLException {
- PreparedStatement ps = (PreparedStatement) statement;
- //执行insert操作
- ps.execute();
- //获得执行行数
- int rows = ps.getUpdateCount();
- Object parameterObject = boundSql.getParameterObject();
- //获得id
- KeyGenerator keyGenerator = mappedStatement.getKeyGenerator();
- keyGenerator.processAfter(executor, mappedStatement, ps, parameterObject);
- return rows;
- }
进一步跟踪getKeyGenerator()获得id的方法, 会进入Jdbc3KeyGenerator类的processBatch方法,如下:
- public void processBatch(MappedStatement ms, Statement stmt, Object parameter) {
- final String[] keyProperties = ms.getKeyProperties();
- if (keyProperties == null || keyProperties.length == 0) {
- return;
- }
- //利用了statement的 getGeneratedKeys()方法
- try (ResultSet rs = stmt.getGeneratedKeys()) {
- final ResultSetMetaData rsmd = rs.getMetaData();
- final Configuration configuration = ms.getConfiguration();
- if (rsmd.getColumnCount() < keyProperties.length) {
- // Error?
- } else {
- assignKeys(configuration, rs, rsmd, keyProperties, parameter);
- }
- } catch (Exception e) {
- throw new ExecutorException("Error getting generated key or setting result to parameter object. Cause: " + e, e);
- }
- }
通过代码的注释我们可以看到,mybatis就是利用了Jdbc的Statement来获得会话insert id的,那我们可不可以自己直接利用jdbc来实现呢?
jdbc statement示例
首先创建一个test表:
- create table test id int not null auto_increment, td int, primary key(id);
然后执行以下代码就可以批量获得id了。
- Class.forName("com.mysql.jdbc.Driver");
- Connection connection = DriverManager.getConnection(url, userName, pwd);
- String sql = "insert into test(td) values(5)";
- Statement statement = connection.createStatement();
- statement.execute(sql, 1);
- ResultSet resultSet = statement.getGeneratedKeys();
- while (resultSet.next()){
- System.out.println(resultSet.getObject(1));
- }
- connection.close();
原理:
既然jdbc能获得insert后的id,那它是怎么实现的呢? 通过断点继续跟踪到这个类:StatementImpl.java
- protected ResultSetInternalMethods getGeneratedKeysInternal(long numKeys) throws SQLException {
- synchronized (checkClosed().getConnectionMutex()) {
- Field[] fields = new Field[1];
- fields[0] = new Field("", "GENERATED_KEY", Types.BIGINT, 20);
- fields[0].setConnection(this.connection);
- fields[0].setUseOldNameMetadata(true);
- ArrayList<ResultSetRow> rowSet = new ArrayList<ResultSetRow>();
- //获得上一次获得insert后的id
- long beginAt = getLastInsertID();
- if (beginAt < 0) { // looking at an UNSIGNED BIGINT that has overflowed
- fields[0].setUnsigned();
- }
- if (this.results != null) {
- String serverInfo = this.results.getServerInfo();
- //
- // Only parse server info messages for 'REPLACE' queries
- //
- if ((numKeys > 0) && (this.results.getFirstCharOfQuery() == 'R') && (serverInfo != null) && (serverInfo.length() > 0)) {
- //计算有多少行数据
- numKeys = getRecordCountFromInfo(serverInfo);
- }
- //生成批量id
- if ((beginAt != 0 /* BIGINT UNSIGNED can wrap the protocol representation */) && (numKeys > 0)) {
- for (int i = 0; i < numKeys; i++) {
- byte[][] row = new byte[1][];
- if (beginAt > 0) {
- row[0] = StringUtils.getBytes(Long.toString(beginAt));
- } else {
- byte[] asBytes = new byte[8];
- asBytes[7] = (byte) (beginAt & 0xff);
- asBytes[6] = (byte) (beginAt >>> 8);
- asBytes[5] = (byte) (beginAt >>> 16);
- asBytes[4] = (byte) (beginAt >>> 24);
- asBytes[3] = (byte) (beginAt >>> 32);
- asBytes[2] = (byte) (beginAt >>> 40);
- asBytes[1] = (byte) (beginAt >>> 48);
- asBytes[0] = (byte) (beginAt >>> 56);
- BigInteger val = new BigInteger(1, asBytes);
- row[0] = val.toString().getBytes();
- }
- rowSet.add(new ByteArrayRow(row, getExceptionInterceptor()));
- beginAt += this.connection.getAutoIncrementIncrement();
- }
- }
- }
- com.mysql.jdbc.ResultSetImpl gkRs = com.mysql.jdbc.ResultSetImpl.getInstance(this.currentCatalog, fields, new RowDataStatic(rowSet),
- this.connection, this, false);
- return gkRs;
- }
- }
代码的流程是这样的:获得上一次insert后的id,再计算本次插入数据的行数,最后自己批量生成,也就是说jdbc并没有一行一行的去数据库查询id.然后我们再看下它是怎么获得上一次insert后的Id的?
- /**
- 支持自增主键
- * getLastInsertID returns the value of the auto_incremented key after an
- * executeQuery() or excute() call.
- *
- * <p>
- * This gets around the un-threadsafe behavior of "select LAST_INSERT_ID()" which is tied to the Connection that created this Statement, and therefore could
- * have had many INSERTS performed before one gets a chance to call "select LAST_INSERT_ID()".
- * </p>
- *
- * @return the last update ID.
- */
- public long getLastInsertID() {
- try {
- synchronized (checkClosed().getConnectionMutex()) {
- return this.lastInsertId;
- }
- } catch (SQLException e) {
- throw new RuntimeException(e); // evolve interface to throw SQLException
- }
- }
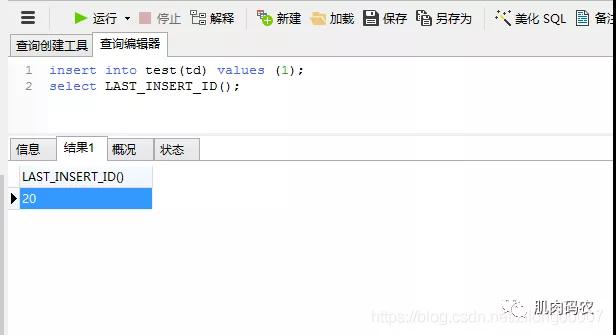
光看上面的代码注释就明白了它的逻辑,通过select LAST_INSERT_ID()来获得会话内的insert后Id,并且只支持自增主键。
mysql client获得id
相关文章
- 全新的 AWS 控制台主页体验
- http www.java.xs_java 实现Http请求
- 在中国区 AWS 上使用 Amplify 开发离线应用的使用心得
- Java NIO学习笔记(一)Java NIO 概述
- Java GUI编程
- 手把手教你玩转 Kubeflow on EKS(三)
- Amazon EKS 集群升级指南
- 宣布推出 AWS IoT Greengrass 2.0 – 拥有开源边缘运行时和新的开发人员功能
- Java ServletContext 详解
- 构建自定义 Angular 应用程序以使用 Amazon SageMaker Ground Truth 标记作业
- 用于 Kubeflow Pipelines 的 Amazon SageMaker Components 介绍
- Java NIO 概述
- 开始使用开源 Web 会议解决方案 Jitsi
- Java NIO概述
- python3 requests简介
- 使用 EC2 Image Builder 实现 OS 映像构建管道自动化
- python3 xml模块
- 如何在 AWS 上构建并行文件系统 BeeGFS
- Python XML解析
- Java Script变量