
Netty的常用编解码器与使用

本文转载自微信公众号「源码学徒」,作者皇甫嗷嗷叫。转载本文请联系源码学徒公众号。
我们本章节将了解基本的编解码器以及自定义编解码器的使用,在了解之前,我们先看一段代码:
一、开发服务端
1.开发服务端的Handler
- /**
- * *********************************************************************
- * 欢迎关注公众号: 【源码学徒】
- * *********************************************************************
- *
- * @author huangfu
- * @date 2021/5/6 21:22
- */
- public class CodecServerHandler extends ChannelInboundHandlerAdapter {
- @Override
- public void channelActive(ChannelHandlerContext ctx) throws Exception {
- //开启一个定时任务
- ctx.channel().eventLoop().scheduleAtFixedRate(() -> {
- ByteBufAllocator aDefault = ByteBufAllocator.DEFAULT;
- ByteBuf byteBuf = aDefault.directBuffer();
- //向客户端写一句话
- byteBuf.writeBytes("无论是任何的源码学习,永远都是枯燥、乏味的,他远没有写出一段很牛逼的代码有成就感!但是当你登堂入室的那一刻,你会发现,源码的阅读是如此的享受!".getBytes(StandardCharsets.UTF_8));
- ctx.writeAndFlush(byteBuf);
- }, 10, 10, TimeUnit.MILLISECONDS);
- }
- @Override
- public void exceptionCaught(ChannelHandlerContext ctx, Throwable cause) throws Exception {
- cause.printStackTrace();
- super.exceptionCaught(ctx, cause);
- }
- }
2. 开发服务端的Server
- /**
- * *********************************************************************
- * 欢迎关注公众号: 【源码学徒】
- * *********************************************************************
- *
- * @author huangfu
- * @date 2021/5/6 21:20
- */
- public class CodecServer {
- public static void main(String[] args) throws InterruptedException {
- EventLoopGroup boss = new NioEventLoopGroup(1);
- EventLoopGroup worker = new NioEventLoopGroup();
- try {
- ServerBootstrap serverBootstrap = new ServerBootstrap();
- serverBootstrap.group(boss, worker)
- .channel(NioServerSocketChannel.class)
- .localAddress(8989)
- .childHandler(new ChannelInitializer<SocketChannel>() {
- @Override
- protected void initChannel(SocketChannel ch) throws Exception {
- ch.pipeline().addLast("codecHandler", new CodecHandler());
- }
- });
- ChannelFuture channelFuture = serverBootstrap.bind().sync();
- channelFuture.channel().closeFuture().sync();
- } finally {
- boss.shutdownGracefully();
- worker.shutdownGracefully();
- }
- }
- }
二、开发客户端
1.开发客户端的Handler
- /**
- * *********************************************************************
- * 欢迎关注公众号: 【源码学徒】
- * *********************************************************************
- *
- * @author huangfu
- * @date 2021/5/6 21:31
- */
- public class CodecClientHandler extends ChannelInboundHandlerAdapter {
- @Override
- public void channelActive(ChannelHandlerContext ctx) throws Exception {
- System.out.println("连接成功");
- }
- @Override
- public void channelRead(ChannelHandlerContext ctx, Object msg) throws Exception {
- ByteBuf byteBuf = (ByteBuf) msg;
- System.out.println(byteBuf.toString(StandardCharsets.UTF_8));
- super.channelRead(ctx, msg);
- }
- }
2.开发客户端
- /**
- * *********************************************************************
- * 欢迎关注公众号: 【源码学徒】
- * *********************************************************************
- *
- * @author huangfu
- * @date 2021/5/6 21:29
- */
- public class CodecClient {
- public static void main(String[] args) throws InterruptedException {
- EventLoopGroup worker = new NioEventLoopGroup();
- try {
- Bootstrap bootstrap = new Bootstrap();
- bootstrap.group(worker)
- .remoteAddress(new InetSocketAddress("127.0.0.1",8989))
- .channel(NioSocketChannel.class)
- .handler(new ChannelInitializer<SocketChannel>() {
- @Override
- protected void initChannel(SocketChannel ch) throws Exception {
- ch.pipeline().addLast("codecClientHandler",new CodecClientHandler());
- }
- });
- ChannelFuture channelFuture = bootstrap.connect().sync();
- channelFuture.channel().closeFuture().sync();
- }finally {
- worker.shutdownGracefully();
- }
- }
- }
三、结果演示
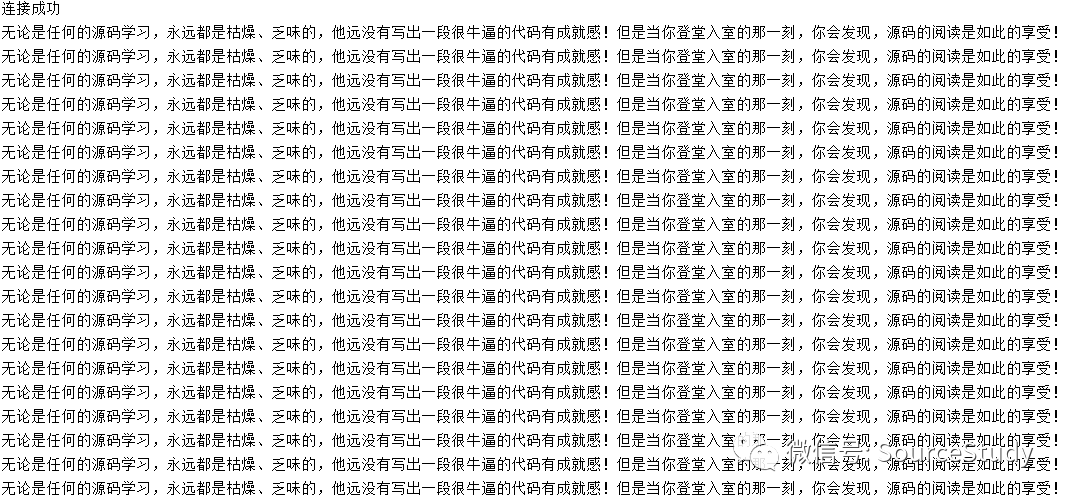
上述的代码相信大家都极其熟悉,就是开发一个服务端和客户端,当客户端连接到服务端之后,服务端每隔10毫秒向客户端输出一句话,客户端收到之后打印出来!
预期结果:

实际结果:
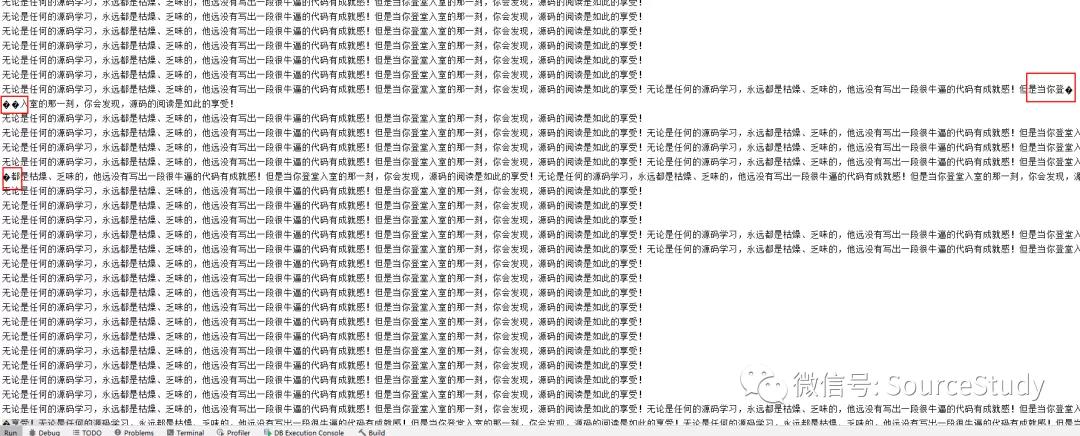
我们发现,真正跑起来,却并没有按照我们预期那样逐行打印,而是好几行连在一起打印,而且有些字符还出现了乱码,这是为什么呢?
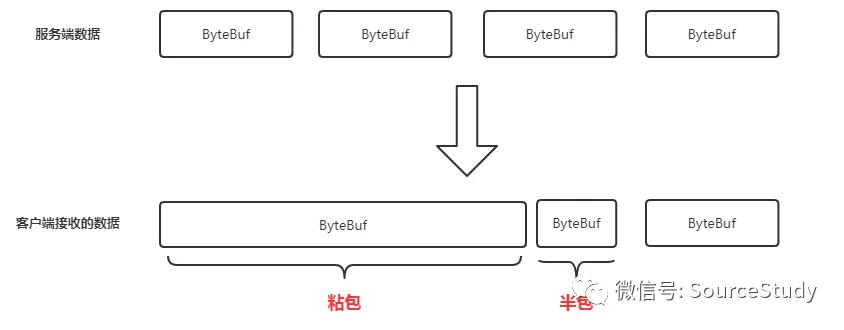
了解过网络传输的同学大概都明白,Socket其实也是TCP的一种,底层通过流的方式传输,由服务端发送的数据到客户端,客户端的Netty需要重新拼装为一个完整的包:
- 当传输的数据量过大的时候,Netty就 分多从拼装,这就造成了乱码的现象! 这种现象,术语叫做半包
- 当Netty读取的时候,一次读取了两个数据包,那就会自动将两个数据包合为一个数据包,从而完成封装为一个数据包,这就是造成好几行连着打印的问题! 这种现象 术语叫做粘包
四、常用的编解码器
为什么会发生粘包、半包!Netty在解析底层数据流转换成ByteBuf,但是当请求过于频繁的时候,两次的请求数据可能会被合并为一个,甚至,一次数据合并一个半的数据流,此时因为数据流字节的不完全接收,会导致读取数据不正确或者乱码等问题!
假设,我们预先知道了这个数据包的一个规则,当数据包规则不满足的情况下等待,超过数据规则限制的时候进行切分,那么是不是就能够有效的区分数据包的界限,从根本上上解决粘包半包的问题?
1. 基于换行符的解码器
LineBasedFrameDecoder
该代码将以\n或者\r\n 作为区分数据包的依据,程序在进行数据解码的时候,会判断该当前的数据包内是否存在\n或者\r\n,当存在的时候会截取以\n或者\r\n的一段字符,作为一个完整的数据包!
客户端增加解码器:
CodecClient:
- .handler(new ChannelInitializer<SocketChannel>() {
- @Override
- protected void initChannel(SocketChannel ch) throws Exception {
- //增加数据包解码器基于换行符的解码器
- ch.pipeline().addLast("lineBasedFrameDecoder", new LineBasedFrameDecoder(Integer.MAX_VALUE));
- ch.pipeline().addLast("codecClientHandler", new CodecClientHandler());
- }
- });
服务端数据结构发生改变:
CodecServerHandler:
- ByteBuf byteBuf = aDefault.directBuffer();
- //增加一个换行符
- byteBuf.writeBytes("无论是任何的源码学习,永远都是枯燥、乏味的,他远没有写出一段很牛逼的代码有成就感!但是当你登堂入室的那一刻,你会发现,源码的阅读是如此的享受!\n".getBytes(StandardCharsets.UTF_8));
- ctx.writeAndFlush(byteBuf);
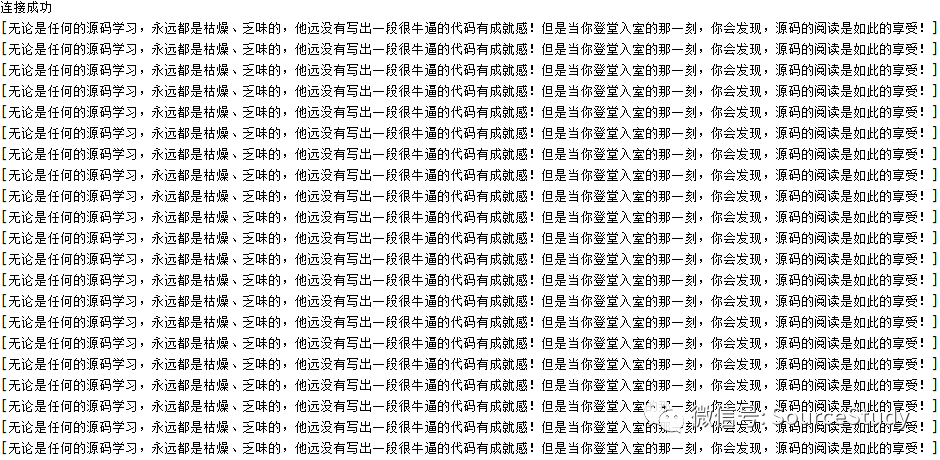
效果图:

2. 基于自定义换行符的解码器
DelimiterBasedFrameDecoder
该代码将以自定义符号作为区分数据包的依据,程序在进行数据解码的时候,会判断该当前的数据包内是否存在指定的自定义的符号,当存在的时候会截取以自定义符号为结尾的一段字符,作为一个完整的数据包!
客户端增加解码器:
CodecClient:
- .handler(new ChannelInitializer<SocketChannel>() {
- @Override
- protected void initChannel(SocketChannel ch) throws Exception {
- ByteBuf byteBuf = Unpooled.copiedBuffer("|".getBytes(StandardCharsets.UTF_8));
- ch.pipeline().addLast("delimiterBasedFrameDecoder", new DelimiterBasedFrameDecoder(Integer.MAX_VALUE, byteBuf));
- ch.pipeline().addLast("codecClientHandler", new CodecClientHandler());
- }
- });
服务端数据结构发生改变:
CodecServerHandler:
- ByteBuf byteBuf = aDefault.directBuffer();
- //末尾增加一个指定的字符
- byteBuf.writeBytes("无论是任何的源码学习,永远都是枯燥、乏味的,他远没有写出一段很牛逼的代码有成就感!但是当你登堂入室的那一刻,你会发现,源码的阅读是如此的享受!|".getBytes(StandardCharsets.UTF_8));
- ctx.writeAndFlush(byteBuf);
效果图:

3. 基于固定长度的解码器
FixedLengthFrameDecoder
定长数据解码器适用于每次发送的数据包是一个固定长度的场景,指定每次读取的数据包的数据长度来进行解码操作!
我们查看我们的数据总共长度是多少:
- 无论是任何的源码学习,永远都是枯燥、乏味的,他远没有写出一段很牛逼的代码有成就感!但是当你登堂入室的那一刻,你会发现,源码的阅读是如此的享受!
经过计算为213各字符,我们假设以后的数据都是这个,我们就可以使用固定字符串,作为区分一个完整数据包的依据:
客户端增加解码器:
CodecClient:
- .handler(new ChannelInitializer<SocketChannel>() {
- @Override
- protected void initChannel(SocketChannel ch) throws Exception {
- //指定一个完整数据包的长度为213个
- ch.pipeline().addLast("fixedLengthFrameDecoder", new FixedLengthFrameDecoder(213));
- ch.pipeline().addLast("codecClientHandler", new CodecClientHandler());
- }
- });
服务端数据结构发生改变:
CodecServerHandler:
- ByteBuf byteBuf = aDefault.directBuffer();
- //发送原数据 不做任何更改
- byteBuf.writeBytes("无论是任何的源码学习,永远都是枯燥、乏味的,他远没有写出一段很牛逼的代码有成就感!但是当你登堂入室的那一刻,你会发现,源码的阅读是如此的享受!".getBytes(StandardCharsets.UTF_8));
- ctx.writeAndFlush(byteBuf);
效果图:

4. 基于不定长的解码器
LengthFieldBasedFrameDecoder
不定长长度域解码器的使用是用在我们不确定数据包的大小的场景下,这也是比较常用的一个解码器
客户端增加解码器:
CodecClient:
- .handler(new ChannelInitializer<SocketChannel>() {
- @Override
- protected void initChannel(SocketChannel ch) throws Exception {
- ch.pipeline().addLast("lengthFieldBasedFrameDecoder", new LengthFieldBasedFrameDecoder(Integer.MAX_VALUE,0,4,0,4));
- ch.pipeline().addLast("codecClientHandler", new CodecClientHandler());
- }
- });
服务端数据结构发生改变:
CodecServerHandler:
- ByteBuf byteBuf = aDefault.directBuffer();
- byte[] bytes = "无论是任何的源码学习,永远都是枯燥、乏味的,他远没有写出一段很牛逼的代码有成就感!但是当你登堂入室的那一刻,你会发现,源码的阅读是如此的享受!".getBytes(StandardCharsets.UTF_8);
- byteBuf.writeInt(bytes.length);
- byteBuf.writeBytes(bytes);
- ctx.writeAndFlush(byteBuf);
他的参数比较多,我们做几个基本的认识:
maxFrameLength:本次能接收的最大的数据长度
lengthFieldOffset:设置的长度域的偏移量,长度域在数据包的起始位置,所以偏移量为0
lengthFieldLength:长度域的长度,例子使用的是Int占4位 所以参数为4
lengthAdjustment:数据包的偏移量,计算方式=数据长度 +lengthAdjustment=数据总长度 这里数据包的总长度=lengthFieldLength ,所以不需要补充,所以参数为0
initialBytesToStrip:需要跳过的字节数,这里我们只关注真正的数据,不关注数据包的长度,所以我们把长度域跳过去,长度域为4,所以跳过4
效果图:

5. 自定义编解码器
I. ByteToMessageDecoder
需求:我们需要在解码器中就将ByteBuf解码,并转成字符串,后面直接打印
开发一个自定义的解码器:
- /**
- * *********************************************************************
- * 欢迎关注公众号: 【源码学徒】
- * 自定义一个基于固定长度的解码器,当解码成功后,将数据转成字符串
- * *********************************************************************
- *
- * @author huangfu
- * @date 2021/5/7 22:43
- */
- public class MyByteToMessageDecoder extends ByteToMessageDecoder {
- private Integer length;
- public MessageEqualDecoder(Integer length) {
- this.length = length;
- }
- @Override
- protected void decode(ChannelHandlerContext ctx, ByteBuf in, List<Object> out) throws Exception {
- //当前的可读字节数
- int readableBytes = in.readableBytes();
- //当可读字节数超过预设数量的时候
- if(readableBytes >= length) {
- byte[] bytes = new byte[length];
- //读取出来
- in.readBytes(bytes);
- //转换成字符串 并添加进集合中
- out.add(new String(bytes, StandardCharsets.UTF_8));
- }
- }
- }
客户端处理器开发:
CodecClientHandler
- /**
- * *********************************************************************
- * 欢迎关注公众号: 【源码学徒】
- * *********************************************************************
- *
- * @author huangfu
- * @date 2021/5/6 21:31
- */
- public class CodecClientHandler extends ChannelInboundHandlerAdapter {
- @Override
- public void channelActive(ChannelHandlerContext ctx) throws Exception {
- System.out.println("连接成功");
- }
- @Override
- public void channelRead(ChannelHandlerContext ctx, Object msg) throws Exception {
- //解码器已经将数据转换成字符串了,这里直接强壮为字符串使用
- String msgStr = (String) msg;
- System.out.println(msgStr);
- super.channelRead(ctx, msg);
- }
- }
客户端开发:
CodecClient
- public class CodecClient {
- public static void main(String[] args) throws InterruptedException {
- EventLoopGroup worker = new NioEventLoopGroup();
- try {
- Bootstrap bootstrap = new Bootstrap();
- bootstrap.group(worker)
- .remoteAddress(new InetSocketAddress("127.0.0.1", 8989))
- .channel(NioSocketChannel.class)
- .handler(new ChannelInitializer<SocketChannel>() {
- @Override
- protected void initChannel(SocketChannel ch) throws Exception {
- //添加自定义的解码器
- ch.pipeline().addLast("messageEqualDecoder", new MyByteToMessageDecoder(213));
- ch.pipeline().addLast("codecClientHandler", new CodecClientHandler());
- }
- });
- ChannelFuture channelFuture = bootstrap.connect().sync();
- channelFuture.channel().closeFuture().sync();
- } finally {
- worker.shutdownGracefully();
- }
- }
- }
效果图:
II. MessageToMessageDecoder
需求:我们再上面自定义的解码器的基础上增加一个需求,要求上一个解码器解码出来的数据,在传播到客户端的时候,需用[]包裹住。
开发自定义的消息转换器(泛型为String的原因是 上一个解码器已经将其转换为了String):
- /**
- * 将消息用[]包裹起来
- *
- * @author huangfu
- * @date 2021年5月8日08:25:21
- */
- public class MyMessageToMessageDecoder extends MessageToMessageDecoder<String> {
- @Override
- protected void decode(ChannelHandlerContext ctx, String msg, List<Object> out) throws Exception {
- if(!StringUtil.isNullOrEmpty(msg)){
- out.add(String.format("[%s]", msg));
- }
- }
- }
客户端开发:
CodecClient
- /**
- * *********************************************************************
- * 欢迎关注公众号: 【源码学徒】
- * *********************************************************************
- *
- * @author huangfu
- * @date 2021/5/6 21:29
- */
- public class CodecClient {
- public static void main(String[] args) throws InterruptedException {
- EventLoopGroup worker = new NioEventLoopGroup();
- try {
- Bootstrap bootstrap = new Bootstrap();
- bootstrap.group(worker)
- .remoteAddress(new InetSocketAddress("127.0.0.1",8989))
- .channel(NioSocketChannel.class)
- .handler(new ChannelInitializer<SocketChannel>() {
- @Override
- protected void initChannel(SocketChannel ch) throws Exception {
- //添加自定义的解码器
- ch.pipeline().addLast("messageEqualDecoder", new MyByteToMessageDecoder(213));
- ch.pipeline().addLast("myMessageToMessageDecoder", new MyMessageToMessageDecoder());
- ch.pipeline().addLast("codecClientHandler", new CodecClientHandler());
- }
- });
- ChannelFuture channelFuture = bootstrap.connect().sync();
- channelFuture.channel().closeFuture().sync();
- }finally {
- worker.shutdownGracefully();
- }
- }
- }
效果图:
6. 心跳检测
我们现在假设有一个客户端与服务端,客户端与服务端进行数据交互,服务端探测到客户端5秒没有发送数据 3次以上关闭连接!
开发一个心跳服务端处理器
- /**
- * 心跳处理的Handler
- *
- * @author huangfu
- * @date 2021年5月8日09:03:46
- */
- public class HeartBeatServerHandler extends ChannelInboundHandlerAdapter {
- /**
- * 读空闲次数
- */
- private int readIdleTimes = 0;
- @Override
- public void channelActive(ChannelHandlerContext ctx) throws Exception {
- System.out.println("客户端连接:"+ ctx.channel().remoteAddress());
- super.channelActive(ctx);
- }
- @Override
- public void channelRead(ChannelHandlerContext ctx, Object msg) throws Exception {
- ByteBuf byteBuf = (ByteBuf) msg;
- String string = byteBuf.toString(StandardCharsets.UTF_8);
- System.out.println(string);
- //有数据 次数归0
- readIdleTimes = 0;
- super.channelRead(ctx, msg);
- }
- @Override
- public void userEventTriggered(ChannelHandlerContext ctx, Object evt) throws Exception {
- if (evt instanceof IdleStateEvent) {
- IdleStateEvent idleStateEvent = (IdleStateEvent) evt;
- if (idleStateEvent.state() == IdleState.READER_IDLE) {
- System.out.println("发生读空闲");
- readIdleTimes++;
- }
- //3次读空闲之后,关闭客户端连接
- if (readIdleTimes > 3) {
- //关闭客户端连接
- System.out.println("客户端连接被关闭:"+ ctx.channel().remoteAddress());
- ctx.close();
- }
- }
- }
- }
开发一个心跳服务端
- /**
- * 心跳服务器
- *
- * @author huangfu
- * @date 2021年5月8日08:52:56
- */
- public class HeartBeatServer {
- public static void main(String[] args) {
- EventLoopGroup boss = new NioEventLoopGroup(1);
- EventLoopGroup worker = new NioEventLoopGroup();
- try {
- ServerBootstrap bootstrap = new ServerBootstrap();
- bootstrap.group(boss,worker)
- .channel(NioServerSocketChannel.class)
- .localAddress(8989)
- .childHandler(new ChannelInitializer<SocketChannel>() {
- @Override
- protected void initChannel(SocketChannel ch) throws Exception {
- //心跳触发器 读空闲 写空闲 读写空闲5秒的均会触发心跳事件
- ch.pipeline().addLast(new IdleStateHandler(5,5,5, TimeUnit.SECONDS));
- ch.pipeline().addLast(new LengthFieldBasedFrameDecoder(Integer.MAX_VALUE, 0,4,0,4));
- //定义处理器
- ch.pipeline().addLast(new HeartBeatServerHandler());
- }
- });
- ChannelFuture channelFuture = bootstrap.bind().sync();
- channelFuture.channel().closeFuture().sync();
- } catch (InterruptedException e) {
- e.printStackTrace();
- } finally {
- boss.shutdownGracefully();
- worker.shutdownGracefully();
- }
- }
- }
开发一个心跳客户端处理器
- /**
- * 客户端心跳处理
- *
- * @author huangfu
- * @date 2021年5月8日09:29:05
- */
- public class HeartBeatClientHandler extends ChannelInboundHandlerAdapter {
- @Override
- public void channelActive(ChannelHandlerContext ctx) throws Exception {
- System.out.println("通道被激活");
- super.channelActive(ctx);
- }
- @Override
- public void channelInactive(ChannelHandlerContext ctx) throws Exception {
- System.out.println("通道被销毁");
- super.channelInactive(ctx);
- }
- }
开发一个心跳客户端
- /**
- * 心跳消息服务
- *
- * @author huangfu
- * @date 2021年5月8日09:37:07
- */
- public class HeartBeatClient {
- private static Channel channel = null;
- private static Scanner sc = new Scanner(System.in);
- public static void main(String[] args) {
- EventLoopGroup worker = new NioEventLoopGroup();
- try {
- Bootstrap bootstrap = new Bootstrap();
- bootstrap.group(worker)
- .channel(NioSocketChannel.class)
- .remoteAddress("127.0.0.1",8989)
- .handler(new ChannelInitializer<SocketChannel>() {
- @Override
- protected void initChannel(SocketChannel ch) throws Exception {
- //长度解码器
- ch.pipeline().addLast(new LengthFieldBasedFrameDecoder(Integer.MAX_VALUE, 0,4,0,4));
- ch.pipeline().addLast(new HeartBeatClientHandler());
- }
- });
- //连接服务端
- ChannelFuture channelFuture = bootstrap.connect().sync();
- channel = channelFuture.channel();
- Thread thread = new Thread(HeartBeatClient::writeStr);
- thread.setDaemon(true);
- thread.start();
- channel.closeFuture().sync();
- } catch (InterruptedException e) {
- e.printStackTrace();
- } finally {
- worker.shutdownGracefully();
- }
- }
- /**
- * 向服务端写入数据
- */
- public static void writeStr(){
- while (true) {
- System.out.print("请输入要发送的数据:");
- //从键盘读入数据
- String line = sc.nextLine();
- ByteBuf buffer = Unpooled.buffer();
- buffer.writeInt(line.length());
- buffer.writeBytes(line.getBytes(StandardCharsets.UTF_8));
- //发送数据
- channel.writeAndFlush(buffer).addListener(future -> {
- if (future.isSuccess()) {
- System.out.println("发送成功");
- }
- });
- }
- }
- }
相关文章
- OpsCenter – 简化 IT 运营的新功能
- 配置appnium+python环境
- Open Distro for Elasticsearch 版本 1.0.0 现已推出
- AWS Project Resilience — 最高获赠 2000 USD AWS 服务抵扣券以支持灾难恢复准备
- 在 AWS 上使用 SUSE HAE 架构高可用的 SAP 系统
- java native关键字
- AWS Marketplace 现已落地中国
- AWS 如何帮助我们的客户走向全球 – 来自韩国的报告
- 使用 Amazon Route 53 和 AWS Transit Gateway 对混合云进行集中式 DNS 管理
- 构建云上勒索病毒防护体系,轻松保护数据完整性
- EC2 实例更新 #8211;另外两种 M5 R5 实例大小
- 利用 AWS Transit Gateway 构建全球传输网络 Global Transit Network
- java volatile关键字
- AWS Security Hub 现已正式发布
- AWS Control Tower – 设置和管理多账户 AWS 环境
- VPC 流量监控 – 捕获检查网络监控
- 新增功能 – 适用于网络负载均衡器的 UDP 负载均衡
- 如何通过未加密的 AMI 快速启动由 EBS 支持的加密 EC2 实例 | AWS 安全性博客
- JAVA WebSocket实现
- 亚马逊人参加 OSCON 2019:开源周